
You just received 50 product images from your design team. Each one needs to be uploaded to your media library, tagged with the right category and keywords, resized into mobile and web variants, and organized into the correct folder. If you do this manually, that’s an afternoon gone. You’ll also probably miss a tag or two along the way.
Now imagine typing one message: “Upload these images, tag them by product category, create mobile and web versions, and organize them into folders.” And it just happens.
That’s what you can build with Claude and Cloudinary MCP. Media asset automation doesn’t have to mean writing custom scripts or learning new project management tools.In this guide, you’ll connect Claude to your Cloudinary account using the Model Context Protocol, then use natural language to automate a complete media asset workflow: uploading, AI-powered tagging, image transformation, and folder organization, all without writing a single line of code.
By the end of this guide, you’ll have a working setup where Claude can:
- Upload images from your computer directly to your Cloudinary Media Library.
- Analyze each image with AI Vision to generate tags and metadata.
- Create optimized variants for mobile and web delivery.
- Organize everything into a clean folder structure.
The stack: Claude Desktop handles the natural-language interface. Cloudinary MCP servers expose Cloudinary’s media management capabilities as tools that Claude can call. You type the instructions. Claude and Cloudinary do the rest.
Before you start, you should have:
- A free Cloudinary account. The free tier works for this tutorial.
- A Claude Pro subscription. You need Pro to access MCP features in the Claude Desktop app.
- Node.js installed on your computer (required for local MCP servers).
- The Claude Desktop app installed.
Cloudinary offers five MCP servers, each handling a different part of the platform. Together, they form a complete digital asset management (DAM) system that you can control through natural language:
| Server | What It Does |
| Asset Management | Upload, manage, search, and transform media assets. |
| Environment Config | Configure environment settings, upload presets, and transformations. |
| Structured Metadata | Create and manage metadata fields for asset organisation. |
| Analysis | AI-powered content analysis, moderation, and auto-tagging. |
| MediaFlows | Low-code workflow automations for images and videos. |
In this tutorial, you’ll use two of these: Asset Management (for uploading, transforming, and organising) and Analysis (for AI-powered tagging and metadata).
Each server comes in two flavours: remote and local. Remote servers are hosted by Cloudinary and ready to use immediately, with no installation required. Local servers run on your machine via npm packages. Cloudinary recommends remote servers for most setups because they’re simpler to configure and always up to date.
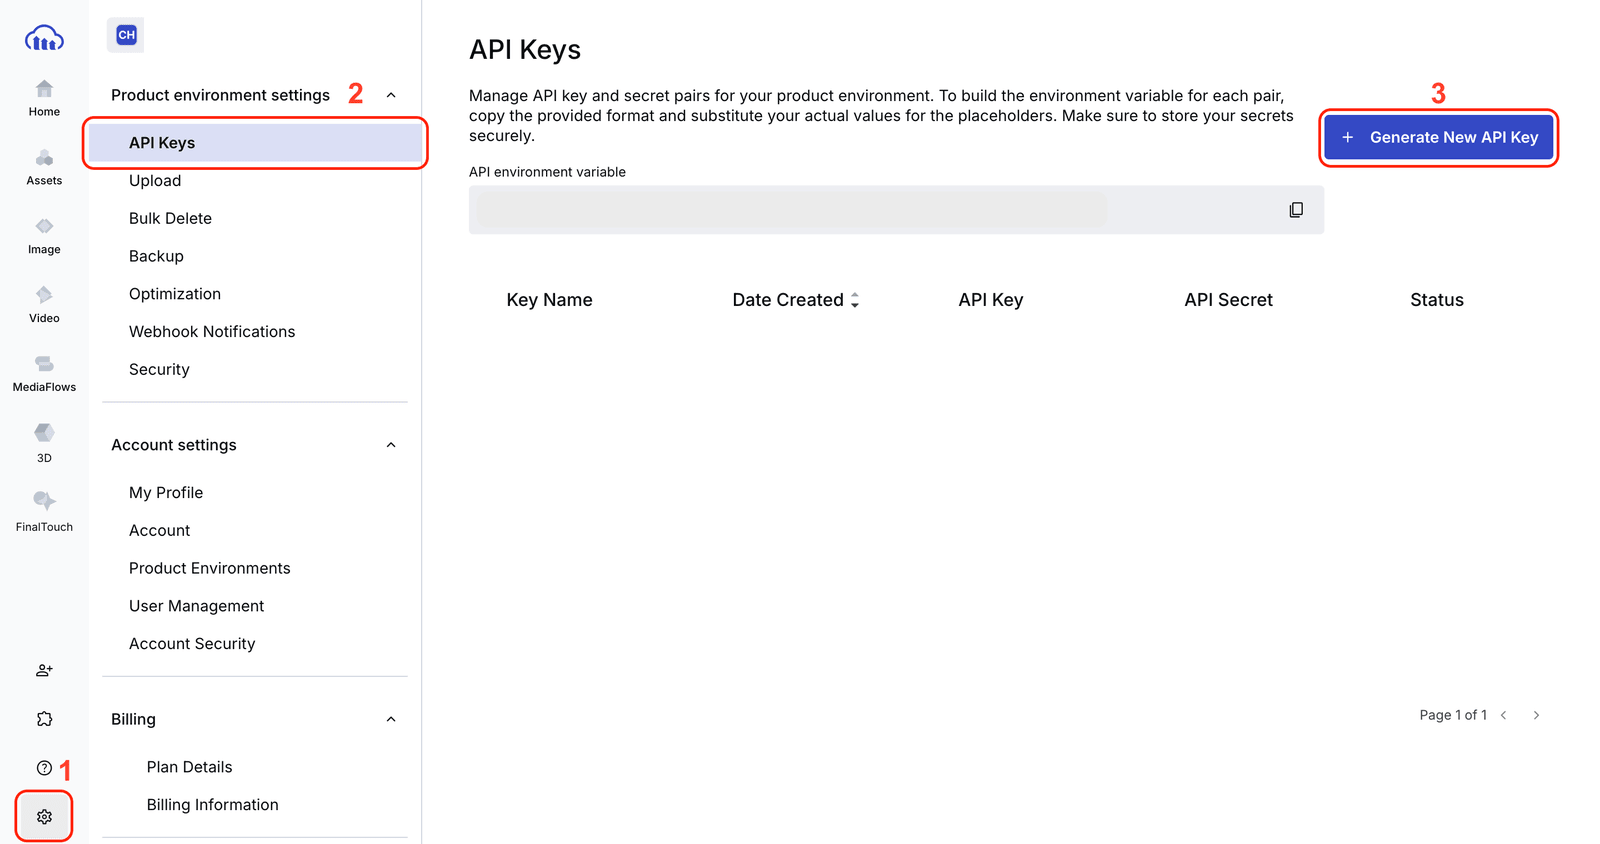
- Log in to your Cloudinary account.
- Navigate to Settings > API Keys on the left panel.
- Click + Generate New API Key if you don’t have one.
- Note your cloud name, API key, and API secret. You’ll need all three.
Before Claude can upload images to Cloudinary, it needs access to the files on your computer. The Filesystem MCP server handles this.
In the Claude Desktop app:
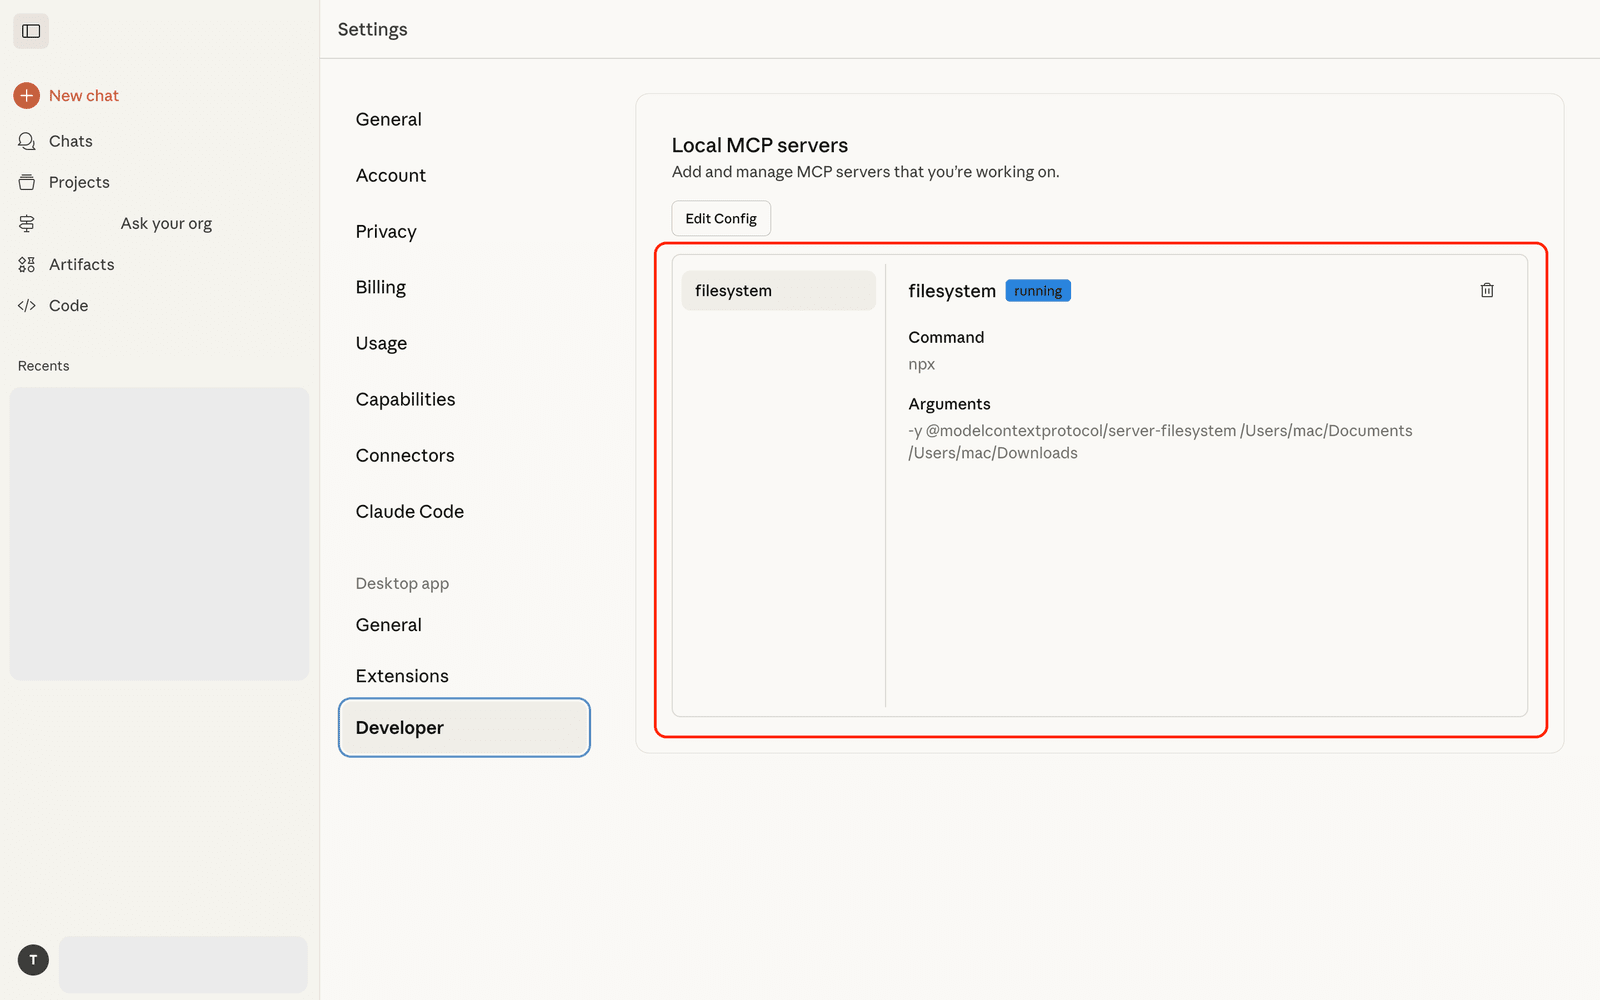
- Open Settings > Developer > Edit Config.
- Add the following to your
claude_desktop_config.jsonfile:
{

  "mcpServers": {

    "filesystem": {

      "command": "npx",

      "args": [

        "-y",

        "@modelcontextprotocol/server-filesystem",

        "/Users/<YOUR-COMPUTER-NAME>/Documents",

        "/Users/<YOUR-COMPUTER-NAME>/Downloads"

      ]

    }

  }

}Code language: JSON / JSON with Comments (json)- Replace
<YOUR-COMPUTER-NAME>with your actual computer username. The args array tells Claude which directories it can access. In this example, it can read files from your Documents and Downloads folders.
- Save the file and restart the Claude Desktop app.
- Go to Settings > Developer. You should see the Filesystem MCP server listed and running.

Now you’ll connect Claude to your Cloudinary account. This is the core integration that enables media asset automation, giving Claude the tools to upload, transform, and organize your digital assets directly. You can do this with either a remote or local server.
Remote servers require no installation. Add this to your claude_desktop_config.json:
{

  "mcpServers": {

    "filesystem": {

      "...": "..."

    },

    "cloudinary-asset-mgmt": {

      "url": "https://asset-management.mcp.cloudinary.com/mcp"

    }

  }

}Code language: JSON / JSON with Comments (json)
When you use a remote server, Claude will prompt you to authenticate with your Cloudinary credentials the first time you use it.
If you prefer to run the server on your machine, add this instead:
{

  "mcpServers": {

    "filesystem": {

      "...": "..."

    },

    "cloudinary-asset-mgmt": {

      "command": "npx",

      "args": [

        "-y",

        "--package",

        "@cloudinary/asset-management",

        "--",

        "mcp",

        "start"

      ],

      "env": {

        "CLOUDINARY_CLOUD_NAME": "<YOUR-CLOUD-NAME>",

        "CLOUDINARY_API_KEY": "<YOUR-API-KEY>",

        "CLOUDINARY_API_SECRET": "<YOUR-API-SECRET>"

      }

    }

  }

}Code language: JSON / JSON with Comments (json)
Replace the placeholder values with your actual Cloudinary credentials from Step 1.
Save the file and restart the Claude Desktop app. You should see the Cloudinary Asset Management MCP server listed and running in your developer settings.
Before building the full workflow, confirm everything works with a quick test. In a new Claude chat, type:
- List the files in the images folder in my Documents directory.
Claude uses the Filesystem MCP server to find the files and returns a list. Now type:
- Upload the headset image to Cloudinary.
Claude reads the file from your computer and calls the Cloudinary MCP server to upload it. Within seconds, you’ll see the upload confirmation with details including the public ID, asset ID, format, dimensions, file size, and secure URL.

That confirms the connection works. Claude communicated with both MCP servers: one to locate the file and one to upload it to your Cloudinary Media Library.
For AI-powered tagging and metadata, you’ll add the Analysis MCP server. This server uses Cloudinary AI Vision to analyze image content and generate relevant tags, categories, and descriptions, automating one of the most repetitive tasks in any digital asset management workflow.
{

  "mcpServers": {

    "filesystem": { "...": "..." },

    "cloudinary-asset-mgmt": { "...": "..." },

    "cloudinary-analysis": {

      "url": "https://analysis.mcp.cloudinary.com/sse"

    }

  }

}Code language: JSON / JSON with Comments (json){
"mcpServers": {
"filesystem": { "...": "..." },
"cloudinary-asset-mgmt": { "...": "..." },
"cloudinary-analysis": {
"command": "npx",
"args": [
"-y",
"--package",
"@cloudinary/analysis",
"--",
"mcp",
"start"
],
"env": {
"CLOUDINARY_CLOUD_NAME": "<YOUR-CLOUD-NAME>",
"CLOUDINARY_API_KEY": "<YOUR-API-KEY>",
"CLOUDINARY_API_SECRET": "<YOUR-API-SECRET>"
}
}
}
}Code language: JSON / JSON with Comments (json)Save and restart the Claude Desktop app.
Now that all three MCP servers are running, you can automate a complete media asset workflow with a single set of instructions. This is where media asset automation saves you the most time.
Here’s a realistic scenario:
- You’re managing an online store, and your design team just delivered a batch of new product images. Instead of uploading, tagging, resizing, filing and processing each one manually, give Claude this prompt:
1. Upload each image from my Documents/images folder to Cloudinary

   in a temporary folder.

2. Analyze each image with AI Vision to determine:

   - Product category

   - Relevant tags (minimum 5-8 tags)

   - Contextual metadata (type, colour, style, etc.)

3. Create a duplicate of each image.

4. Generate optimized mobile and web versions for the original

   and duplicate of each image.

5. Organize images into this folder structure:

   new-products/

     ├── {category}/

     │   ├── {descriptive-name} (original)

     │   └── {descriptive-name}-copy (transformed)

6. Add AI-generated tags and metadata to both original and duplicate.Code language: JavaScript (javascript)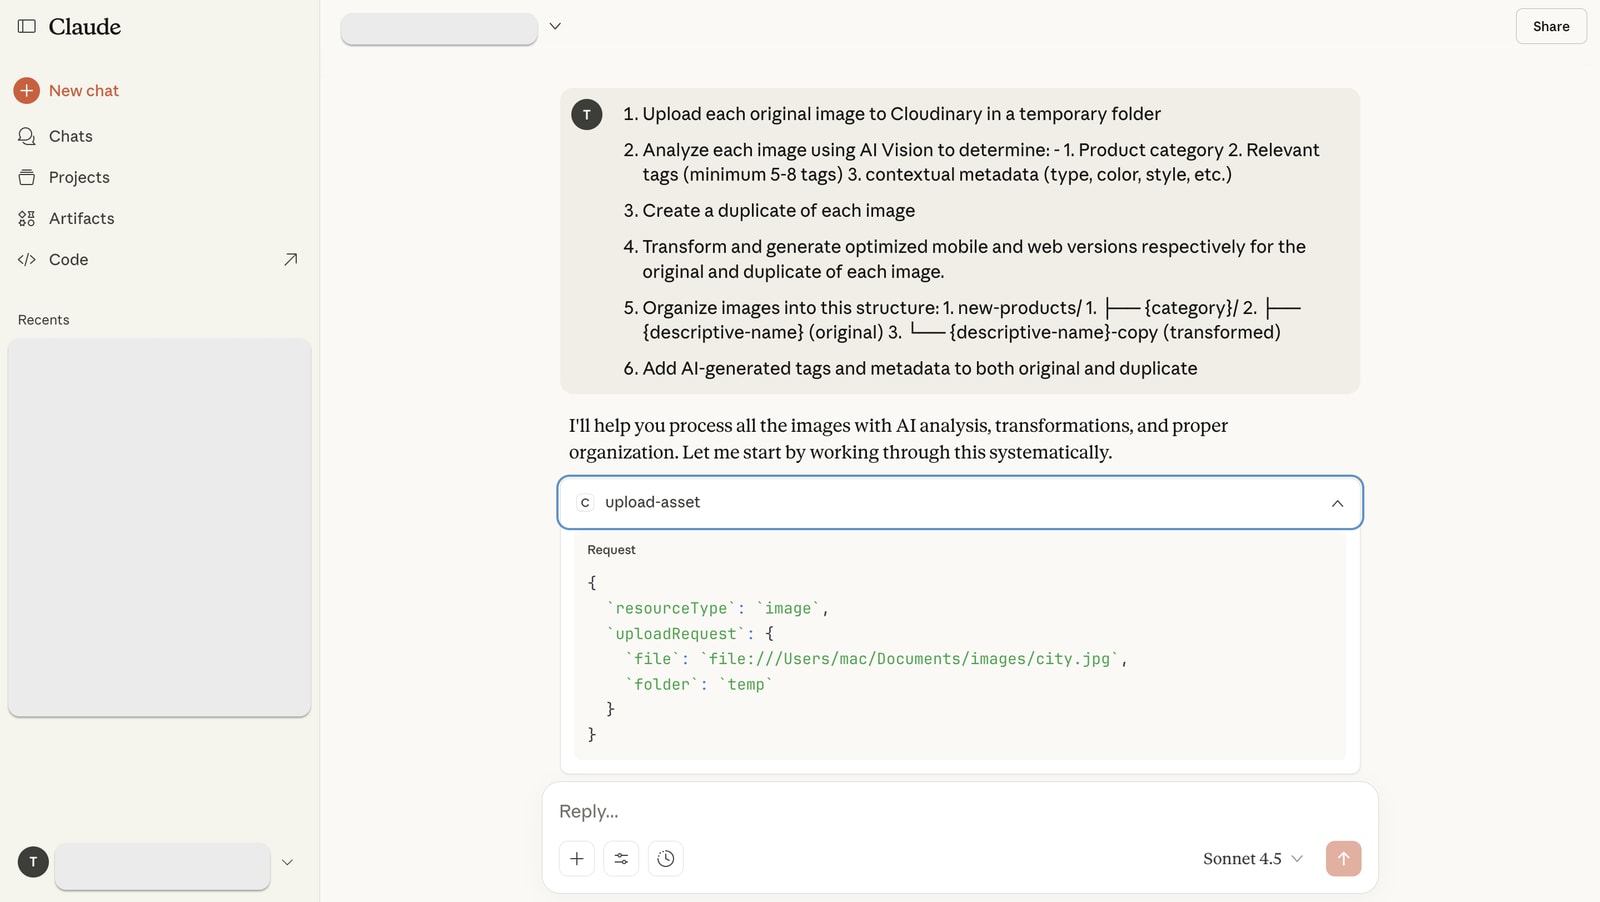
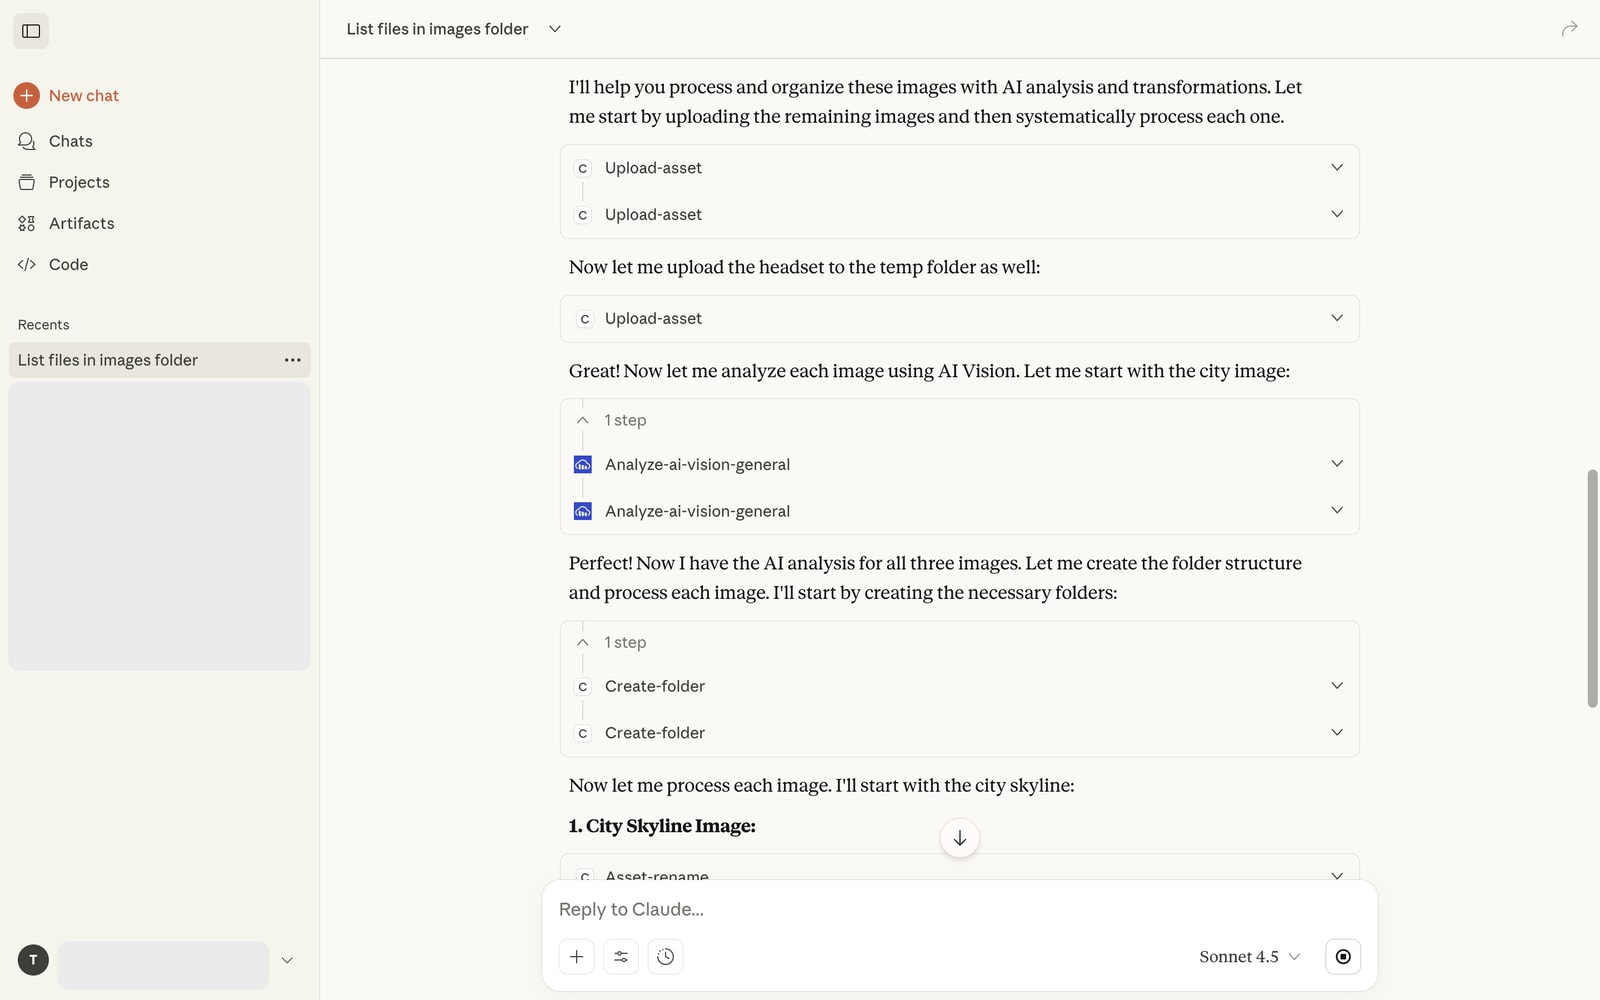
When you send this prompt, Claude coordinates across all three MCP servers to execute each step of the workflow. Here’s a breakdown of each automated task:
- File retrieval. Claude uses the Filesystem MCP server to locate and read the images from your computer.
- Upload. Claude calls the Asset Management MCP server to upload each image to a temporary folder in your Cloudinary Media Library.
- AI analysis. Claude calls the Analysis MCP server, which uses Cloudinary AI Vision to examine each image and return product categories, tags, and contextual metadata. Claude generates structured metadata fields like SKU, category, and description based on the visual content.
- Transformation. Claude calls the Asset Management MCP server to create optimized variants for mobile and web delivery using the transformations you specified.
- Organization. Claude creates the folder structure, renames assets with descriptive names, and moves everything into the right location. This ensures your team can easily search for and find any asset across folders.
- Metadata tagging. Claude applies the AI-generated tags and metadata to both the original and transformed versions of each image, maintaining brand consistency across all assets.
Open your Cloudinary console and navigate to Media Library > Folders. You’ll see the new-products folder with category subfolders created automatically.
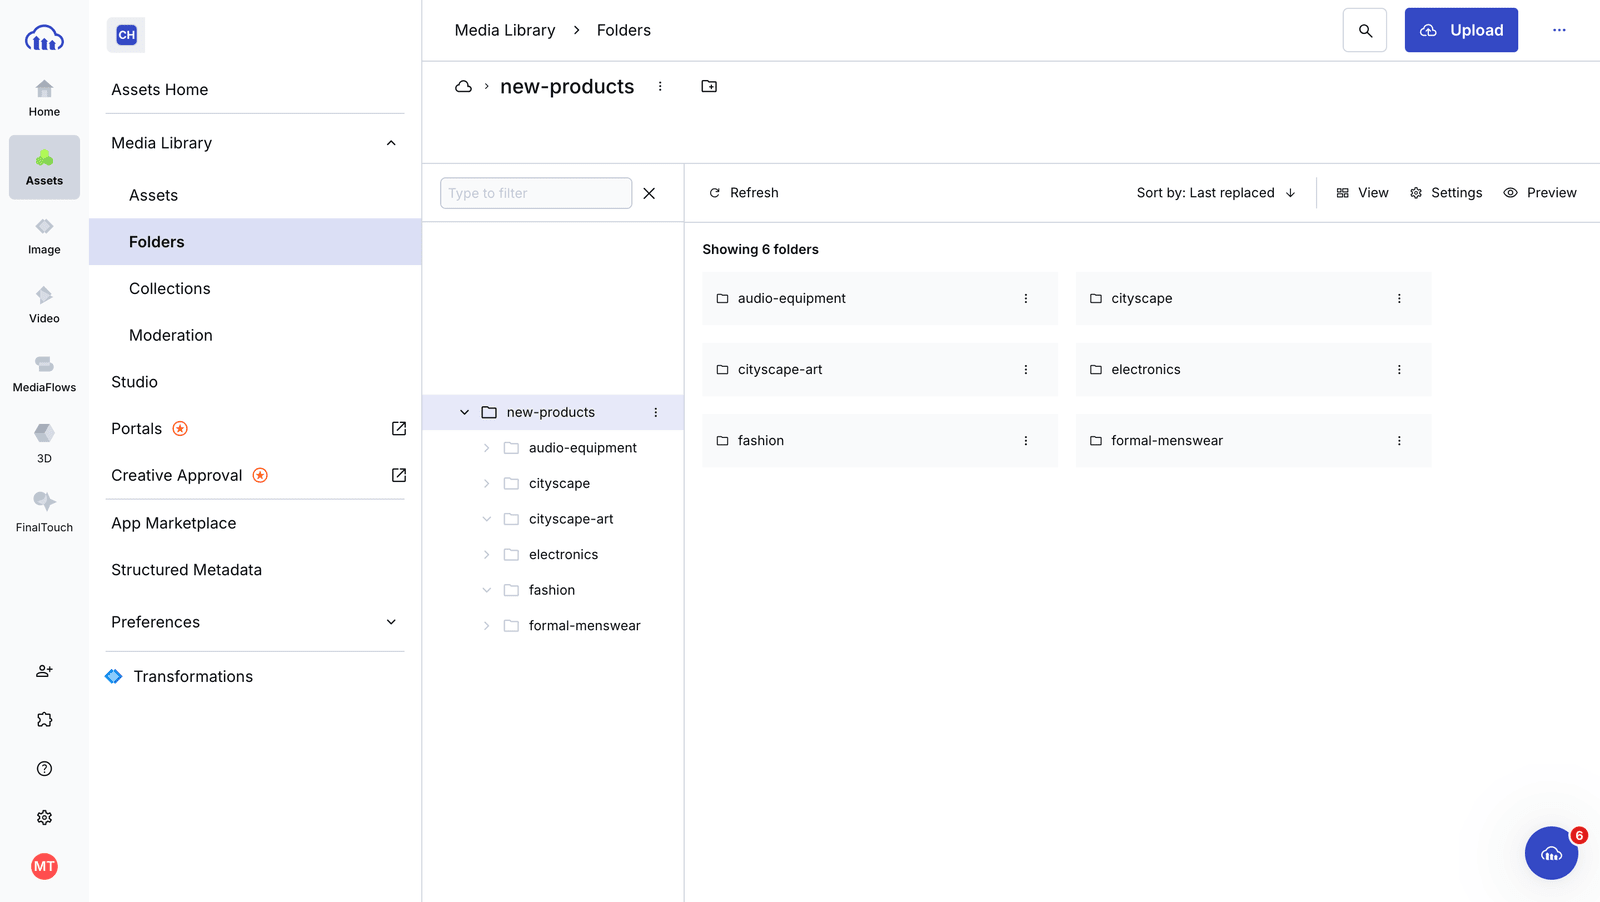
Click into any asset to see the applied tags, structured metadata, and the optimized variants. Each version has its own secure URL that you can use directly in your application or website. The metadata tagging, folder organisation, and transformation steps all ran without manual effort, improving productivity across your entire content production pipeline.
You connected Claude to Cloudinary using three MCP servers — Filesystem, Asset Management, and Analysis — and used natural language to automate a workflow that would normally take hours of manual effort. This approach lets you automate repetitive tasks like metadata tagging, image transformation, and folder organisation, saving time and reducing errors across your team.
The same approach works for any media management task: bulk renaming, format conversion, watermarking, background removal, or organising assets across multiple folders.
Here are a few ways to take this further:
- Add the Environment Config MCP server to manage upload presets and named transformations directly from Claude.
- Add the Structured Metadata MCP server to create custom metadata schemas for more advanced asset organisation.
- Try it with video. Cloudinary MCP servers support video assets with the same natural-language workflow.
- Build a MediaFlows automation to trigger this workflow automatically whenever new assets arrive.
Try it yourself with one or two images to see the results. Sign up for a free Cloudinary account to get started.
Resources:


