
Modern development is becoming a conversation. Instead of just writing code, we can now instruct powerful AI agents to perform complex tasks for us. This new paradigm, however, requires a standardized way for our tools to communicate.
AI-native code editors like Windsurf are at the forefront of this shift, integrating AI agents like Windsurf’s Cascade directly into the development environment. For these agents to interact with external services, they need a secure and standard protocol. This is where the Model Context Protocol (MCP) comes in. As detailed in the official Windsurf documentation, MCP allows agents to securely access external tools. Cloudinary provides a powerful suite of these tools, known as Cloudinary MCP servers, which expose features like asset management and AI analysis directly to your editor’s AI assistant.
This new capability allows us to solve a common developer pain point: the slow, manual process of leaving the editor to find, transform, and embed media assets while writing documentation. In this tutorial, we will demonstrate a “Smart Documentation Assistant” workflow. We’ll show you how to use a single, natural-language prompt in Windsurf to automate the entire process: finding a local image, uploading it to Cloudinary, applying transformations, and replacing a placeholder in our Markdown file with the final, optimized URL — all in one seamless operation.
Before our AI assistant can perform any tasks, we need to give it the right tools. This is done by configuring Cloudinary’s MCP servers within Windsurf. These servers act as a bridge, allowing the AI to securely access and command Cloudinary’s powerful features.
Cloudinary provides a comprehensive set of MCP servers to cover the entire visual media lifecycle. While it’s a good practice to install all of them for general use, it’s important to understand what each one does.
-
Asset Management. Upload, manage, search, and organize all your visual media assets.
-
Environment Config. Manage upload presets, named transformations, and webhooks.
-
Structured Metadata. Define and manage custom metadata fields for your assets.
-
Analysis. Leverage AI for auto-tagging, moderation, and visual analysis.
-
Cloudinary’s MediaFlows. Create and manage complex media automation workflows.
For our specific “Smart Documentation Assistant” workflow, we only need to enable two of these: Asset Management to handle the file upload and replacement, and Analysis to perform the AI-powered visual search.
Make sure you have Node.js (v18 or later) and npm installed on your system before proceeding.
-
Find and open your Windsurf MCP configuration file (e.g.,
~/.cursor/mcp.json). -
Add the following JSON block to the
mcpServersobject. This includes the configurations for the two servers we need.
{
  "mcpServers": {
    "cloudinary-asset-mgmt": {
      "command": "npx",
      "args": [
        "-y",
        "--package",
        "@cloudinary/asset-management",
        "--",
        "mcp",
        "start"
      ],
      "env": {
        "CLOUDINARY_CLOUD_NAME": "your_cloud_name",
        "CLOUDINARY_API_KEY": "your_api_key",
        "CLOUDINARY_API_SECRET": "your_api_secret"
      }
    },
    "cloudinary-analysis": {
      "command": "npx",
      "args": ["-y", "--package", "@cloudinary/analysis", "--", "mcp", "start"],
      "env": {
        "CLOUDINARY_CLOUD_NAME": "your_cloud_name",
        "CLOUDINARY_API_KEY": "your_api_key",
        "CLOUDINARY_API_SECRET": "your_api_secret"
      }
    }
  }
}

Code language: JSON / JSON with Comments (json)-
Crucially, replace the placeholder values (
your_cloud_name,your_api_key,your_api_secret) with your actual credentials from your Cloudinary Dashboard.
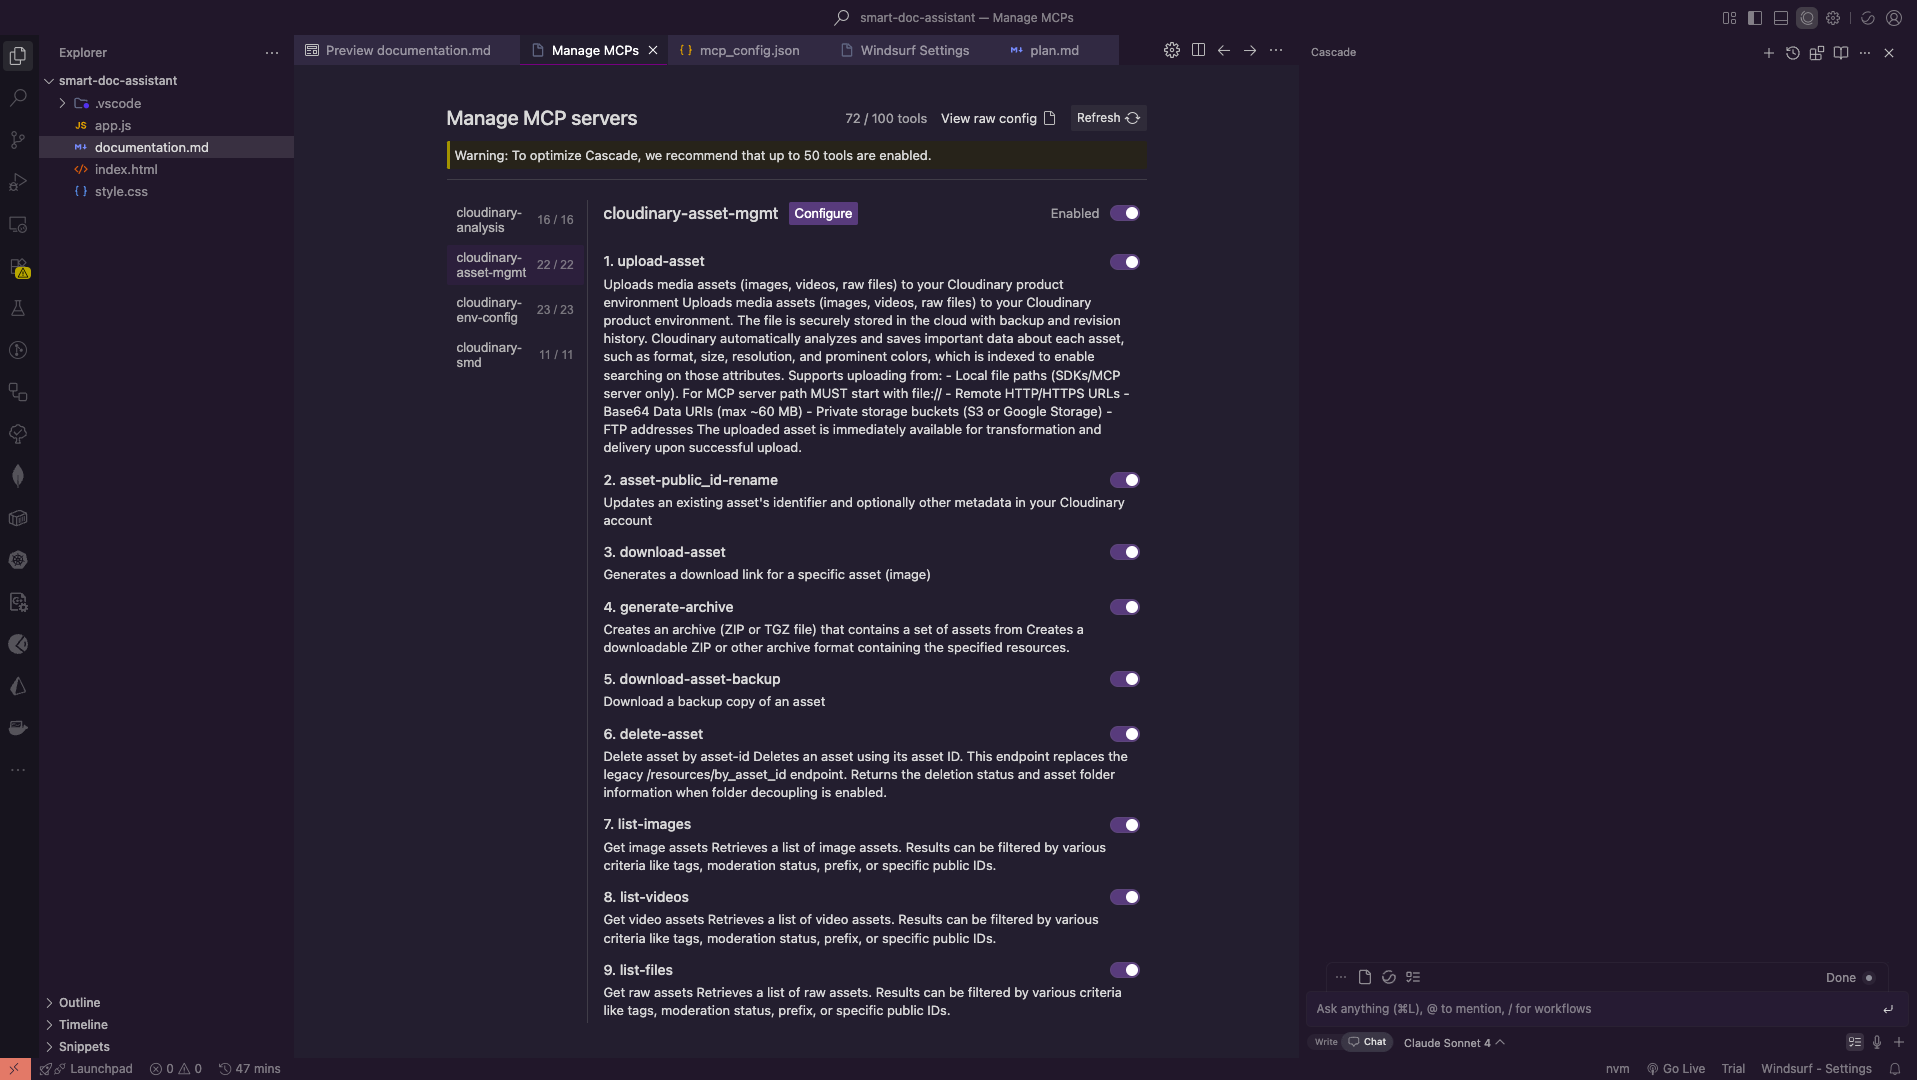
After saving the configuration file and refreshing or restarting Windsurf, you should see the new servers enabled in your editor’s MCP management panel. It will provide a list of all the powerful tools now available to your AI assistant, as shown below.
With our tools configured, let’s set the stage for our workflow. To follow along, you can clone the repository for this project, which contains the sample docs.md and hydra.png files we’ll be working with.
git  clone  https://github.com/musebe/cloudinary--windsurf-visual-search-demo
Code language: PHP (php)
Imagine you are a developer with this project open in your Windsurf editor. Your task is to update the project’s documentation.
You have a docs.md file open. The file contains a mix of text, code blocks, and an image placeholder for a crucial architectural diagram. Currently, the placeholder points to a local image file on your machine, hydra.png.
# Project Hydra: System Architecture
...
### Architectural Diagram

...
Code language: PHP (php)The goal is to replace this local, temporary image with a permanent, optimized version hosted on Cloudinary. The traditional process would involve several manual steps, but our goal is to achieve this with a single, conversational command to our AI assistant. We want to tell it to:
-
Upload the local
hydra.pngfile. -
Organize it by placing it in a specific folder named
project-hydra-diagrams. -
Optimize it by applying a transformation to resize it to a width of 800 pixels.
-
Update the
docs.mdfile by replacing the local path with the new, transformed Cloudinary URL.
Now we get to the core of this workflow. Instead of performing a series of small, manual tasks, we can encapsulate our entire intent into a single, powerful, natural-language prompt. This is where the AI agent in Windsurf truly shines, acting as a junior developer that can understand and execute a complex sequence of commands.
We will give our AI assistant the following prompt. This command clearly outlines every step we want it to perform, from finding the local file to modifying our source code.
Upload the local image `hydra.png` to a new folder named `project-hydra-diagrams` in my Cloudinary account.

After it's uploaded, generate a URL for the image with the following transformations:
- Resized to a width of 800 pixels

Finally, open the `docs.md` file and replace the local image path `./hydra.png` with the new transformed image URL.
This prompt is effective because it’s structured like a set of instructions you would give to a human colleague. It defines the source (hydra.png), the destination (project-hydra-diagrams folder), the desired transformations (width of 800 pixels), and the final action (replace the path in docs.md). The AI agent can now parse this intent and create a plan to execute it using the tools we provided.
After you provide the prompt to Windsurf, the AI agent gets to work. This is where you can see the true power of the MCP integration. The agent doesn’t just give you a final answer; it shows its entire thought process, breaking down your complex request into a logical, transparent plan.
Let’s analyze the AI’s response, which mirrors the process shown in the screenshots.
First, the AI confirms its understanding of your request and creates a step-by-step plan. It will typically outline the exact actions it intends to take, such as:
-
Add a note about the user’s request to upload
hydra.png. -
Set the current goal to uploading the image to Cloudinary.
-
Proceed to update the plan now.
This planning phase is crucial because it allows you to verify that the AI has correctly interpreted your intent before it makes any changes.
Next, the AI executes the first part of its plan. It uses the tools available from the @cloudinary/asset-management MCP server to perform the upload. You’ll see it call the upload-asset tool, providing the necessary arguments like the local file path and the destination folder. Once the upload is complete, it will display the successful API response from Cloudinary, including details like the new public_id and the asset’s dimensions.
With the image successfully uploaded, the AI moves to the next steps of its plan. It generates the new, transformed Cloudinary URL according to your specifications (e.g., with a width of 800 pixels).
Finally, it presents a Proposed Edit. This is one of the most powerful features of the workflow. The AI shows you a “diff” view, a clear, color-coded comparison of the original line in your docs.md file and the new line it wants to insert. This gives you complete control and confidence in the changes being made to your code.
After the AI has successfully executed its plan and presented the proposed changes, the workflow is complete. The developer has been guided through a complex, multi-step process without ever leaving their editor or writing a single line of API code.
The final, simple step is to accept the AI’s work. With a single click on the “Apply” button, the AI’s proposed change is committed, and the docs.md file is instantly updated with the correct, optimized, and transformed image URL from Cloudinary. The local placeholder is gone, replaced by a production-ready asset link.
The final result is a seamless, conversational workflow that feels less like programming and more like collaborating with a skilled assistant.
The final result should look like this:
We’ve successfully automated a complex, multi-step developer workflow using only natural language. What once required leaving the editor, navigating a web UI, and manually updating code can now be accomplished with a single, conversational prompt.
This is the future of AI-assisted development. By composing powerful, specialized tools like Cloudinary’s MCP servers and integrating them into AI-native editors like Windsurf, we’re changing the developer experience. The workflow is no longer a series of manual tasks and context switches, but a seamless conversation between the developer and their AI assistant. This not only boosts productivity but also allows developers to stay focused on what they do best: solving problems and building great software.
Contact us today to learn more.


