
In my last post, we spoke about AI-Based Content Analysis. Now, given the importance of security and privacy, authentication is at the heart of virtually all software. Access control is the layer on top of authentication that determines who can access what. Why is access control necessary? Because within most organizations nowadays is a multitude of digital assets stored in various folders, and functional teams need access to some of those assets to do their work even though their access to private assets must be restricted. Complexity arises as a result, especially during cross-functional collaboration among developers and other teams.
Cloudinary’s digital asset management (DAM) solution features built-in access-control modes. For example, to avoid inadvertent deletions of valid or relevant assets, Cloudinary retains deleted assets for at least 30 days and blocks access to private assets.
Access control is a premium Cloudinary feature, currently available only to accounts with a custom plan or those accounts whose owners have explicitly requested enablement of access control.
Once Cloudinary has enabled access control for your account, you can set up the modes for your assets from within your Media Library.
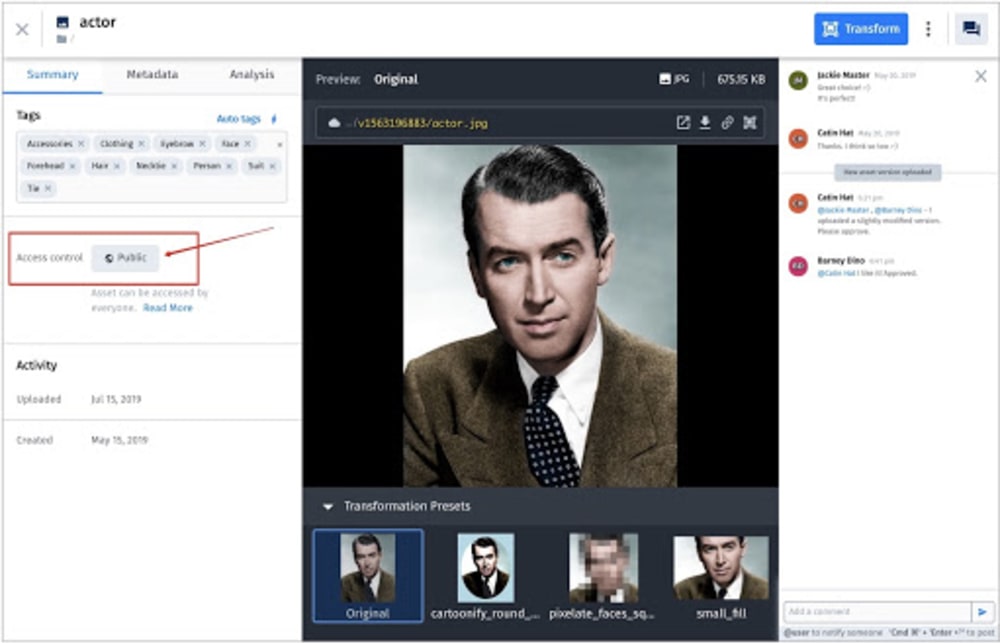
If an asset is restricted for access, as shown in the image above, no one can view it outside the Media Library—except those individuals who have both the asset’s URL and authentication token.
To change an asset’s access-control mode, click the asset and then the Summary tab for the Access control section, as shown in the image below:
This dialog box then opens:
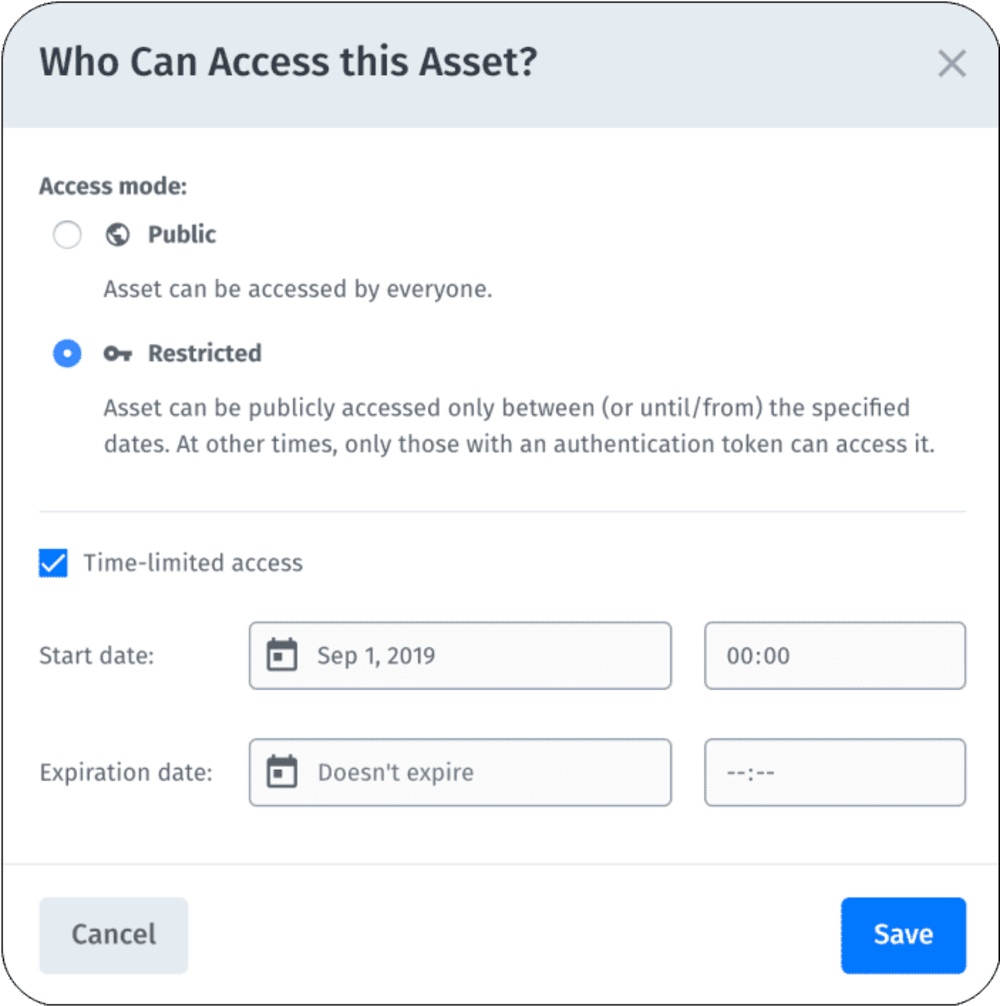
Here, you can make the asset publicly available or restricted within a certain time frame. For example, you can specify the duration of the related project under Time-limited access to avoid assets being shared outside the company or team while the project is in progress.
To change the access-control mode for multiple assets, set up upload presets before uploading those assets with the Media Library’s upload widget. By default, the Upload Presets option is not available in the advanced options of the upload widget. Contact Cloudinary support to enable that option.
An authentication token is an obfuscated alphanumeric code that ensures that the person requesting access to an asset through its URL has the permission to do so. Cloudinary DAM generates two types of tokens for access control:
- The query parameter token, which is appended to an asset’s delivery URL.
- The cookie token, which is downloaded to the user’s device for verification when the user accesses the asset through its URL.
Recall that you can access assets outside the Media Library only if you have both their URLs and authentication tokens.
Collections are conceptual groupings of assets regardless of the latter’s folder structure. As an administrator or someone with owner permissions for a particular collection, you can perform the following tasks:
- Create assets and add them to the collection
- View the collection
- Rename the collection
- Delete the collection
- Remove assets from the collection
- Share the collection
See these two examples:
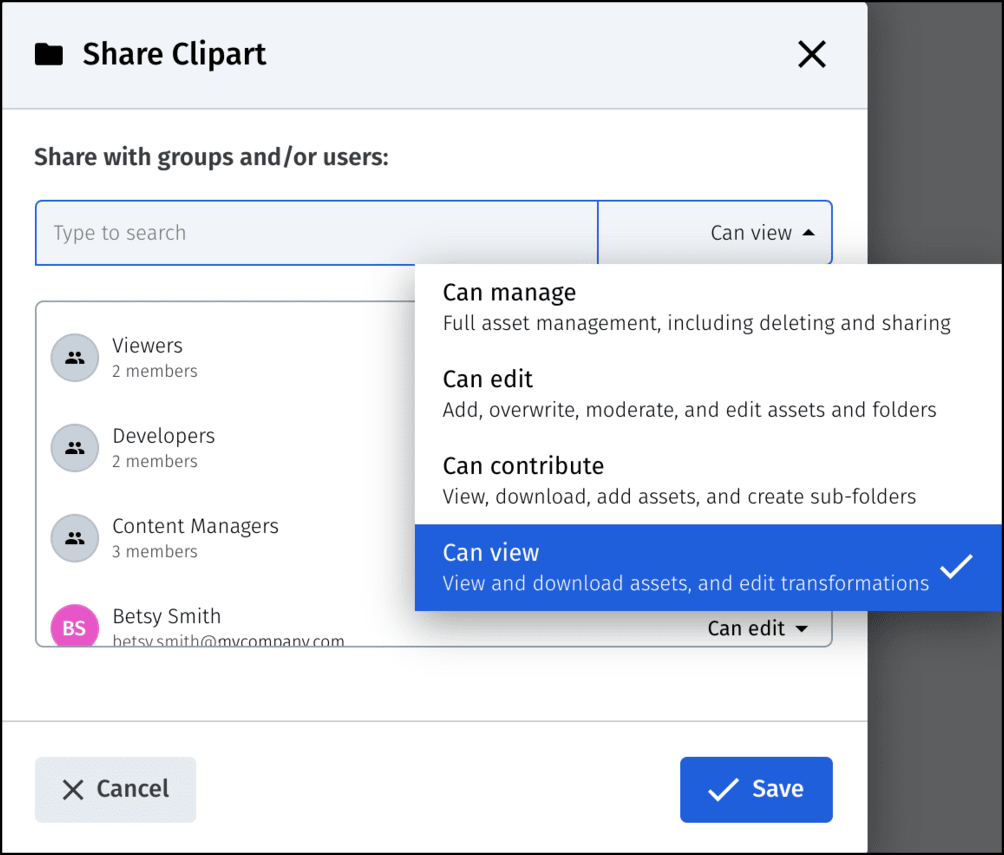

As an administrator or owner of all collections, you can set up access-permission levels to control who can access which groups.
The sharing and permission-setup capabilities are available for multiple user accounts only, which are offered under Cloudinary’s advanced plan and other higher plans.
For more details on the access control-related tasks described in this post, see the related documentation. Stay tuned for my next post in the DAM for developers series about asset metadata.
- The Ultimate Digital Asset Management Guide
- Reimaging DAM: The next-generation solution for marketing & development
- A unified approach to DAM across the asset lifecycle
- How a cloud-native DAM optimizes customer experiences
- Rise above the noise with dynamic visual experiences
- Auto AI content recognition tagging in Cloudinary DAM
- Image fingerprinting identify similar images using pHash
- How to create attractive PDF thumbnails – for PDF cover page and internal pages
- An intuitive RESTful HTTP administrative API provides control to programmatically manage assets
- Learn how to leverage Cloudinary’s cloud-based API for applying effects on images to automatically blur faces using the pixelate effect