
Images are crucial to website performance, but most still don’t implement responsive images. It’s not just about fitting an image on the screen, but also making the image size relatively rational to the device. The srcset and sizes options, which are your best hit are hard to implement. Cloudinary provides an easier way, which we will discuss in this article.
In this blog, I’ll share a valuable shortcut that can help you turn all images responsive. But first, let’s talk a bit about what responsive images are: An image is considered responsive if it retains its quality on varying device sizes without having an unpleasant impact on performance.
To better understand this concept, let’s take a look at some device dimensions:
- Large/X-Large commercial screens: 2000+ pixels
- Websites: 760 – 1200 pixels
- Mobile Phones: < 760 pixels
Let’s assume you have a mobile-first strategy for building responsive apps. You may decide to use 760px images throughout, without considering larger screens. If these images are meant to take the full width of the devices on which they are rendered, then your content will look distorted and unprofessional on websites or commercial screens.
Your next attempt would be to use the largest possible image (2000px) and scale it down based on the screen sizes on which it is displayed.
This is part of a series of articles about Responsive Images.
Using CSS or JavaScript to down-scale images only makes them dimensionally responsive. The following image illustrates this better:
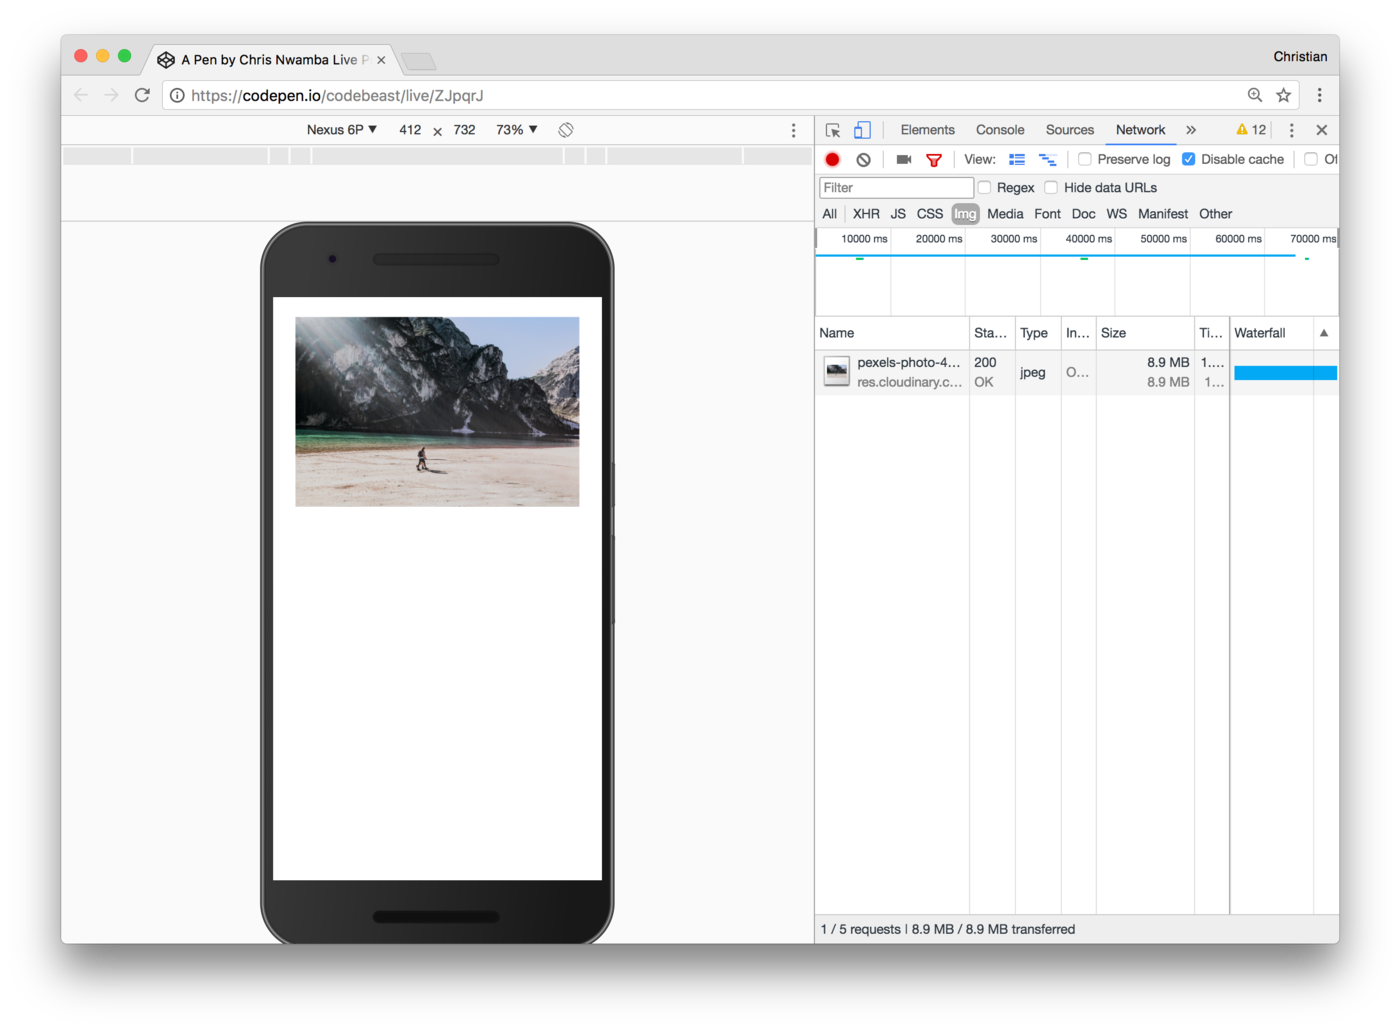 On mobile
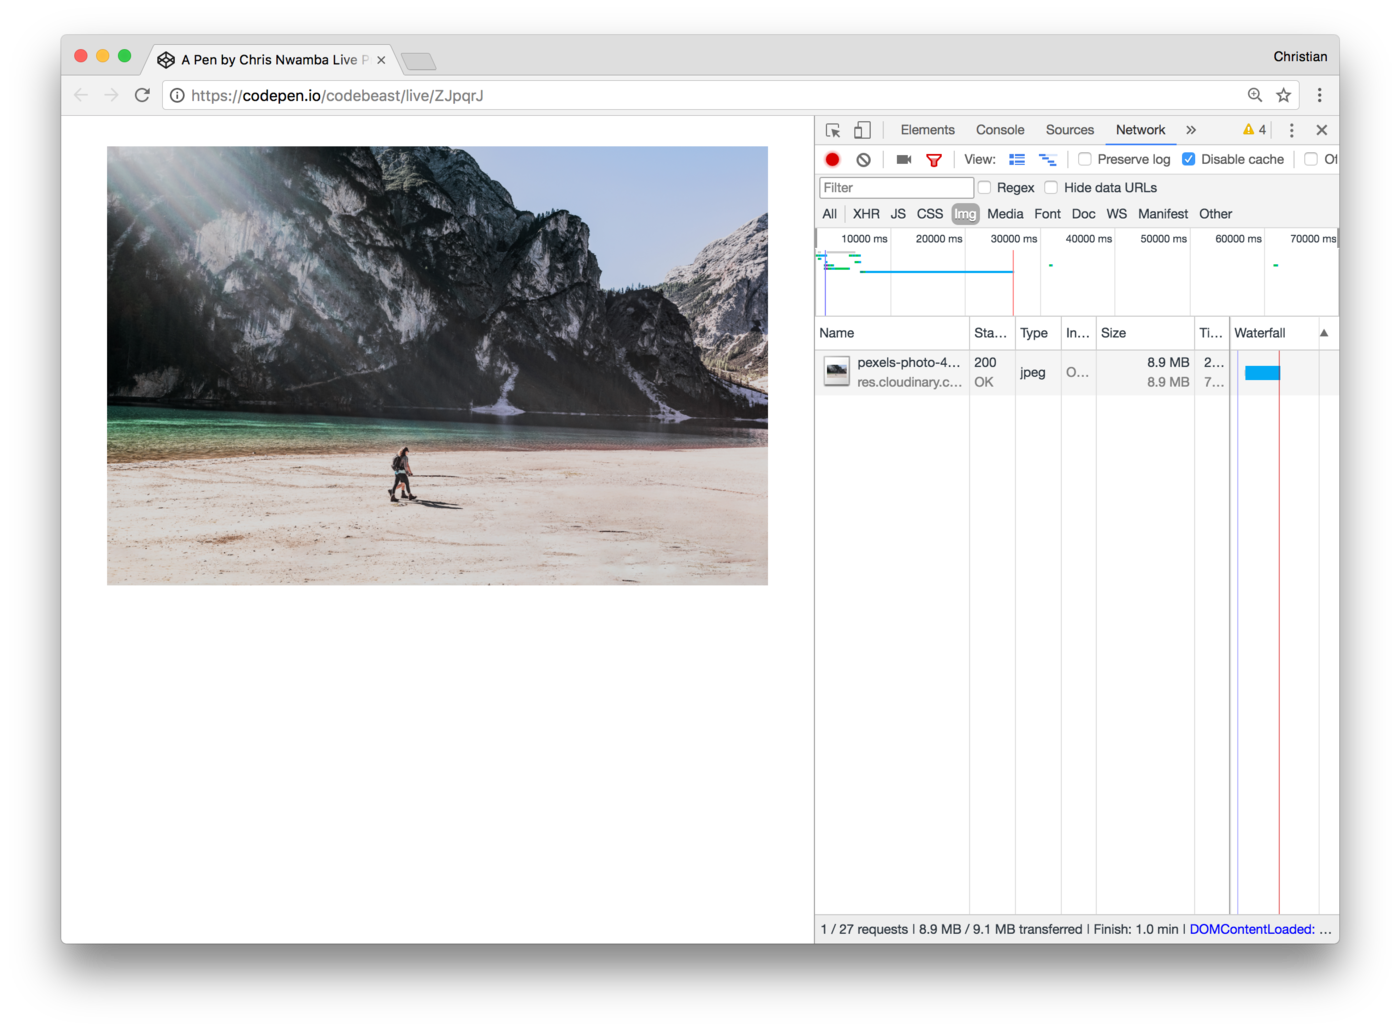 On desktop
Both on web and mobile devices, the size is still 8.9MB. Bearing in mind that your mobile phones have less resources than your PC, we still have more work to do.
Using only a down-scaling approach is not ideal because it does not account for the size of the image; just its dimensions.
We have already seen that up-scaling wouldn’t work either, hence we need something that handles both dimensions and size.
Our best option is to generate images based on the screen size and render them. This process can be extremely complex, but there’s a shortcut that can help you automate much of the process. You can make all images responsive in three easy steps with Cloudinary:
Add the Cloudinary SDK to your project simply by including it in your index.html using script tags:
<script src="https://cdnjs.cloudflare.com/ajax/libs/cloudinary-core/2.3.0/cloudinary-core-shrinkwrap.min.js"></script>
Code language: HTML, XML (xml)You don’t want the images rendered immediately, until JavaScript runs. Hence, include the image using the data-src attribute instead of src:
<img data-src="https://res.cloudinary.com/christekh/image/upload/w_auto,c_scale/v1501761946/pexels-photo-457044_etqwsd.jpg" alt="" class="cld-responsive">
Code language: JavaScript (javascript)
Using this approach, Cloudinary analyzes your browser screen first, resizes the image saved in Cloudinary storage as provided in data-src, and then renders the image in the appropriate size and dimension using JavaScript.
Two things to note from the tag:
-
w_auto,c_scaletransformation parameters tell Cloudinary to dynamically generate an image URL scaled to the correct width value, based on the detected width actually available for the image in the containing element. - The class
cld-responsivetells Cloudinary which images to apply this feature too.
Finally, initialize a Cloudinary instance in your JavaScript files and call the responsive method on this instance:
// Initialize
var cl = cloudinary.Cloudinary.new({  cloud_name: '<Cloud Name>' });
// Call
cl.responsive();
Code language: PHP (php)
Remember to create a free Cloudinary account so you can be handed a cloud name for configuring this instance.
This piece of code will walk through the DOM, find all image tags with the class cld-responsive to apply size and dimension fitting images on them.
Always keep in mind that when you use CSS like the following code below to make images responsive, it does not guarantee a good user experience:
img {
  width: 100%;
  height: auto;
}
Code language: CSS (css)
The sizes of these images remain the same. Large images on mobile devices eat up resources (like allocated memory and running processes) causing slow downloads or unexpected behavior on the user’s device. Responsive images ensure that users save lots of data bandwidth & have great experiences when using your image-rich website or app.
Lastly, it’s good to keep in mind that the suggested approach relies on JavaScript. Therefore, preloading provided by srcset and sizes are sacrificed and your browser must have JavaScript active for this feature to work.