
The European Accessibility Act (EAA) is designed to make digital products and services usable by everyone, including people with disabilities. That includes video, whether it’s a product demo, educational content, or marketing material.
And this isn’t a small audience, as over 87 million people in the EU live with some form of disability, according to the European Commission. That’s nearly one in five people. If your video content isn’t accessible, you’re effectively shutting the door on a huge chunk of your potential audience.
The EAA went into effect on June 28, 2025, so the best time to get your video content into shape is now. If your business serves the EU market, you’re expected to meet WCAG 2.1 AA standards, especially around subtitles, audio descriptions, and player accessibility.
To comply with the EAA’s requirements, video content must support:
- Subtitles or closed captions for spoken content.
- Keyboard navigation and accessible playback controls.
- Screen reader compatibility via semantic markup and metadata.
- Alternate audio tracks or descriptive audio options.
If your current video workflows don’t already account for these requirements, the time to fix it is now. The best place to start is your video player. This article will guide you on how you can use Cloudinary’s player to enable keyboard navigation and accessible controls.
Before captions, transcripts, or metadata even come into play, users need a way to interact with your video, whether they’re using a keyboard, a screen reader, or other assistive technology. That’s why making the player itself accessible is the first step.
Your video player should support:
- Keyboard access. All controls, like Play/Pause, Volume, and Fullscreen, must be reachable using only the keyboard. For example, pressing Tab should move through the controls, and Enter or Space should activate them.
- Screen reader compatibility. People using screen readers should hear descriptive labels like “Play button” or “Mute toggle,” not just vague announcements like “button.”
- Visible focus indicators. When using the keyboard to navigate, each focused element should be highlighted visually so users know where they are.
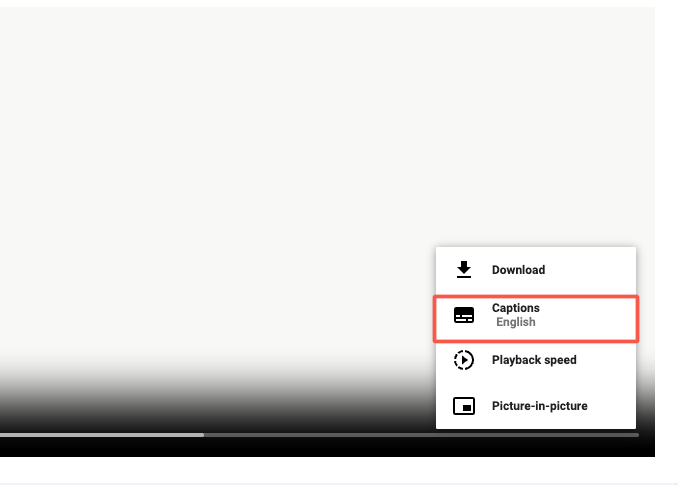
- Caption and subtitle support. The player should allow users to toggle captions on or off, switch between languages, and display subtitles with proper timing and readable styling.
- Accessible color contrast. UI elements like buttons, progress bars, and captions must meet contrast guidelines to be readable by users with low vision or color blindness.
Unfortunately, many default or custom-built players miss these marks. They look good, but they’re not built with accessibility in mind, and that can lead to real exclusion.
Cloudinary’s Video Player solves this out of the box. It comes with built-in support for keyboard navigation, proper Accessible Rich Internet Applications (ARIA) labels for screen readers, clear focus outlines, and customizable UI elements that meet accessibility contrast ratios.
This means you don’t have to hack together workarounds or rebuild your player from scratch, as it’s already built to meet the standard.
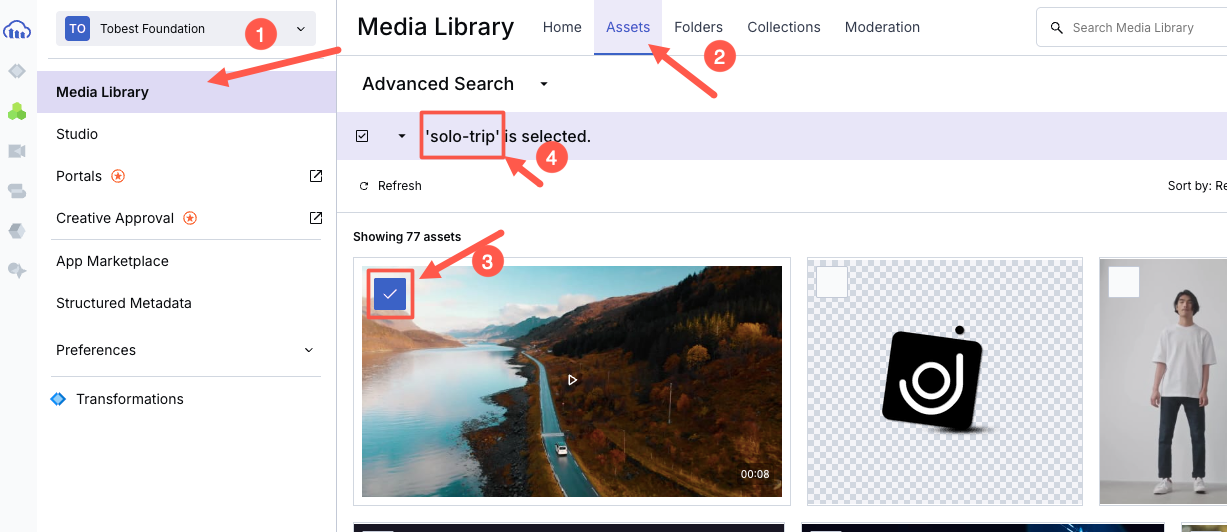
To get started, you’ll need your Cloudinary cloud name and the public ID of a video you’ve uploaded. There are a few ways to find the public ID, but the easiest is to click on the video inside your Media Library. You’ll see the public ID of the selected video as highlighted below:
Once you have those, you need to either install Cloudinary’s Video Player NPM library or use its CDN:
<!-- Include the Cloudinary Video Player styles and script -->
<link rel="stylesheet" href="https://cdn.jsdelivr.net/npm/cloudinary-video-player@2.3.5/dist/cld-video-player.min.css" />
<script src="https://cdn.jsdelivr.net/npm/cloudinary-video-player@2.3.5/dist/cld-video-player.min.js"></script>Code language: HTML, XML (xml)
Next, add a basic video element to your HTML:
<!-- This is the placeholder for your video player -->

<div style="max-width: 800px">

  <video

    id="doc-player"

    controls

    muted

    class="cld-video-player cld-fluid">

  </video>

</div>Code language: HTML, XML (xml)
The id="doc-player" in the code above is just a reference. You can name it anything, but make sure your JavaScript uses the same ID to attach the player.
Now, connect the video player using JavaScript:
// Initialize the Cloudinary video player and load your video

const player = cloudinary.videoPlayer('doc-player', {

  cloudName: 'your-cloud-name' // Replace this with your actual Cloudinary cloud name

});

player.source('your-video-public-id'); // Replace this with the public ID of your videoCode language: JavaScript (javascript)
That’s it! Your site now has a fully responsive, keyboard-friendly, screen-reader-accessible video player.
Once your player is accessible, the next major step is making sure people can follow what’s being said in your videos, whether they’re deaf, hard of hearing, in a noisy environment, or simply prefer reading along.
That’s where subtitles and captions come in. And under the EAA, they’re not optional. Your videos need to provide:
- Closed captions for all spoken dialogue, sound effects, or relevant audio.
- Multiple language subtitle tracks, especially for public-facing or multilingual content.
- Readable, toggleable, and properly timed captions that don’t block important visuals.
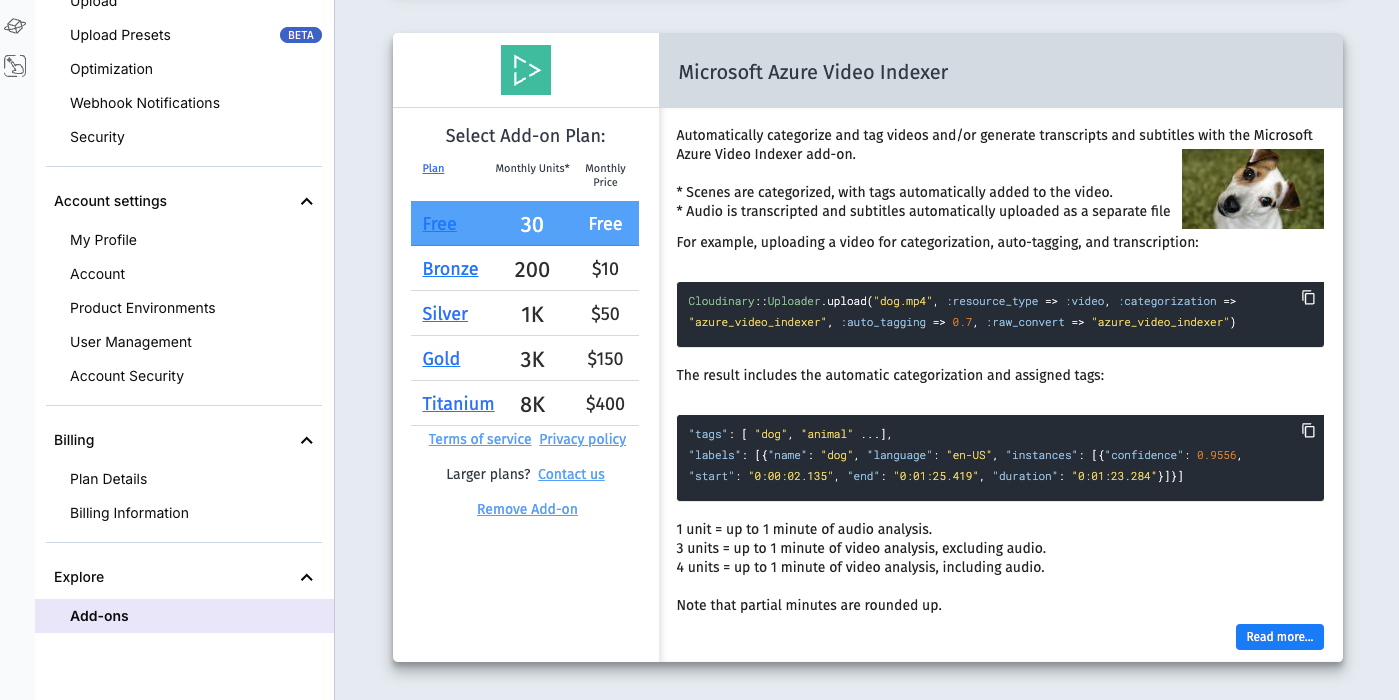
With Cloudinary, you can easily generate these subtitles via AI add-ons like the Google AI Video Transcription add-on or the Microsoft Azure Video Indexer add-on as you upload your videos.
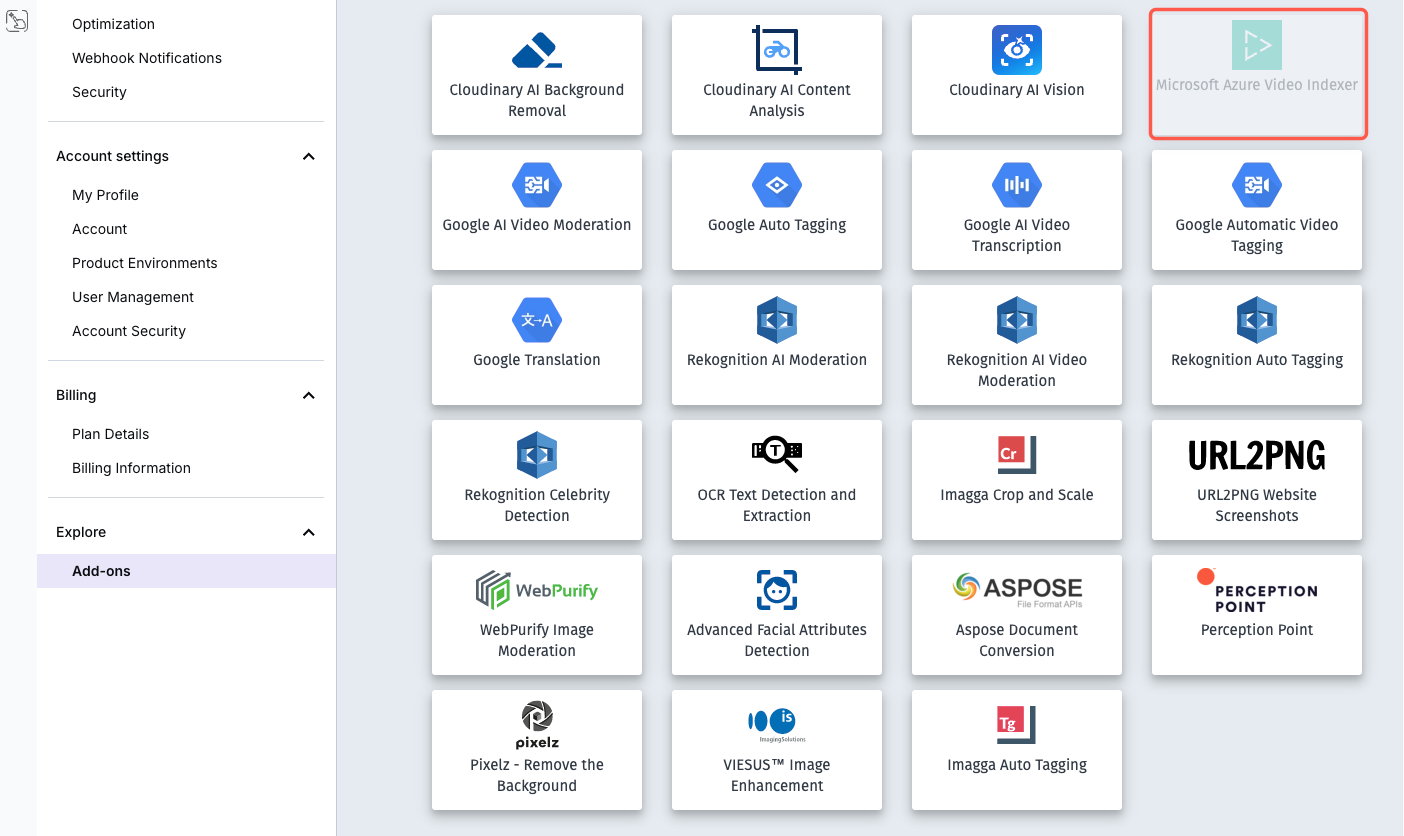
To do this, you must enable the add-on in your Cloudinary account. For example, to enable Azure Video Indexer, go to the Add-ons section in the Cloudinary dashboard, search for Microsoft Azure Video Indexer, and click it.
Once there, you can select a subscription plan. For this demo, the free plan (which gives you 30 units per month) will be enough. If you need more, you can choose a paid plan.
Once the add-on is active, generating subtitles is as simple as adding a raw_convert parameter to your upload logic.
cloudinary.v2.uploader

.upload("folder-permissions-tutorial.mp4",

  { resource_type: "video",

    raw_convert: "azure_video_indexer" })

.then(result=>console.log(result));Code language: JavaScript (javascript)For this to work, you must have installed Cloudinary’s Node.js SDK and configured it using your API keys.
When the process is complete, a new transcript file (e.g., en-us.azure.transcript) is created in your Cloudinary product environment. If you want to use the transcript as subtitles in a video player, you can request specific subtitle formats like WebVTT (.vtt) or SRT (.srt).
To do this, append the file type to the raw_convert value with a colon, like so:
raw_convert: 'azure_video_indexer:vtt'
This will generate .vtt subtitle files. You can also translate the subtitles into multiple languages by specifying additional target languages after the source language, separated by colons. For example:
raw_convert: 'azure_video_indexer:srt:vtt:en-US:fr-FR'
This will generate subtitles in both English and French, in both .vtt and .srt formats. You can then attach them to your Cloudinary video player using the textTracks config:
player.source('folder-permissions-tutorial', {

  textTracks: {

    captions: {

      label: 'English',

      default: true,

      language: 'en-US'

    },

    subtitles: [

      {

        label: 'French',

        language: 'fr-FR'

      },

      {

        label: 'Spanish',

        language: 'es-ES'

      }

    ]

  }

});Code language: PHP (php)
That’s all it takes. The player will load the correct .vtt files based on your video’s public ID, and users will be able to switch subtitle languages directly from the player UI.
Subtitles should be accurate, easy to read, well-timed, and visually consistent with your brand. Cloudinary gives you full control over how subtitles look and behave using the textTracks configuration inside the video player setup.
You can style fonts, adjust positioning, and even control how subtitles are paced, like limiting the number of words shown at once or highlighting each word as it’s spoken. These enhancements not only make your video feel more polished, but they also help meet accessibility guidelines under the EAA.
Here’s a complete example showing how to set custom subtitles, pace them, and apply styling:
player.source('outdoors', {

  textTracks: {

    options: {

      fontFace: 'Kanit',

      fontSize: '1.5rem',

      gravity: 'bottom',

      style: { opacity: '0.8' },

      theme: 'yellow-outlined',

      wordHighlightStyle: {

        color: 'royalblue'

      }

    },

    subtitles: {

      label: 'English',

      default: true,

      maxWords: 3,

      wordHighlight: true,

      url: 'https://res.cloudinary.com/demo/raw/upload/outdoors.vtt'

    }

  }

});Code language: PHP (php)You can either reference a subtitle file you’ve uploaded (like a .vtt file) or use auto-generated .transcript files produced during upload, like we covered in the previous section.
The code above loads English subtitles from a .vtt file, limits the display to three words per frame for readability, and highlights each word as it’s spoken.
Next, we’ll examine alternate audio tracks and how they expand accessibility for blind or multilingual users.
Subtitles aren’t the only way to make your videos more inclusive. For blind or low-vision users, descriptive audio can narrate what’s happening visually. And for multilingual audiences, alternate audio tracks in different languages may feel more natural than reading subtitles.
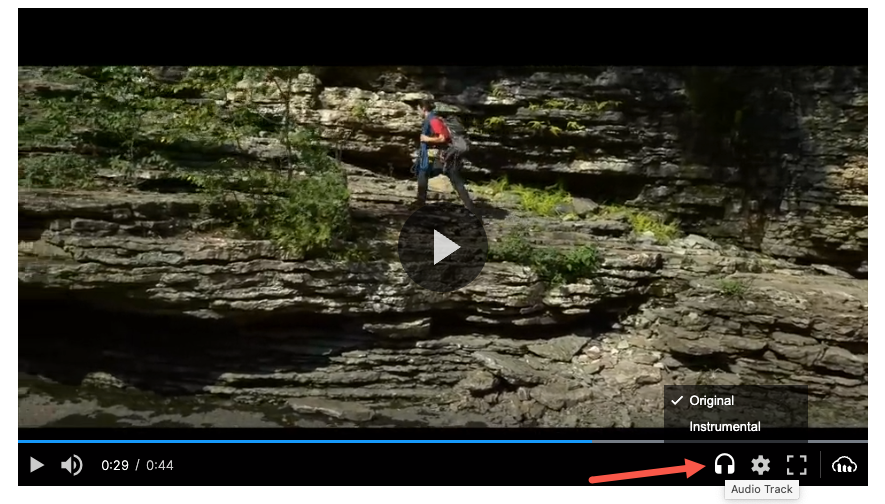
Cloudinary lets you add multiple audio tracks to a video using transformation parameters. These alternate audio tracks show up in the player UI (when supported, like in the Cloudinary Video Player), and users can choose which version they want to hear.
This is done using the l_audio layer transformation along with the fl_alternate flag.
Here’s an example of a video URL that includes both the original audio and an instrumental alternate track:
https://res.cloudinary.com/demo/video/upload/
fl_alternate:lang_en;name_Original,l_audio:outdoors/fl_layer_apply/
fl_alternate:lang_en;name_Instrumental,l_audio:docs:instrumental-short/fl_layer_apply/
sp_auto/outdoors.m3u8Code language: JavaScript (javascript)
Here’s a break down of the video URL above:
l_audio:outdoorsadds the original audio from a video, where outdoors is the public ID of your audio file.fl_alternate:lang_en;name_Originalsets the audio language and how it’s labeled in the player.- A second
l_audiolayer adds a different audio track (e.g., an instrumental or translated version), also tagged with fl_alternate. sp_autoapplies automatic streaming profile selection, needed for adaptive bitrate and audio switching.
When users play this video using the Cloudinary Video Player, they can pick between audio tracks, just like language options in a Netflix player.
This method doesn’t currently work through Cloudinary SDKs. You’ll need to build and manage the transformation URLs manually.
Not every user will be able to watch your videos, as some rely on screen readers, some are on slow connections, and others might have autoplay disabled. That’s why having fallback content and proper metadata is part of delivering accessible video under the EAA.
With Cloudinary, you can add contextual metadata and structure your video sources so they still provide value even if the video can’t be played.
Here’s what you should cover:
- Title, subtitle, and description. These help screen readers and assistive tech users understand the video’s content.
- Transcript or alt content. If the video fails to load or autoplay is blocked, users should still be able to access the core message.
- Structured metadata. This improves accessibility and also helps with SEO and discoverability.
Using contextual metadata, you can define titles, subtitles, and descriptions either via the API or directly in the Media Library. Here is an example using the upload API:
cloudinary.v2.uploader.upload("product-demo.mp4", {

  resource_type: "video",

  context: {

    title: "Quick Product Demo",

    subtitle: "How to get started in 90 seconds",

    description: "This video walks through the basics of using our dashboard and key features."

  }

});Code language: CSS (css)
This metadata is used as the fallback label when a video can’t play. If you don’t define a title, the public ID will be used by default, which isn’t helpful for accessibility.
Alternatively, you can define this info directly in the player source:
player.source('product-demo', {

  info: {

    title: 'Quick Product Demo',

    subtitle: 'Get started fast',

    description: 'Covers dashboard setup, tools, and integrations'

  }

});Code language: JavaScript (javascript)
This overrides any metadata set at the asset level and gives you flexibility to localize or customize per use case.
If you’ve followed this guide, you’ve either implemented most of the key accessibility steps or at least know exactly what to tackle next. But how can you be sure your videos are truly inclusive and EAA-compliant?
The answer is simple: Test like your users would. Modern browsers make accessibility testing surprisingly approachable:
- In Chrome, open DevTools and head to the Accessibility panel. You’ll be able to inspect ARIA roles, check element labels, and confirm the focus order makes sense.
- Use only your keyboard to interact with the video player. Can you reach the Play button, toggle subtitles, and adjust volume using just Tab, Enter, and Space?
- Run a screen reader like NVDA (Windows) or VoiceOver (macOS) and listen. Do your captions read smoothly? Are your buttons clearly described, or do they just say “button”?
If all of this works well, congratulations. You’ve taken solid steps toward delivering EAA-compliant, inclusive video.
Sign up on Cloudinary to deliver accessible, EAA-compliant videos with subtitles, audio tracks, and metadata-driven workflows.


