When building web applications, developers do their best to make all content responsive. A common way to perform this is by delivering full-size images and relying on browser-side cropping (CSS and HTML width and height attributes). However, this forces visitors to download the original large image files before serving the cropped image.
React, a JavaScript library for building user interfaces, offers many cropping packages. However, these still don’t solve the problem of forcing visitors to download large image files before serving the cropped images. The best way to solve this problem is to deliver images from the server at their final size needed for responsiveness on the users’ device, window size, or resolution.
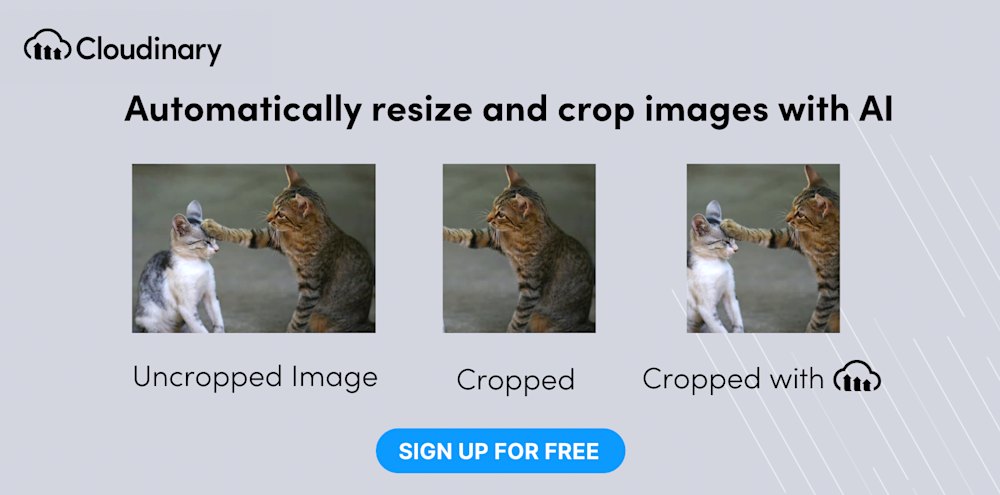
This article will discuss how to dynamically crop images on the fly. The magic of Cloudinary and its image transformation features to deliver image assets to the browser at the requested size.
Sandbox
We’ve completed this project in a CodeSandbox. Fork and run it to quickly get started to crop an image with React.
<CodeSandbox id="lucid-goldwasser-9qm7rk" title="How to crop an image with React" />
The GitHub link is here.
Using Cloudinary in a React application
Cloudinary is an end-to-end media management platform for software applications covering everything from uploads, storage, transformations and optimizations to delivery. Cloudinary offers SDKs for frontend, backend, and mobile development.
One of the cool features of Cloudinary is its ability to transform media on-the-fly, meaning, there’s no need to pre-process images and videos. Instead, simply append attributes to the URL and Cloudinary will go off to generate that asset and return it.
To use Cloudinary:
- Set up an account — create one for free here.
- Configure the React SDK.
- Upload the images you want to crop.
- Crop using Cloudinary’s cropping modes.

Configuring Cloudinary in a React application
After creating a free Cloudinary account, build a React application by navigating to a directory and running the command below in a terminal:
npx create-react-app crop_image && cd crop_image
The above command creates a React application called ‘crop_image’ and navigates to the project directory.
Next, install the @cloudinary/url-gen and @cloudinary/react packages with:
npm i @cloudinary/url-gen @cloudinary/react
The @cloudinary/url-gen package contains all the functionalities required to create delivery URLs for uploaded images.
The @cloudinary/react package contains the React components for rendering, configuring, and transforming the images.
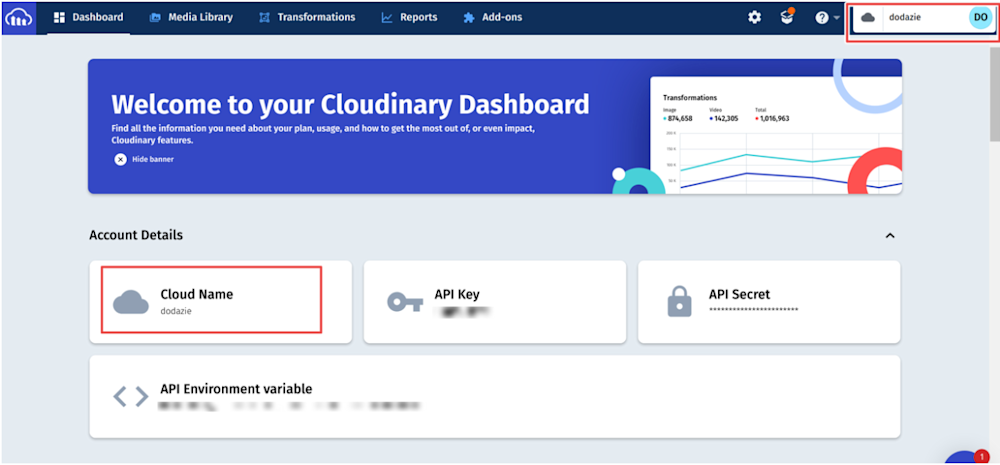
Include the Cloudinary account Cloud Name as an environment variable. You get the Cloud Name by logging into the Cloudinary console and viewing any of the highlighted sections as shown below:
Then, create a .env file in the root directory and add the variable below to the file:
REACT_APP_CLOUDINARY_CLOUD_NAME=/*YOUR CLOUD NAME HERE/*
Lastly, upload the images you want to crop to your Cloudinary account.
Uploading images to Cloudinary
There are multiple ways to upload images to Cloudinary. For this article, we will use the Cloudinary Upload widget.
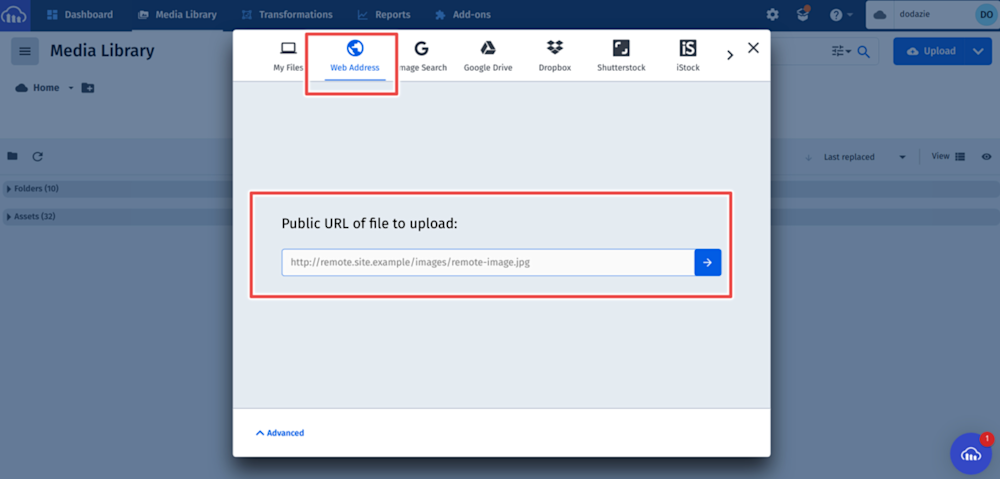
To upload images using the Upload widget on the Cloudinary console, click on Media Library and then Upload:

In the popup, select the Web Address option to upload an image via a web url:
Here are 3 sample images we can use:
- Store: https://images.unsplash.com/photo-1441986300917-64674bd600d8?ixlib=rb-1.2.1&ixid=MnwxMjA3fDB8MHxwaG90by1wYWdlfHx8fGVufDB8fHx8&auto=format&fit=crop&w=2370&q=80
- Man: https://images.unsplash.com/photo-1495603889488-42d1d66e5523?ixlib=rb-1.2.1&ixid=MnwxMjA3fDB8MHxwaG90by1wYWdlfHx8fGVufDB8fHx8&auto=format&fit=crop&w=1471&q=80
- Beach: https://images.unsplash.com/photo-1475503572774-15a45e5d60b9?ixlib=rb-1.2.1&ixid=MnwxMjA3fDB8MHxwaG90by1wYWdlfHx8fGVufDB8fHx8&auto=format&fit=crop&w=1470&q=80
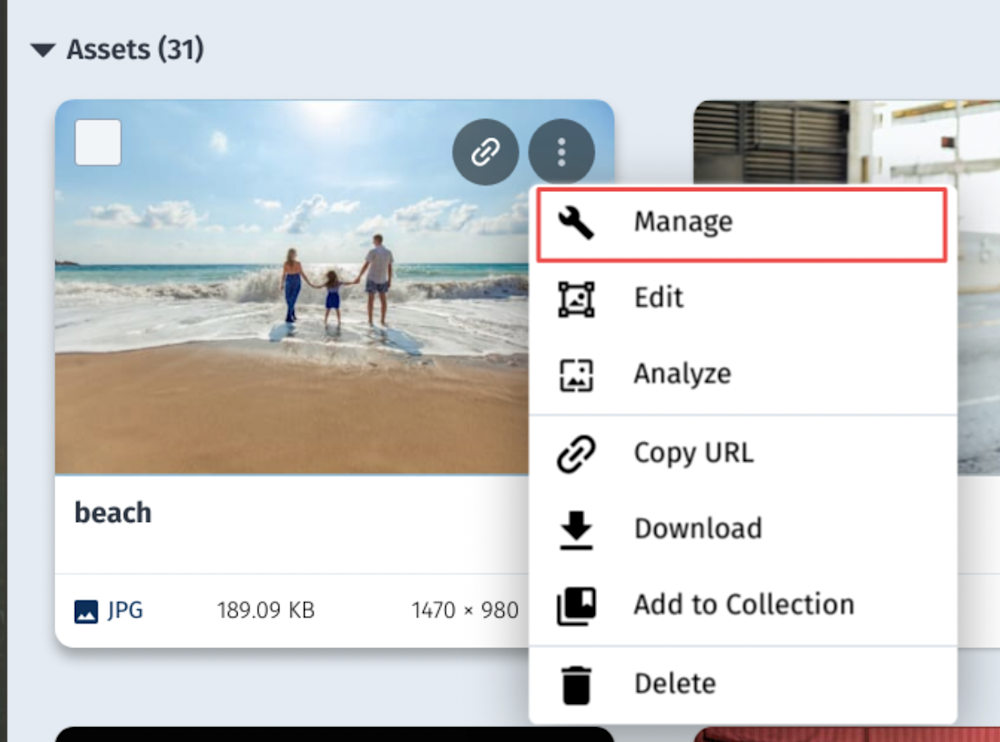
After uploading these images, use each image and its Public ID (the unique identifier for an asset stored in Cloudinary) to access it and crop the image with React:* We manually edited the names of the images because Cloudinary gives default names after upload. To edit an image name, hover on the image, click on the ellipsis at the top right corner, and click Manage:
It’s time to start cropping!
- Crop the store image to a specific dimension using the crop mode.
- Crop the man image to thumbnail with face detection using the thumb mode
- Crop the beach image smartly without scaling it using the Cloudinary Imagga add-on.
Using Cloudinary cropping modes in React
-
- Import the Cloudinary packages and the required actions and qualifiers to use the cropping modes and to crop an image with React. Then instantiate Cloudinary and pass a cloud name (the unique identifier name for your Cloudinary product environment. You can find it on the top right side of the Cloudinary dashboard).
- Update the src/App.js file of the React application:
import { Cloudinary } from "@cloudinary/url-gen";
import {AdvancedImage} from "@cloudinary/react";
// Import required actions and qualifiers
import { crop, thumbnail, imaggaCrop } from "@cloudinary/url-gen/actions/resize";
import {focusOn} from "@cloudinary/url-gen/qualifiers/gravity";
import {face} from "@cloudinary/url-gen/qualifiers/focusOn";
const App = () => {
  const cld = new Cloudinary({
    cloud: {
      cloudName: process.env.REACT_APP_CLOUDINARY_CLOUD_NAME
    }
  });


  return (
  );
}
export default App;
-
- Create variables that use the cld instance with the Public ID of the images to generate the image URLs:
const imageToCropToSpecifiedDimension = cld.image("store");
const imageToCropToThumbnail = cld.image("man");
const imageToCropWithImagga = cld.image("beach");
- Crop the images using the imported Cloudinary qualifiers and actions:
//Cropping to a specficed dimension of 300px by 300px
imageToCropToSpecifiedDimension.resize(crop().width(300).height(300));
// Cropping to thumbnail with focus on face
imageToCropToThumbnail.resize(
  thumbnail()
    .width(300)
    .height(300)
    .gravity(focusOn(face()))
);
// Using the Imagga addon to smartly crop
imageToCropWithImagga.resize(imaggaCrop());
- In the return (); function, add the JSX to display the images on the browser using the Cloudinary AdvancedImage component:
-
<>
  <div>
    <h2>Crop To Specified Dimension</h2>
    <AdvancedImage cldImg={imageToCropToSpecifiedDimension} />
  </div>
  <br />
  <div>
    <h2>Thumbnail Crop</h2>
    <AdvancedImage cldImg={imageToCropToThumbnail} />
  </div>
  <br />
  <br />
  <div>
    <h2>Imagga Crop</h2>
    <AdvancedImage cldImg={imageToCropWithImagga} />
  </div>
</>
The AdvancedImage component creates an image by passing the generated image URL (the image variables).
The results
The store image before cropping:
The store image after cropping:
The man image before cropping:
The man image after cropping:
The beach image before cropping:
The beach image after cropping:
Conclusion
You’ve seen how easy it is to crop an image using Cloudinary and React. Additionally, Cloudinary offers advanced media functionality like filtering, resizing, retouching, and more. Try it out (it’s free forever!) and unleash the full potential of your digital media.
More from Cloudinary