
Every piece of digital content, from your photos to marketing videos, is a part of your brand. Managing these assets comes with challenges: preventing unauthorized use, recovering from accidental deletions, ensuring that you’re always using the latest versions… Given the sheer volume of digital content today, what you need is robust, active protection, not just a place to store files.
Cloudinary Assets offers exactly that. It’s a powerful system designed to safeguard your digital assets from every angle. In this post, you’ll discover how Cloudinary Assets, Cloudinary’s intelligent DAM, empowers you to manage asset visibility, control access, automate asset lifecycles, and even recover lost items.
Cloudinary covers the entire asset lifecycle, from the moment it’s uploaded to when it’s removed. This whole strategy is built on four core ideas, each designed to It keeps your digital assets in top shape and ready whenever you need them:
-
Consistent, on-brand visuals. Think of this as your content’s quality control check before it ever goes live. This stops anything inappropriate or “off-brand” from ever seeing the light of day.
-
Secure asset sharing. Ensure that sensitive or private content remains confidential until it’s officially released. Access management allows you to control who can view, delete, or download your assets outside of your main Media Library, mitigating the risk of compromising your confidential materials.
-
Automated workflows. Prevent old, irrelevant, or even problematic content from being used. By automatically setting expiration dates or removing outdated content, you can keep your asset library clean and current, saving yourself from potential legal headaches and protecting your brand’s image.
-
Easy version management. Everyone makes mistakes, but you shouldn’t have to worry about making them. Provide robust methods for undoing errors, reverting to earlier versions, and restoring assets that were accidentally deleted.
These four pillars work together to create a powerful system for managing and protecting your digital assets. We’ll go through these features in more detail next to show you exactly how Cloudinary helps.
Every asset you put out there is a direct reflection of your brand. If something is inappropriate, offensive, or low quality, it can hurt your reputation or even land you in legal trouble. Moderation is your first line of defense, ensuring that every uploaded asset matches your brand’s standards and guidelines before it goes public.
Cloudinary offers two main ways to handle moderation:
-
Manual. Based on the permission levels, the administrator or specific Media Library users can review and approve or reject assets. This human touch is valuable for more nuanced decisions and allows you to override any automatic flags.
-
Automatic. Cloudinary AI automatically flags inappropriate assets that don’t meet your quality standards. This method is super fast and consistent, especially for large uploads.
Automatic moderation cuts down on manual review by automatically flagging content that might be off-brand or problematic. This means less work for your team, fewer human errors, and a much faster workflow from asset upload to publication. Unlike human reviewers, AI doesn’t have personal biases, leading to more consistent content standards across huge libraries. This efficiency boost allows you to manage significantly more content without the overhead, speeding up your content delivery.
While AI is fast and great at spotting patterns, it lacks the nuanced understanding or subjective judgment needed for complex or culturally sensitive content. Human moderators, though slower, can interpret those intricacies or specific brand guidelines that AI might miss. Combining both helps prevent “false positives” (where good content gets rejected) and “false negatives” (where subtly inappropriate material slips through).
When you upload files, they’ll get flagged for moderation based on whichever upload preset you’re using. If you’re an admin, you can either create a new preset or tweak an existing preset, then choose between manual moderation or setting up automatic checks with an add-on. (For more information, take a look at the Automatic and manual moderation docs.)
Once your admin has created a preset with the desired moderation settings and set it as the default in the Media Library, every new upload will be automatically queued for review.
Users with Master admin, Media Library admin, and Technical admin roles can moderate assets. Additionally, Media Library users with the Moderate asset administrator permission can moderate assets in folders for which they have Can Edit or Can Manage permissions.
When it’s time to review assets, all moderated content is conveniently displayed on the “Moderation” page. Here’s how it works on this page:
- Assets waiting for a human review are marked “Pending.”
- Assets moderated automatically appear here with their decision.
- You can always manually override automatic decisions, whether it’s approving a rejected image or rejecting an approved one.
- You can easily filter assets by moderation type and decision status on the page.
Note: Depending on your account or product environment setup, you may also be able to moderate assets that are pending manual moderation directly in the Media Library, and not just from the Moderation page, by selecting Approve or Reject from the three-dot options menu on the asset itself, or, after selecting one or more assets, on the asset toolbar.
You know how some things just aren’t meant for everyone to see? Like confidential marketing plans or sneak peeks of new products? Cloudinary’s Access Control Modes are built exactly for these situations.
Note: The access control mode feature is a premium offering for Assets Enterprise plans, and its availability depends on your account setup. If access control mode is not yet enabled for your account and you’d like to enable it, please contact your Customer Success Manager.
When an asset is marked as restricted, it can only be viewed outside your Media Library by someone who has both the asset’s web address (URL) and a unique authentication token. Your administrator can even flip a switch to block downloads for these restricted assets, making them even more secure. It’s perfect for keeping truly sensitive content under wraps.
Think of the authentication token like a secret key. Requiring both the URL and this special token creates a strong, multi-layered security system, dramatically reducing the risk of accidental exposure and giving you solid protection for your most sensitive digital assets.
Beyond just restricting assets, Cloudinary also gives you Time-limited Restricted Access. This removes restricted access to assets for a limited time and is incredibly handy for things like launching a new campaign or revealing a new product design. You can set your assets to become public for a specific period, and then automatically switch back to restricted mode once that time is up. This means no more worrying about content leaking too early or lingering around once it’s obsolete. It’s a fantastic way to manage your content’s visibility right in line with your marketing calendar.
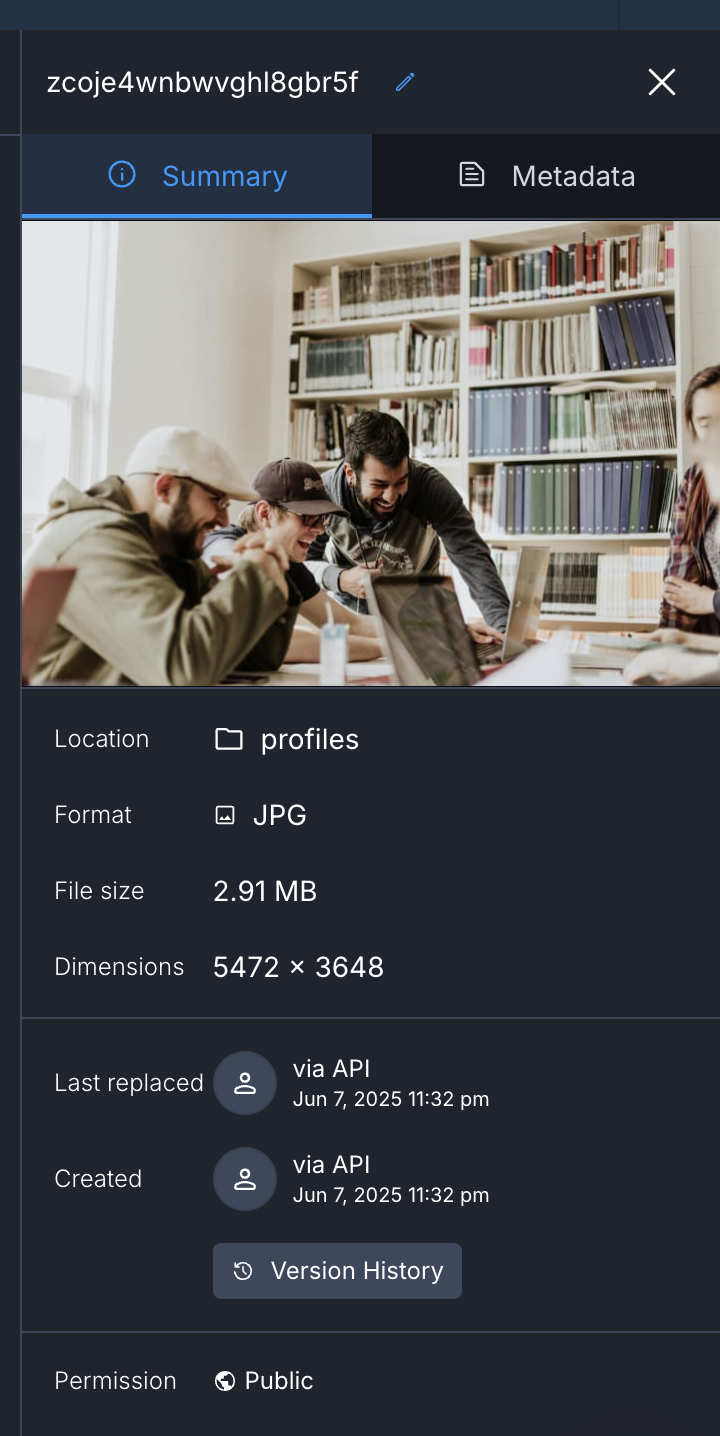
You can quickly check if your asset is “Public” or “Restricted” in the Summary tab, which can be found either in the Media Library Preview pane or the Asset Management Summary tab.
When you’re uploading a bunch of assets and want them to have the same access rules, your Assets administrator can add those settings right into your default upload presets. This means that new uploads receive the correct access control automatically. Alternatively, if you’re using the Media Library Upload Widget, you may be able to pick an upload preset that is already configured for restricted access.
Note: If you don’t see the Upload Presets option in your widget’s advanced settings, your administrator can simply submit a support request to Cloudinary to get it activated.
Content can get old pretty fast. Using outdated, irrelevant, or expired assets can lead to all sorts of headaches. We’re talking potential legal issues, confusing your brand message with obsolete logos, or simply cluttering your digital asset management (DAM) system with unnecessary files. So, actively managing when your assets expire isn’t just nice to have; it’s crucial for keeping your digital library clean, compliant, and efficient.
Cloudinary offers smart ways to automatically handle asset expiration, making sure your content stays current and compliant.
First, building on our Access Control features mentioned earlier, you can automatically stop assets from being delivered after a certain date. This is done by setting their access control to “Restricted” and defining a public time range. It’s a straightforward way to retire content once its purpose is served.
For more advanced and hands-off expiration workflows, Cloudinary introduces EasyFlows. These powerful automation tools enable your administrators to create custom rules that automatically trigger actions based on specific license expiry dates in your metadata or even an asset’s location within a folder. This means less manual tracking and more proactive, rule-based management of your asset lifecycles.
In any creative project, trying out different ideas is key. Designs change, marketing text gets tweaked, and videos go through countless edits. That’s why being able to track these changes, look back at past versions, or even revert to an earlier iteration is incredibly valuable. Think of version history as your critical safety net, allowing you to be creative without the fear of making irreversible mistakes or losing your work. It ensures that every step of an asset’s development is saved and always accessible.
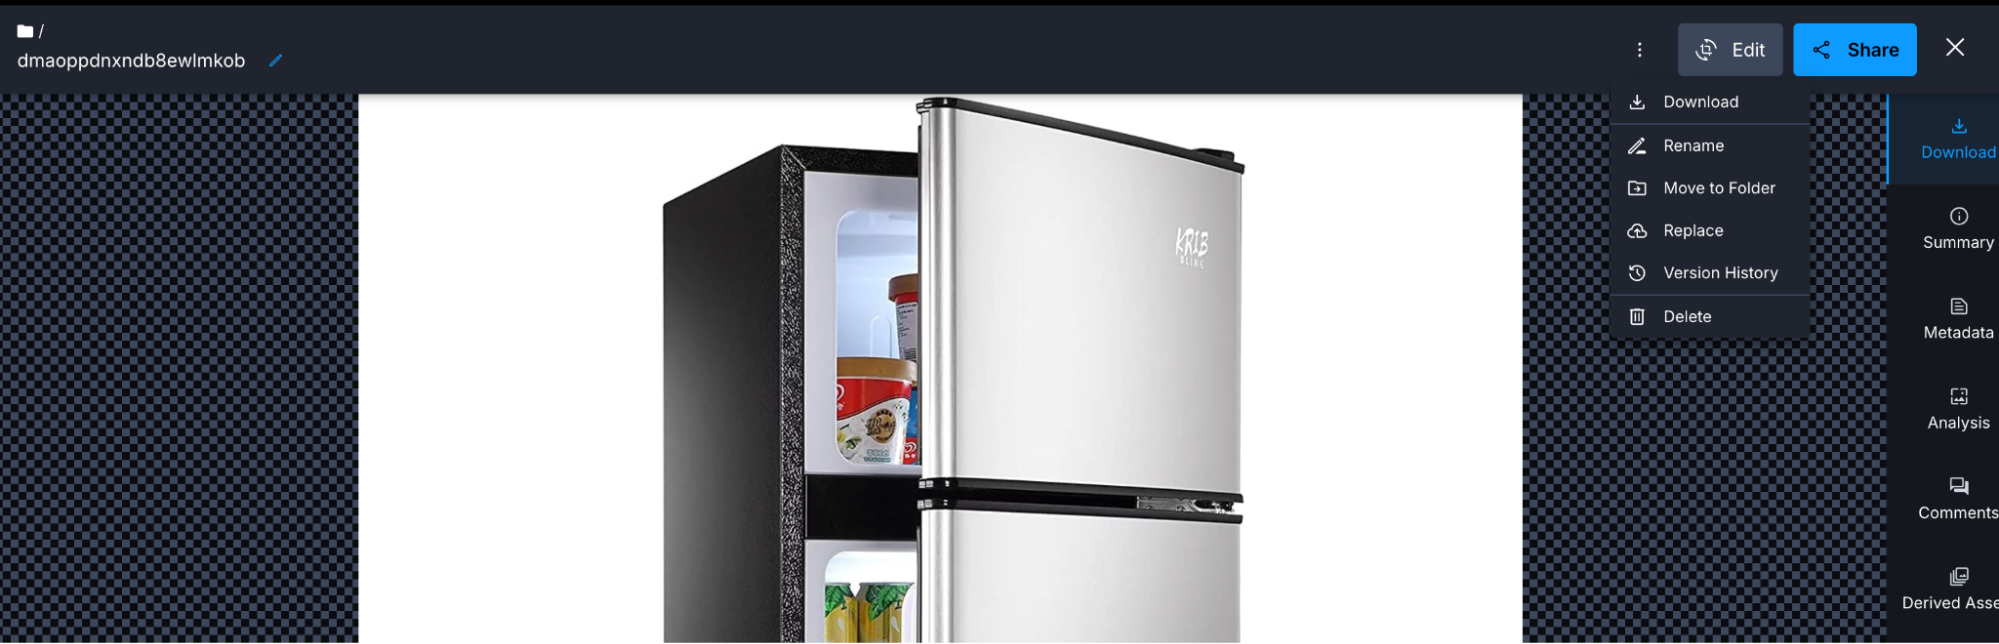
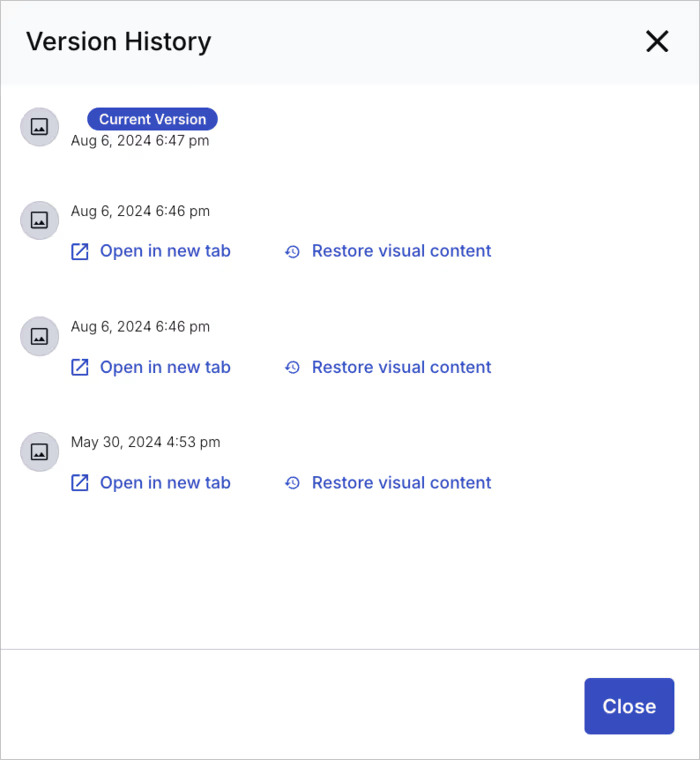
You can list, preview, and restore previous versions of an asset from the asset management drill down page (as seen above) by clicking Version History from the dropdown menu.
To preview a specific version of the asset, click Open in new tab. To restore a previous version, click the Restore visual content link next to the listed version.
Note: In order to take advantage of this feature, your administrator must first enable automatic backup. For more information, see Enabling automatic backup.
Even with the most careful workflows, accidentally deleting a crucial asset is just a fact of life in digital asset management. That moment of panic when you realize something important is gone? It can disrupt your entire workflow and lead to costly recreation efforts. Cloudinary anticipates this common problem by offering a robust and straightforward solution for restoring deleted assets, serving as a vital undo button for your digital library. Here’s a detailed video tutorial on how to restore deleted assets.
While each of Cloudinary’s asset protection features offers fantastic benefits on its own, their real power truly shines when you see them working together as one connected, integrated system. This all-encompassing approach brings some significant strategic advantages that go far beyond just basic security:
-
Significantly reduce legal risk. Proactive moderation, precise access controls, and automated expiration all work seamlessly together to secure your assets. This helps you avoid legal pitfalls tied to expired licenses, brand damage from outdated or inappropriate content, and secure sensitive materials from any unauthorized access.
-
Efficiency gains with automation. Automate moderation and use EasyFlows for expiration of assets, freeing your team from manual oversight and giving them back more time for impactful work. And with strong versioning and immediate asset recovery capabilities, you’re insulated from costly downtime or the headache of recreating lost assets.
-
Strong brand integrity. Every asset you put out will be on-brand and compliant. This dedication to quality content builds deep trust with your audience, strengthens your brand’s identity, and ensures a unified, professional presence wherever your brand appears online.
See how Cloudinary Assets can help you manage and protect your most valuable assets throughout the entire visual media lifecycle. Contact us today to learn more.


