
If you’ve been using Cloudinary to transform images, you’re probably familiar with the original Studio and the Transformation Builder. Both have been valuable tools for applying transformations to your images through an intuitive UI. Now, we’re introducing a new Studio that combines the best of both tools and adds powerful new capabilities.
The new Studio is set to replace both the original Studio and the Transformation Builder, providing a unified interface for building transformations, getting the URL or SDK code you need, and saving transformed images directly to your Media Library.
To open Studio for a single image:
- In the Media Library, locate your image.
- Click the (three-dotted) Options menu on the image.
- Select Edit.
Alternatively, from an image’s drill-down page, click Edit from the Edit drop-down button.
To work with multiple images, select them first, then click the Edit icon in the assets toolbar.
If you’ve used the original Studio in the past, you’ll find all the core transformations you rely on:
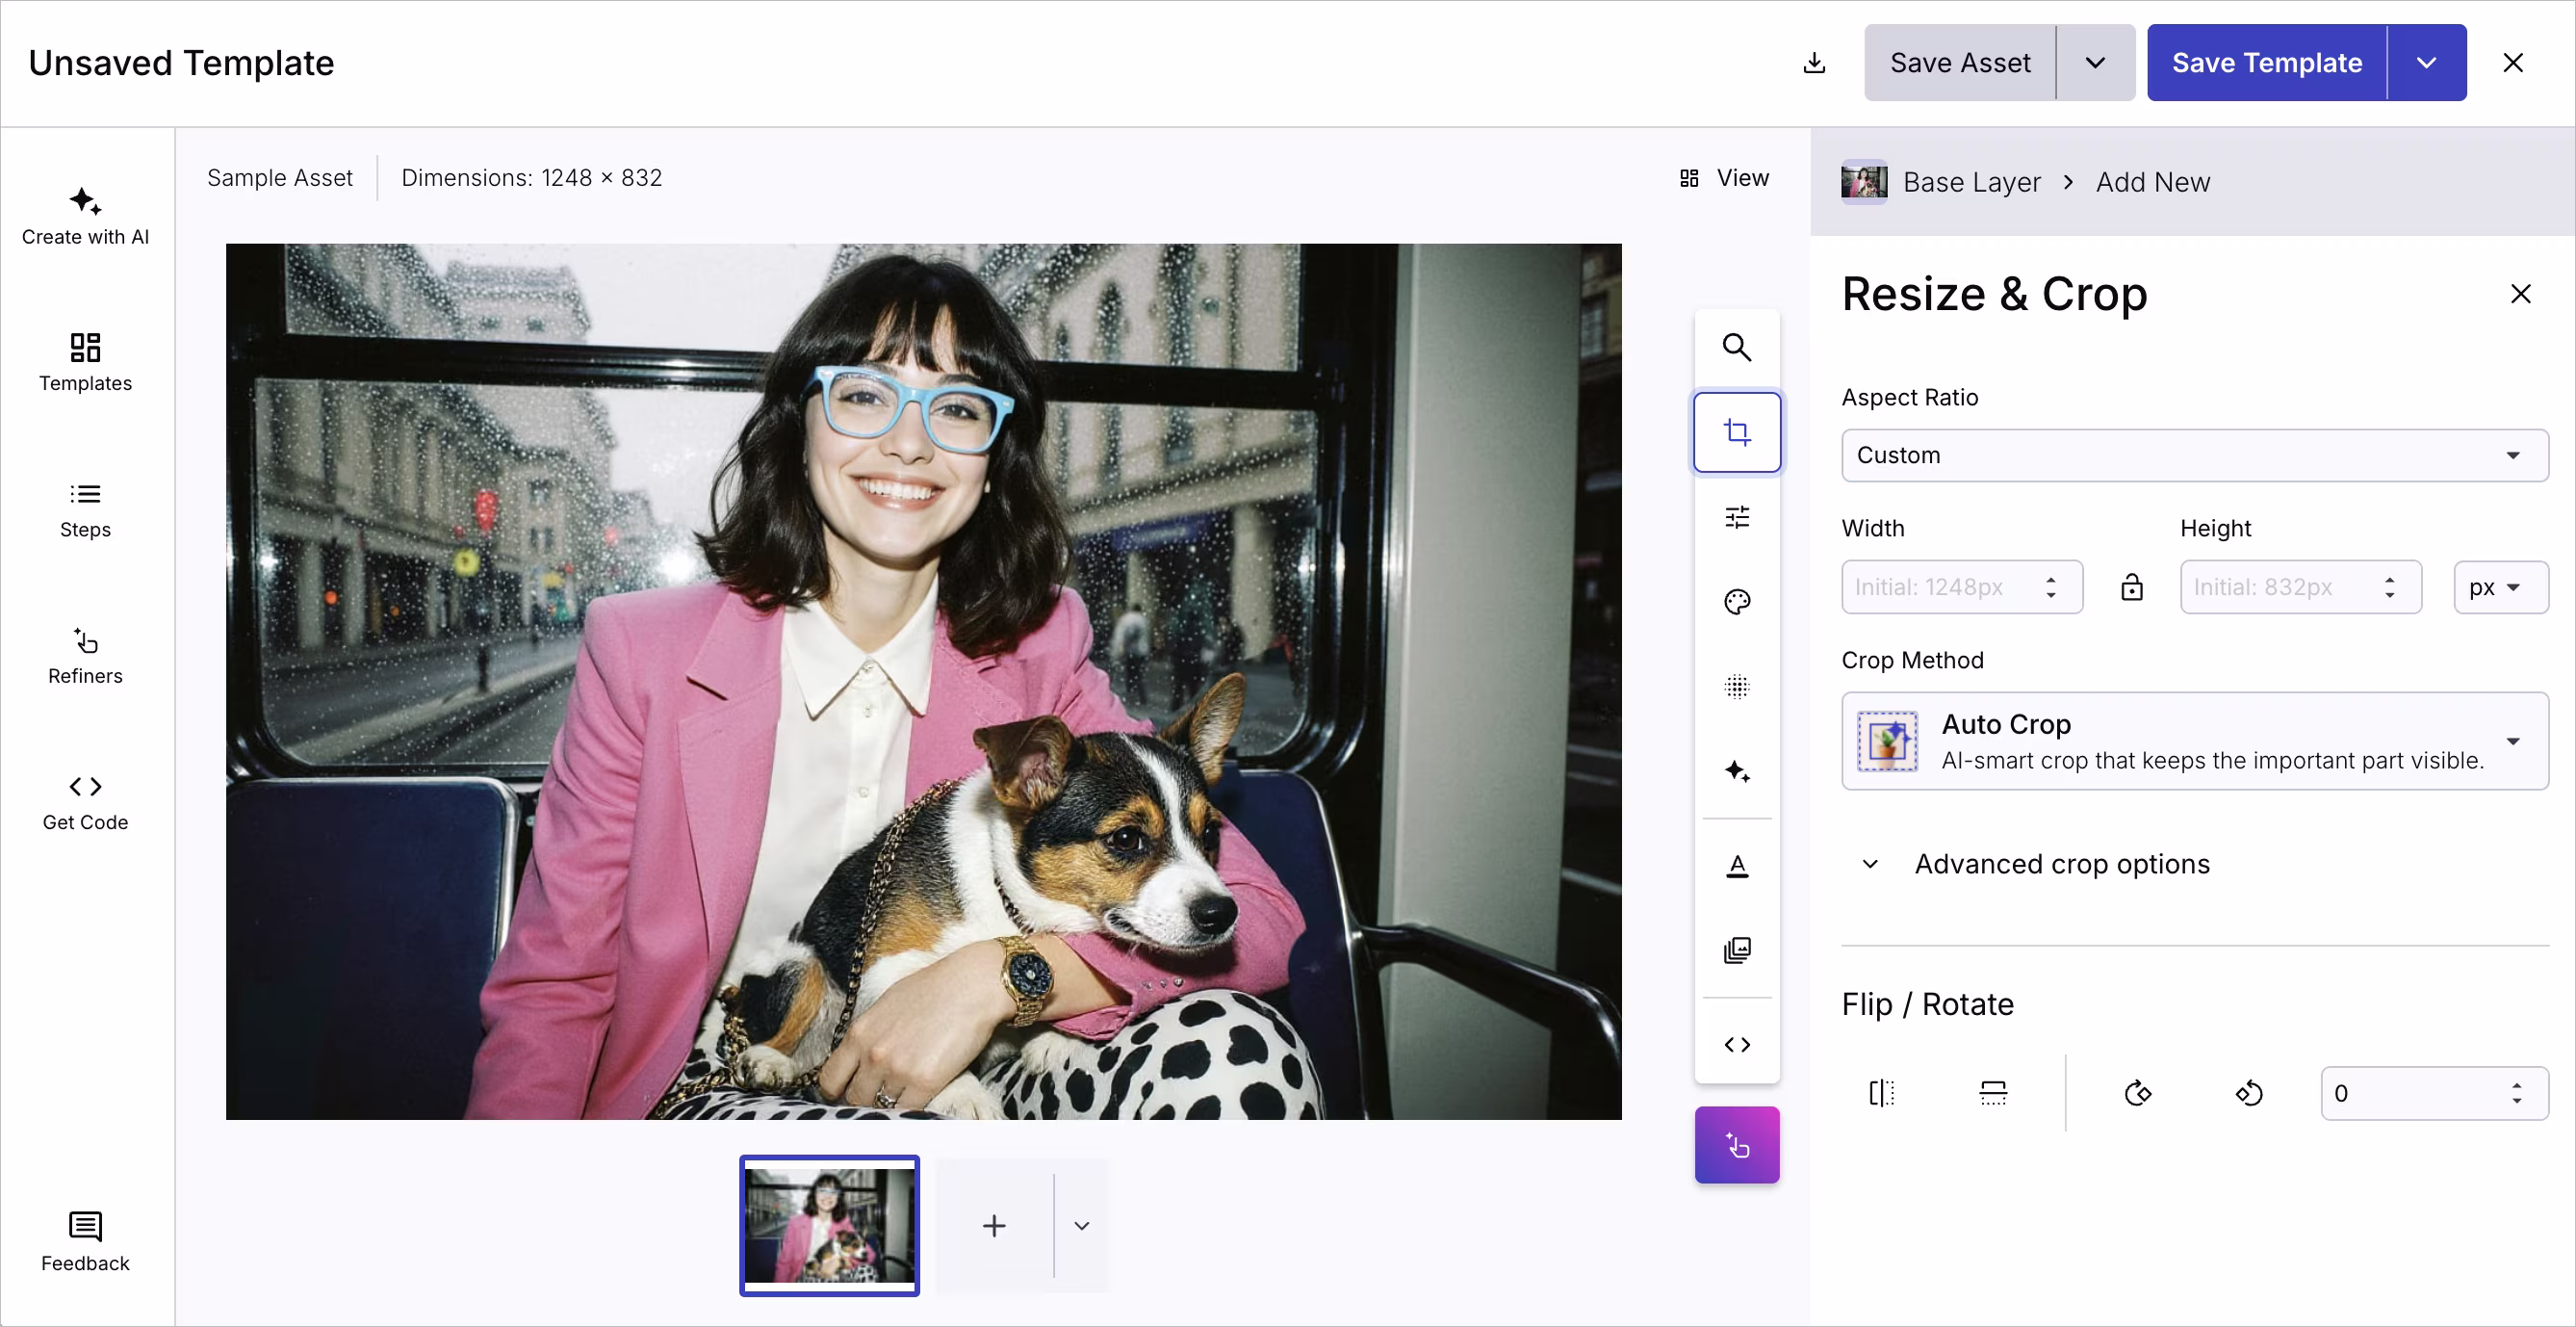
- Resize and crop
- Background removal
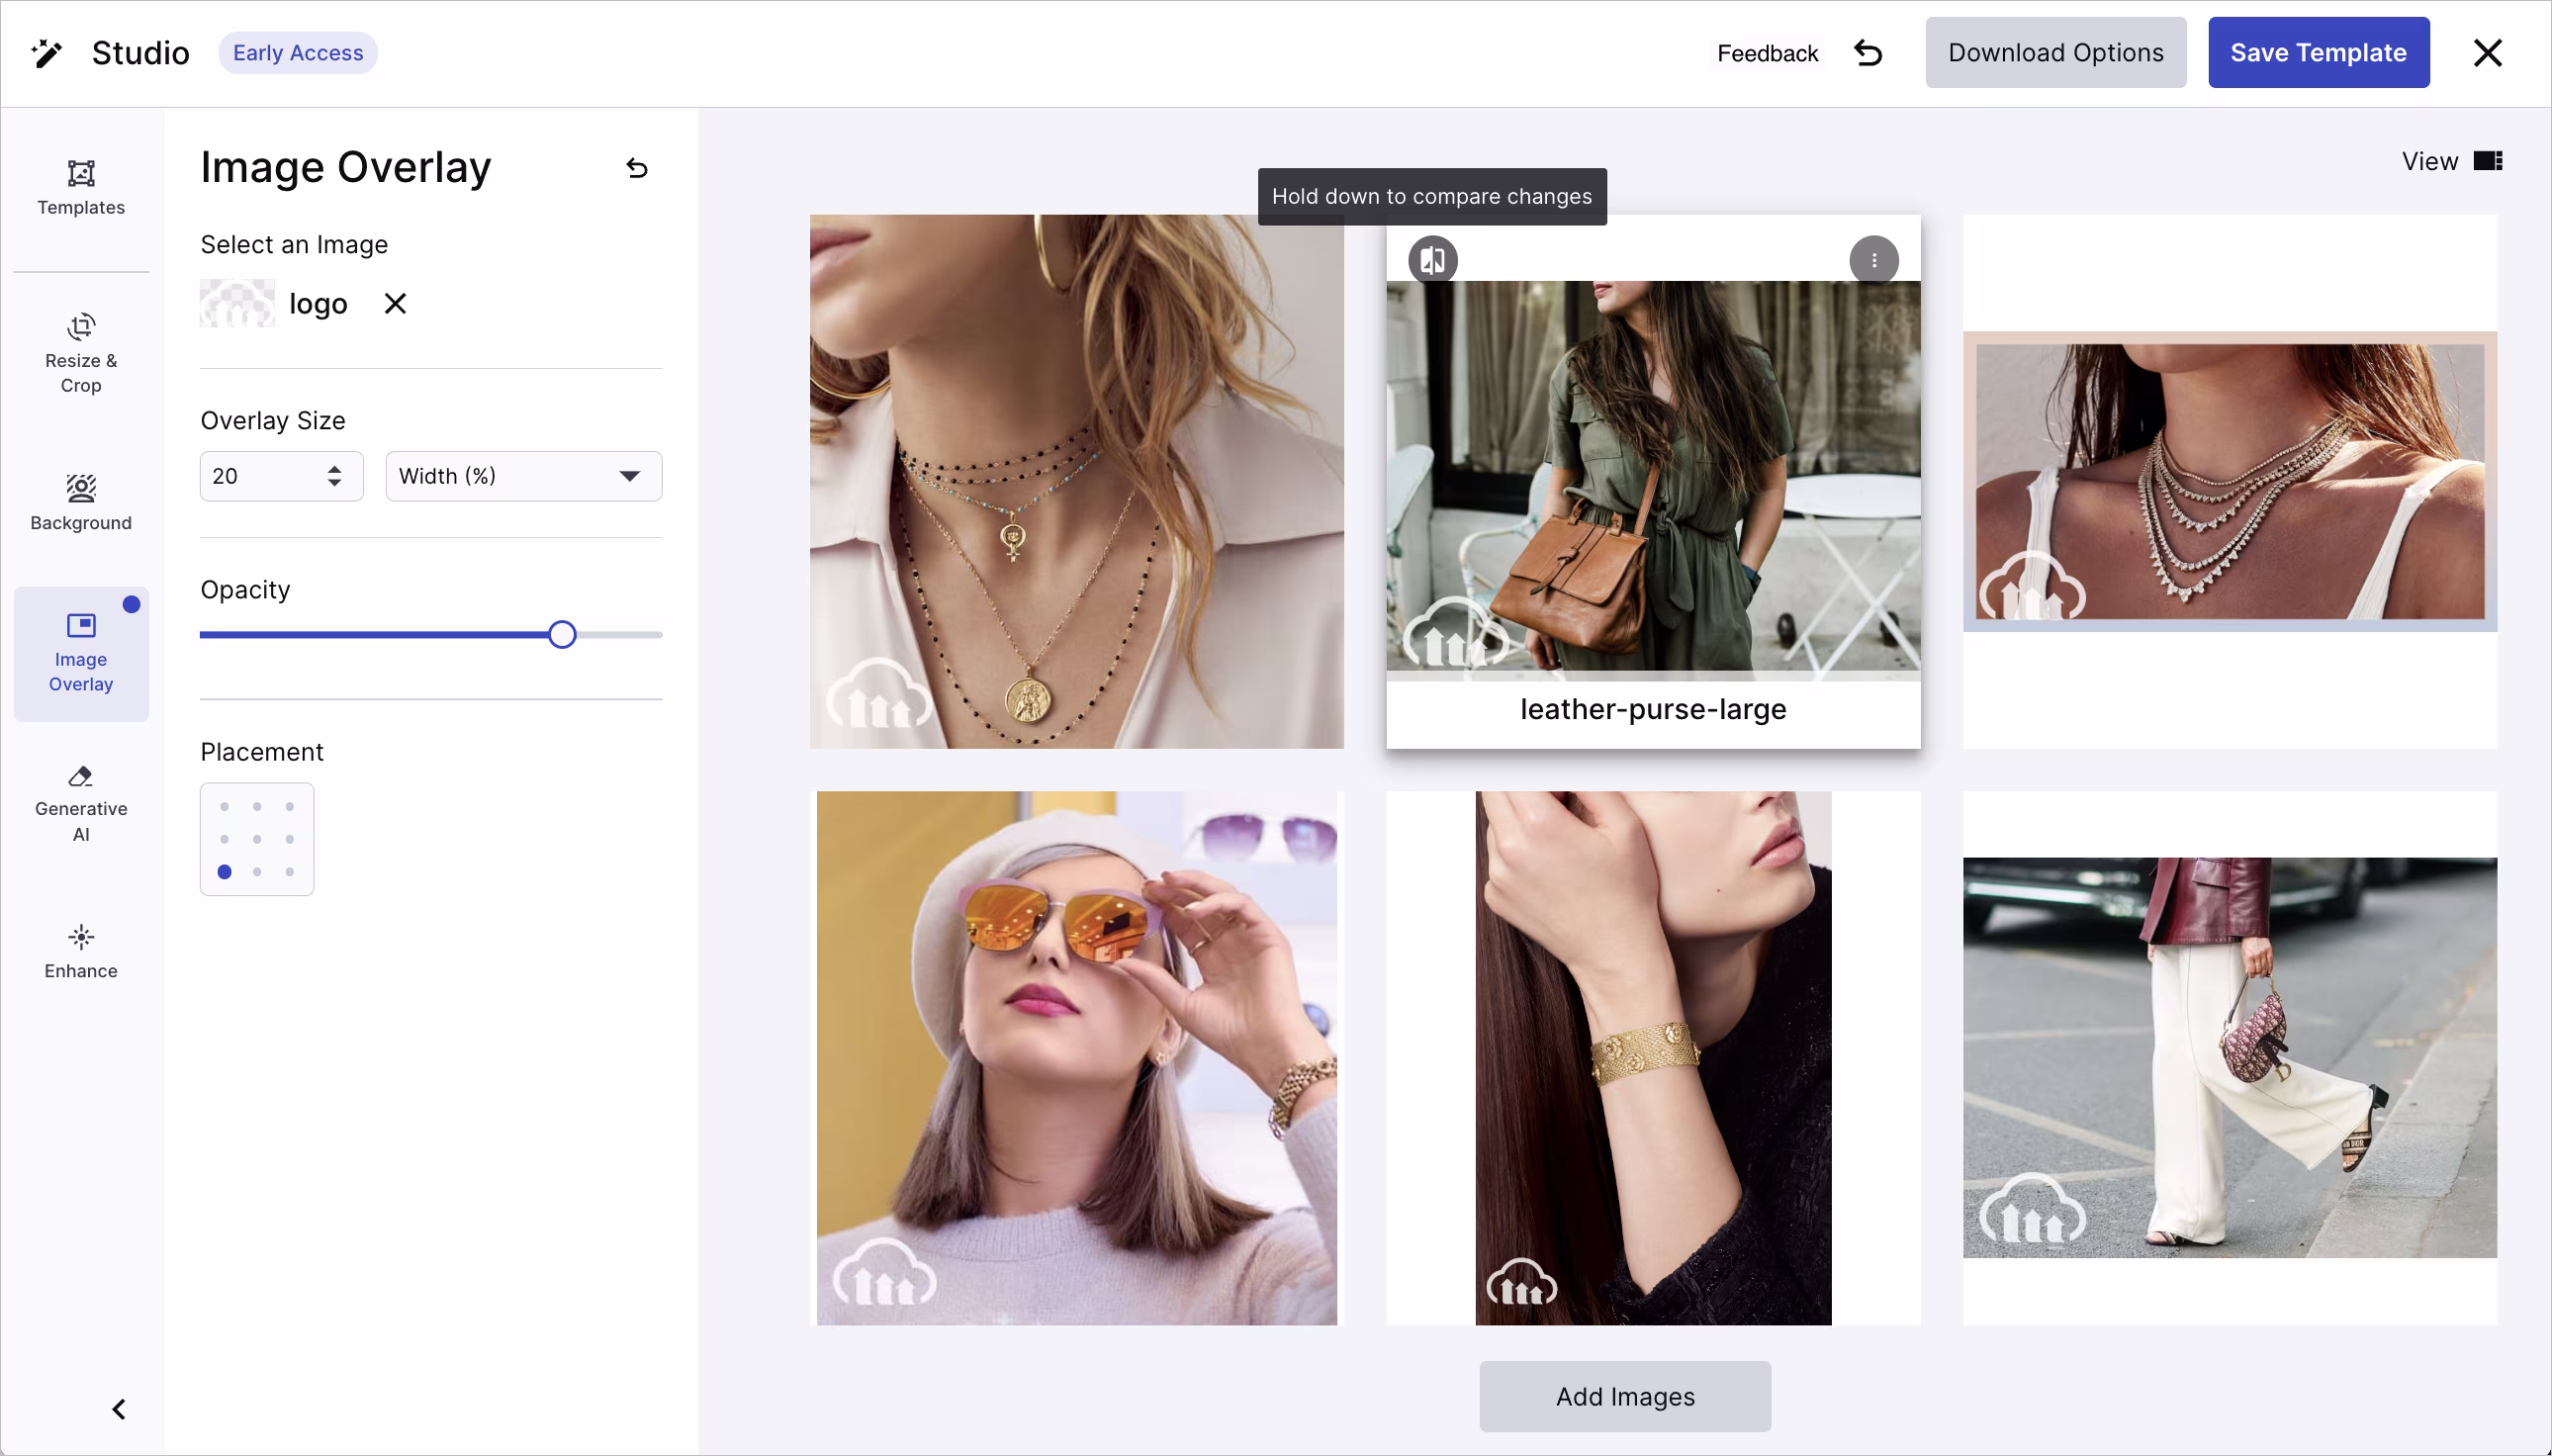
- Image overlays
- Generative AI transformations
- Image enhancements
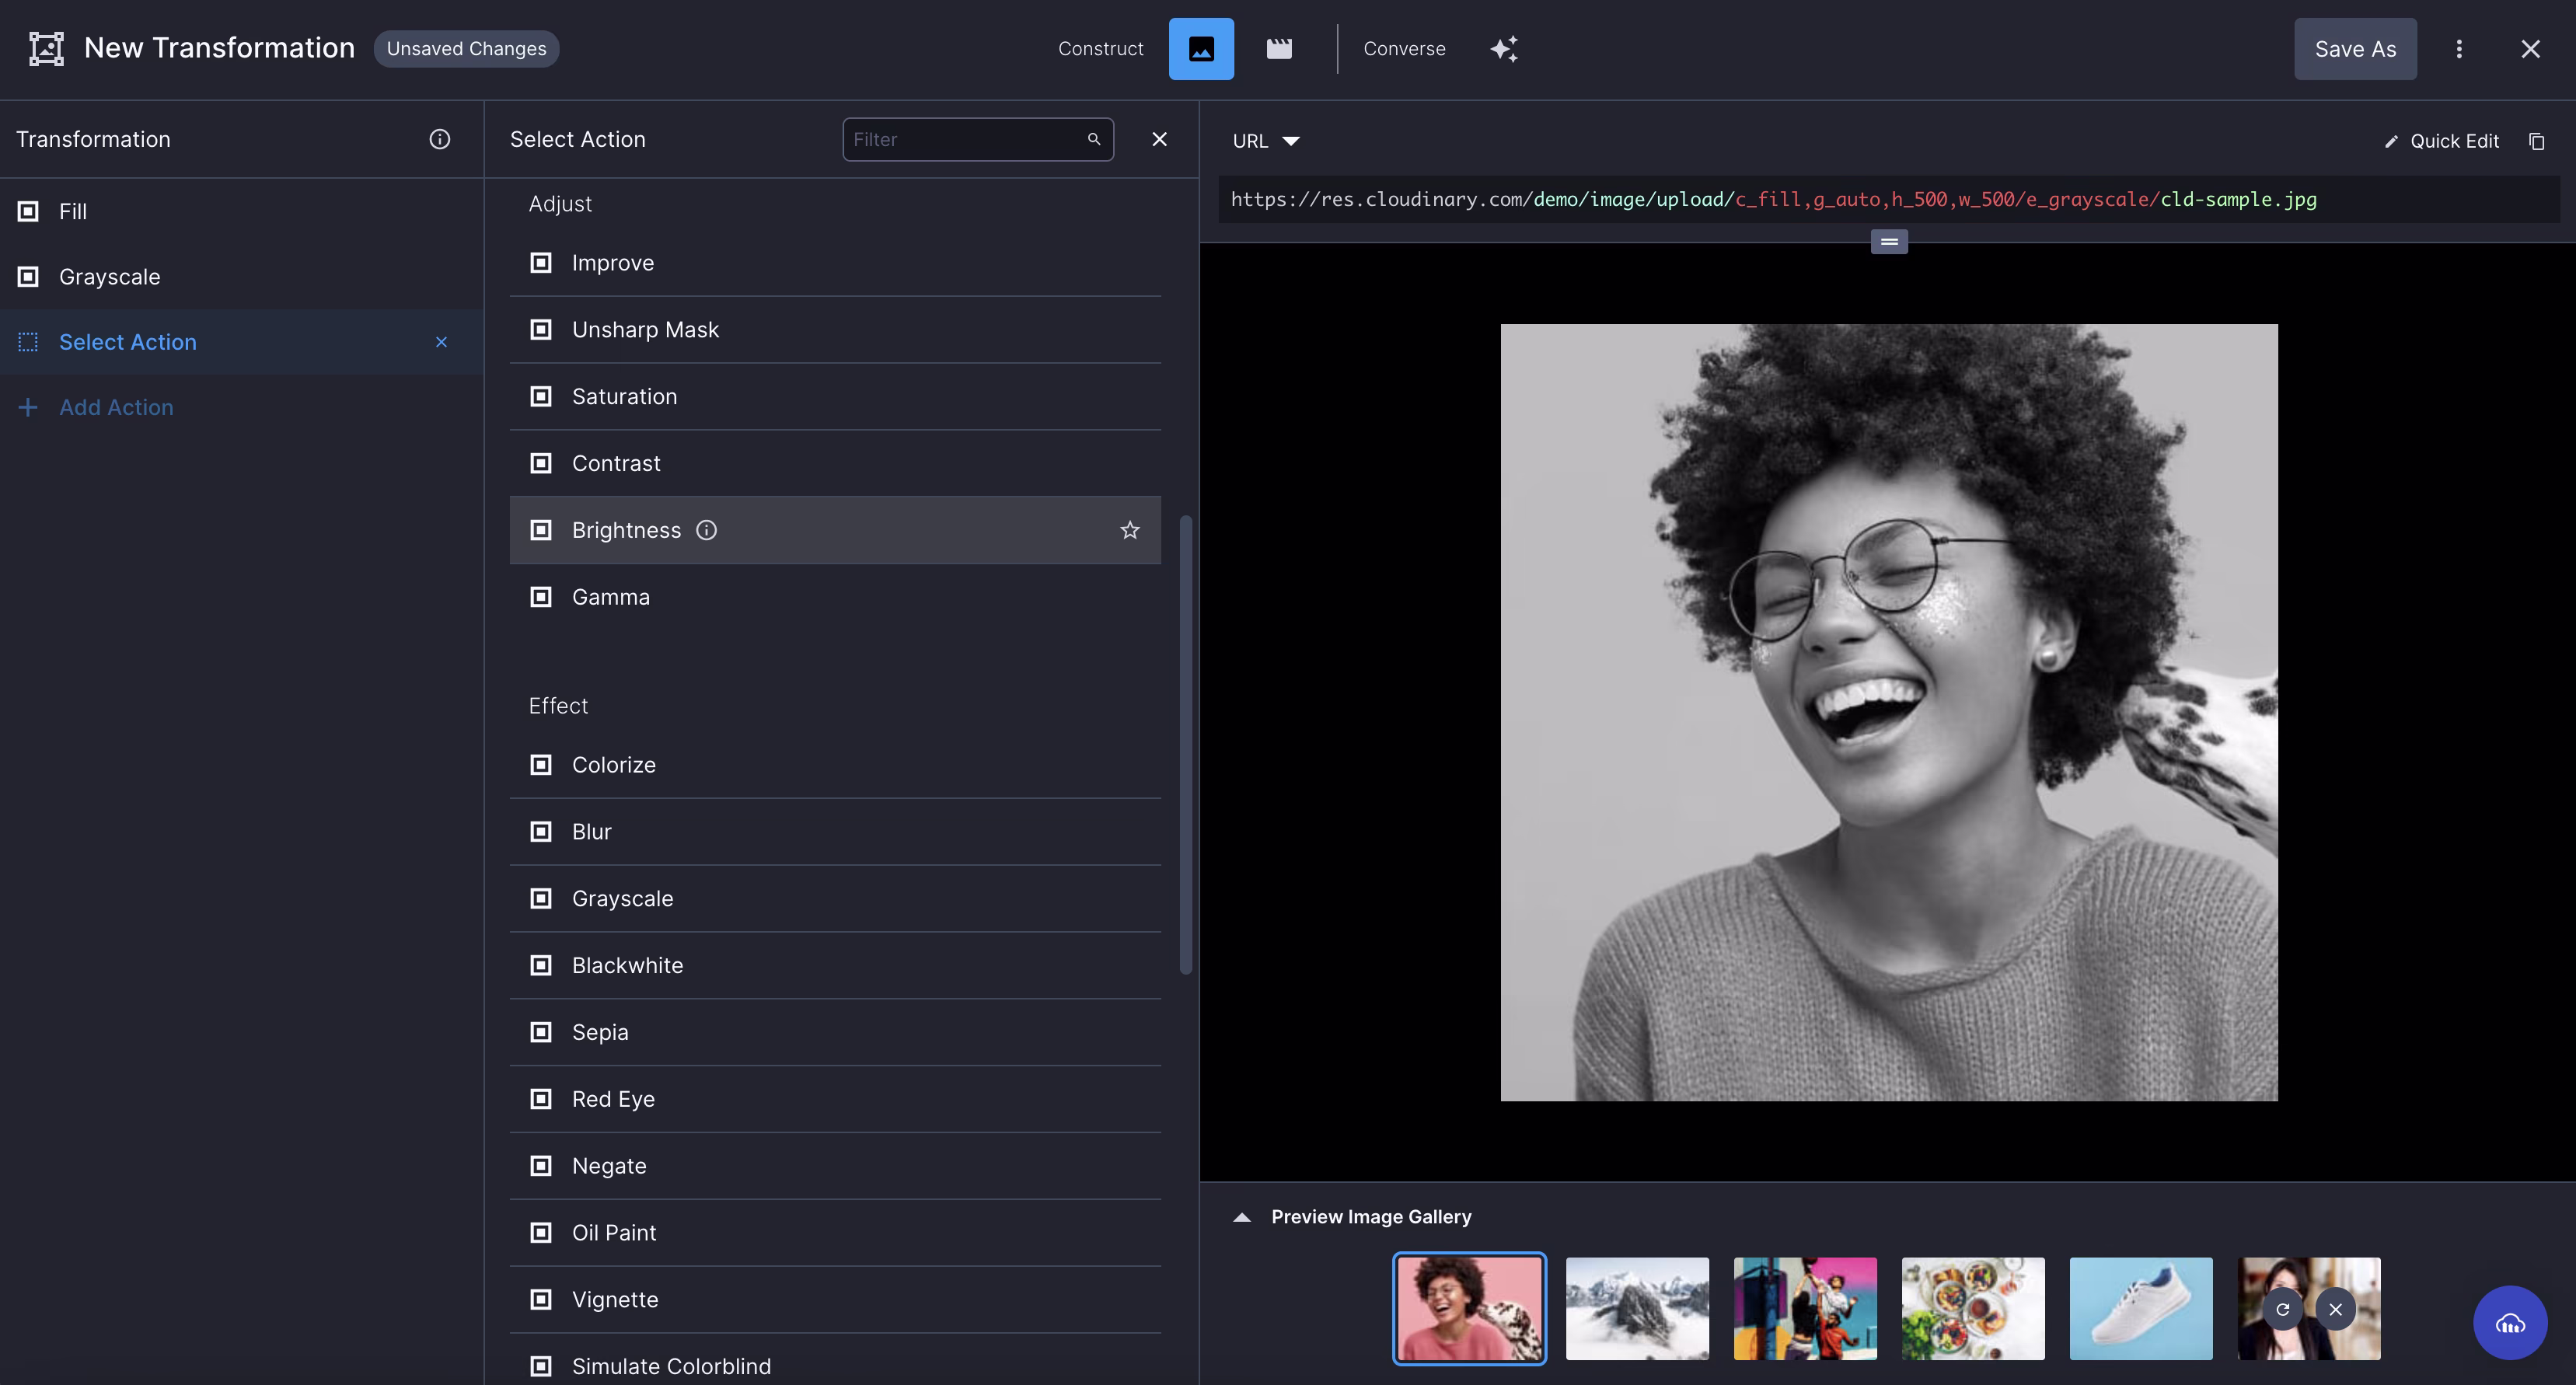
…plus, now you have access to many more, such as color adjustments, borders, artistic filters and effects.
Use the search at the top of the vertical toolbar to find transformations quickly. If no results are returned, it’s possible that Studio doesn’t support it yet. In this case you could create a transformation with Custom Syntax (towards the bottom of the toolbar). Enter transformation parameters directly using Cloudinary’s URL-based transformation syntax. This gives you access to the full range of Cloudinary transformations without leaving Studio.
In the new Studio, each transformation you apply is saved as an individual step. This gives you granular control:
- Reorder steps to see how the sequence affects the final result.
- Disable steps temporarily to test different combinations without deleting them.
- Delete individual steps that you no longer need.
- Edit configuration details within a step.
- Undo and redo edits using the keyboard shortcuts Cmd+Z/Cmd+Shift+Z.
- View the transformation URL or SDK code at any point in the process.
This approach makes it easier to experiment and iterate on your transformations.
In this video you can see a text overlay being added, the image being given rounded corners, then cropped. Notice that when the rounded corners step comes before the crop, only the top two corners remain rounded, but see how easy it is to move the rounded corners step to the end, so that they’re applied to the image after the crop:
The new Studio enhances the image editing experience through direct canvas interaction. You can now intuitively place and resize text and image overlays, as well as precisely define crop areas, directly on the image canvas.
See the previous video for text layer placement, and the next one for manually cropping.
This drag-and-drop capability and visual feedback make complex layer placement and cropping adjustments much more immediate and easier to manage than relying solely on input fields, leading to a more intuitive and efficient editing workflow.
Studio caters for all your image editing needs, whether you want to tweak one particular image, or set up a transformation that works across multiple images.
Here’s how to manually crop one image:
But this crop is specific to this image. For multiple images, use smart cropping, which automatically detects the important part of the image and keeps it in the frame:
The video shows key aspects of working with multiple images simultaneously:
- Adding multiple preview images to see how transformations look across different assets.
- Toggling between grid view and pinned view.
- Applying the same transformations to all images at once.
Transformation templates continue to work as they did in the original Studio. You can save a set of transformation steps as a template, which you can reuse across other images. When you save a template in the new Studio, it automatically creates a named transformation for easy application to images at scale.
If you’re not completely happy with AI-generated results, you can fine-tune them using Refiners. For example, after using background removal, you can clean up any parts of the background that weren’t removed or restore parts that were removed accidentally. Different refiners are available based on which AI transformations you’ve used.
In this video you can see the Background Removal Refiner in action, followed by the Generative Background Replace Refiner:
The new Studio includes an AI chat interface where you can describe how you want to edit an image using natural language. The AI suggests transformations and shows you a preview. If you like what you see, you can apply those suggestions to your image and they’ll be added as steps automatically.
Keep in mind that AI won’t always interpret requests exactly as you intend, especially for complex or out-of-scope edits, but it can be a quick way to get started.
If you’re looking to deliver your transformed images straight to your website, head to the Get Code tab. Here, you can add optimization and delivery settings, such as format, quality, color space and DPR, which don’t change the preview but impact the delivered image, then copy the URL or the code required for your SDK.
When working with multiple images, there are different download options to choose from. Either download all the transformed images as a ZIP file, or download a CSV file that contains all the transformation URLs. Otherwise, if you’re editing just one image, the download button simply downloads the transformed version of that image.
The new Studio lets you save transformed images to your Media Library. There are several ways to save images:
-
Save as a new image. Create a new asset in your Media Library with the transformations permanently applied. You can specify the display name for the new image (the public ID will be the original public ID with random characters appended).
-
Overwrite the original. Replace the original image with the transformed version while keeping its metadata. If backups are enabled, you can revert to a previous version if needed.
-
Bulk save operations. You can save multiple transformed images at once, either as new assets or by overwriting the originals. When saving as new assets, you can provide a suffix to apply to each display name.
Of course, you can still choose not to save the transformed image at all and simply use the transformation URL to deliver transformed variations dynamically, keeping your original intact.
If you’ve been using the original Studio or the Transformation Builder, you’ll find the new Studio feels familiar while offering more flexibility. The core workflows remain the same, you’re still building transformations visually and applying them to your images, but now you have more control over the process and more options for what to do with the results.
The new Studio is available for accounts on Assets Free plans created after December 15, 2025, and is currently being rolled out to all customers.


