
If you manage media assets for a growing product, you know the challenge. Hundreds of new images, videos, and files arrive every week. Each one needs to be uploaded, organized, tagged, and optimized before it can go live. Doing this manually leads to duplicate assets, inconsistent tags, and files scattered across folders.
Cloudinary MCP (Model Context Protocol) connects your Cloudinary account to an AI agent like Claude. Instead of writing scripts or clicking through dashboards, you tell Claude what to do in plain English. Upload files, apply transformations, organize by metadata, generate delivery URLs. Claude calls the right Cloudinary tools and handles the execution.
In this guide, you’ll set up the Cloudinary Asset Management MCP server, connect it to Claude Desktop, and use natural language to automate uploading, transforming, organizing, and analyzing your media assets.
A working setup where Claude can:
- Upload images and videos to your Cloudinary Media Library from URLs or your local filesystem.
- Tag assets automatically at upload with categories, campaigns, and product metadata.
- Generate optimized variants (web, mobile, thumbnail) from a single source asset.
- Analyze assets with AI to generate auto-tags based on image content.
- Create asset reports showing file names, formats, and storage usage.
Cloudinary provides several MCP servers, each designed for a different part of the media workflow:
| Server | Purpose |
| Asset Management | Upload, manage, search, and transform media assets. |
| Environment Config | Manage environment settings, upload presets, and transformation configurations. |
| Structured Metadata | Create and query structured metadata fields for asset organization and search. |
| Analysis | AI-powered content recognition, tagging, and moderation. |
| MediaFlows | Automated workflows for processing and delivering media at scale. |
This guide focuses on the Asset Management MCP server, which handles uploading, transforming, and organizing assets. This is the foundation for any automated media workflow.
Before you start, make sure you have:
- A free Cloudinary account. You need your cloud name, API key, and API secret from the Cloudinary console (how to find them).
- Node.js version 18 or higher installed.
- Claude Desktop installed and running.
Open Claude Desktop, navigate to Settings, and click the Developers tab. You’ll see an option to add local MCP servers.

Click Edit Config. This opens a folder containing claude_desktop_config.json. You’ll add your Cloudinary MCP configuration to this file.
Open claude_desktop_config.json in your code editor and add the Asset Management MCP server:
{

  "mcpServers": {

    "cloudinary-asset-mgmt": {

      "command": "npx",

      "args": [

        "-y",

        "--package",

        "@cloudinary/asset-management",

        "--",

        "mcp",

        "start"

      ],

      "env": {

        "CLOUDINARY_URL": "api_key:api_secret@cloud_name"

      }

    }

  }

}Code language: JSON / JSON with Comments (json)
Replace api_key, api_secret, and cloud_name with your actual credentials from the Cloudinary console. Save the file.
If your assets are stored locally (on your Desktop or Downloads folder), add the Filesystem MCP server alongside the Cloudinary one so Claude can access your local files:
{

  "mcpServers": {

    "cloudinary-asset-mgmt": {

      "...": "..."

    },

    "filesystem": {

      "command": "npx",

      "args": [

        "-y",

        "@modelcontextprotocol/server-filesystem",

        "/Users/YOUR_USERNAME/Desktop",

        "/Users/YOUR_USERNAME/Downloads"

      ]

    }

  }

}Code language: JSON / JSON with Comments (json)
Replace YOUR_USERNAME with your actual OS username. Add or remove directories in the argsarray based on where your files are stored.
Quit and reopen Claude Desktop so it loads the new configuration. Return to the Developers tab to confirm the MCP server is listed and running.

Test the connection by asking Claude:
<code>Can you show me the available Cloudinary tools?</code>Code language: HTML, XML (xml)If everything is configured correctly, Claude lists the available tools, including upload-asset, transform-asset, search-assets, and get-asset-details.
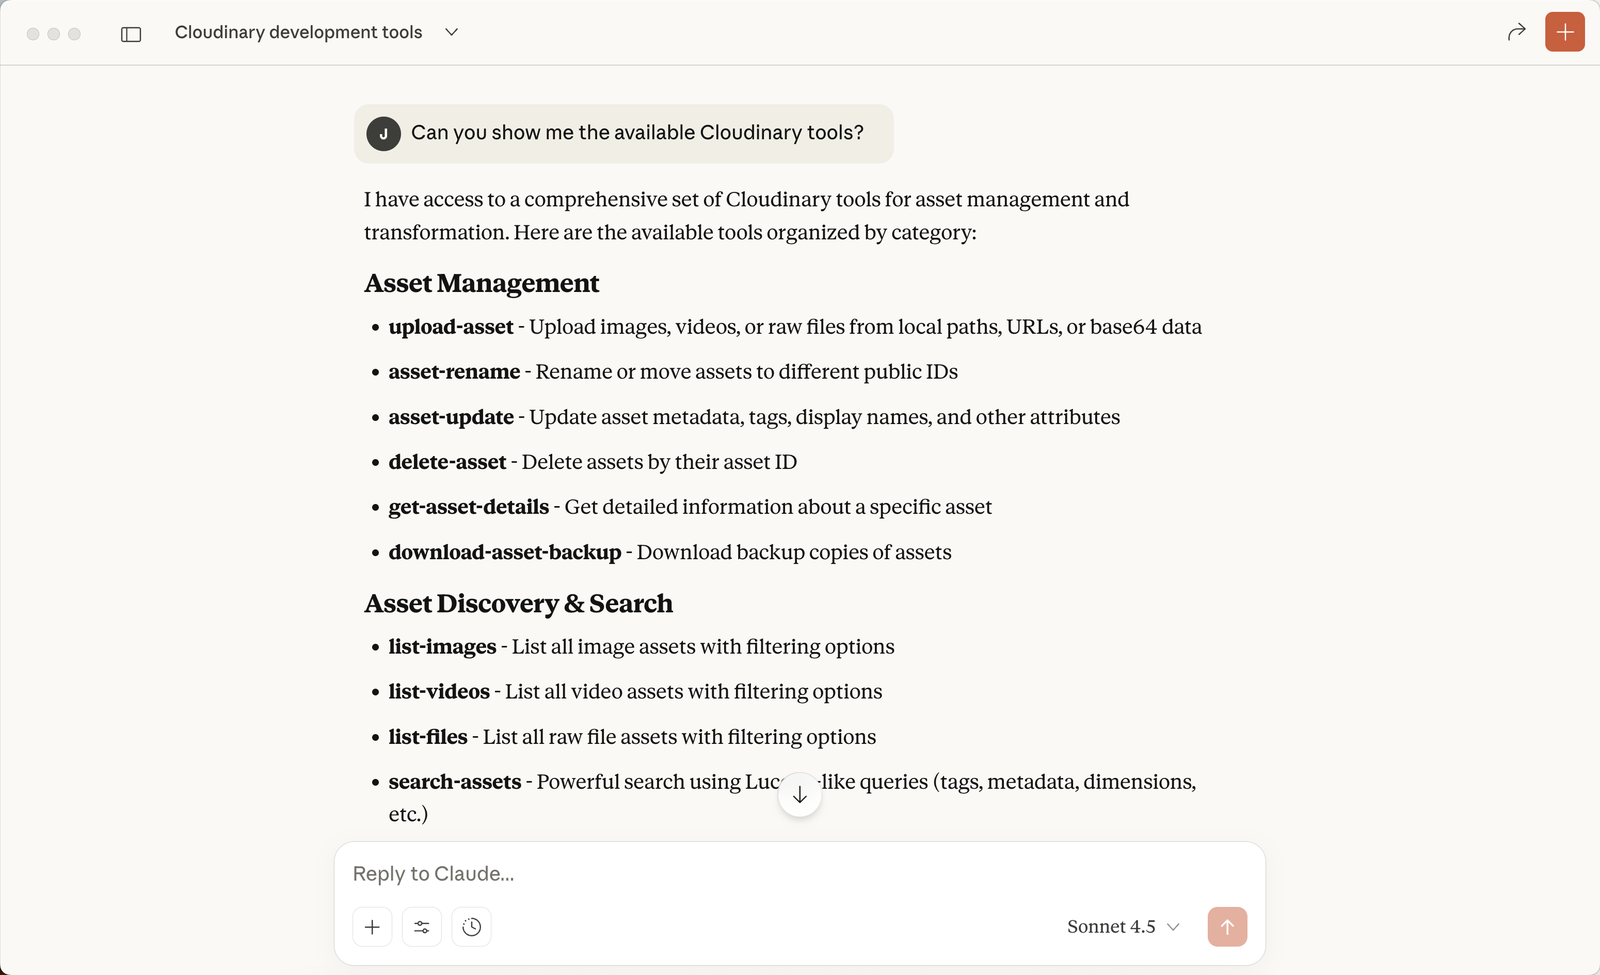
The connection is active. You can start managing assets.
With Claude connected to Cloudinary, you manage your media operations through conversation. You describe what you want done, and Claude calls the right tools.
When your product images are hosted online (from a photographer’s shared link or a staging CDN), you can upload and tag them in a single prompt:
Upload these images to Cloudinary and tag them with "spring-2025, product, footwear":

- https://example.com/assets/shoe-001-front.jpg

- https://example.com/assets/shoe-001-side.jpg

- https://example.com/assets/shoe-002-front.jpgCode language: JavaScript (javascript)
Claude calls the upload-asset tool for each file, applies your tags, and returns the results with file names, formats, file sizes, and Cloudinary URLs.

The uploaded images are now stored in your Cloudinary Media Library, tagged and ready to use.

If your assets are stored locally and you’ve added the Filesystem MCP server (from Step 2), Claude can browse your local directories and upload files to Cloudinary.
First, you can ask Claude to organize your local files:
<code>List all .jpg and .png files in my Desktop/product-launch folder and move them into subfolders based on file type.</code>Code language: HTML, XML (xml)Then upload the entire folder:
<code>Upload all files from my Desktop/product-launch/images folder to Cloudinary and tag them with "spring-2025, marketing, images".</code>Code language: JavaScript (javascript)Claude reads your local directory, passes each file through the upload-assettool, and applies your tags automatically.

This workflow is useful for large batches of media files from photo shoots, video productions, or audio recordings that originate on your machine.
Once assets are uploaded, Claude can generate optimized versions for different platforms. Ask for a single transformation:
<code>Create a web-optimized version of all assets tagged "spring-2025" with maximum width 1200px, automatic format and quality.</code>Code language: HTML, XML (xml)Claude first calls search-assets to find everything tagged spring-2025, then calls transform-asset on each result with the parameters c_limit,w_1200/f_auto/q_auto.

You can also generate multiple variants in one prompt:
Generate three versions of each image:

- A web version (max width 1200px)

- A mobile version (max width 600px)

- A thumbnail (300x300 crop, fill mode)
Claude applies each transformation and organizes the results in your Cloudinary folders.
If you have the Google Auto Tagging add-on enabled in your Cloudinary account, Claude can analyze assets and generate content-based tags automatically:
<code>Analyze all assets tagged "spring-2025" and generate auto-tags based on image content.</code>Code language: HTML, XML (xml)Claude calls the analysis tools to examine each file and enrich it with metadata like color, product type, or scene. These tags make your library searchable without manual categorization.

You can also organize assets by naming patterns:
<code>Group all "shoe-001" images into a folder named "shoe-001" and link them as related assets.</code>Code language: JavaScript (javascript)When you need visibility into your library for audits, team handoffs, or tracking growth, ask Claude to generate a report:
<code>Create a report of all assets tagged "spring-2025" showing file names, formats, and storage usage.</code>Code language: HTML, XML (xml)Claude fetches the details from Cloudinary and returns a summary in chat. You can also ask for a .json or .csv export.

Here’s a walkthrough of the complete local file workflow. Files from a local “cloudinary” folder are uploaded to Cloudinary and organized into a “beach-2025” folder:
You connected Claude to Cloudinary through the Asset Management MCP server and used natural language to upload, tag, transform, analyze, and organize media assets. Every operation that would normally require manual dashboard work or custom scripts runs through a single conversational interface.
Here are a few ways to extend your setup:
- Add the Analysis MCP server. Connect the Cloudinary Analysis MCP server for AI-powered content recognition, moderation, and auto-tagging directly through Claude.
- Add the Structured Metadata MCP server. Create custom metadata fields (product line, region, expiration date) and apply them to assets through Claude for more advanced organization.
- Connect MediaFlows MCP. Build automated workflows that trigger on upload, metadata changes, or tag additions. See the MediaFlows MCP documentation for setup details.
- Combine with other MCP servers. If your team uses Google Drive, Dropbox, or Slack MCP servers, Claude can pull assets from those sources and upload them to Cloudinary in a single conversation.
- Build batch processing scripts. Use Claude to generate Node.js scripts that batch-process hundreds of assets with consistent tags, transformations, and folder structures.
For a deeper walkthrough of remote vs. local server setup and troubleshooting tips, read our blog post on automating media workflows with Claude and Cloudinary MCP.
Sign up for a free Cloudinary account to try it yourself.
Resources:
- Cloudinary MCP servers overview
- Asset Management MCP server
- Cloudinary upload documentation
- Image transformations documentation
- Google Auto Tagging add-on
- Filesystem MCP server


