
If you’ve ever managed a social media ad campaign, you know how messy things can get: sorting through endless files, multiple ad formats, and constant requests to tweak visuals for different platforms. Before you know it, your desktop is filled with duplicate assets, and you’re wasting hours trying to keep everything in order.
A digital asset management (DAM) system will help you stay organized and work more efficiently. With Cloudinary Assets, you can keep everything in one place, create variations easily, save time with automation, and gain insights into asset performance.
This blog post will show you how to create and test ad variations using Cloudinary’s DAM while optimizing your visuals for social media platforms like Instagram and Facebook.
Cloudinary Assets is a digital asset management system for storing, organizing, and editing ad creatives in one place. It makes it easy to create variations and optimize visuals for different platforms.
Here’s how you can use it, step by step:
There are two ways to upload and organize assets in Cloudinary. You can either upload all your assets first and move them into folders later, or you can create folders upfront and upload the files directly into them. For this post, we’ll go with the latter.
First, sign up for a Cloudinary account if you don’t already have one, or log in if you do. Navigate to the Media Library section and click the Folders button in the navigation menu. A new page will open, where you can click the folder-plus icon, name the folder (e.g., “Holiday Sale Campaign”), and hit Save, as shown in the image below.

Once the folder is created, open it. You’ll see an Upload button that allows you to add your assets to the folder. From here, you can either upload everything at once or organize your assets into subfolders like “Instagram Posts,” “Facebook Ads,” and “Reels and Stories” by creating these folders and moving the files into them.
The image below shows a folder with two sub-folders with images grouped into them:

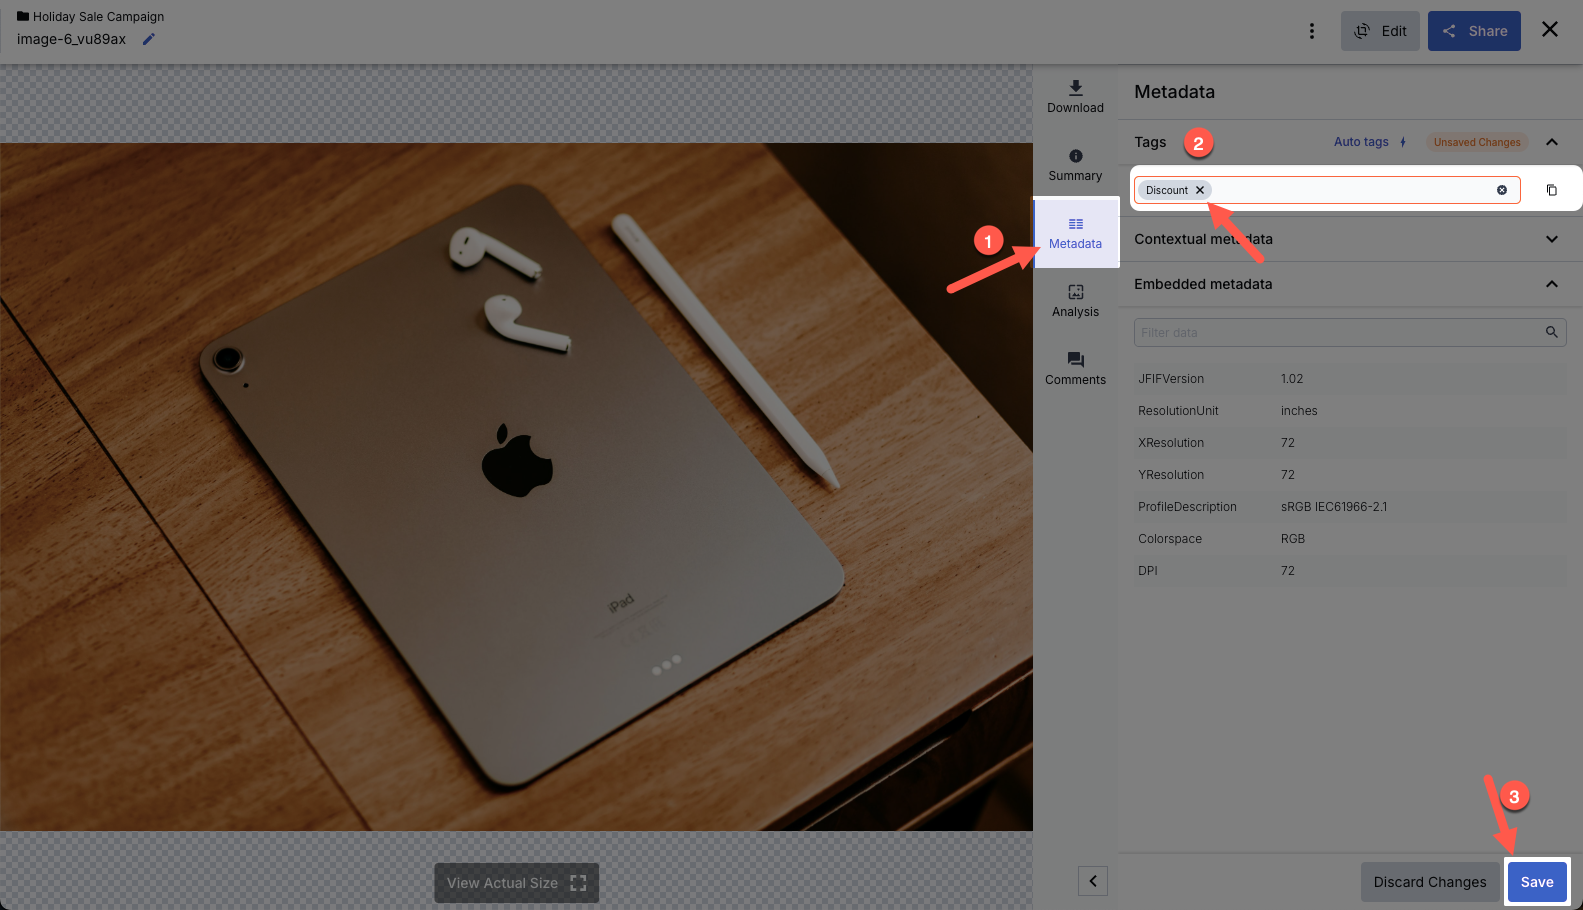
After uploading and organizing your assets, you can start tagging them. Tags like “Discount,” “Winter Sale,” or “Tech Gadgets” make searching for specific assets much easier later.
The image below shows you how to add tags. Click an asset, go to Metadata, add tags, and click Save.
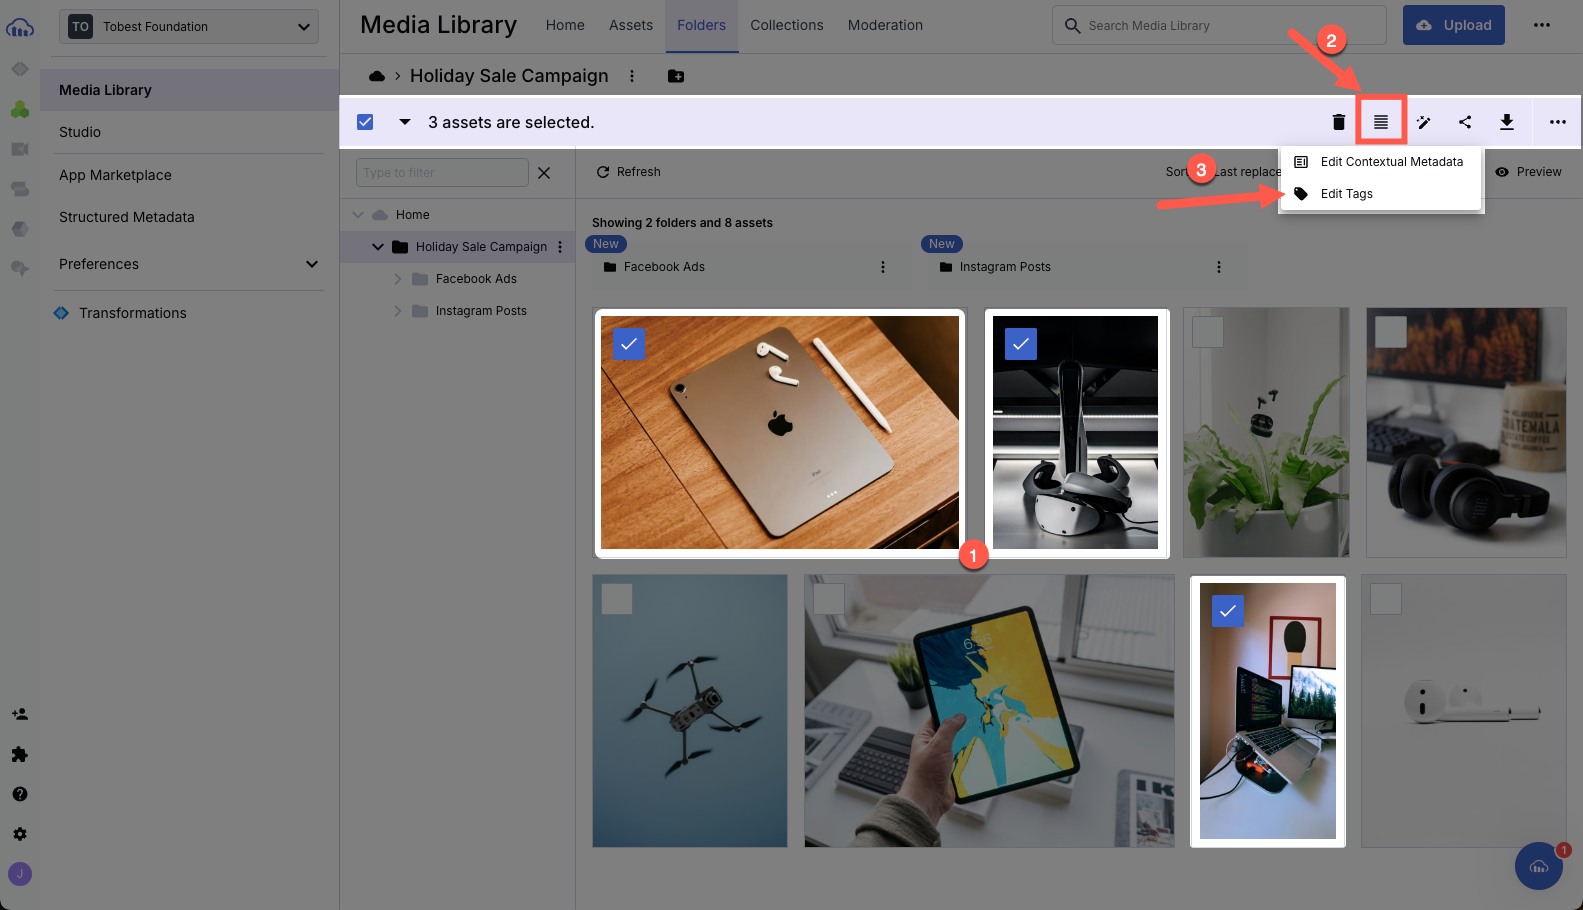
If you want to tag multiple images at once, select the assets, click the Metadata icon, and choose the Edit Tags option.
Once you have taken the steps shown in the image above, click Update. A field will appear where you can add as many tags as possible and then click the Update button.
Instead of manually editing each asset, you can use Cloudinary’s dynamic URLs to apply transformations in real time. This allows you to resize, crop, or add text overlays without creating multiple copies of the same file.
Start by selecting an asset (or multiple assets) in the media library, click the Edit button, and choose Transform from the dropdown menu.
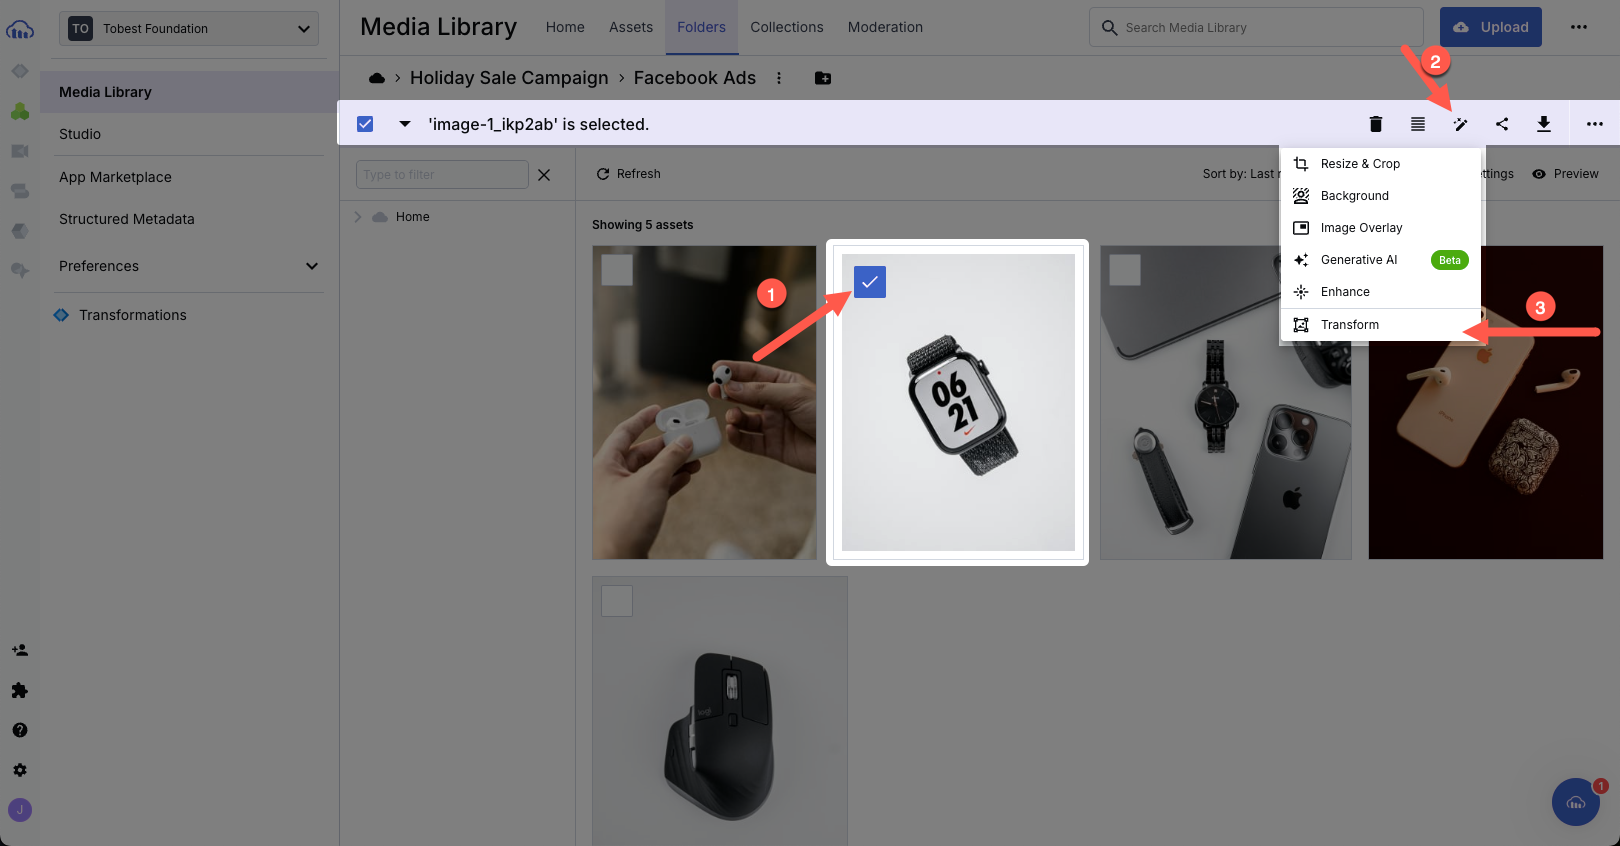
This will open the Transformation Editor, where you can apply actions like cropping, resizing, adding overlays, rotating, blurring, or adjusting colors.
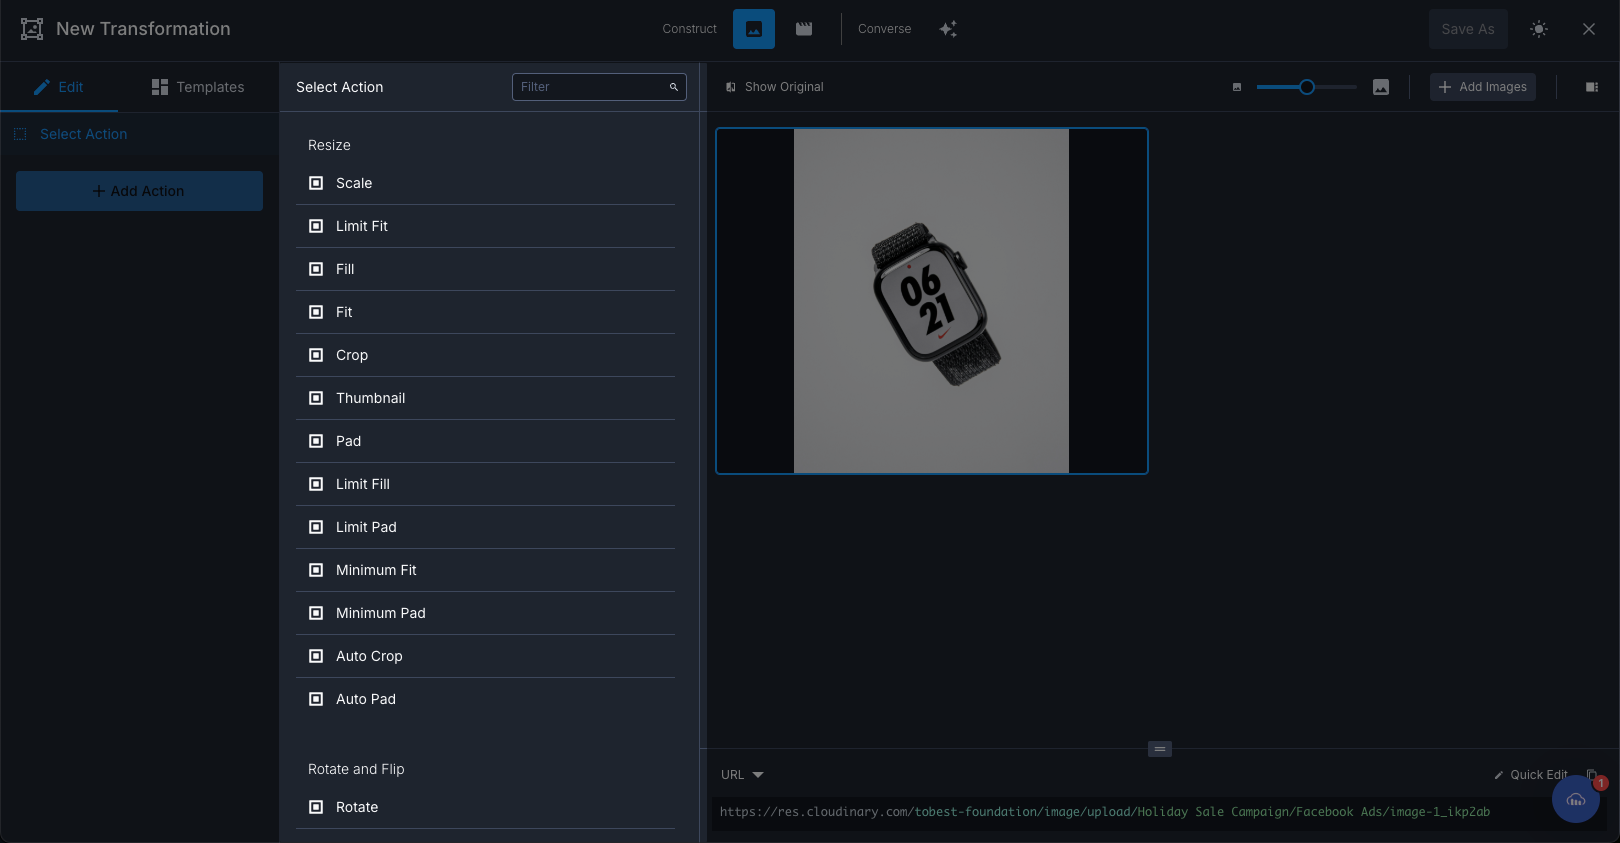
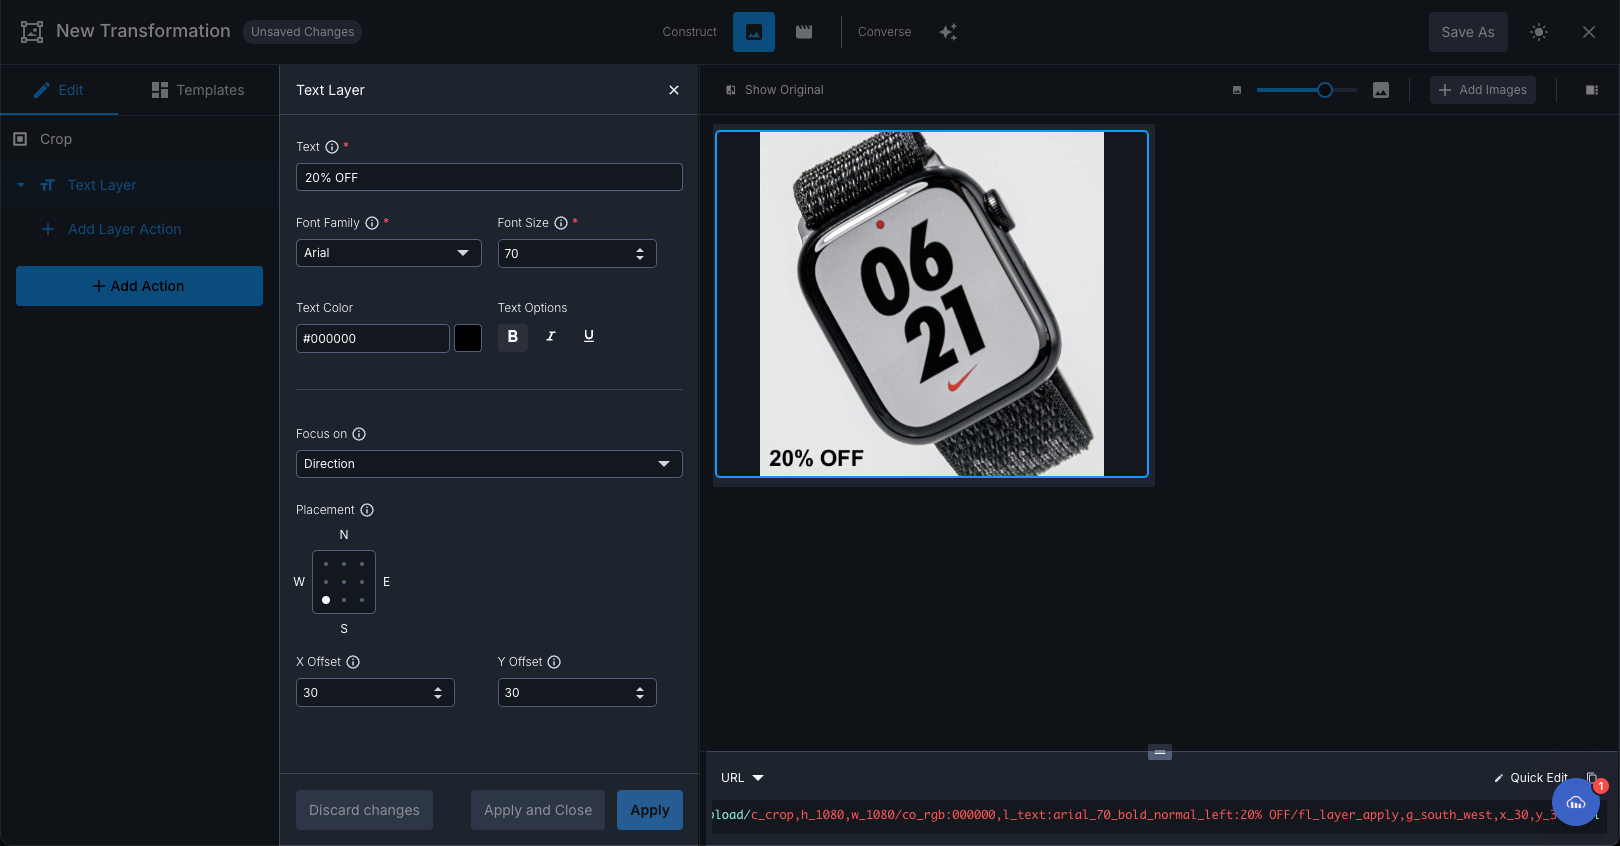
For example, to resize an image for Instagram posts (1080×1080 pixels), click the Crop action as shown below, set the width and height to 1080px, and hit Apply. The URL will automatically include the transformation string: c_crop,h_1080,w_1080. You can apply even more transformations. If you want to add promotional text like “20% Off” shown in the image below, scroll through the actions to find the Text Layer and fill in the details (text, font, size, color, and placement).
Each transformation generates a unique URL you can copy and use directly in your campaigns.
Once you have certain transformations and want to apply them to a group of images (e.g., “20% Off” text) or multiple assets, you don’t have to transform each asset. You can save time by using Cloudinary’s named transformations.
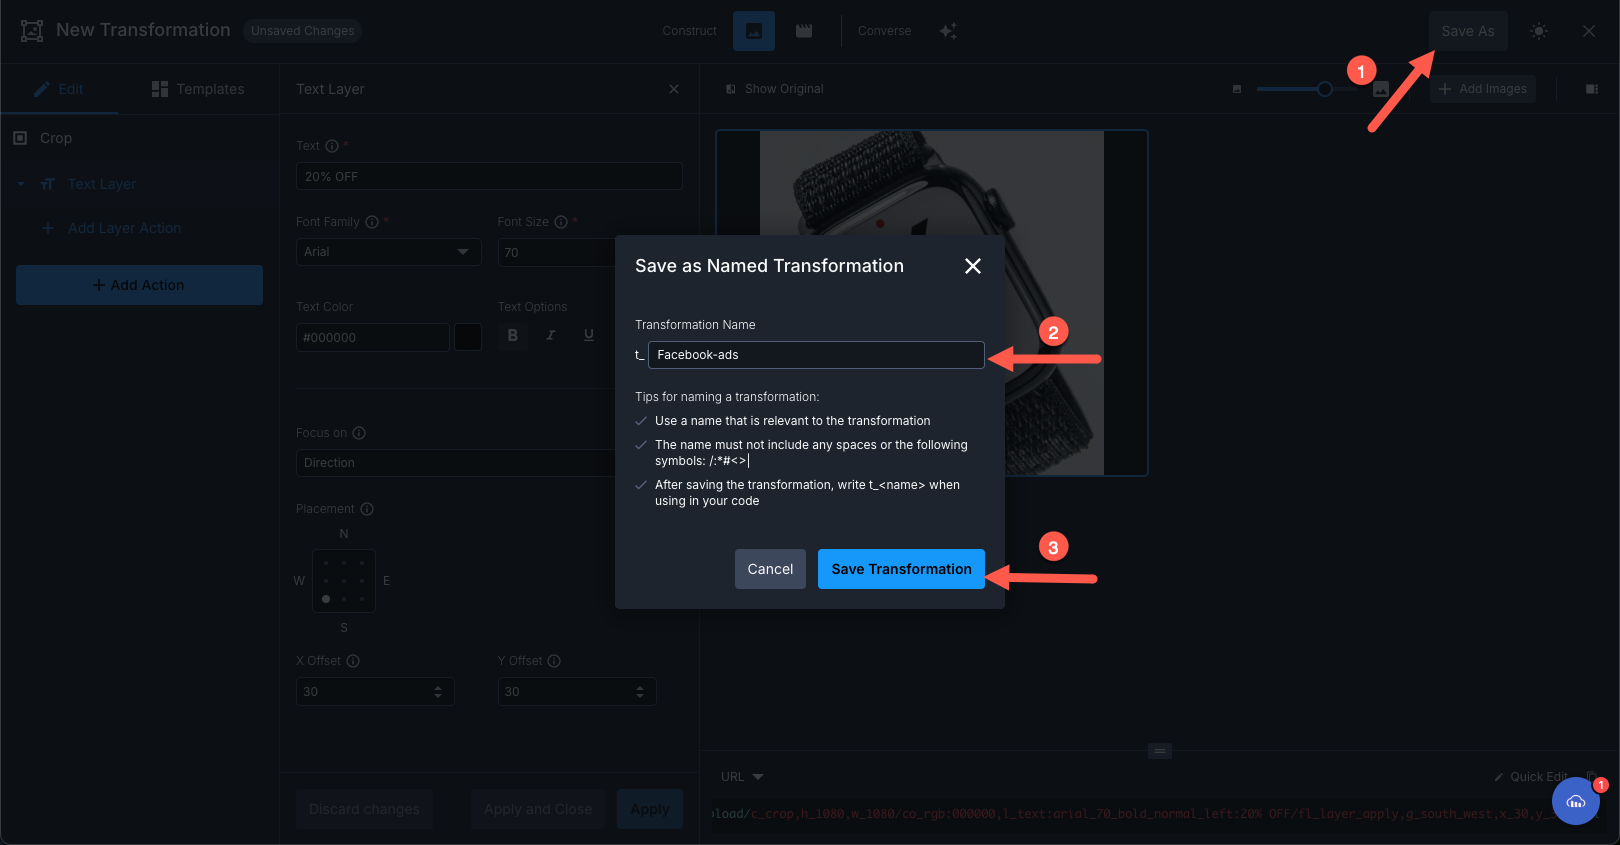
The image below shows you how to save a transformation. Click the Save As button at the top right of the page and give the transformation a name.
To manage saved transformations, go to Manage Transformations > Named Transformations. Here, you’ll see a list of saved transformations.
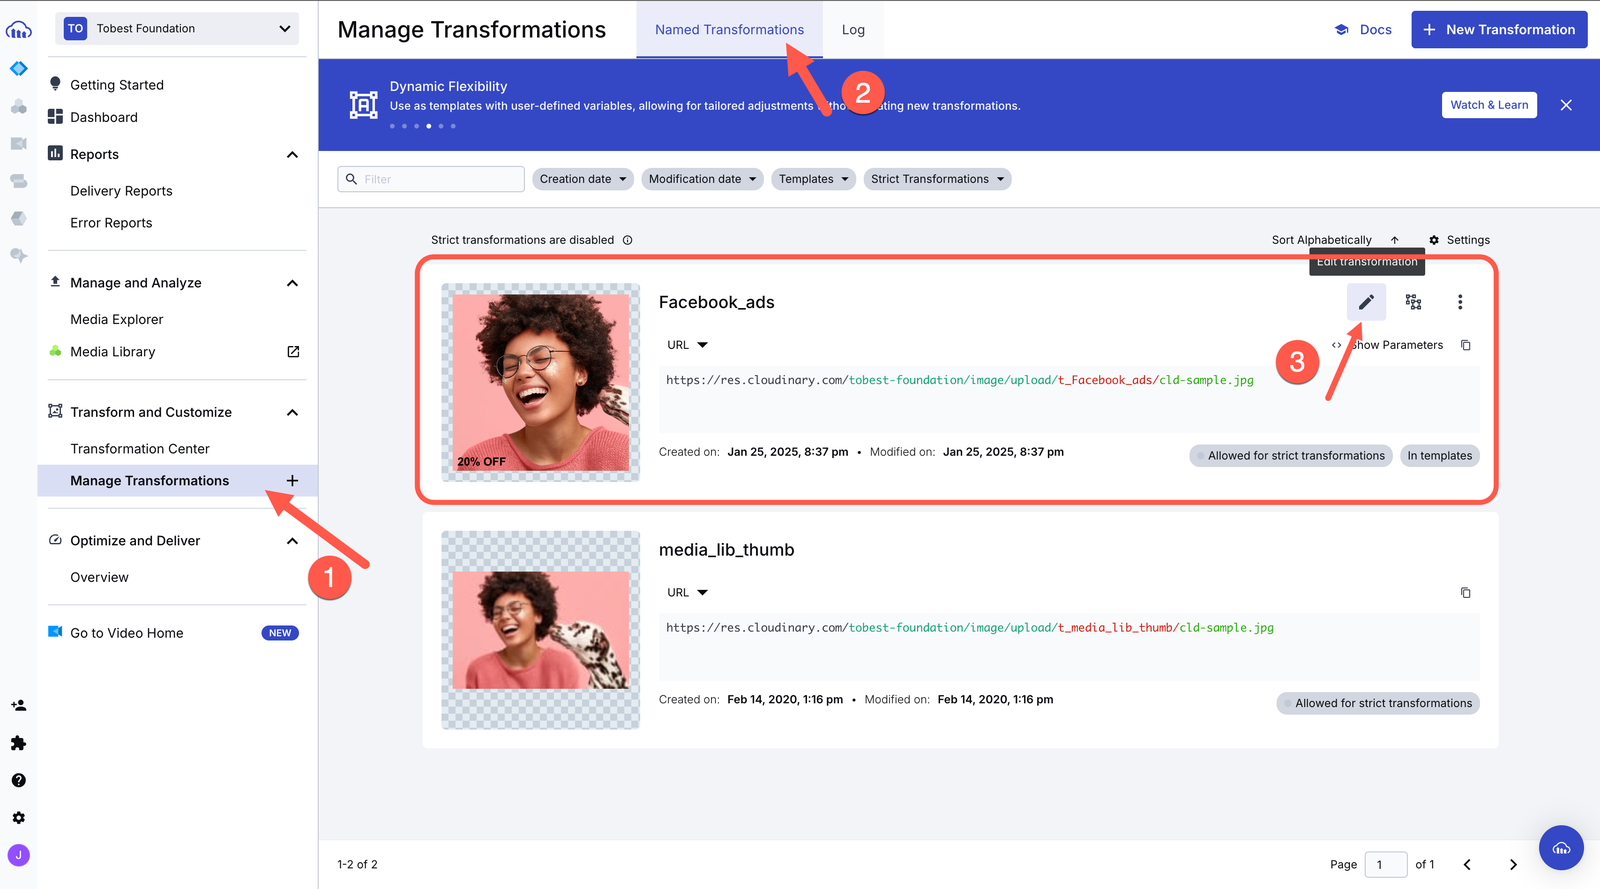
To use the transformation, hover over it, click the pencil icon to open it, and add multiple images. The transformation will automatically apply to all the selected assets.

Once your variations are ready, it’s time to deploy them for A/B testing. Follow these steps:
- Export assets. Download the transformed images from Cloudinary.
- Set up A/B testing. Upload the variations to platforms like Instagram or Facebook. In Ads Manager, create an ad campaign and upload two variations: one product-focused and one lifestyle-focused.
- Track performance. Monitor key metrics like click-through rate (CTR) and engagement to determine which variation performs better.
After reviewing the performance data, the next step is making adjustments to improve results. But since Instagram and Facebook have different styles and audiences, you’ll need to tailor your creatives for each platform.
When it comes to social media ads, one size definitely doesn’t fit all. Instagram and Facebook each have their unique vibe, audience, and formats, and if you’re running ads on both, it’s important to tailor your visuals to match your audiences’ expectations.
Instagram is all about grabbing attention as users scroll through their feeds. Whether it’s a post, a Story, or a Reel, your visuals need to stand out instantly.
Here’s what works:
- Stories and reels. These formats are vertical (aspect ratio: 9:16), so your visuals should fill the entire screen. Keep them clean and minimal, but don’t forget to include a strong call to action, such as “Swipe Up” or “Shop Now.”
- Posts. Square (1080×1080) and vertical portrait (1080×1350) formats perform best. A well-framed product shot or a colorful lifestyle image can make a big impact here. Avoid overcrowding your image with text, as less is often more on Instagram.
Unlike Instagram, Facebook gives you more room to tell a story. It caters to a broader audience, so your visuals need to be more strategic. For example, carousel ads work particularly well, allowing you to tell a cohesive story or showcase multiple products. Each card in the carousel should focus on one clear idea, with the recommended size being 1200×628 pixels. This format is ideal for mixing product photos, lifestyle shots, and simple text overlays.
Cloudinary makes optimizing your creatives for Instagram and Facebook simple. Now that we’ve seen how these tools work, here’s how they can help:
- Quick resizing with the transformation editor. With just a few clicks, you can resize a product photo to 1080×1920 for Instagram Stories or 1200×628 for Facebook carousel ads. You can also add overlays like “Limited Offer” or adjust the brightness to match the platform’s aesthetic.
- Dynamic URLs for instant, limitless variations. Cloudinary allows you to create platform-specific versions of the same image just by tweaking the URL. For example, you can generate a square version for Instagram posts and a carousel-sized version for Facebook, all from one original file.
- Named transformation automation. Save time by setting up named transformations. For instance, create a transformation for Instagram Stories (vertical crop with a “Swipe Up” overlay) and another for Facebook Carousel (horizontal crop with a “Shop Now” button). Apply these transformations to an entire folder of images with a single click.
When you manage a large number of visuals for ad campaigns, keeping everything organized is challenging. AI Vision acts as a personal assistant for your media library, automatically tagging and analyzing assets to save time and improve efficiency.
Imagine uploading a folder of campaign assets, such as product photos, lifestyle images, and banner graphics. Instead of spending hours manually tagging each file, AI Vision scans your images, analyzes their content, and applies relevant tags based on what it detects.
For example:
- An image of a person running in a park might be tagged with “People,” “Nature,” or “Fitness.”
- A bright product photo could be tagged as: “Bright Colors,” “Tech Gadgets,” and “Minimalist.”
This makes finding the right assets easy. For example, let’s say you’re creating a holiday ad with cozy vibes. Instead of scrolling endlessly, you can search for tags like “Warm Colors” or “Lifestyle” and instantly pull up relevant images.
To use an AI tool, click on the asset, and it will display in an editor. As shown in the image below, you can click Analysis, select an AI tool you want to use, such as Google Vision or Amazon Rekogition, then click Register.
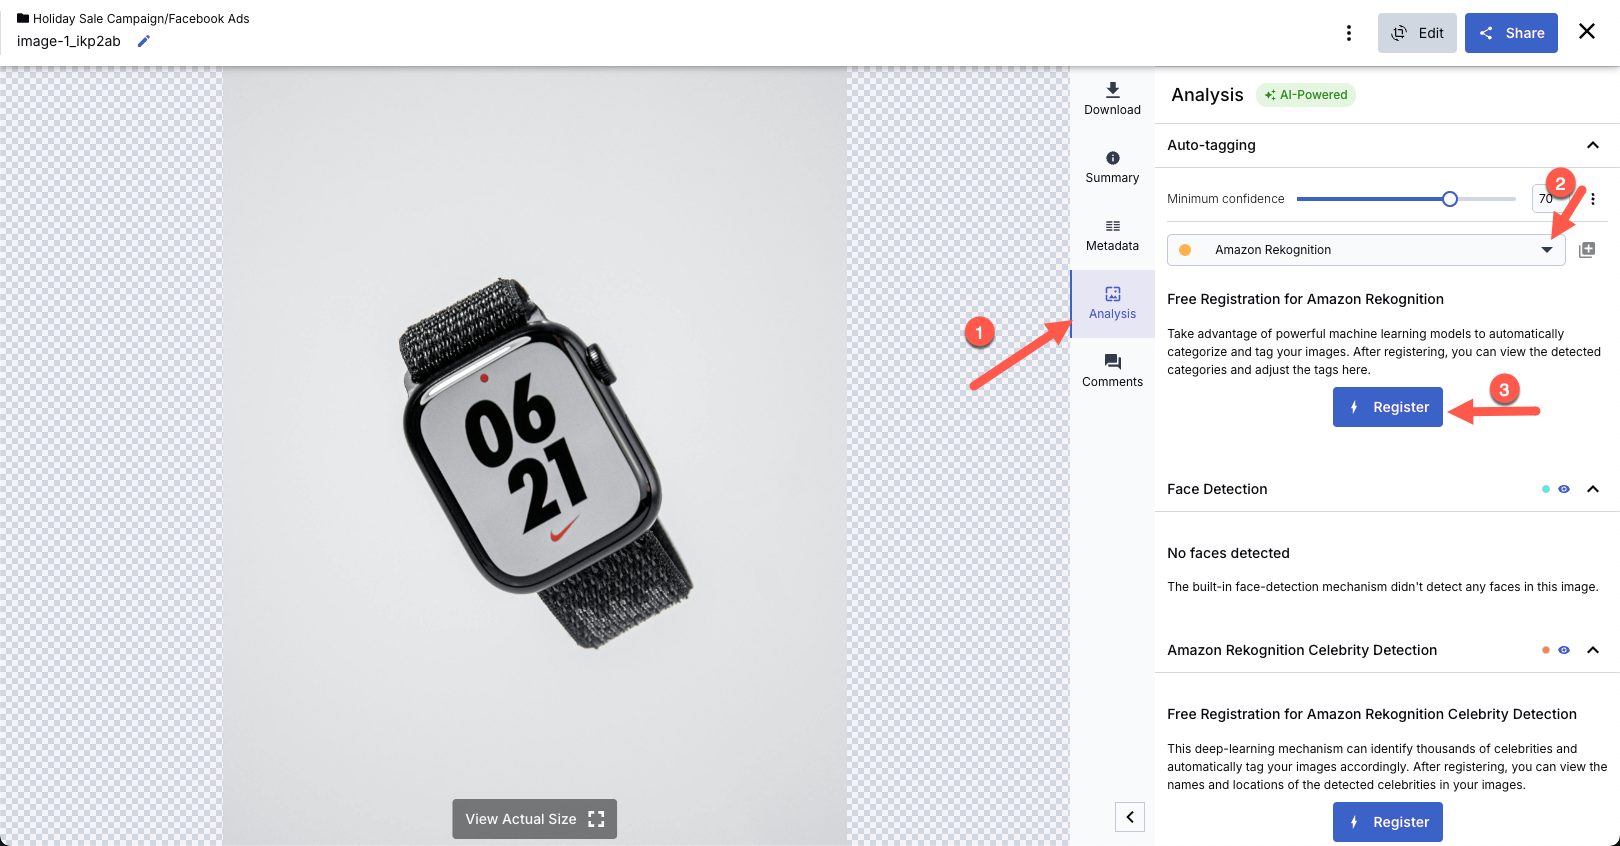
You can then accept the terms of service and Register, and you will be given a number of free trials to enjoy the AI tool. Next, to generate AI tags for your images, click Run Now, and a list of tags that you can add will be generated, as shown in the following image.
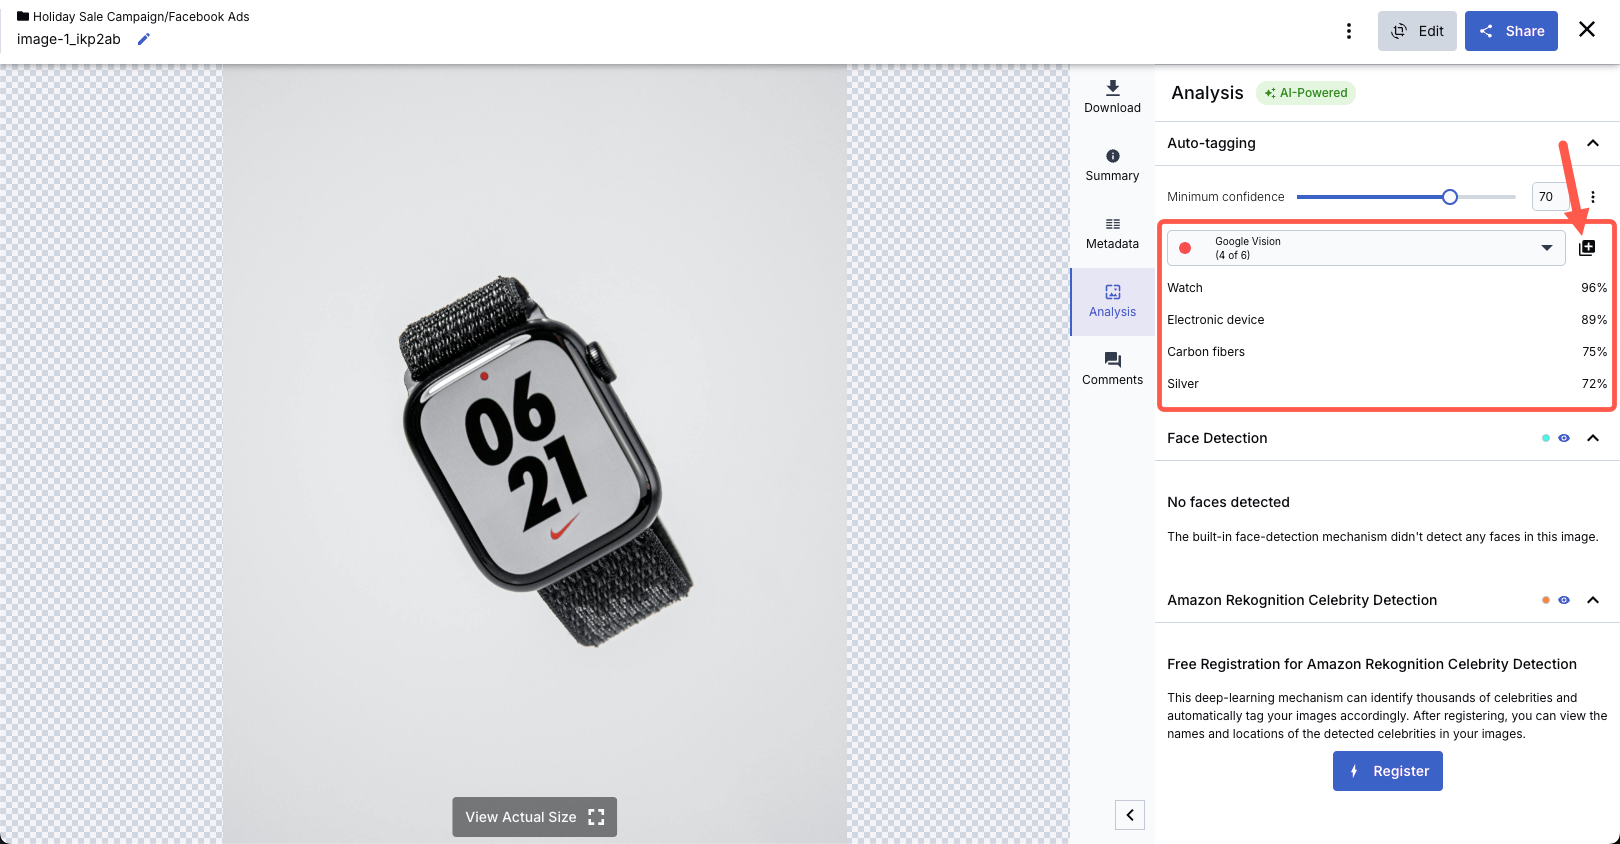
Click the + button to add the tags. By the time you do this for all assets for your campaign, it will be easier to filter through your assets, refine them, and use them.
AI Vision doesn’t just help with tagging. It also analyzes media assets to maintain brand compliance, detect important elements, and provide insights into ad performance.
AI Vision can automatically flag inappropriate, violent, or sensitive content for brand compliance and content moderation before it gets published. This is particularly useful for businesses that must follow strict advertising guidelines across different platforms.
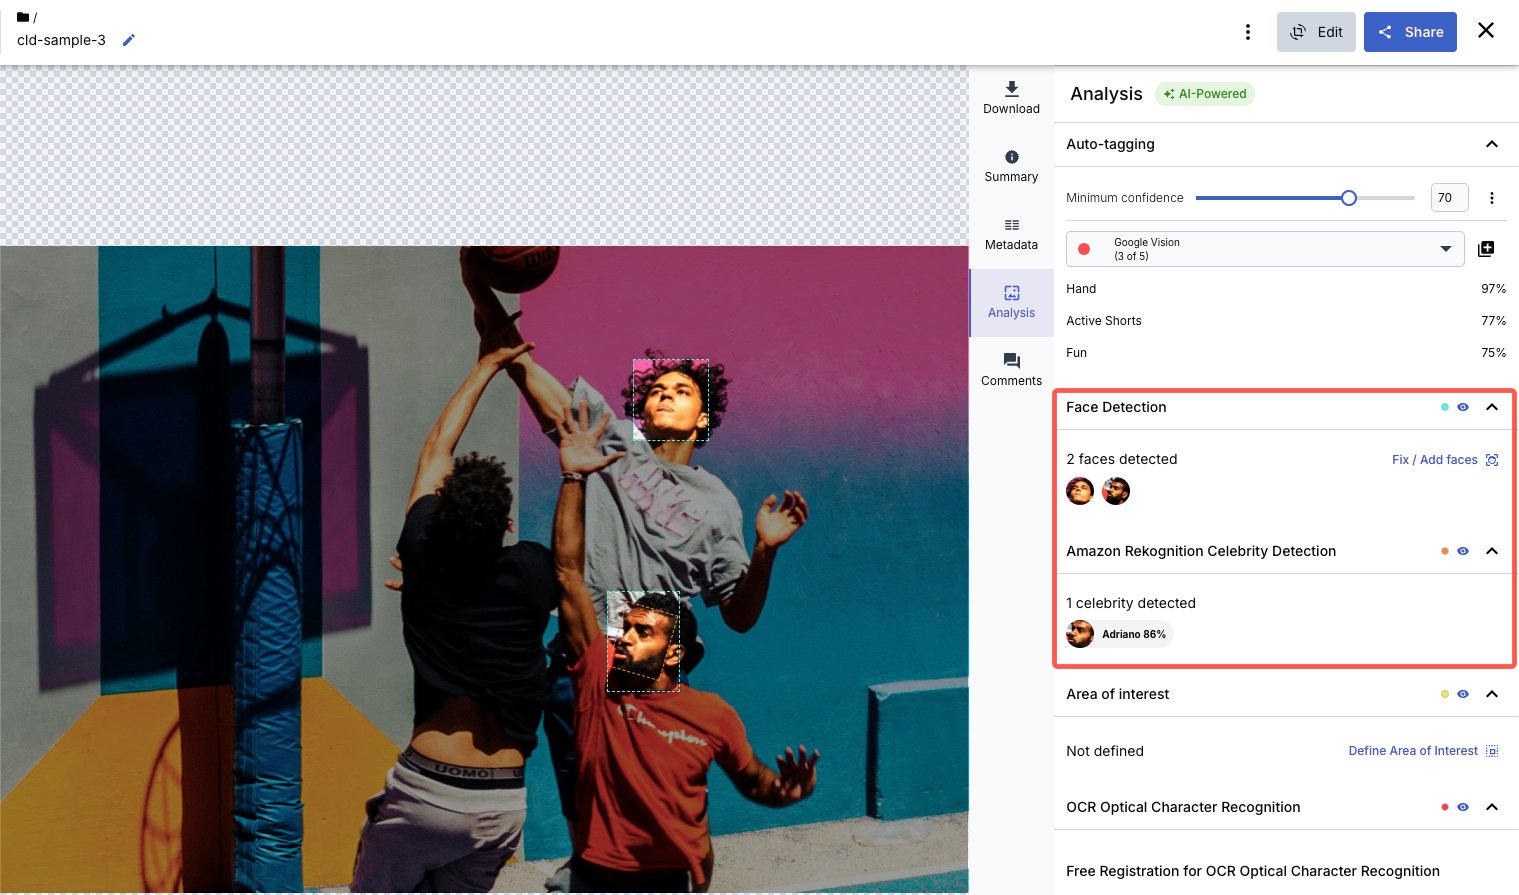
Additionally, Cloudinary supports Amazon Rekognition Celebrity Detection, which automatically identifies celebrities within images. Once registered, AI Vision will scan your images, detect famous personalities, and tag them accordingly. This feature is particularly useful for businesses working with influencer campaigns or high-profile endorsements, keeping celebrity appearances properly labeled and organized.
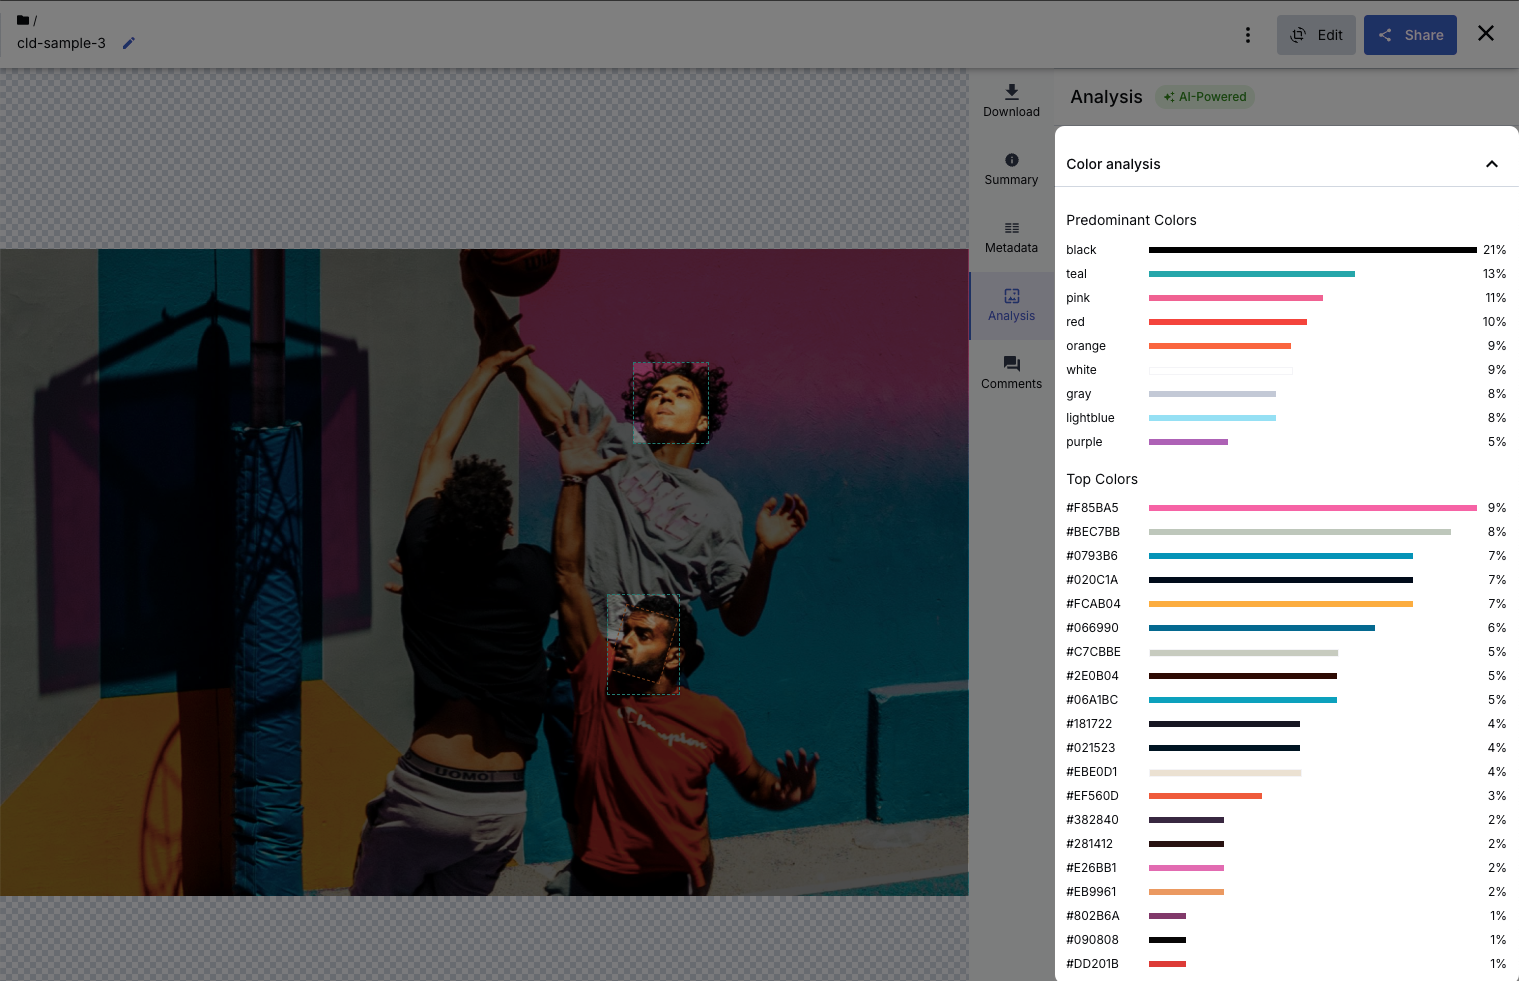
Beyond content moderation, AI Vision also provides performance insights by analyzing your media library’s most effective ad creatives. It can identify trends in high-performing visuals, such as frequently used colors, popular backgrounds, or recurring objects that drive engagement.
For example, if most of your top-performing ads contain vibrant colors and human subjects, AI Vision will highlight this pattern, allowing you to refine your creative approach based on real data rather than guesswork.
Different social media platforms cater to different audiences, behaviors, and visual preferences. A call to action (CTA) that works wonders on Instagram Stories might flop on Facebook, and a design that looks stunning on a desktop screen might fail to engage on a mobile device.
To truly connect with your audience, you need to tailor your visuals to each platform’s unique quirks and expectations. Here are some tips:
- Test CTAs across platforms.CTAs work differently depending on the platform. For example, “Swipe Up” is perfect for Instagram Stories, where users are accustomed to gestures, while Facebook users respond better to button-based CTAs like “Shop Now.” Tailor your CTAs to fit each platform’s design and behavior.
- Experiment with visual elements.Play around with colors, fonts, text placements, and overall composition. For instance, bright colors and bold fonts might catch attention on Instagram, while Facebook may call for cleaner, subtler designs. Test light and dark themes to see what resonates with your audience.
- Optimize for mobile-first platforms. Mobile phones drive 54% of all website traffic, so make sure your visuals are clear on smaller screens. Keep the text short and readable, use Cloudinary’s auto cropping feature to focus on key elements, and choose platform-specific aspect ratios like 9:16 for Instagram Stories and 16:9 for Facebook.
Creating and testing social media ad creatives doesn’t have to be overwhelming. With Cloudinary, you can stay organized, adapt your visuals for different platforms, and manage your campaigns more efficiently.
Ready to take your social media ads to the next level? Sign up for Cloudinary to experiment with social ad variations using dynamic URLs and AI tools.


