WordPress powers 34% of the internet and represents 60% of all CMS-built sites. From small blogs to large enterprise websites, WordPress is a popular choice for publishers and companies of all kinds. Media management within WordPress is an important component and one that, when done right, can significantly boost user engagement and overall site performance.
The enhanced Cloudinary for WordPress Plugin comprises robust features that make it easier than ever to manage and deliver optimized media assets.
With our new plugin, you can:
- Easily manage your entire Media Library with Cloudinary and take full advantage of our comprehensive digital asset management (DAM) solution, directly from WordPress.
- Fine-tune the transformations and optimizations of your media assets to ensure that the correct customizations are applied at global and taxonomy level.
- Generate responsive images through best-in-class logic.
- Deliver a highly optimized video experience with Cloudinary’s dynamic video platform.
To alleviate the challenges of managing large volumes of media assets with WordPress, the Cloudinary for WordPress Plugin enables you to locate them through Cloudinary DAM’s smart-search capabilities and to organize, select and transform assets without leaving the WordPress UI. Ultimately, you can seamlessly and efficiently transform and optimize assets for fast delivery.
By using Cloudinary’s Media Library to manage assets, users can:
- Tag, categorize and sort media assets into folders and collections, and take advantage of AI auto-tagging to intelligently tag media based on content type.
- Utilize advanced-search to easily find the right assets, and refine searches based on the media type, custom and embedded metadata or specific analytical results extrapolated from the file.
- Ensure cross-team collaboration through comments and sharing capabilities.
All of this has been available within the Cloudinary console for a while, but now you access it all, without leaving WordPress. Whenever you want to add media to your site, you can open the Cloudinary Media Library, manage and insert, simple as that.
Transforming and optimizing your assets goes a long way toward making your site look beautiful and load fast. However, for a large volume of assets, you must be able to perform those tasks at scale and fine-tune them for your various use-cases.
With Cloudinary, you can configure transformations at global or taxonomy (category or tag) level. You can also transform an individual asset using the Cloudinary Media Library transformation editor before adding it to your site. Even though all transformations are combined when viewed on the site, you can override them at each level for the desired effect for your media.
With the Cloudinary settings, you can configure global transformations and optimizations for your images, and optionally, different ones for videos. For example, you can set up quality and compression parameters and those for generating responsive images, ultimately cutting bandwidth and shortening page-load times. You might also want to add a watermark to protect your assets. You can do all that by simply adding global transformation parameters using Cloudinary’s URL syntax.
For the example below, we have-
- Enabled responsive breakpoint generation with a maximum of five breakpoints
- Configured format and quality to be set automatically
- Added the Cloudinary logo in the bottom right corner using the Image Transformation string –
w_0.2,g_south_east,x_5,y_5,l_cloudinary_icon.
The result is that all image delivery URLs (unless overridden) will contain the following transformation string and a maximum of 5 breakpoints to deliver optimally sized images:
l_cloudinary_icon,w_0.2,g_south_east,x_5,y_5/f_auto,q_auto
For example:
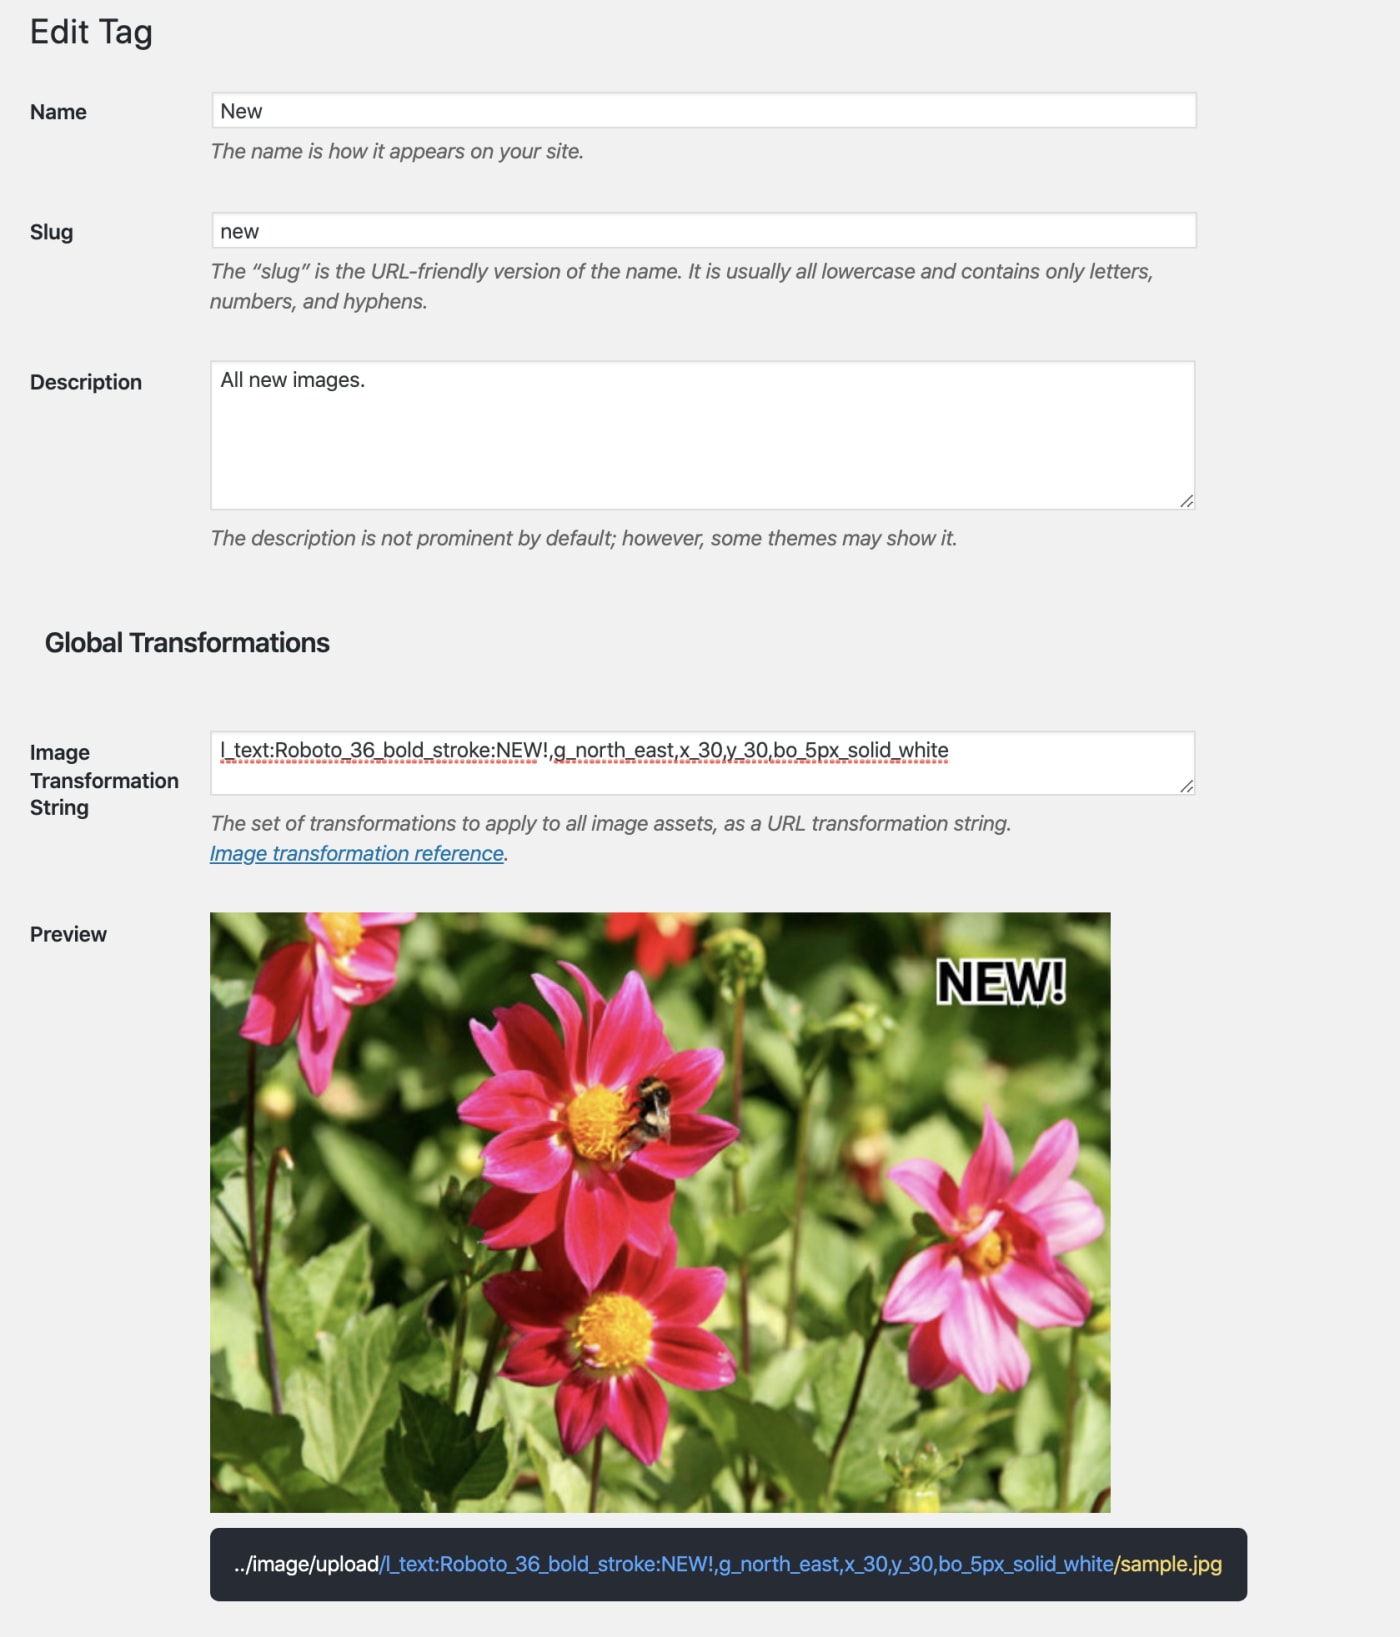
Categorizing or tagging pages and posts is a really great way to organize and control your content, and we think it’s also a great way to control and target your transformations as well. Just like with global transformations, you can add a set of transformations to any category or tag using Cloudinary’s URL syntax. This is a useful way to apply some use-case specific transformations. For example, you might want to tag some recently uploaded images with a new tag. You could then overlay a “NEW!” text banner to all images with that tag:
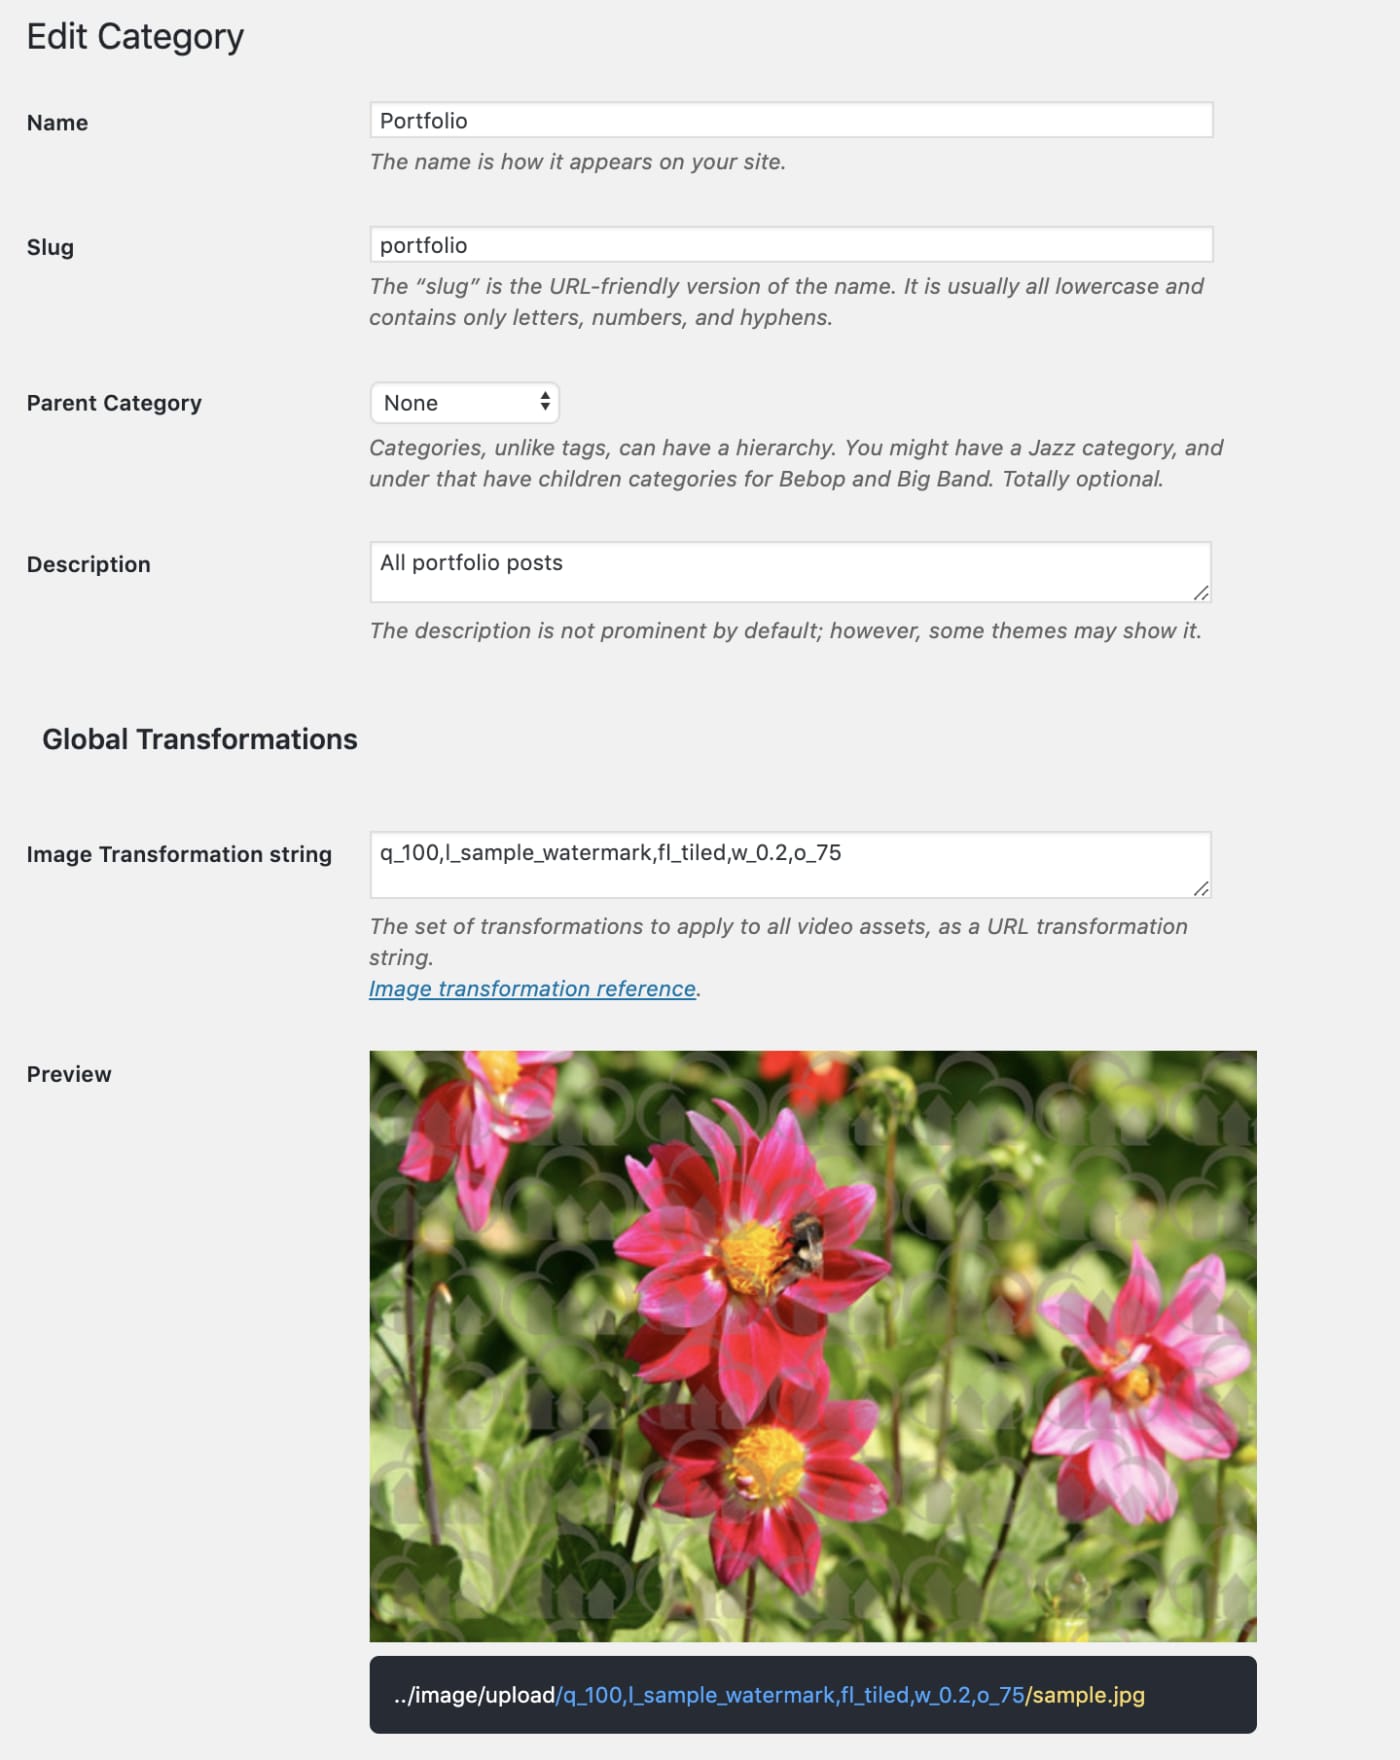
In another scenario, you might be using WordPress to demonstrate your portfolio of images. Here you could use the taxonomies to identify posts with images that need to be high resolution or to add a watermark if not added globally. In the taxonomy transformation, this time for a category, you could set a custom quality setting and watermark, then override the global default.
By controlling the transformations at a taxonomy level, you can easily automate your transformations and optimizations, simply by adding a category or tag and controlling whether to overwrite the globally applied transformations.
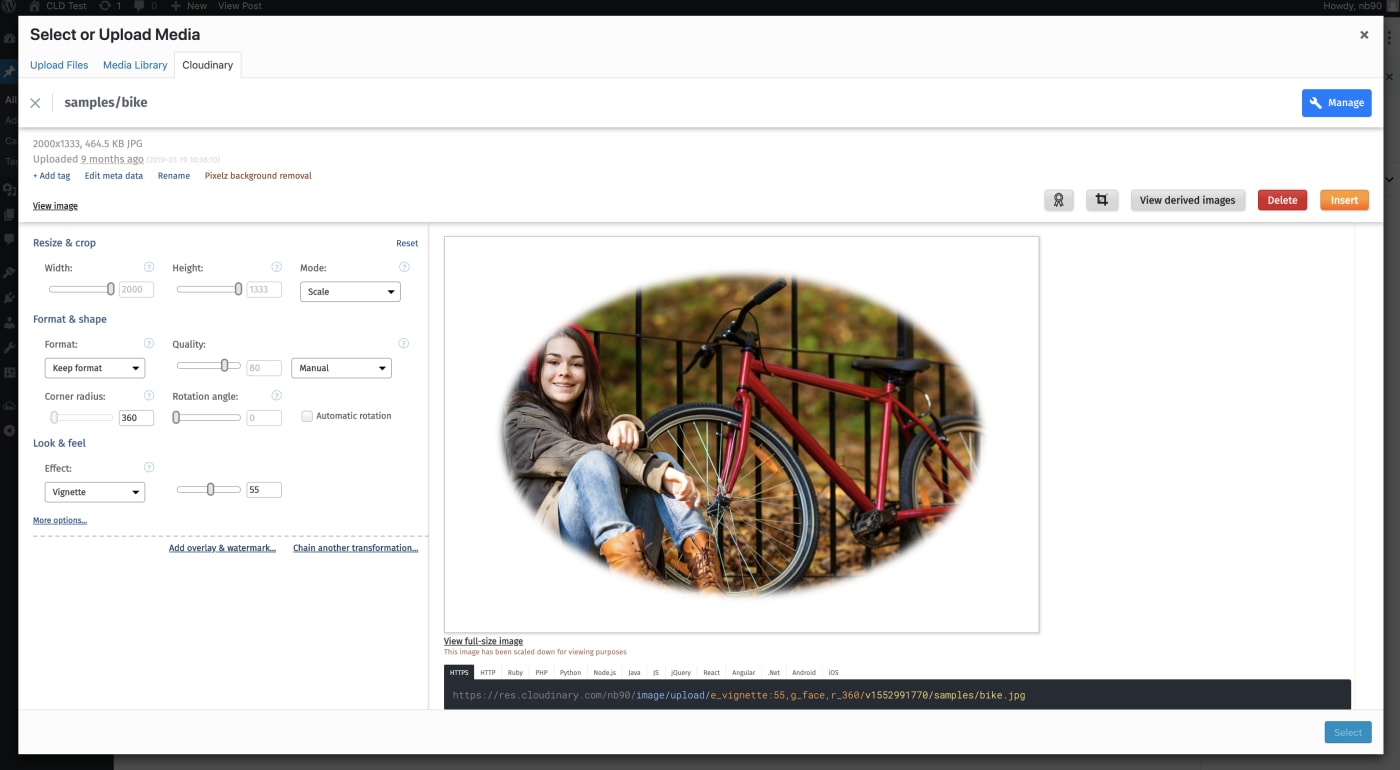
Transformations on individual media assets are extremely useful when you have very specific requirements for an image or video. These transformations are not defined using the WordPress UI and instead can be created and inserted using the Cloudinary Media Library.
You may have created a complex transformation that conflicts with transformations set at either taxonomy or global level and therefore you’ll want to override both of those when inserting. This can be done by configuring the asset through the WordPress UI.
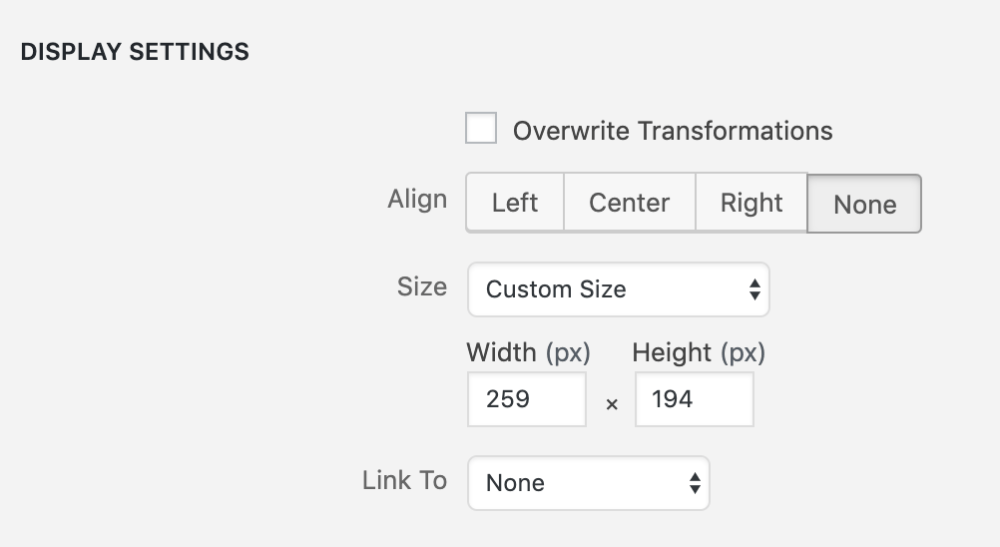 Classic
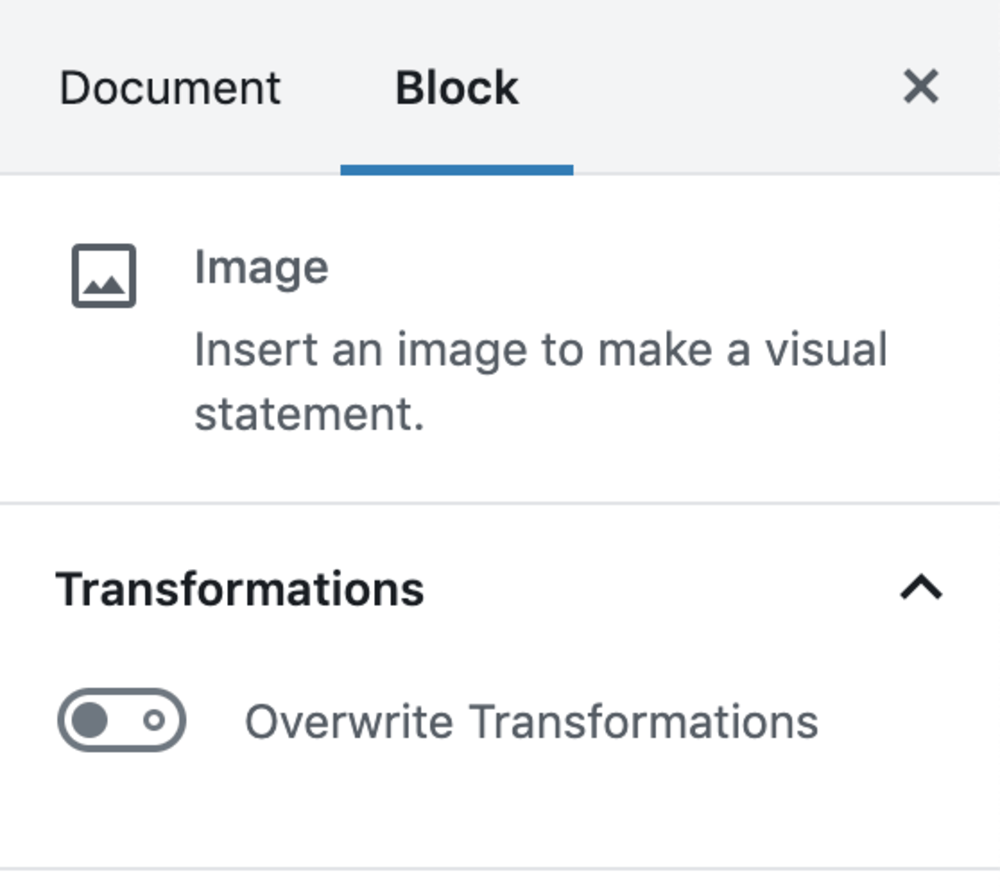 Gutenberg
Video is a major part of all websites today and WordPress sites are no exception. With WordPress’ out-of-the-box video solution, you can upload and deliver videos on your site. Cloudinary’s WordPress plugin enables you to further enhance the presentation by leveraging Cloudinary’s Dynamic Video Platform with its intelligent automatic transformations and optimization capabilities, ultimately delivering it all through Cloudinary’s feature-rich video player.
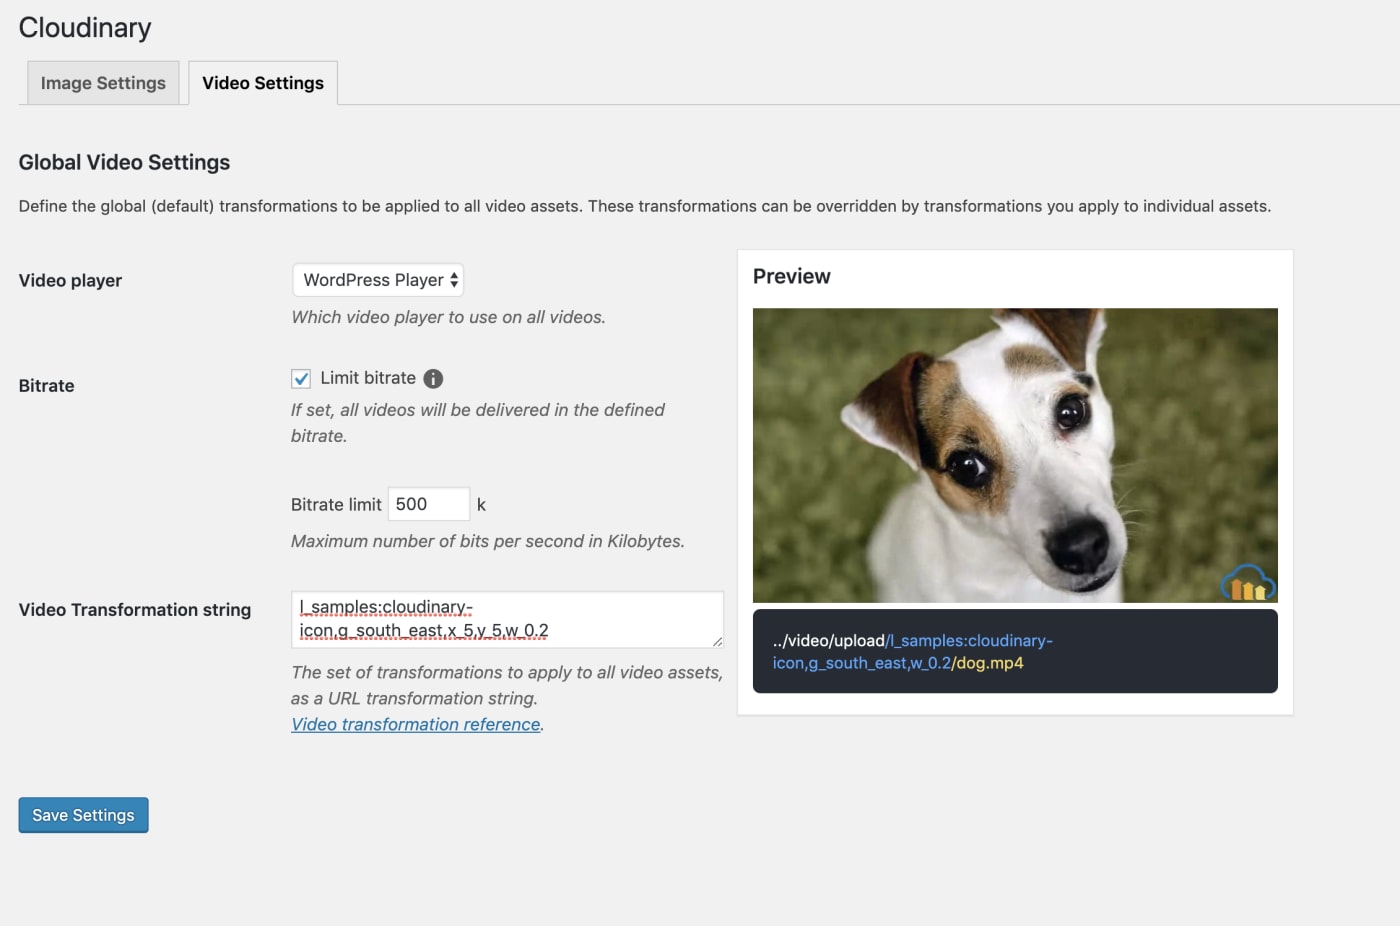
On Cloudinary’s Dynamic Video Platform, it’s really easy to limit your bitrate and also apply watermarks to videos, as you would do with images. See this example:
Additionally, you can tailor a video experience with several unique features on Cloudinary’s video player. For example, you can configure your videos to autoplay or loop, and to display the controls to your users or hide them. For a slick and compelling user experience on eCommerce sites, for example, you might choose to autoplay, loop and hide the controls of product videos. Here’s an example:
The enhanced Cloudinary’s WordPress for Plugin offers many superior Cloudinary features, all accessible and usable within WordPress. From full DAM functionality to advanced transformations to our Dynamic Video Platform, it’s a breeze to get the best out of media on WordPress. Go ahead and install the latest version from the WordPress plugin library. To get started, link your Cloudinary account. If you don’t have one yet, sign up now for free. For further reference, check out our documentation on the WordPress plugin.
- Image Optimization for Websites: Beautiful Pages That Load Quickly
- PHP Image Compression, Resize, and Optimization
- Python Image Optimization and Transformation
-
Evolution of
: Gif without the GIF
- Top 10 Mistakes in Handling Website Images and How to Solve Them
- Three Popular and Efficient Ways for Loading Images
- CDN for Images: Optimize and Deliver Images Faster
- Compress an Image Automatically Without Losing Quality
- Automatically Reduce Image Size Without Losing Quality
- How to Automatically Adapt Website Images to Retina and HiDPI Devices

