
Manually tagging videos works for a handful of files. Once you’re dealing with hundreds or thousands of TikTok clips and user-generated content (UGC) uploads, the process breaks down. Tags get skipped, naming conventions drift, and finding a specific video means scrolling through a library organized by guesswork.
Cloudinary Google Auto Tagging add-on solves this by analyzing every uploaded video with AI and applying relevant tags automatically. You configure it once in an upload preset, and every video uploaded through that preset gets tagged with objects, scenes, activities, and other content labels without manual effort.
In this guide, you’ll enable the Google Auto Tagging add-on, create an upload preset that triggers auto-tagging on every upload, upload videos through the Media Library and the Node.js SDK, and verify the generated tags.
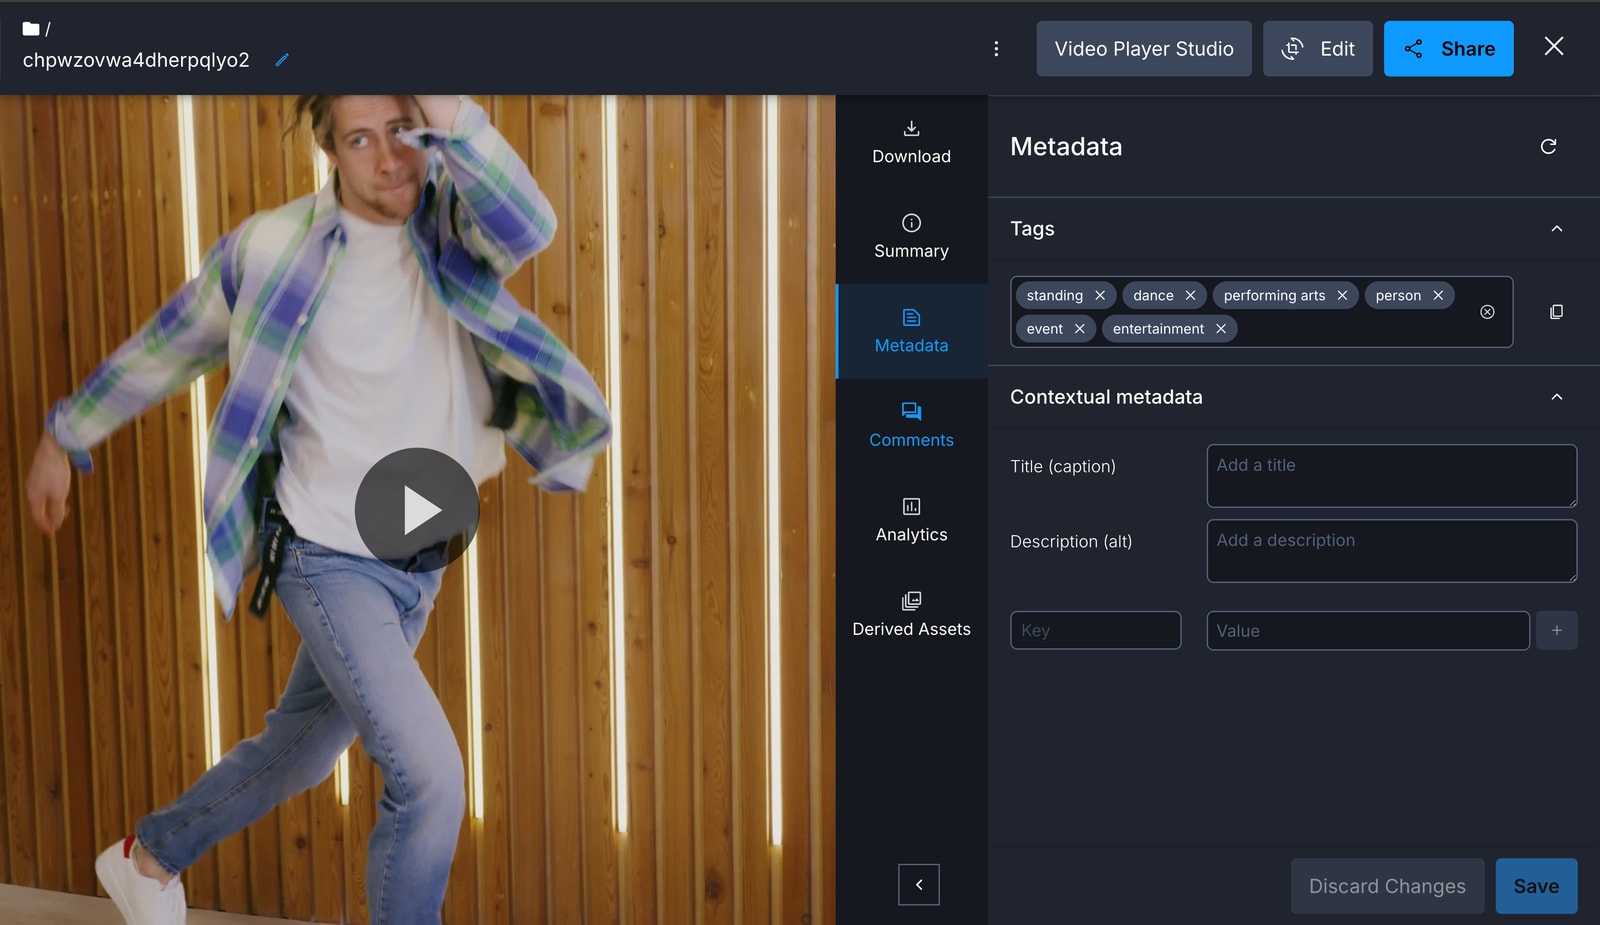
- Source Code: https://github.com/Princesso/cloudinary-autotag
By the end of this guide, you’ll have a workflow that:
- Analyzes every uploaded video with Google AI to detect objects, scenes, and activities.
- Applies tags automatically based on a confidence threshold you set.
- Works for both manual uploads (Media Library) and programmatic uploads (SDK/API).
- Keeps your video library organized and searchable without manual tagging.
- Supports combining AI-generated tags with manual campaign or brand tags.
Before you start, make sure you have:
- A free Cloudinary account. The free tier includes the Google Auto Tagging add-on.
- Node.js installed (required only for the SDK upload option).
- A few TikTok or UGC video files to test with.
The Google Auto Tagging add-on brings Google video recognition directly into your Cloudinary workflow. It identifies objects, people, scenes, and activities in your videos and generates searchable tags.
To enable it:
- Sign in to your Cloudinary dashboard.
- Navigate to the Add-ons section and search for Automatic Video Tagging.
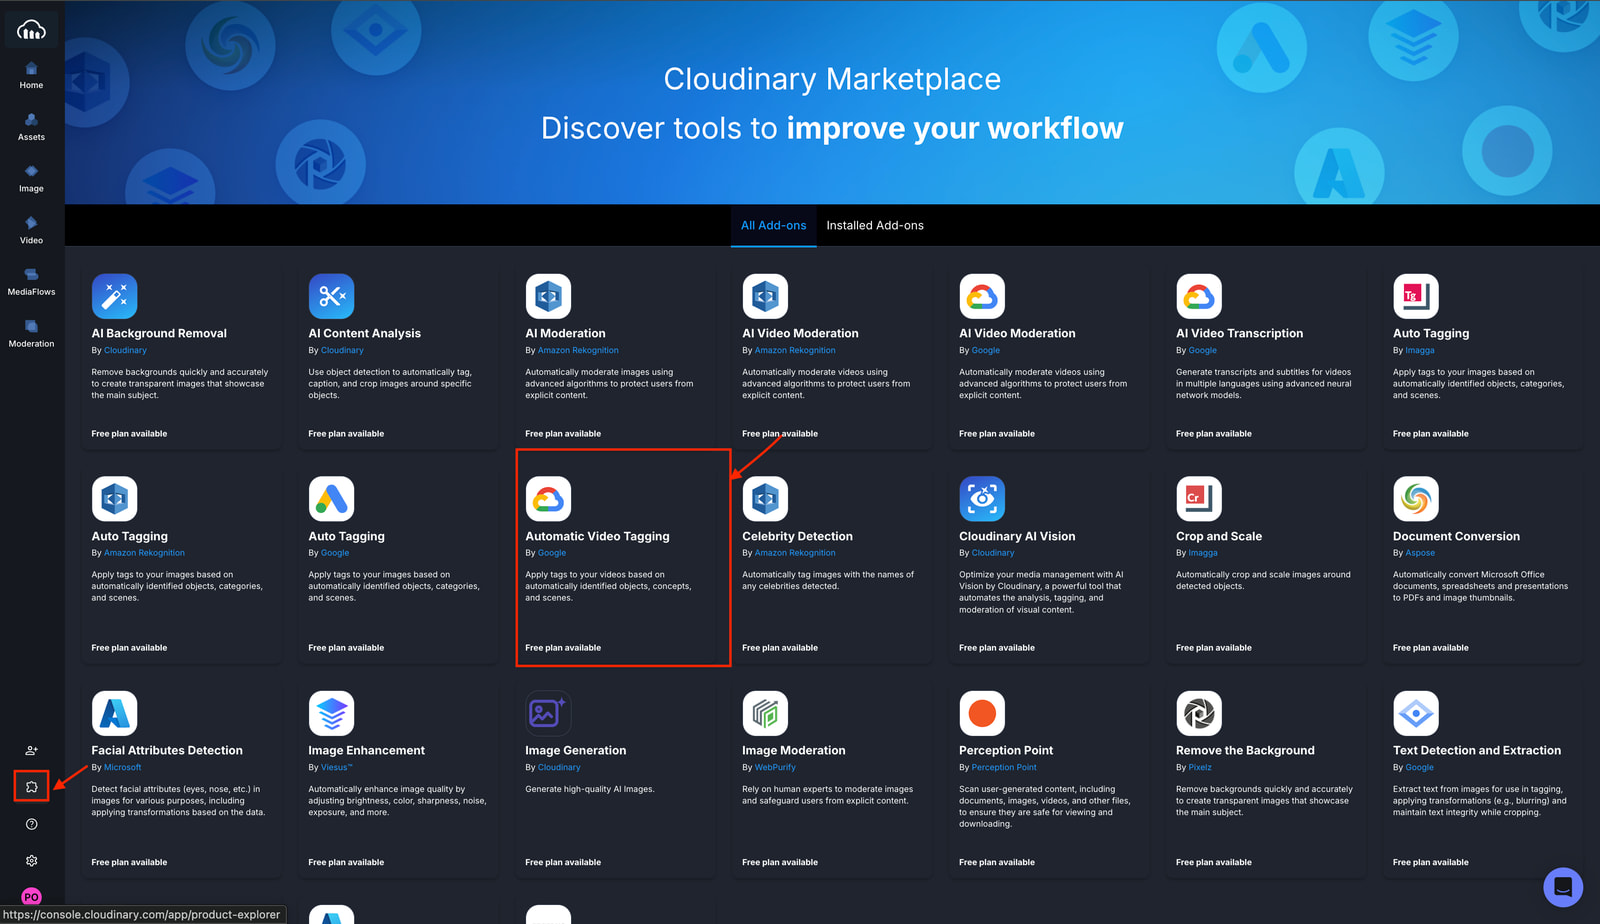
- Select the add-on and click Install Add-on in the top-right corner. The free plan works for testing. Choose a paid plan if you need higher tagging volume.
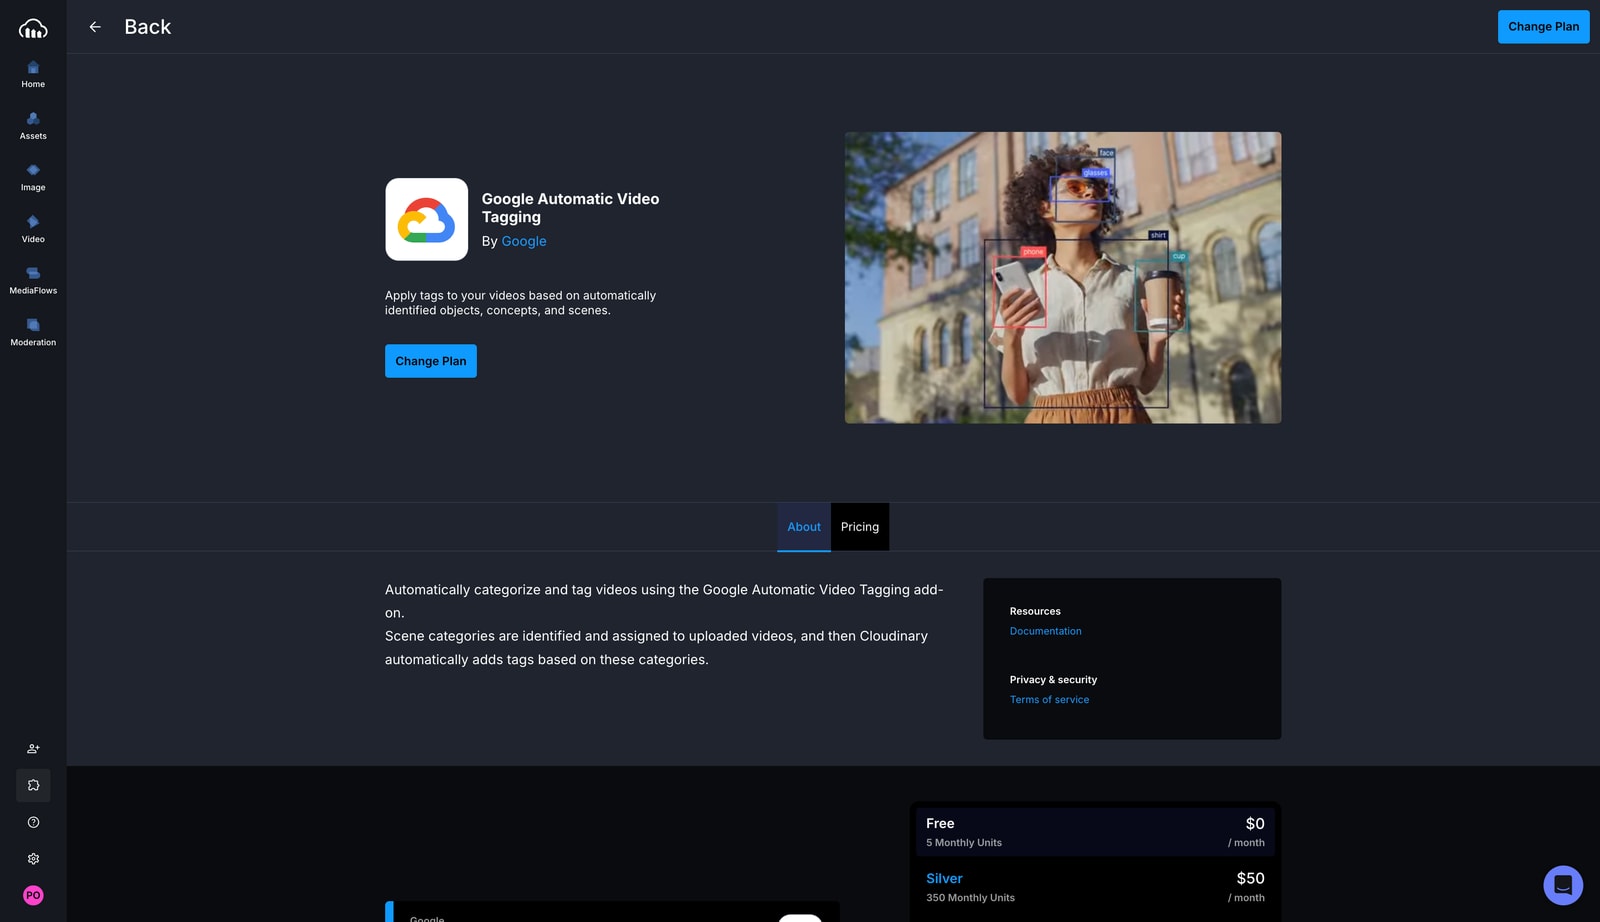
With the add-on installed, the next step is creating an upload preset that triggers auto-tagging on every upload.
Upload presets are saved configurations that define how Cloudinary handles your assets at upload time. Instead of sending tagging rules and transformation options with every API request, you store them once as a preset and reference the preset name during uploads.
To create a preset with auto-tagging enabled:
- Navigate to Settings > Upload Presets and click Add Upload Preset.
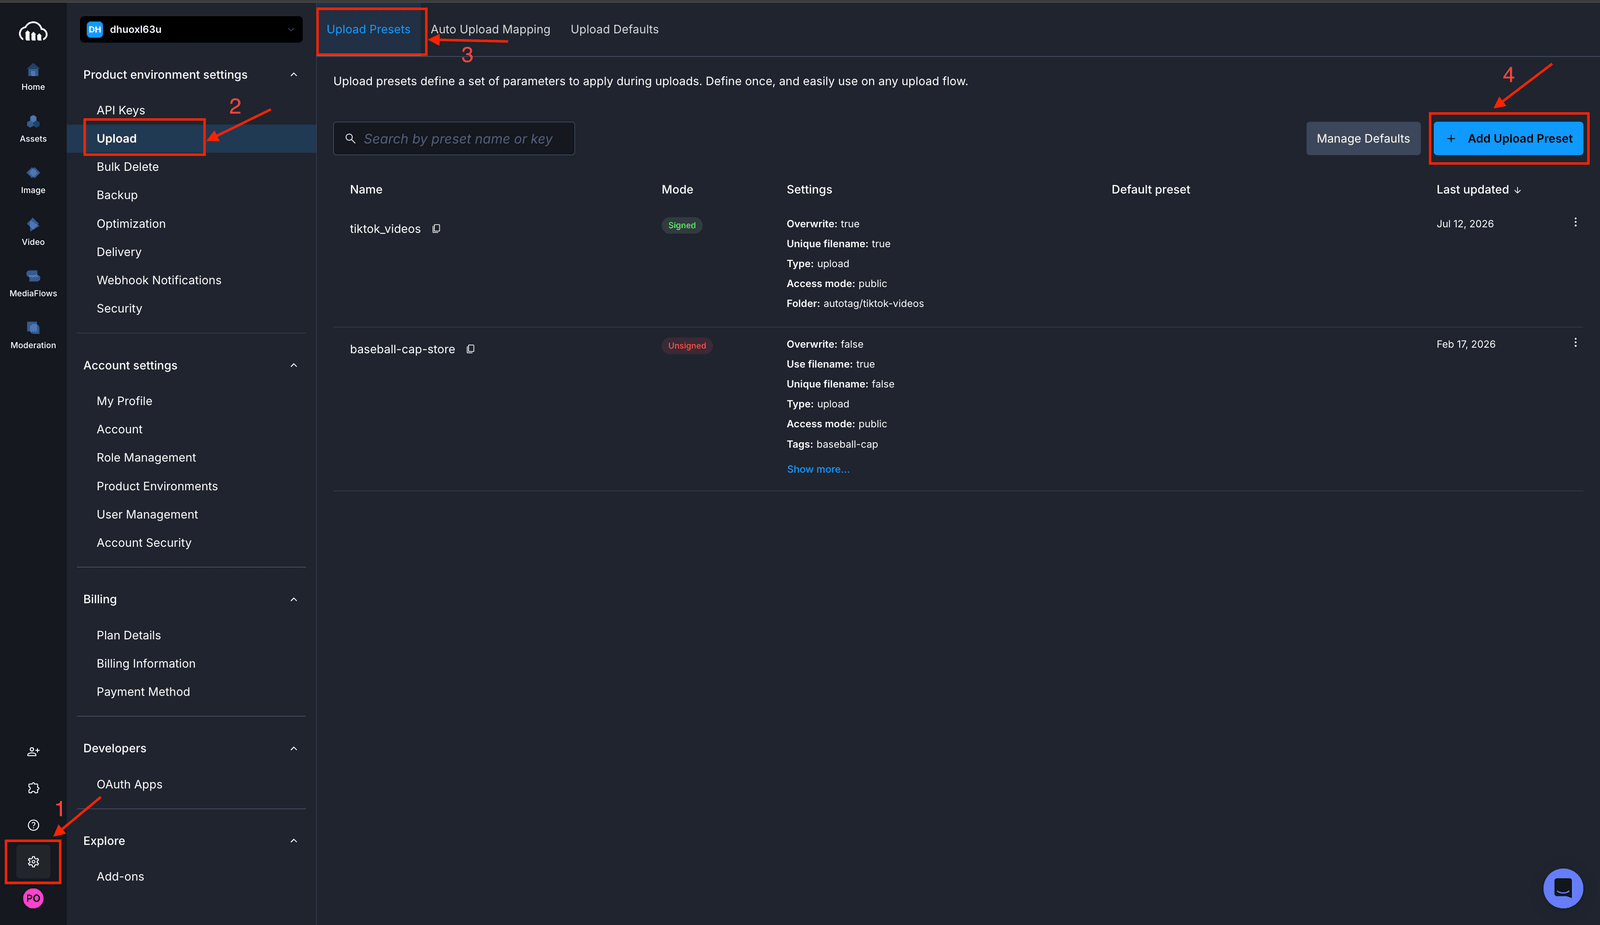
- Under General, give the preset a name and select a signing mode based on your use case.
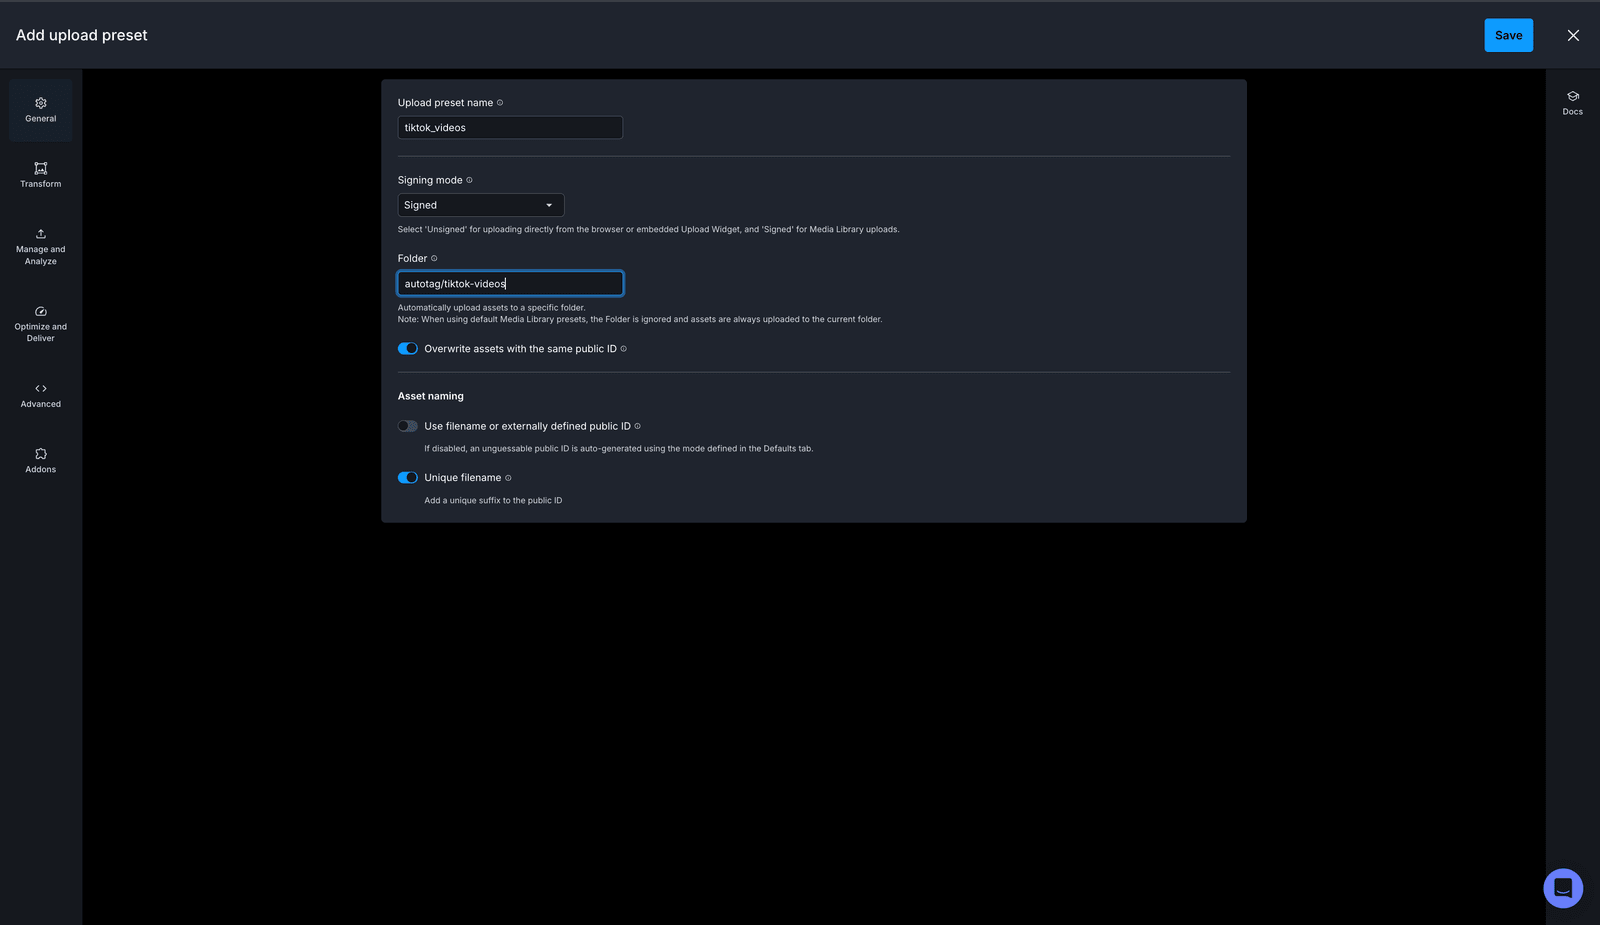
- Navigate to the Add-ons tab. Under Auto-tagging, set a confidence score. This determines how confident the AI must be before applying a tag. A score of 0.7 means the AI applies only tags it’s at least 70% confident about. Start at 0.6 or 0.7 for a good balance between coverage and accuracy.
- Click + Add to Preset next to the Google Automatic Video Tagging add-on. This ensures every video uploaded with this preset is automatically analyzed and tagged.
- Click Save in the top-right corner. Your new preset appears on the Upload Presets page.
- To apply auto-tagging to all uploads by default, click Manage Defaults and select your preset. This applies the preset to manual uploads through the Media Library across all asset types (images, videos, and raw files).
Your upload preset is ready. Now you can upload videos and see the auto-tagging in action.
You can upload videos two ways: manually through the Media Library, or programmatically through the SDK.
Use this option for manual uploads:
- Navigate to the Media Library tab in your Cloudinary console.
- Click Upload, select your video file, and wait for the upload to complete.
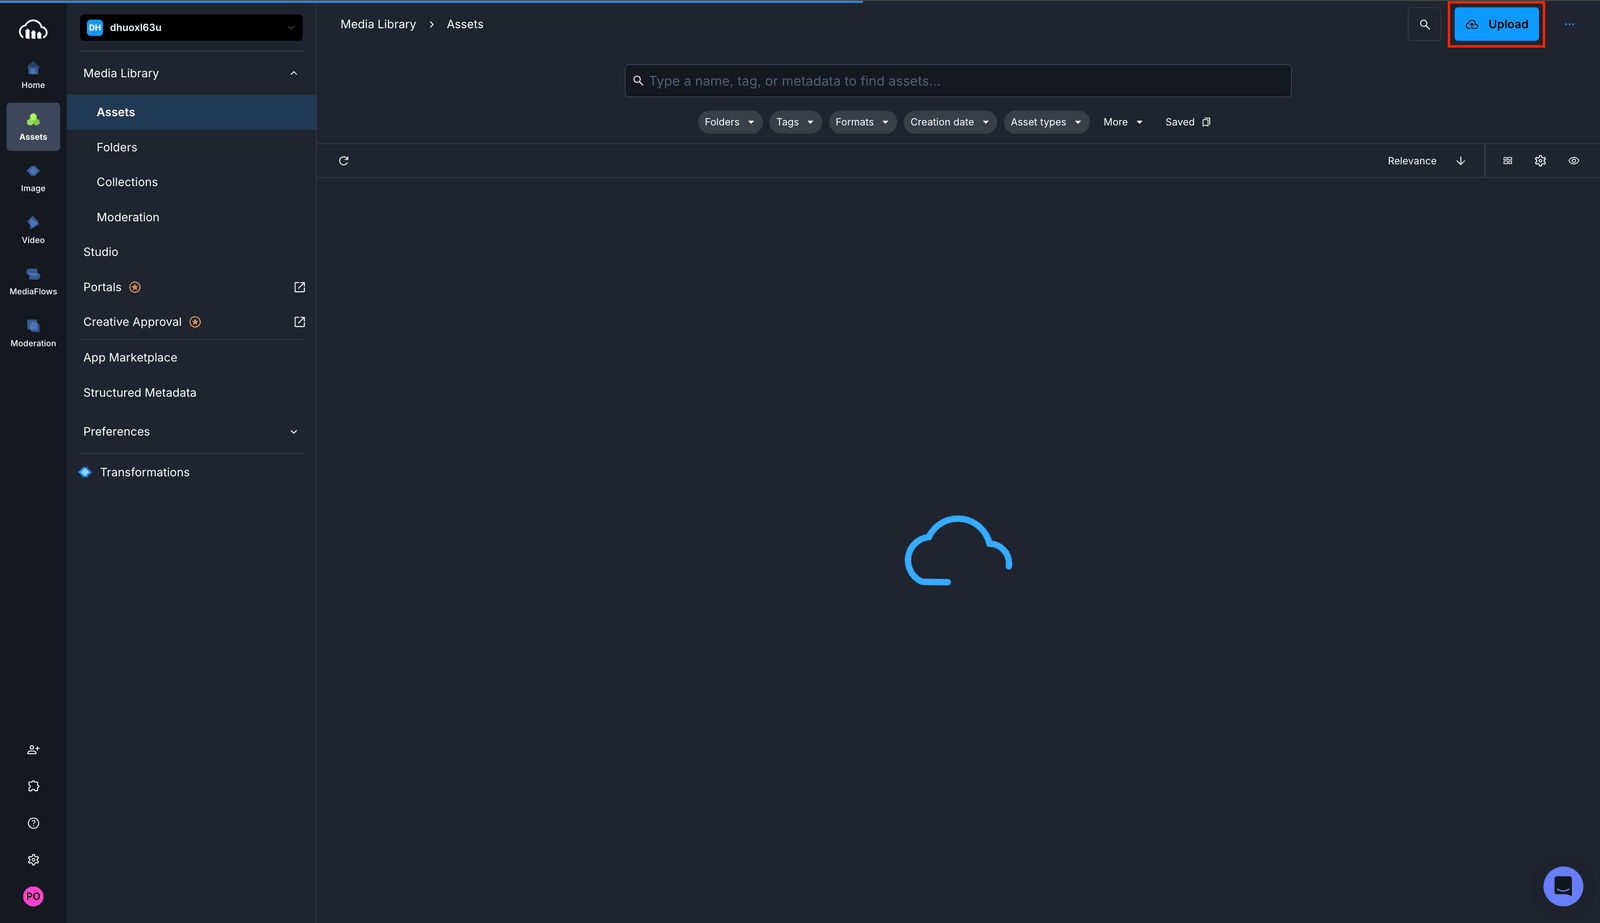
The upload preset triggers the Google Auto Tagging add-on automatically. Processing takes a few seconds depending on video length.
Use this option when you need to upload from your app or automate uploads from a pipeline.
Install the Cloudinary SDK:
<code>npm install cloudinary</code>Code language: HTML, XML (xml)Configure Cloudinary with your credentials:
// .env

CLOUDINARY_CLOUD_NAME=your_cloud_name

CLOUDINARY_API_KEY=your_api_key

CLOUDINARY_API_SECRET=your_api_secret

// cloudinary-config.js

require('dotenv').config();

const cloudinary = require('cloudinary').v2;

cloudinary.config({

  cloud_name: process.env.CLOUDINARY_CLOUD_NAME,

  api_key: process.env.CLOUDINARY_API_KEY,

  api_secret: process.env.CLOUDINARY_API_SECRET,

});

module.exports = cloudinary;Code language: JavaScript (javascript)
Replace the placeholder values with your actual credentials from Settings > API Keys in the Cloudinary console.
Upload a video:
// upload-video.js

const cloudinary = require('./cloudinary-config');

cloudinary.uploader.upload('link-to-your-video/video.mp4', {

  resource_type: 'video',

  categorization: 'google_video_tagging',

  upload_preset: 'your_preset_name', // optional, if you have a specific upload preset

  auto_tagging: 0.5, // minimum confidence score (0-1) for a detected tag to be applied

})

  .then(result => {

    console.log('Upload successful!');

    console.log('Video URL:', result.secure_url);

    console.log('Tags:', result.tags);

  })

  .catch(error => {

    console.error('Upload failed:', error);

  });Code language: JavaScript (javascript)
If your auto-tagging preset is set as the default, the add-on runs automatically. If not, pass the preset name in the upload options:
cloudinary.uploader.upload('path/to/video.mp4', {

  resource_type: 'video',

  upload_preset: 'your_preset_name',

})Code language: JavaScript (javascript)After the upload completes, the Google Auto Tagging add-on analyzes your video and applies tags. You can verify the results in two ways.
Open the uploaded asset in your Media Library. The automatically generated tags appear in the Metadata panel alongside any default tags you set in the preset.
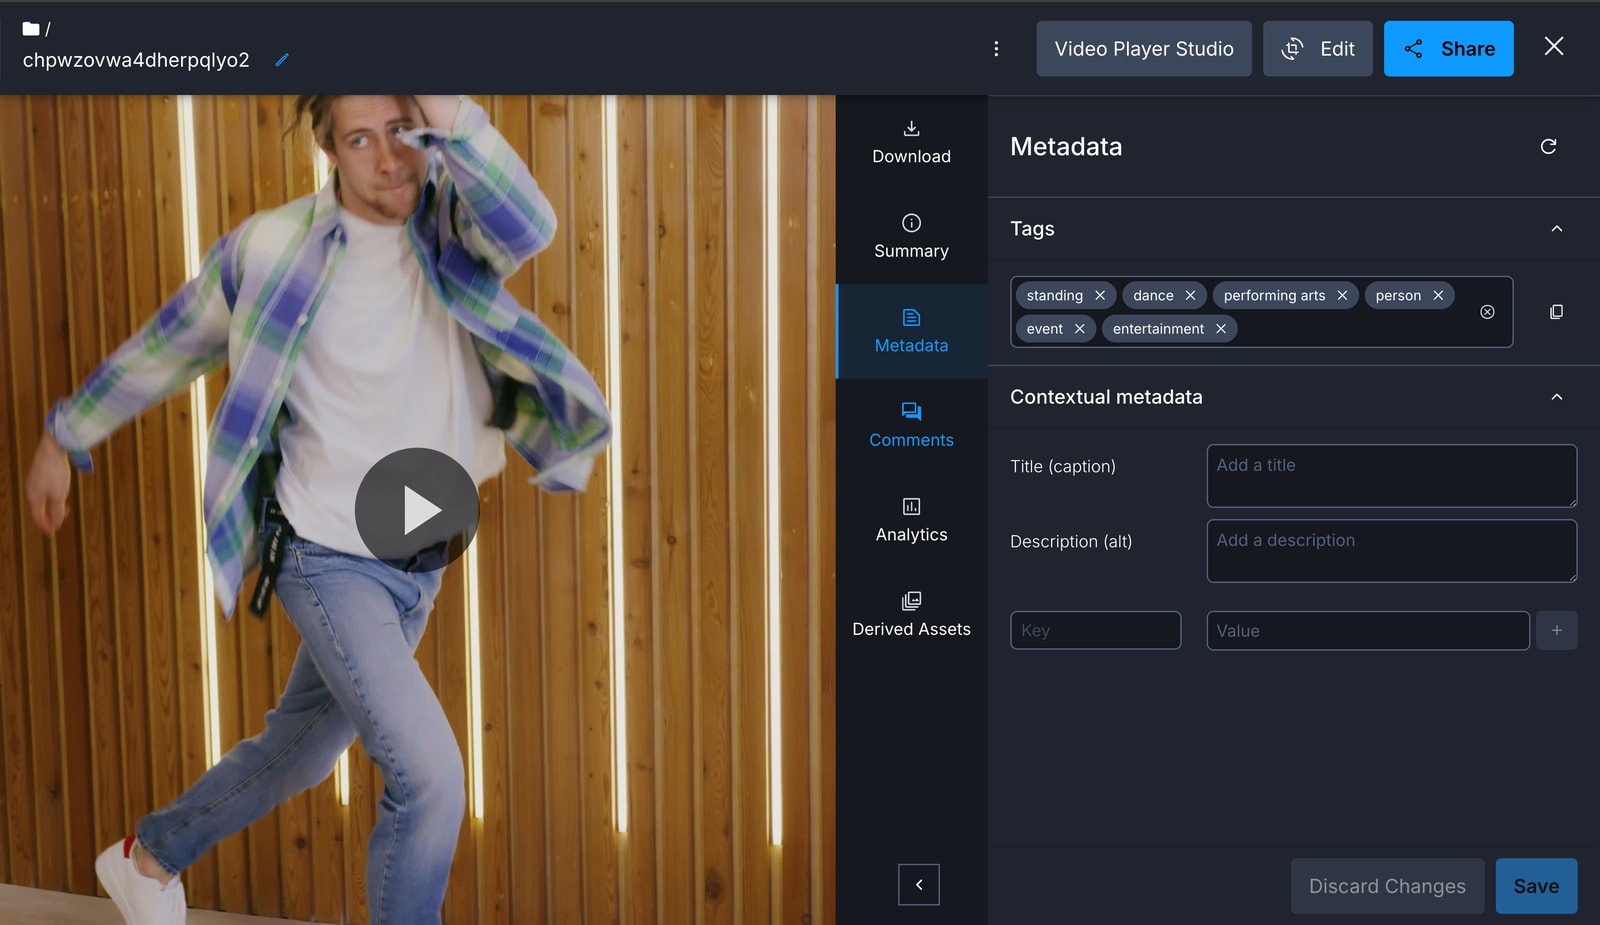
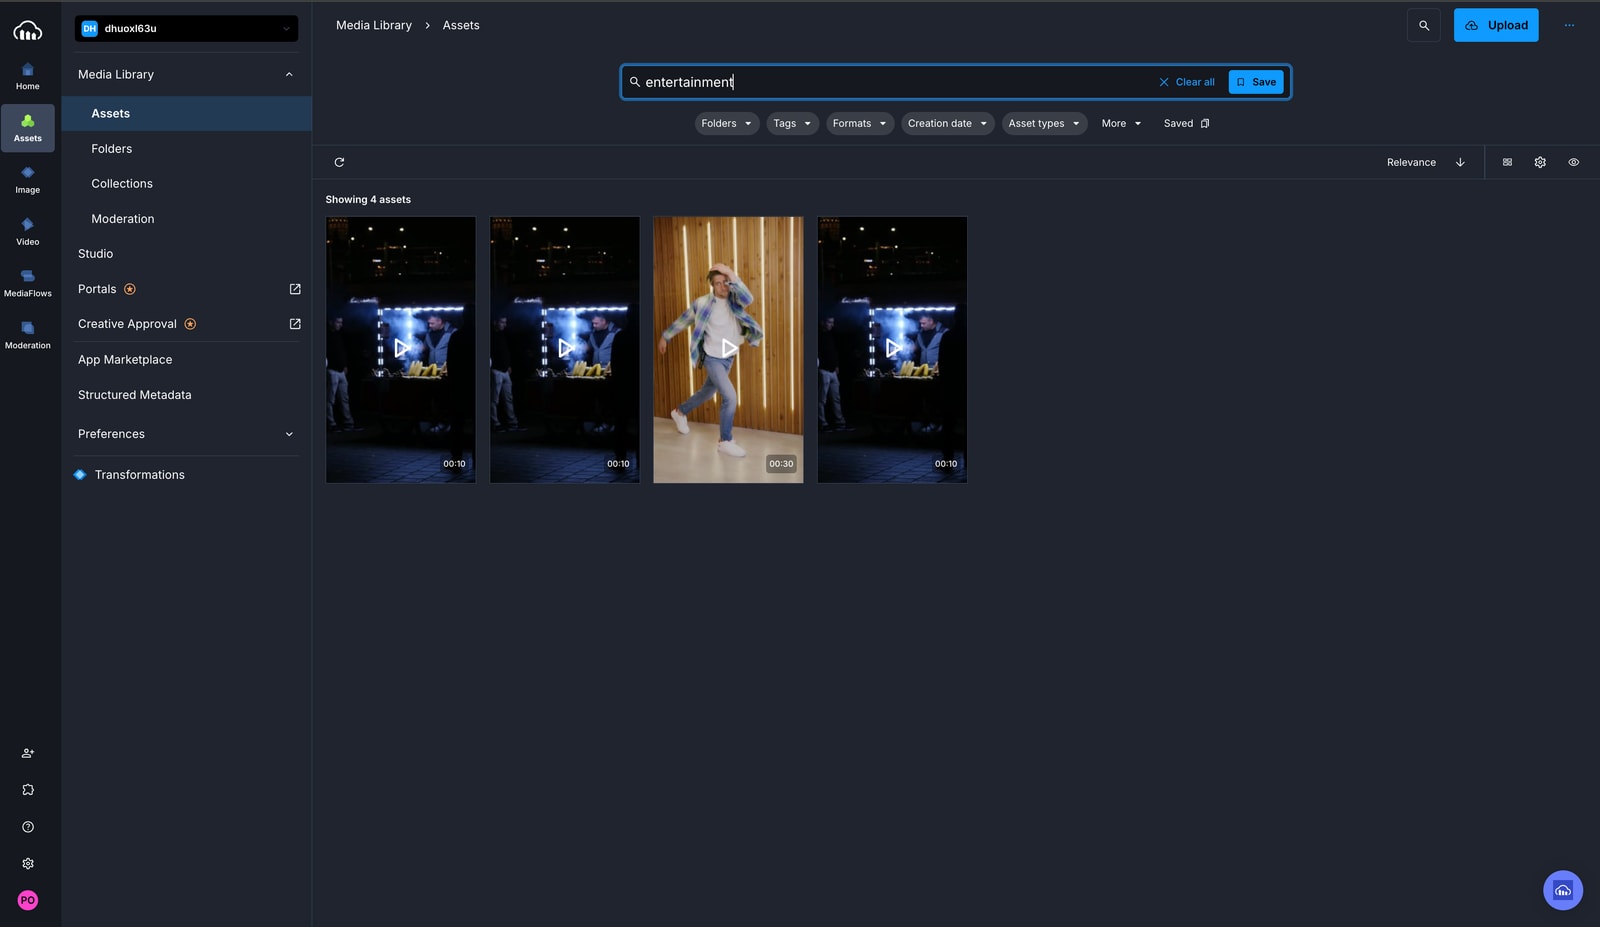
You can now search and filter assets by tag, group similar TikTok videos, and locate content for reuse or editing in seconds.
When uploading through the SDK or API, the response payload includes the detected tags. You can log, store, or process them in your application:
{

  "asset_id": "1a2b3c4d5e6f7890",

  "public_id": "ugc/tiktok_video_12345",

  "format": "mp4",

  "resource_type": "video",

  "created_at": "2026-06-11T20:32:56Z",

  "tags": [

    "dancing",

    "standing",

    "entertainment",

    "event"

  ],

  "secure_url": "https://res.cloudinary.com/dhuoxl63u/video/upload/v1783874129/fhzdjmumuy5shjyfklms.mp4"

}Code language: JSON / JSON with Comments (json)
The tags array contains every label the AI applied above your confidence threshold. You can use these tags to build filtered views, power search, or route content through moderation pipelines.
Consider an online store that posts dozens of TikTok videos each week featuring products from customers and influencers. Without auto-tagging, finding a video that shows a “bag” or “pants” means scrolling through hundreds of files and guessing from filenames.
With the Google Auto Tagging add-on, every video is automatically tagged with what it shows: bag, fashion, pants, outdoor. The team finds what they need in seconds by searching tags instead of filenames. They can also add manual tags for campaigns like black_friday or holiday_sale to group videos by event.
As your library grows, these practices keep your tags accurate and useful.
- Set the right confidence threshold. Start at 0.6 or 0.7. This gives you a balance between capturing enough tags and avoiding irrelevant ones. If your videos are consistent (like product demos), raise the threshold for higher accuracy. Review the applied tags periodically and adjust if you see too many false positives or missing labels.
- Combine auto tags with manual tags for context. Auto tags capture what’s in the video (objects, activities, settings), but they can’t understand brand or campaign context. Add manual tags like
summer_campaignorinfluencer_collabalongside the AI-generated ones. This makes your assets searchable by both content and business context. - Audit your tags regularly. Filter your Media Library by tag and check for duplicates, irrelevant labels, or tags that don’t fit your use case. Remove anything that adds noise without value.
- Prioritize searchable tags over descriptive ones. When reviewing auto-generated tags, keep terms that your team will actually search for. A tag like person is too generic. Tags like skateboarding or
outdoor_sportare specific enough to be useful. Focus on a concise set of tags that your content, social, and moderation teams are most likely to use when locating and repurposing content.
You set up an automated video tagging workflow using Cloudinary Google Auto Tagging add-on and upload presets. Every video uploaded to your library is now analyzed by AI and tagged with relevant labels automatically. No manual tagging required.
Here are a few ways to extend this setup:
- Build moderation workflows. Use auto-generated tags to flag videos that need human review before publishing (for example, route any video tagged alcohol or violence through a moderation queue).
- Power search and filtering. Build a custom search interface that queries Cloudinary by tag, letting your content team find and repurpose videos instantly.
- Combine with custom metadata. Pair auto tags with custom metadata fields for product line, region, or campaign to create a fully structured video library.
- Automate with MediaFlows. Use MediaFlows to trigger actions based on tags (for example, auto-move videos tagged product_demo to a specific folder).
- Scale to images. The same Google Auto Tagging add-on works with images. Apply the same preset to your entire media library.
Sign up for a free Cloudinary account to try it yourself.
Resources:
- GitHub Repository
- Google Auto Tagging add-on documentation
- Upload presets documentation
- Cloudinary upload documentation
- Custom metadata documentation
- Cloudinary Node.js SDK
What is the Cloudinary Google Auto Tagging add-on?
How does the confidence threshold affect which tags get applied?
Can auto-tagging run automatically on every upload without extra code?
Do I have to choose between AI-generated tags and my own campaign tags?
black_friday or influencer_collab add business or campaign context the AI can’t infer. For more structured organization, you can also layer on custom metadata fields alongside tags.Can auto-generated tags be used to trigger moderation or other automated actions?
alcohol or violence through a moderation queue, or using MediaFlows to automatically move tagged assets into specific folders without writing custom backend code.

