As a designer or developer, one tends to notice the value of producing media usable by everyone. The availability of subtitles for video information is a crucial component of accessibility, and it’s becoming even more popular for the average user, too. Yet, manually producing subtitles can be a laborious and time-consuming operation.
Let’s break down the best auto subtitle generators:
1. Cloudinary
Cloudinary is a cloud-based media management platform that goes beyond hosting and optimization, offering the ability to automatically generate subtitles for your videos. By leveraging the Google AI Video Transcription add-on, Cloudinary runs your video files through Google’s neural networks to produce accurate transcripts and subtitles, all managed seamlessly in the cloud.
Unlike traditional editors, Cloudinary integrates subtitle generation directly into its media pipeline, meaning you can store, transcribe, and deliver videos all in one platform.
Setup and Integration
Before getting started with this tutorial, we’ll need a few things. Primarily, we need a Cloudinary account (which you can start with for free). We will create a Node.js script to generate subtitles from our videos automatically, so install it from the official Node page.
Next, you’ll need to install Cloudinary’s Node.js SDK to make and authenticate API calls to Cloudinary. To install this library, create a project folder in a directory of your choice, open up your terminal, and type the following command:
npm install cloudinary
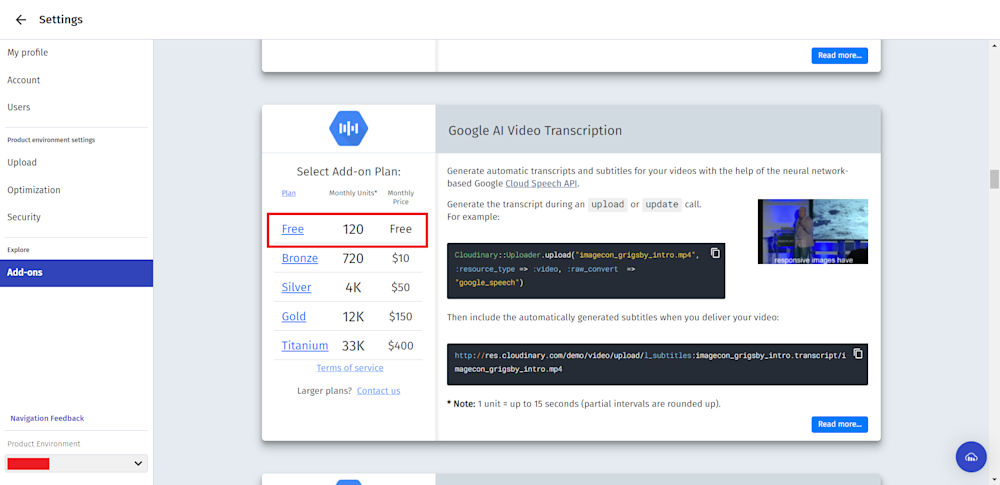
Finally, we need to activate the Google AI Video Transcription service. To do this, log in to your Cloudinary account and head to the Add-on tab.
Next, search for the Google AI Video Transcription add-on:
Finally, click on the add-on and subscribe to the free plan:
With this, we are ready to make API calls to Cloudinary.
Generating Subtitles Using Google AI Video Transcription
To start setting up our Cloudinary API, we’ll be utilizing the Cloudinary Node.js SDK. This SDK will allow us to call our API and authenticate our requests, which is essential for generating accurate transcripts.
The first step is to create a project folder in the directory of your choice. Once you’ve done that, you can open up your terminal, navigate to your project directory, and run the following command:
npm install cloudinary
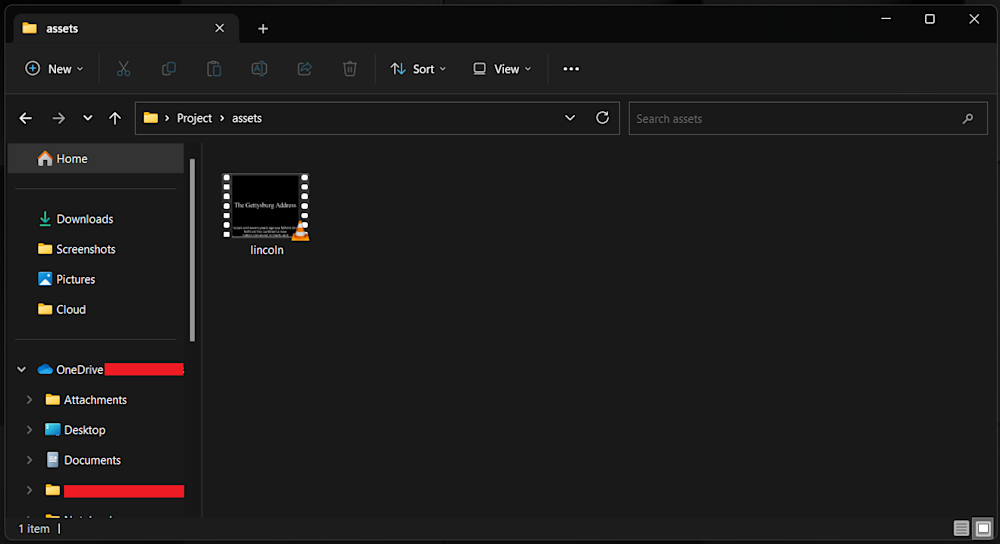
Now let’s define videos that we want to generate subtitles for. Open up your project’s folder and create an assets folder. Here add the video that you want to use. We will use lincoln.mp4:

Next, we need to configure Cloudinary with our account details. In your project folder, create a new file called Subtitiles.js and add start by importing the Cloudinary SDK and defining our API with your account details:
// Import the Cloudinary SDK
const cloudinary = require('cloudinary').v2;
// Configure Cloudinary with your account details
cloudinary.config({
  cloud_name: 'CLOUD_NAME',
  api_key: 'API_KEY',
  api_secret: 'API_SECRET'
});
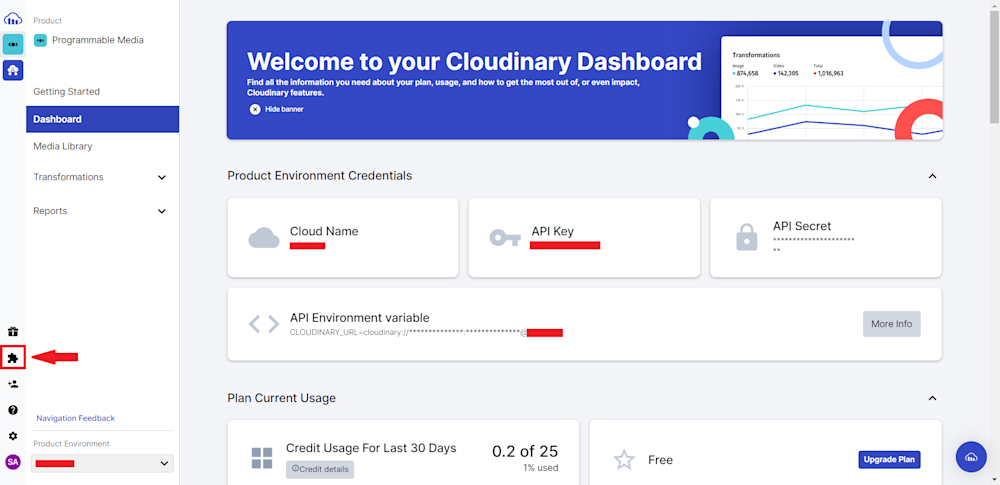
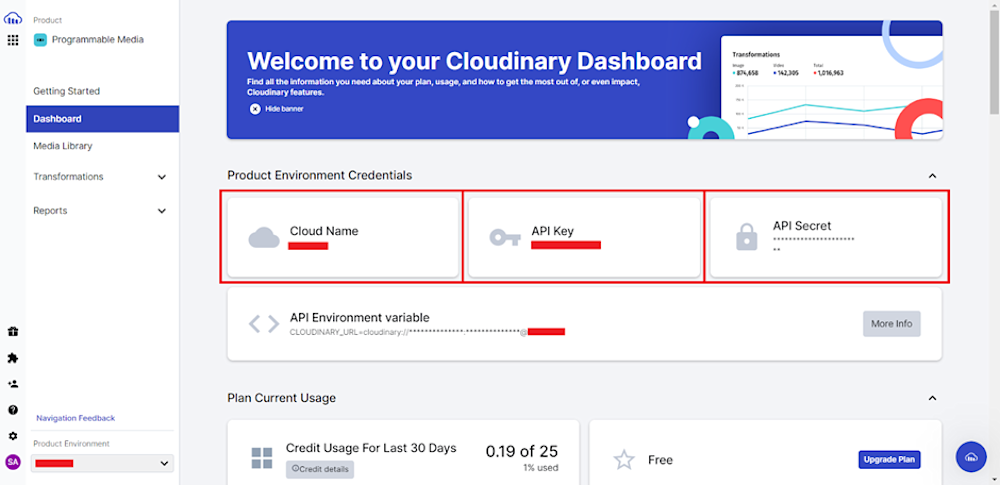
Replace CLOUD_NAME, API_KEY, and API_SECRET with your Cloudinary credentials, which you can find in your account dashboard.
Next, we’ll upload the video and generate the transcript. Add the following code to Subtitiles.js:
// Define a public ID for the video and its transcript
const videoPublicId = 'lincoln';
const transcriptPublicId = `${videoPublicId}.transcript`;

// Upload the video to Cloudinary and convert it to text using Google Speech Recognition
cloudinary.uploader.upload('assets/lincoln.mp4', {
  public_id: videoPublicId,
  resource_type: 'video',
  raw_convert: 'google_speech'
})
Next, a public ID is defined for the video and transcript files. The transcript file’s public ID is set to the video file’s public ID with the suffix .transcript. The cloudinary.uploader.upload() method uploads the video file to Cloudinary and converts it to text using Google Speech Recognition. The raw_convert option is set to google_speech to specify that the video should be converted to text using Google’s speech recognition API. The transcription that will be generated will then be named lincoln.transcript.
Now that we have the transcript, we can add subtitles to the video. Add the following code to Subtitiles.js:
.then(result => {
  // Create a promise that adds the transcription as a subtitle overlay to the video
  return new Promise((resolve, reject) => {
    // Specify the subtitle overlay as "subtitles:public_id.transcript"
    const subtitlesOverlay = `subtitles:${transcriptPublicId}`;
    // Set the transformation options for the video, including the subtitle overlay
    const transformationOptions = [
      {overlay: subtitlesOverlay},
      {flags: "layer_apply"}
    ];
    // Generate a URL for the video with the subtitle overlay
    const videoUrl = cloudinary.url(videoPublicId, {
      resource_type: 'video',
      transformation: transformationOptions
    });
    // Resolve the promise with the video URL
    resolve(videoUrl);
  });
})
.then(result => console.log(result)) // Print the video URL to the console
.catch(error => console.error(error)); // Handle any errors that occur
Once the video has been uploaded and converted, the code creates a new promise that adds the transcription as a subtitle overlay to the video. The subtitle overlay is specified as subtitles:public_id.transcript, where public_id.transcript is the public ID for the transcript file. The transformation options for the video are set to include the subtitle overlay using the overlay and flags options.
Finally, a URL for the video with the subtitle overlay is generated using the cloudinary.url() method, and the URL is printed to the console using console.log(). Any errors that occur are handled using a catch() block. Our final code should look like:
// Import the Cloudinary SDK
const cloudinary = require('cloudinary').v2;

// Configure Cloudinary with your account details
cloudinary.config({
  cloud_name: 'CLOUD_NAME',
  api_key: 'API_KEY',
  api_secret: 'API_SECRET'
});

// Define a public ID for the video and its transcript
const videoPublicId = 'lincoln';
const transcriptPublicId = `${videoPublicId}.transcript`;

// Upload the video to Cloudinary and convert it to text using Google Speech Recognition
cloudinary.uploader.upload('assets/lincoln.mp4', {
  public_id: videoPublicId,
  resource_type: 'video',
  raw_convert: 'google_speech'
})
.then(result => {
  // Create a promise that adds the transcription as a subtitle overlay to the video
  return new Promise((resolve, reject) => {

    // Specify the subtitle overlay as "subtitles:public_id.transcript"
    const subtitlesOverlay = `subtitles:${transcriptPublicId}`;

    // Set the transformation options for the video, including the subtitle overlay
    const transformationOptions = [
      {overlay: subtitlesOverlay},
      {flags: "layer_apply"}
    ];

    // Generate a URL for the video with the subtitle overlay
    const videoUrl = cloudinary.url(videoPublicId, {
      resource_type: 'video',
      transformation: transformationOptions
    });

    // Resolve the promise with the video URL
    resolve(videoUrl);
  });
})
.then(result => console.log(result)) // Print the video URL to the console
.catch(error => console.error(error)); // Handle any errors that occur
Running the code above yields the following result:

To verify your upload, follow the URL in the terminal output or head to the Media Library tab in your Cloudinary account. If the process was successful, you’ll be able to see your video and its transcription:
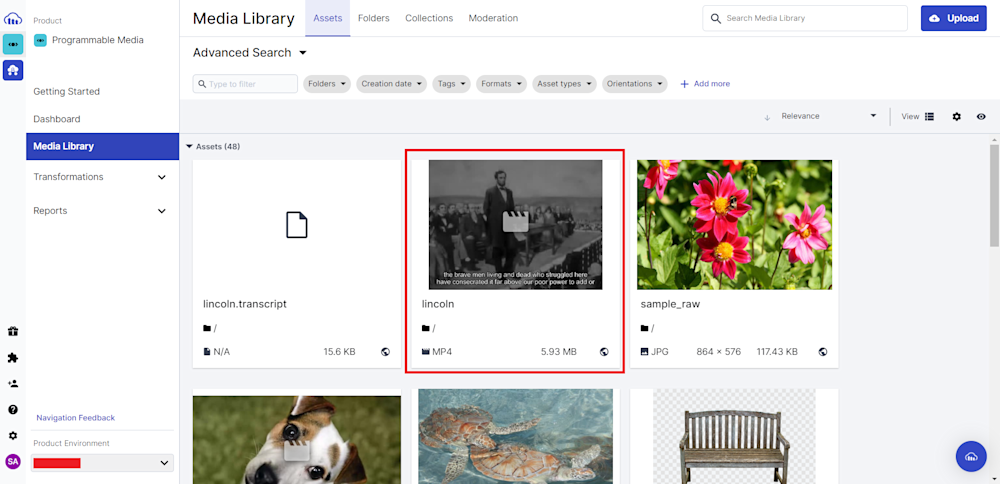
Here is what our video looks like:

Export and Plans
Since the subtitle generation runs directly in the cloud, all processed videos are stored in your Cloudinary account. You can access them via a generated URL or through the Media Library dashboard.
The Google AI Video Transcription add-on comes with a free tier, making it easy to test before scaling up. Paid usage is based on consumption, so pricing depends on how many minutes of transcription you need.
Pros and Cons
Pros:
- Fully cloud-based workflow, no manual editing tools needed
- Integrated with Cloudinary’s media pipeline (store, optimize, deliver)
- Strong transcription accuracy powered by Google AI
- Free plan available
Cons:
- Limited subtitle styling/customization compared to dedicated editors
- Requires basic setup with Node.js and Cloudinary SDK
- Accuracy still depends on audio quality/context
2. Happy Scribe
Happy Scribe is a versatile transcription and subtitling tool that offers both automatic and human-powered transcription services. You can use Happy Scribe not just for generating subtitles, but also for repurposing audio or video content, perfect if you want to turn a podcast episode or long video into a blog post or ebook. Uploading is simple: drag and drop your files or paste in a video URL.
After you upload your file, Happy Scribe calculates how long it will take to create your transcript. This might be a little slower than some options, however, we’re only talking about a few extra minutes, which isn’t a major concern.
Accuracy and Editing
Accuracy is generally strong, it handles word recognition well but can stumble on grammar and context. If you use the free automated transcription, expect to do a quick cleanup, fixing punctuation and small errors.
The subtitle editor lets you adjust font, size, colors, background, and position. However, customization is somewhat limited: you can only shift subtitles vertically (up or down) and settings apply to the entire video, not individual scenes.
When finished, you can export your project either as a burned-in video file or as a separate .srt or .vtt file.
Pricing
Happy Scribe doesn’t offer a free plan. Their lowest tier is a pay-as-you-go model, starting with 10 minutes of free transcription. From then on, it’s $12 for 60 minutes of AI transcription, with human proofreading running at $2/minute.
Moving to their paid plans:
- $9/mo gives you 60 minutes of transcription time.
- $29/mo gives you 600 minutes of transcription time.
- $89/mo gives you 6000 minutes of transcription time (and cuts human proofreading down to $1.90/min)
Pros and Cons
Pros:
- Simple and intuitive interface
- Clean, user-friendly design
Cons:
- Limited subtitle styling options
- Slightly slower transcription than some tools
3. Rev.com
Rev.com is a popular transcription and subtitling platform known for its high accuracy and professional results. The service allows you to convert audio and video into text or captions with ease, thanks to its user-friendly interface. Uploading files is easy, and you can also paste direct links, though notably, YouTube uploads aren’t supported, which may be inconvenient for some users.
Accuracy and Editing
Rev.com is one of the most accurate services available, promising up to 99% accuracy for their human transcription services. However, some users on social media claim that Rev uses AI and humans, despite paying for just human transcription services. This leaves it as a bit of a mixed bag, with accuracy still generally being accurate.
Free Trial and Limitations
Unlike some competitors, Rev.com doesn’t offer a fully free plan. Instead, you can get 45 minutes of free AI transcription per month, and access to the pay-per-minute human transcriptions. Compared to the lowest paid plan ($9.99/mo) you get 20 hours of AI transcription and a 15% discount on human transcription.
Pros and Cons
Pros:
- Exceptional accuracy
- Fast turnaround time
- Intuitive, user-friendly interface
Cons:
- Relatively expensive, especially at scale
- No option to preview subtitled videos before payment
4. VEED.IO
VEED.IO is more than just a subtitle generator; it’s an AI-powered video creation platform. While most of the platform’s other features may not interest you (such as creating AI-generated “avatars” to communicate for you), they do offer a fully-featured video editing platform with translations and subtitles.
Accuracy and Editing
VEED.IO delivers highly accurate transcriptions with few errors compared to competitors. A standout feature is its “low confidence word” highlighting: any words the AI isn’t sure about appear in orange, making proofreading quick and efficient. In most cases, you’ll spend minimal time correcting mistakes.
Export and Free Plan
Videos can be exported in MP4 format with subtitles included. However, the free plan comes with significant limitations:
- Videos are exported in 720p only
- A large VEED.IO watermark is added to every free video
- Videos can’t be longer than 10 minutes or larger than 1GB
- You are limited to 2 minutes of automatic subtitle generation per month
Beyond that, their lowest paid tier comes with 144 hours/year of subtitle generation.
Pros and Cons
Pros:
- Get started instantly, no account required
- High transcription accuracy with highlighted “low confidence” words
- Excellent subtitle customization and styling options
Cons:
- Free plan only offers 2 minutes of subtitle generation
- Free plan limited to SD quality
5. Subly
Subly is an AI-powered subtitling platform designed to make adding captions to your videos quick and effortless. Supporting 40+ languages, it combines a user-friendly interface with advanced transcription technology to generate captions in just a few clicks.
You can start by uploading a video file or entering a URL (including YouTube links). Under the Subtitle menu, simply select the auto-transcription option, and Subly will generate captions for your video.
Accuracy and Editing
Subly delivers solid transcription accuracy, though punctuation can sometimes trip it up, for example, inserting full stops during mid-sentence pauses. This means a quick manual review is recommended to polish the captions before finalizing them.
Where Subly really stands out is in its styling and customization options. Users can adjust font, size, and style, with enhancements like outlines, drop shadows, and solid backgrounds.
Pricing
As of September 2025, Subtly no longer has any public information about their pricing or plans, requiring you to contact them for a custom demo.
Pros and Cons
Pros:
- AI transcription across 40+ languages
- Extensive styling options for captions
Cons:
- No pricing information makes it tough to recommend without any hint of what is included.
Make Subtitles A Breeze with Cloudinary
Designers and developers aiming to increase the accessibility of their video content will find automatic subtitle generation a game-changer. Not only does adding subtitles make your content more accessible to users, but it’s also a massive improvement for your overall user experience. Plus, with modern AI-powered tools like Cloudinary, it’s never been easier.
Cloudinary’s sophisticated algorithms and adaptable styling options make it simple to create precise and aesthetically pleasing subtitles that improve the viewing experience for all viewers.So why not try Cloudinary?
Get a free account right now to discover how automating the production of subtitles might enhance your content creation workflow.
More from Cloudinary:

