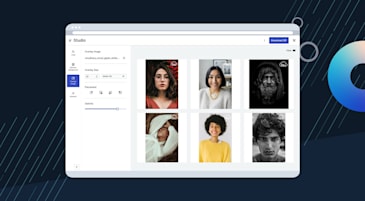
A portfolio starts with a file picker, but it rarely ends there. Visitors use different screens and browsers. Editors need accessible descriptions. A A portrait may need a different crop from a gallery card. Videos need a capable player. Every byte still has to reach the visitor quickly.
This tutorial builds Media Quest, a playful portfolio studio that handles that complete path. You will upload images and videos directly to Cloudinary, read them back in a Next.js Server Component, explore responsive transformations, and let Cloudinary AI Vision generate and persist alt text plus captions. A Server Action provides protected AI backfill for older images. The home route is the working product rather than a marketing page.
The key proof is refresh persistence: upload an asset, refresh the browser, and the same asset returns from Cloudinary Search API. This is not a local array dressed up as a gallery.
Media Quest includes four connected stations:
- Upload Mission opens Cloudinary Upload Widget with local file, camera, and remote URL sources, or generates a managed image through Cloudinary’s multi-model Image Generation API.
- Portfolio Vault reads persisted images and videos from one Cloudinary asset folder, then adds search and resource-type filters.
- Transformation Lab derives several visual treatments from one original, including automatic-gravity cropping and opt-in generative fill.
-
Delivery Board explains responsive
srcset, automatic format and quality, the delivery hostname, and CDN caching.
Open any asset to inspect its dimensions and delivery URL. The detail sheet also displays a read-only AI story. Cloudinary AI Vision creates distinct alt text and a portfolio caption, while the app validates and stores both as Cloudinary context metadata. You do not write either field manually.
The browser can select files and shows immediate feedback. It shouldn’t receive an API secret. The server is good at authenticated Search API queries and controlled metadata writes, and shouldn’t become an unnecessary media proxy.
This split gives each layer one clear job:
Browser -> Upload Widget -> Cloudinary
Bounded recent upload -> Analyze API -> alt text + caption -> context
Cloudinary -> Search API -> Server Component -> gallery
Older asset -> Server Action -> AI Vision -> Cloudinary metadata
Public ID -> transformation URL -> CDN -> visitor
Code language: PHP (php)
Cloudinary’s Upload Widget supports direct uploads while an unsigned upload preset supplies account-side restrictions. The Cloudinary Upload Widget documentation and upload preset documentation cover the available sources and preset controls.
Next.js Server Components keep the Admin API credentials out of the client bundle. A Server Action lets an authorized editor trigger AI backfill for an older asset without accepting author-written metadata. See the current Next.js Server Actions guide for the framework’s security and validation recommendations.
You need:
- Node.js 20.9 or newer
- A Cloudinary account
- The Cloudinary AI Vision add-on for automatic image descriptions
- The Cloudinary Image Generation add-on for the optional generation path
- Basic React and TypeScript familiarity
- About 30 minutes for the core path
Clone the project, install the packages, and create your local environment file:
npm install
cp .env.example .env.local
Code language: CSS (css)
The project uses Next.js 16, React 19, next-cloudinary, the Cloudinary Node
SDK, Zod, Tailwind CSS, and shadcn/ui. Its playful TweakCN theme uses
self-hosted fonts, rounded cards, bright yellow action surfaces, and purple
progress accents.
Open the Cloudinary Console, choose Settings, open Upload, and add an upload preset.
Use these values:
- Preset name:
media_portfolio_unsigned - Signing mode: Unsigned
- Asset folder:
media-portfolio - Allowed formats:
jpg,jpeg,png,webp,avif,gif,mp4,webm,mov
Set account-level file-size restrictions that match your product. The demo also asks the widget to allow at most eight queued files, 12 MB images, and 80 MB videos. Browser options improve the experience, but the preset is the enforcement boundary.
Add the public upload values to .env.local:
NEXT_PUBLIC_CLOUDINARY_CLOUD_NAME=your_cloud_name
NEXT_PUBLIC_CLOUDINARY_UPLOAD_PRESET=media_portfolio_unsigned
These values may reach the browser. An unsigned preset is not a secret, so it
must be narrow. Never add NEXT_PUBLIC_ to an API secret.
UploadMission is a Client Component because the widget needs browser events.
The essential integration is compact:
<CldUploadWidget
  uploadPreset={uploadPreset}
  config={{ cloud: { cloudName } }}
  options={{
    sources: ["local", "camera", "url"],
    multiple: true,
    maxFiles: 8,
    resourceType: "auto",
  }}
  onSuccess={(result) => addOptimisticAsset(result)}
  onQueuesEnd={(_, { widget }) => {
    widget.close();
    router.refresh();
  }}
>
  {({ open }) => (
    <Button onClick={() => open()}>Upload media</Button>
  )}
</CldUploadWidget>
Code language: HTML, XML (xml)
The actual component performs result type checks, reports status through an
aria-live region, and adds a temporary optimistic card. When the queue ends,
router.refresh() asks the Server Component for Cloudinary’s persisted view.
For images, it also forwards the immutable asset ID, public ID, and version to
/api/describe. The server reads the asset back and requires the exact
portfolio folder, preset tag, resource type, matching creation version, and a
15-minute window before AI Vision can spend quota.
The app detects Cloudinary folder mode. The widget sends
asset_folder=media-portfolio for dynamic folders or
folder=media-portfolio for a legacy fixed-folder environment. The unsigned
preset defines the same destination as the authoritative value.
Read the full implementation in
src/components/upload-mission.tsx.
This path is efficient because the file travels from the visitor to Cloudinary. Your Next.js function does not buffer a large image or video.
The Upload Mission also has a Generate tab. It follows the same managed asset pattern used in the companion image-generation project: The browser sends a prompt, model family, tier, and portfolio edit token to a Node.js Route Handler. The Cloudinary API key and secret remain on the server.
Enable the
Cloudinary Image Generation add-on,
then create a signed preset named media_portfolio_generations. Set its
dynamic Asset folder or legacy Folder to the same media-portfolio
value used by the unsigned Upload Widget preset.
Add the preset name to .env.local:
CLOUDINARY_IMAGE_GENERATION_PRESET=media_portfolio_generations
The route maps five allowlisted model families and standard or premium tiers
to current model IDs. It calls the account-scoped text_to_image endpoint with
HTTP Basic authentication:
const response = await fetch(
  `https://api.cloudinary.com/v2/generate/${cloudName}/text_to_image`,
  {
    method: "POST",
    headers: {
      Authorization: `Basic ${authorization}`,
      "Content-Type": "application/json",
    },
    body: JSON.stringify({
      prompt,
      model: { id: modelId },
      target: {
        target_type: "managed_asset",
        public_id: generatedId,
        upload_preset: generationPreset,
      },
    }),
  },
);
Code language: JavaScript (javascript)
The request has a 120-second timeout because image generation takes longer than a metadata write. The edit token protects add-on credits in this single-user demo. A public multi-user product should add authentication, durable rate limiting, ownership checks, and account quota monitoring.
Folder consistency is verified rather than assumed. Before spending quota,
the route reads the generation preset through Admin API and confirms it is
signed and targets media-portfolio through the mode-appropriate folder
field. After generation, it reads the immutable asset ID and verifies the
stored folder again. The gallery likewise chooses asset_folder for dynamic
folders or folder for fixed folders, so both uploads and generations remain
visible after refresh. The protected generation route then asks AI Vision for
alt text and a caption before returning the generated asset.
Add the server-only values to .env.local:
CLOUDINARY_API_KEY=your_api_key
CLOUDINARY_API_SECRET=your_api_secret
CLOUDINARY_PORTFOLIO_FOLDER=media-portfolio
CLOUDINARY_IMAGE_GENERATION_PRESET=media_portfolio_generations
PORTFOLIO_ADMIN_TOKEN=create_a_long_random_token
The Cloudinary module begins with import "server-only". That guard makes an
accidental client import fail during development instead of leaking privileged
code into the browser.
The home page is a Server Component:
export default async function Home() {
  await connection();
  const snapshot = await getPortfolioSnapshot();

  return (
    <main>
      <MediaStudio snapshot={snapshot} />
    </main>
  );
}
Code language: JavaScript (javascript)
connection() tells Next.js that the result belongs to request time. Live
Cloudinary data is not frozen into a production build.
getPortfolioSnapshot() configures the Node SDK and queries Search API:
const folderMode = await resolveFolderMode();
const folderField = folderMode === "fixed" ? "folder" : "asset_folder";

const result = await cloudinary.search
  .expression(`${folderField}="${PORTFOLIO_FOLDER}"`)
  .sort_by("created_at", "desc")
  .max_results(40)
  .with_field("context")
  .with_field("tags")
  .execute();
Code language: JavaScript (javascript)
The function treats the SDK response as external data, checks field types, and
returns a smaller PortfolioAsset shape. This prevents rendering code from
depending on every detail of the Admin API response. The current
Cloudinary Search API reference
explains expressions, sorting, fields, and pagination.
When credentials are absent, Media Quest enters a labelled demo mode with
public assets from Cloudinary’s demo cloud. Upload and metadata setup states
remain visible. It never claims those samples are the user’s persistent data.
The portfolio doesn’t create and upload five copies of every image. It keeps one original and expresses each layout need as a transformation.
The gallery cards use CldImage, a width and height, responsive sizing hints,
and accessible alt text. The component generates a responsive srcset while
Cloudinary applies automatic format and quality delivery. f_auto can choose
an efficient browser-supported format, while q_auto balances visual quality
and bytes. Cloudinary documents both in its
image optimization guide.
The Transformation Lab makes the URL model visible:
- Fit preserves the complete frame inside a landscape box.
- Smart crop uses fill cropping with automatic gravity to protect the visually relevant region.
- Portrait first identifies the subject, then creates an editorial vertical composition.
- Grayscale changes the treatment without creating another stored source.
- Generative fill expands the image to a new aspect ratio when the user explicitly enables it.
Generative transformations can add processing cost and may require human review. Media Quest labels that choice and leaves it off by default. This is a more honest product pattern than silently spending transformation credits.
Cloudinary transformations are URL instructions. Different transformation URLs become separately cacheable derived assets, while the original remains available for future designs. Use the transformation reference when adding effects beyond this lab.
Alt text and captions have related but different jobs. Alt text communicates visible, relevant content when the image is unavailable. A portfolio caption can add editorial framing for every visitor. Reusing one generic sentence for both weakens that distinction.
Register for the
Cloudinary AI Vision add-on.
The server calls AI Vision General through the
Analyze API with the
immutable Cloudinary asset ID. One prompt includes a JSON Schema requiring
separate alt and caption strings:
const response = await fetch(
  `${analysisBaseUrl}/analyze/ai_vision_general`,
  {
    method: "POST",
    headers: {
      Authorization: `Basic ${authorization}`,
      "Content-Type": "application/json",
    },
    body: JSON.stringify({
      source: { asset_id: asset.assetId },
      prompts: [descriptionPrompt],
    }),
  },
);
Code language: JavaScript (javascript)
Structured output arrives as a JSON string inside
data.analysis.responses[0].value. The app parses it, validates both strings
with Zod, and rejects malformed or oversized output before writing anything.
It then stores the result with the asset:
await cloudinary.uploader.explicit(asset.publicId, {
  type: "upload",
  resource_type: "image",
  context: {
    alt,
    caption,
    ai_description_source: "cloudinary_ai_vision",
    ai_description_model: modelVersion,
  },
});
Code language: CSS (css)
The helper reads the immutable asset ID back and compares the persisted metadata with the generated values. This makes Cloudinary, rather than React state, the source of truth.
Two automatic triggers cover new images:
- Upload Widget returns the immutable asset ID, public ID, and version. The description route verifies those values against a recent, tagged image in the exact portfolio folder before calling AI Vision.
- Image Generation already runs behind the edit token, so its route calls AI Vision immediately after folder verification.
An older image without metadata displays one Generate story with Cloudinary
AI action. Its Server Action accepts only assetId and the edit token. It
does not accept manually written alt text or captions.
Read the full workflow in
src/lib/cloudinary-description.ts,src/app/api/describe/route.ts, andsrc/app/actions.ts.
AI-generated text still needs an editorial review policy. Automation removes repetitive writing, but it does not guarantee Web Content Accessibility Guidelines (WCAG) conformance or prevent every unsupported inference.
Start the project:
npm run dev
Open http://localhost:3000, upload an image, and watch it appear. Then perform
the important test:
- Refresh the browser.
- Confirm the uploaded asset remains.
- Open Generate and create one standard-tier managed image.
- Confirm the response verifies the folder and stores AI metadata.
- Open either asset’s detail sheet.
- Inspect the read-only AI alt text and portfolio caption.
- Refresh again and confirm both fields remain without manual writing.
- Open the Delivery Board and inspect the generated URL.
The app also exposes /api/health. It reports readiness booleans and the asset
folder without returning credential values.
Run the full local verification before deployment:
npm run check
That command runs ESLint, TypeScript, and an optimized production build.
A Cloudinary delivery URL normally uses res.cloudinary.com. On the first
request for a transformation, Cloudinary produces or retrieves the derived
asset and delivers it through the configured CDN. Subsequent requests can be
served from edge caches close to visitors.
Private CDN distributions and custom delivery hostnames require account configuration. Cloudinary also offers smart and dynamic multi-CDN capabilities for eligible accounts, generally as enterprise delivery features. They are configured at the Cloudinary account and delivery layer, not activated by a React state toggle.
Media Quest shows the active delivery hostname and accepts optional
NEXT_PUBLIC_CLOUDINARY_SECURE_DISTRIBUTION and
NEXT_PUBLIC_CLOUDINARY_PRIVATE_CDN values. Only set them after Cloudinary has
configured that distribution for your account. Read
Cloudinary’s advanced URL delivery options
for the current requirements.
This separation is powerful: application code asks for the media variant, and the delivery configuration decides how that response reaches the visitor.
The demo includes several patterns that belong in production work:
- Gallery images have intrinsic dimensions, responsive size hints, and lazy loading outside the leading content.
- The video player is dynamically imported only when a video detail view needs it.
- Search uses
useDeferredValue, keeping typing responsive as the gallery filters. - Alt text is stored with the asset instead of scattered through page code.
- Loading, empty, error, demo, and incomplete-setup states are distinct.
- Upload status uses a polite live region.
- Motion is reduced when the visitor requests reduced motion.
- Server credentials remain in a module guarded by
server-only.
Performance is a system property. Cloudinary reduces media weight, while Next.js controls rendering and JavaScript boundaries. The best result comes from using both intentionally.
Once the core proof works, extend one boundary at a time:
- Add signed uploads when users need dynamic, trusted upload parameters.
- Add authentication and per-user asset folders.
- Add durable per-user limits for Image Generation API credits.
- Add durable per-user limits for AI Vision analysis tokens.
- Create a webhook-driven moderation or AI-tagging workflow.
- Paginate Search API results with
next_cursor. - Add a comparison panel that records transferred bytes through the browser Performance API.
- Generate social cards with a Cloudinary overlay transformation.
- Add an authenticated delete flow with confirmation and an audit trail.
- Connect a configured private CDN or enterprise multi-CDN account and compare cache headers across regions.
The most important design principle remains the same: Store the original once, keep privileged operations on the server, and derive delivery-ready media at the edge.
Ready to start building? Sign up for a free Cloudinary account today and build better visual media experiences.
Is an unsigned upload preset safe?
Why use Search API instead of keeping upload results in React state?
Why use both a route handler and a Server Action for AI metadata?
Does generated alt text guarantee accessibility?
Does f_auto,q_auto mean every visitor receives the same file?
Does this app enable Cloudinary multi-CDN?
Can the same approach handle video?
resourceType: "auto", the server normalizes image and video results, and video details load Cloudinary Video Player. Production video workflows may add eager transformations, adaptive streaming, captions, and webhook status handling.Are Cloudinary-generated images stored with uploads?
managed_asset generation target stores the generated original in the Cloudinary product environment. This project applies a signed preset and then verifies that its asset folder matches the Upload Widget’s media-portfolio folder.