
Editing and processing videos on the backend is a common requirement for many modern web applications. Whether it’s trimming user uploads, resizing clips for mobile, or converting formats for compatibility, automating these tasks saves time and resources. With PHP and FFmpeg, you can handle video transformations directly in your server-side code using simple, scriptable logic.
In this article, we will walk through how to build a PHP video editor using FFmpeg and PHP-FFMpeg. We will also explore browser-based examples, cloud-based workflows with Cloudinary, and tips for scaling video pipelines in production environments.
Key takeaways
- PHP-FFMpeg provides a powerful wrapper around FFmpeg, letting you trim, resize, merge, or convert videos using clean PHP syntax.
- You can create both CLI and browser-based video tools using simple forms and a few lines of PHP.
- Video workflows can be scaled with job queues, webhooks, and cloud APIs for faster processing and better performance.
Defining a PHP Video Editor: Libraries, APIs, and FFmpeg Wrappers
A PHP video editor, as the name suggests, is a PHP-based backend tool used to process video files. It allows for automating everyday video processing tasks, such as trimming, resizing, merging, or adding captions.
At the core of most PHP video editors is the FFmpeg library. It’s an open-source command-line utility that handles almost everything related to multimedia. With FFmpeg, we can convert formats, adjust bitrate, add filters, or grab thumbnails. The only downside is that working with raw FFmpeg commands in PHP isn’t always clean or maintainable.
That’s where wrappers come in. Libraries like PHP-FFmpeg make it easier to control FFmpeg from PHP code. Instead of writing full command strings, we use PHP methods to apply transformations. PHP-FFmpeg also provides a clear structure and improved error handling.
Some teams prefer to avoid local FFmpeg installs entirely. In that case, cloud-based video APIs like Cloudinary can efficiently perform advanced video processing tasks without requiring us to manage the infrastructure ourselves. These services automatically handle encoding and scaling, returning ready-to-play video URLs.
How to Create a PHP Video Editor
Before we can start writing code to trim or resize videos with PHP, we need to set up the tools. This includes installing FFmpeg, adding the PHP-FFmpeg library to our project, and ensuring PHP can access all necessary resources. Here’s the whole setup, step by step.
1. Create A New PHP Project Folder
We start by creating a directory to work in. This will hold all our PHP scripts and any test videos we process.
mkdir php-video-editor
cd php-video-editor
2. Install Composer
Composer is the package manager we use to install PHP libraries. Depending upon your OS, follow these steps to install Composer.
# Linux (Ubuntu/Debian):
sudo apt update
sudo apt install composer

# macOS:
brew install composer
Windows:
Download and run the Composer installer from getcomposer.org.
Once installed, check the version to confirm with composer --version
3. Install PHP-FFMpeg using Composer
In your project folder, install the wrapper library:
composer require php-ffmpeg/php-ffmpeg
This creates a vendor/ directory and installs all dependencies. We will use Composer’s autoloader in our scripts later.
4. Install FFmpeg and FFprobe
PHP-FFMpeg relies on FFmpeg and FFprobe to do the actual media work. Both must be installed and available in your system path.
# Linux (Ubuntu/Debian):
sudo apt install ffmpeg

# macOS:
brew install ffmpeg
Windows:
Download the static build from ffmpeg.org, extract it, and add the bin/ folder to your system’s PATH environment variable. This makes both ffmpeg and ffprobe available from the command line.
Once installed, check both tools:
ffmpeg -version
ffprobe -version
5. Run a quick test script
We can now test the setup by creating a simple PHP file. Inside your project folder, create “test.php”:
<?php
require 'vendor/autoload.php';

use FFMpeg\FFMpeg;

$ffmpeg = FFMpeg::create();
$video = $ffmpeg->open('sample.mp4');

echo "Video loaded successfully.\n";
Make sure you have a test video named sample.mp4 in the same folder, or update the filename. Run the script, and if no errors appear and you see the success message, everything is working.
Quick Start: Rendering Your First Video with a PHP Editor
Now that everything is set up, let’s walk through a couple of examples of how to use a PHP video editor for video editing tasks. We will use this video as “sample.mp4” in the following code.
Converting video formats
<?php
require 'vendor/autoload.php';

use FFMpeg\FFMpeg;
use FFMpeg\Format\Video\WebM;

$ffmpeg = FFMpeg::create();
$video = $ffmpeg->open('sample.mp4');

$video->save(new WebM(), 'output.webm');

echo "Video converted to WebM format.\n";
The above script loads a “sample.mp4” video file and saves it as “output.webm”. If the script runs without errors, the conversion worked.
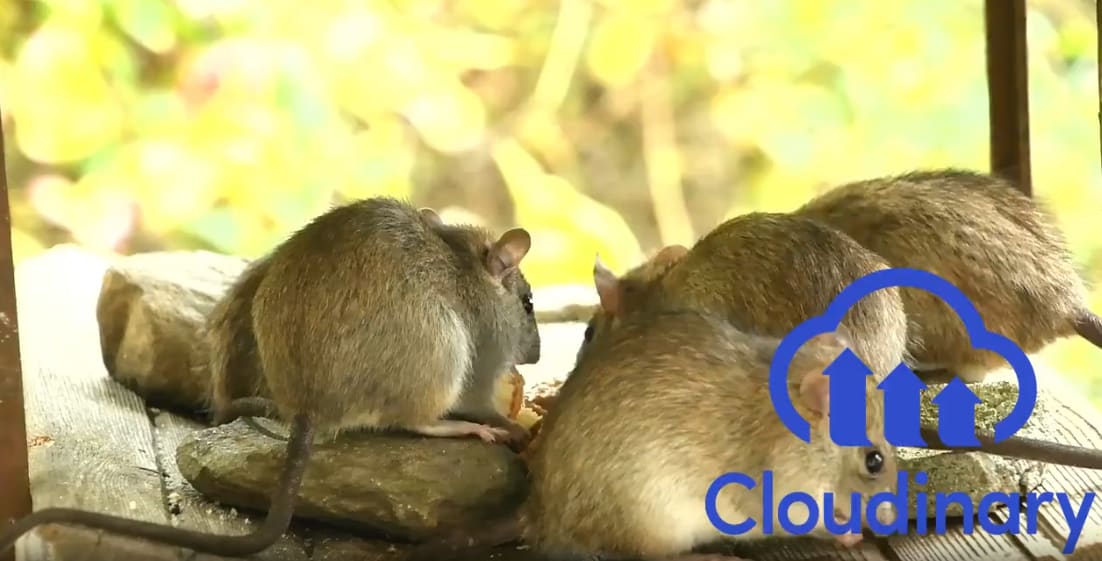
Add a watermark image to the video
<?php
require 'vendor/autoload.php';

use FFMpeg\FFMpeg;
use FFMpeg\Format\Video\X264; // This line is required for saving the video

$ffmpeg = FFMpeg::create();
$video = $ffmpeg->open('sample.mp4');

// Apply watermark
$video->filters()->watermark('logo.png', [
    'position' => 'relative',
    'bottom' => 20,
    'right' => 20,
]);

// Save output
$video->save(new X264(), 'watermarked_output.mp4');

echo "Video saved with watermark.\n";
Here is how the output video looks with the logo:
Real-World Use Cases for PHP Video Editors
A PHP video editor can play a valuable role in many backend workflows that require video processing. From user uploads to automated video marketing, here are a few common scenarios where this setup works well.
User-generated content platforms (UGC)
Websites and apps that allow user-generated videos often need to standardize or clean up those files before publishing. A PHP video editor can automatically trim long videos, generate thumbnails for previews, and resize videos to fit a consistent layout. It can also be used to add watermarks or time limits before content goes live.
E-commerce and product showcases
In e-commerce, product videos are becoming more important for driving engagement and conversions. A backend editor can help prepare those videos for publishing by optimizing resolution, compressing file sizes, or converting formats for different devices.
Marketing automation
Marketing teams often need to process and repurpose content quickly. This includes creating short promo clips, adding subtitles, or re-encoding videos for social platforms. With PHP and FFmpeg, these workflows can be scripted and automated. For example, a marketing platform might let teams upload a testimonial and automatically add captions, compress it for mobile, and save it in multiple formats.
SaaS and custom platforms
Any SaaS product that involves media, such as a video messaging tool, a social feed builder, or a content management platform, can benefit from automated video editing. PHP is a common backend choice for these apps, and with FFmpeg, we can handle all video transformations within the same codebase. Videos can be edited on the fly, queued for background processing, or integrated into user-facing dashboards.
Example Code Snippets: Join, Resize, Add Captions, and Generate Thumbnails
Now that we have explored what PHP-FFMpeg can do, let’s try it out in a browser. We will build a simple web interface that allows us to upload a video and perform common editing tasks like trimming, resizing, generating a thumbnail, or joining two clips.
We will create two files inside our project: an HTML upload form and a PHP script that processes the video.
Step 1: Create the HTML form
In the root of your project folder, create a file called index.html with the following content:
<!DOCTYPE html>
<html>
<head>
<title>PHP Video Editor</title>
<style>
body {
font-family: Arial, sans-serif;
display: flex;
flex-direction: column;
align-items: center;
justify-content: center;
height: 100vh;
margin: 0;
background: #f8f8f8;
}
form {
background: #fff;
border: 1px solid #ccc;
padding: 30px;
border-radius: 8px;
text-align: center;
box-shadow: 0 2px 5px rgba(0,0,0,0.1);
}
button {
margin: 5px;
padding: 10px 15px;
}
input[type="file"] {
margin: 5px 0;
}
</style>
</head>
<body>
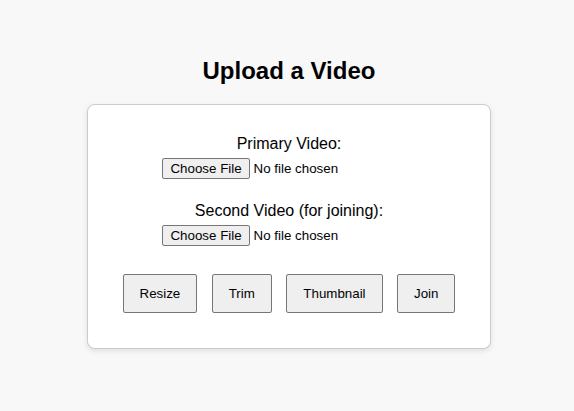
<h2>Upload a Video</h2>
<form action="process.php" method="POST" enctype="multipart/form-data">
<label>Primary Video:</label><br />
<input type="file" name="video" accept="video/*" required /><br /><br />
<label>Second Video (for joining):</label><br />
<input type="file" name="video2" accept="video/*" /><br /><br />
<button type="submit" name="action" value="resize">Resize</button>
<button type="submit" name="action" value="trim">Trim</button>
<button type="submit" name="action" value="thumbnail">Thumbnail</button>
<button type="submit" name="action" value="join">Join</button>
</form>
</body>
</html>
The form looks like this:
Step 2: Create the PHP processor
In the same folder, create a file called process.php and add the following code in it.
<?php
require 'vendor/autoload.php';

use FFMpeg\FFMpeg;
use FFMpeg\Coordinate\TimeCode;
use FFMpeg\Coordinate\Dimension;
use FFMpeg\Format\Video\X264;

if (!isset($_FILES['video']) || $_FILES['video']['error'] !== UPLOAD_ERR_OK) {
    exit('No file uploaded or error in upload.');
}

if (!is_dir('uploads')) mkdir('uploads');
if (!is_dir('outputs')) mkdir('outputs');

// Save first video
$uploadedFile = $_FILES['video']['tmp_name'];
$originalName = basename($_FILES['video']['name']);
$fileHash = md5_file($uploadedFile);
$targetPath = "uploads/{$fileHash}_{$originalName}";

if (!file_exists($targetPath)) {
    move_uploaded_file($uploadedFile, $targetPath);
}

$ffmpeg = FFMpeg::create();
$video = $ffmpeg->open($targetPath);

$action = $_POST['action'] ?? '';
$outputFile = '';

switch ($action) {
    case 'resize':
        $outputFile = 'outputs/resized_' . basename($targetPath);
        $video->filters()->resize(new Dimension(640, 480))->synchronize();
        $video->save(new X264(), $outputFile);
        echo "Video resized and saved to $outputFile";
        break;

    case 'trim':
        $outputFile = 'outputs/trimmed_' . basename($targetPath);
        $clip = $video->clip(TimeCode::fromSeconds(0), TimeCode::fromSeconds(5));
        $clip->save(new X264(), $outputFile);
        echo "Video trimmed and saved to $outputFile";
        break;

    case 'thumbnail':
        $outputFile = 'outputs/thumbnail_' . pathinfo($targetPath, PATHINFO_FILENAME) . '.jpg';
        $frame = $video->frame(TimeCode::fromSeconds(2));
        $frame->save($outputFile);
        echo "Thumbnail saved to $outputFile";
        break;

    case 'join':
        if (!isset($_FILES['video2']) || $_FILES['video2']['error'] !== UPLOAD_ERR_OK) {
            exit('Second video not uploaded for joining.');
        }

        $uploadedFile2 = $_FILES['video2']['tmp_name'];
        $originalName2 = basename($_FILES['video2']['name']);
        $fileHash2 = md5_file($uploadedFile2);
        $targetPath2 = "uploads/{$fileHash2}_{$originalName2}";

        if (!file_exists($targetPath2)) {
            move_uploaded_file($uploadedFile2, $targetPath2);
        }

        $absolutePath1 = realpath($targetPath);
        $absolutePath2 = realpath($targetPath2);
        $outputFile = 'outputs/joined_' . time() . '.mp4';

        $video1 = $ffmpeg->open($absolutePath1);
        $video1->concat([$absolutePath1, $absolutePath2])
               ->saveFromSameCodecs($outputFile, true);

        echo "Videos joined and saved to $outputFile";
        break;

    default:
        echo "Unknown action.";
}
The above code handles uploads, processes the selected action using PHP-FFMpeg, and saves the result in an outputs/ folder.
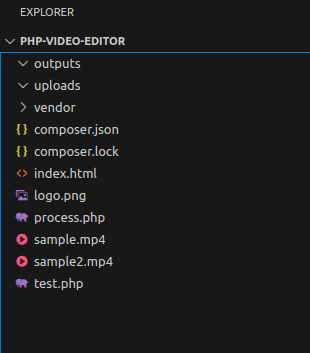
Make sure both uploads/ and outputs/ directories exist or are created by the script. Your folder should look similar to this. You can replace the videos with your own sample videos.
Step 3: Start the server and test
Run the built-in PHP development server:
php -S localhost:8000
Then open your browser and visit http://localhost:8000
You can now upload a video and click any of the action buttons. The result will be saved to the outputs/ directory in your project.
Scaling and Performance: Queues, Webhooks, and Cloud Rendering
Once we’ve got our PHP video editor working locally, the next challenge is scale. Processing one file at a time works for testing, but production systems often need to handle multiple videos in parallel. This is where performance strategies come into play.
Use Background Queues
Video rendering is resource-intensive and can slow down the user experience if done during a request. Instead of processing videos immediately in a form handler, it’s better to move them to a queue. Tools like Redis with Laravel Horizon or Symfony Messenger can help run video tasks in the background without blocking the main app.
Trigger Work with Webhooks
In some systems, especially where uploads come from external services or cloud storage, it’s useful to use webhooks. When a video is uploaded to a remote location (like S3 or Cloudinary), a webhook can notify your PHP backend to start processing the file. This makes the system more event-driven and decouples upload from processing.
Consider Cloud-based Platforms Like Cloudinary
If local servers can’t keep up or you need high availability, it might make sense to offload video processing to the cloud.
Cloudinary, for example, offers APIs to resize, trim, caption, or transform videos entirely in the cloud. It eliminates the need to manage servers or FFmpeg installs, and can handle high-volume jobs more efficiently.
You can use multiple front-end and back-end programming languages to optimize images and videos using Cloudinary.
Let’s look at an example of optimizing videos with the Cloudinary PHP API. Before you run the scripts below, sign up for Cloudinary and get your Cloudinary credentials.
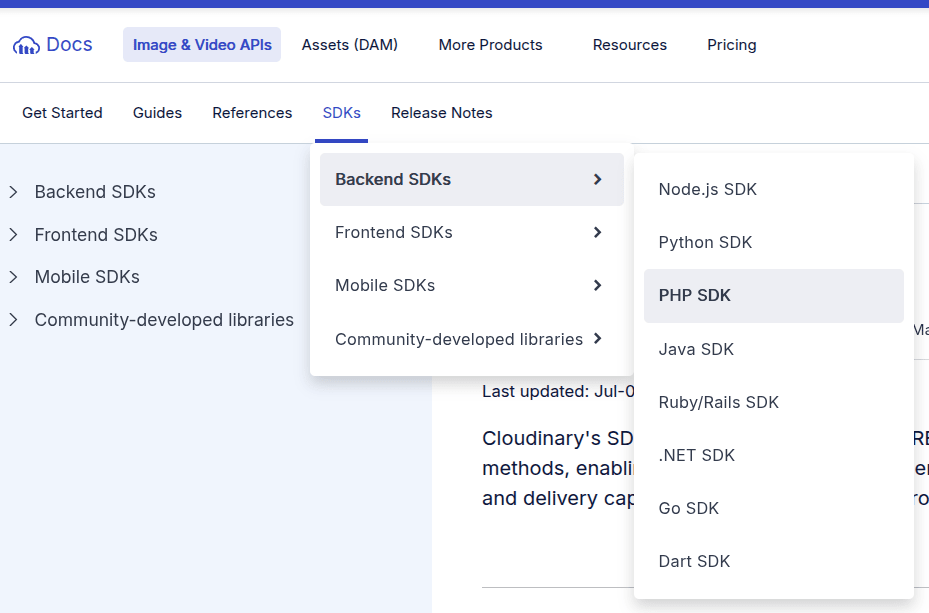
Next, install the Cloudinary PHP SDK and dotenv using Composer:
composer require cloudinary/cloudinary_php
composer require vlucas/phpdotenv
Create a .env file in your project root and replace your Cloudinary credentials in the following variable:
CLOUDINARY_URL=cloudinary://API_KEY:API_SECRET@CLOUD_NAME
Next, create a cloudinary_demo.php file in your root project directory and the following script:
<?php
require_once __DIR__ . '/vendor/autoload.php';

use Cloudinary\Cloudinary;
use Dotenv\Dotenv;
use Cloudinary\Transformation\Resize;

// Load environment variables
$dotenv = Dotenv::createImmutable(__DIR__);
$dotenv->load();

$cloudinary = new Cloudinary($_ENV['CLOUDINARY_URL']);

// Videos to upload and optimize
$videoPaths = [
    'sample.mp4',
    'sample2.mp4',
];

foreach ($videoPaths as $filePath) {
    if (!file_exists($filePath)) {
        echo "File not found: $filePath\n";
        continue;
    }

    $publicId = pathinfo($filePath, PATHINFO_FILENAME);

    echo "Uploading {$filePath} as {$publicId}...\n";

    // Upload video
    $uploadResult = $cloudinary->uploadApi()->upload(
        $filePath,
        [
            'resource_type' => 'video',
            'public_id' => $publicId,
        ]
    );

    // Generate optimized delivery URL
    $optimizedUrl = (string) $cloudinary->video($publicId)
        ->resize(
            Resize::scale()->width(512)
        )
        ->quality(30)
        ->format('auto');

    echo "Optimized video URL:\n{$optimizedUrl}\n\n";
}

echo "All uploads completed.\n";
Start your PHP server again, and navigate to http://localhost:8000/cloudinary_demo.php
Here, you’ll see the Cloudinary-processed URLs. These URLs will render transformed videos at runtime.
With this approach, your PHP backend uploads a single master video to Cloudinary. All resizing, quality adjustments, and format conversions are applied dynamically at delivery time using transformation URLs.
This allows you to:
- Avoid managing FFmpeg and encoding infrastructure
- Generate multiple optimized video versions without duplicating files
- Deliver videos globally through Cloudinary’s CDN
- Scale video processing independently from your PHP application
How to Choose the Right PHP Video Editor: Self-Hosted vs Cloud
When building a video editing workflow with PHP, one of the biggest decisions is whether to use a self-hosted setup or rely on a cloud-based API. Both options have their strengths, and the right choice depends on your use case and how much infrastructure you want to manage.
Go Self-Hosted if You Want Full Control
A local setup using PHP-FFMpeg and the FFmpeg binary gives us maximum flexibility. We can build exactly the processing steps we need, run jobs locally or in a queue, and tune performance to match our environment. This setup is ideal for teams already comfortable managing PHP servers or needing to avoid external services for privacy or cost reasons.
Use a Cloud Service if You Want Speed and Scale
If the priority is speed to launch, high availability, or scaling without managing infrastructure, a platform like Cloudinary offers a full-featured API for video editing and delivery. You can trim, resize, re-encode, or add captions with a single URL or API call. Cloudinary handles everything from media storage to global CDN distribution, making it a strong choice for production-scale apps. Cloudinary also supports on-the-fly video transformations, automatic format optimization, and AI-powered compression.
Use Both When It Makes Sense
Many teams benefit from a hybrid setup. You can prototype locally with PHP-FFMpeg and switch to Cloudinary when traffic grows or when processing needs outpace your backend.
Simplify your video content operations with Cloudinary’s automated management features. Join Cloudinary and take the hassle out of video management.
Frequently Asked Questions
Do I need to install FFmpeg separately if I’m using PHP-FFMpeg?
Yes. PHP-FFMpeg is just a wrapper. FFmpeg and FFprobe must be installed and accessible via the command line for the wrapper to work.
What video formats can I process with PHP-FFMpeg?
It depends on how your FFmpeg is compiled, but it typically supports MP4, WebM, AVI, MOV, and more. You can re-encode videos into any format supported by your FFmpeg binary.
Is Cloudinary free to use for video processing?
Cloudinary has a generous free tier, especially for image and video storage and transformations. For high-volume use, their paid plans offer more bandwidth, transformations, and features.

