Managing individual media assets

Last updated: Mar-22-2023

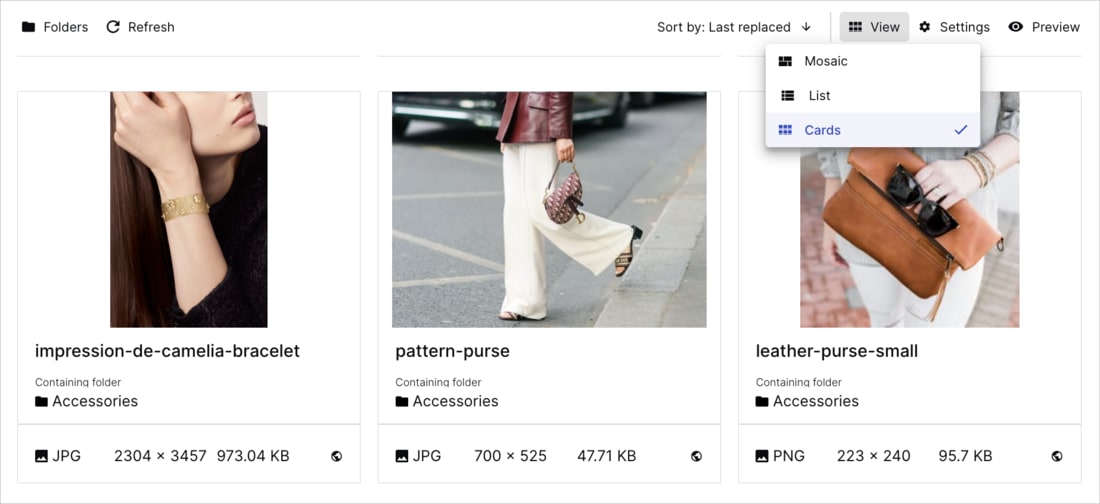
You can display your assets from any view (Assets, Folders, Collections, Moderation, etc.) as:

  • A grid of square thumbnail cards (Grid View). This view allows you to browse your assets as previews with descriptive details displayed on them.
  • An asset list (List View). This view allows you to see detailed information about all your assets in list format, providing a global view of your assets and enabling you to easily compare their data.

You can switch between these views using the View toggle button View toggle button at the top right of the main Asset Pane.

Asset card (Grid View) Asset list item (List View)

Note
The icon allows you to configure different display settings for the two views:
  • Grid View: The settings option allows you to customize your asset cards by selecting which descriptive details to display on the card and whether to always show them. If you don't select to always show the details, they'll be displayed only when you hover over a card.
  • List View: The settings option allows you to customize your list by choosing table columns to show information that suits your needs, including structured metadata fields. You can also sort your asset list in ascending or descending order by clicking on sortable columns.

Asset operations

For any displayed asset in any Media Library view, i.e., Assets, Folders, Collections, and Moderation, you can perform the following actions:

Action How to Details
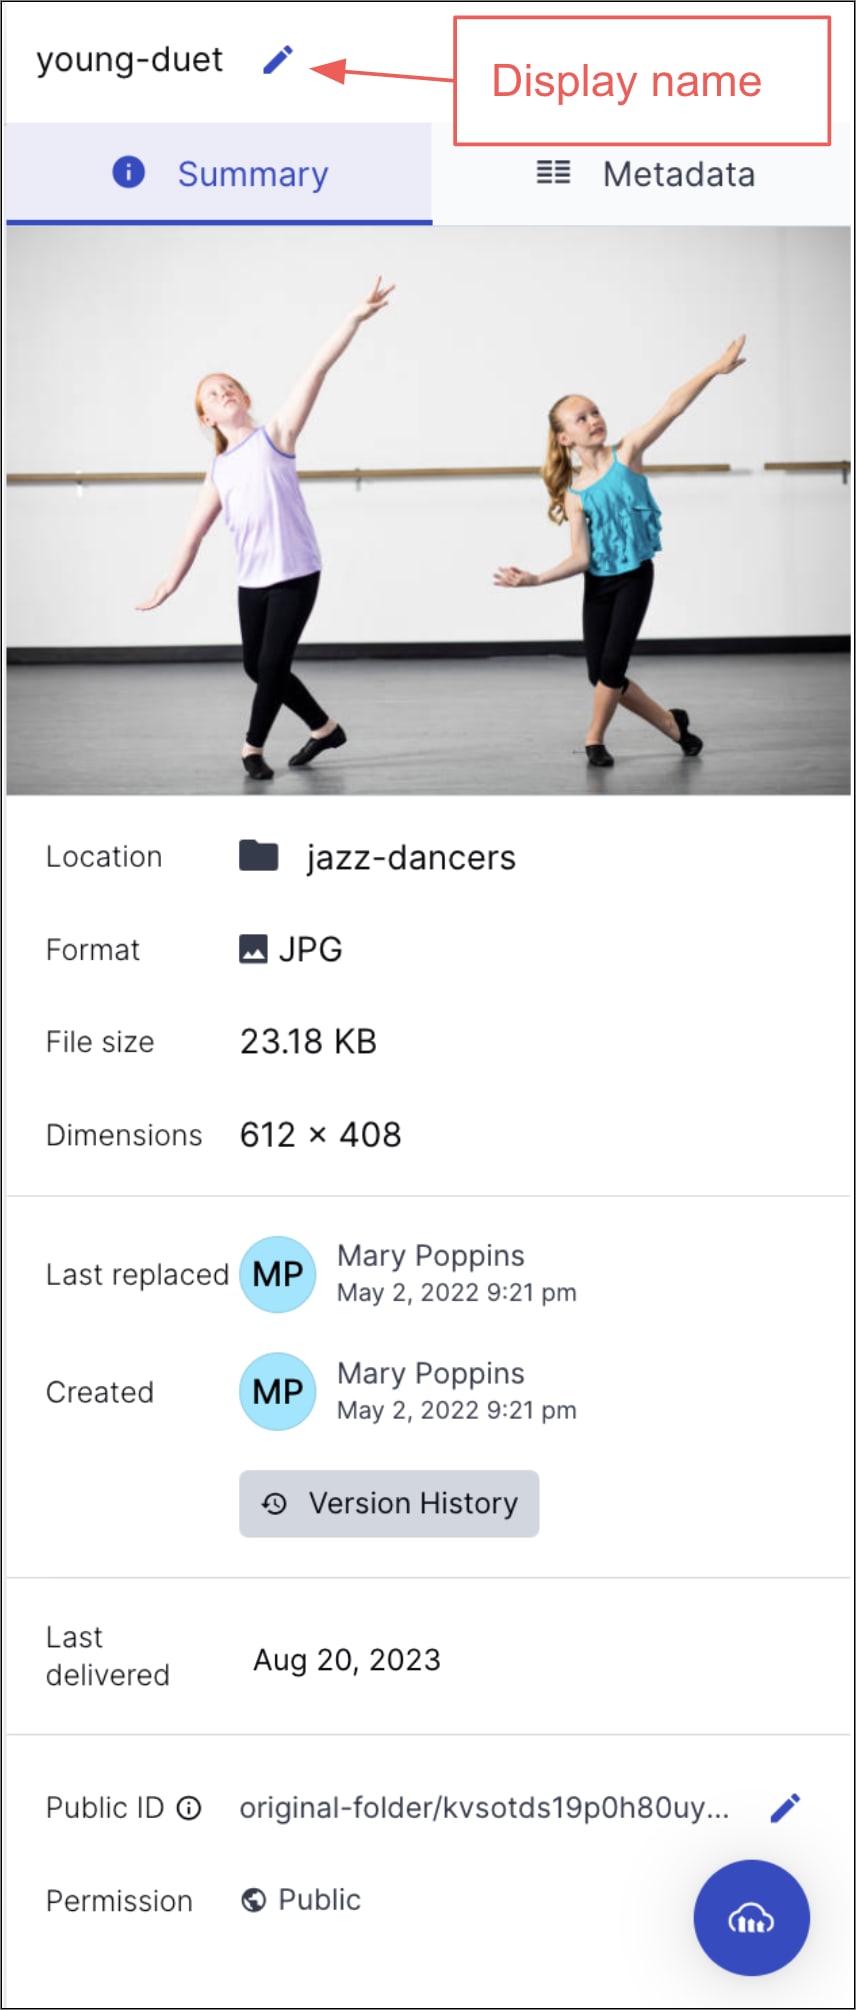
Viewing or editing summary details and metadata (tags, structured, contextual) in the Preview pane

Selecting one asset to perform operations
Single-click the asset The Preview pane is available on the right side of the screen. If the Preview pane is closed, click the Open Preview button Preview Pane toggle button to display it.

Perform any of the operations available in the displayed asset toolbar on the selected asset.
Navigating between assets Left/right arrows Moves selection one asset to the left or right.
Managing the asset Double-click the asset
or
Click Open from the (3-dots) options menu
Opens the Asset Management drill-down page where you can view or edit summary, metadata, and analysis data.
Selecting one or more assets to perform bulk operations Click the checkmark icon
or
Shift+single-click a first and last asset in a range
or
Cmd+click (Mac) Ctrl+click (Windows)
Performs any of the operations available in the displayed asset toolbar on all selected assets at once.

For example, you can delete selected assets, add/remove tags or custom metadata, move assets, download them, apply a moderation status, or generate a Product Gallery.
Selecting all assets on the page Cmd+A (Mac)
Ctrl+A (Windows)
The number of assets selected appears on the toolbar. If there are more assets in the folder that you want to select, keep scrolling down and pressing Cmd+A or Ctrl+A until all the assets you want are selected.
Deselecting all previously selected assets Single-click an asset
or
Single-click the grid background
Deselection can't be undone.
Publishing a link Click Publish a Link from the (3-dots) options menu Generates a public link to the selected asset that you can share with external parties.
Invite internal users to collaborate Click Invite from the (3-dots) options menu Share a link to the selected asset's manage page with users who have access.
Opening the asset's context menu Right-click the asset
or
Click the (3-dots) options menu
Provides another way to perform many of the above actions as well as additional operations. For example:
- Open the Access control options.
- Navigate to the asset's containing folder (when you are currently in a non-folder view).
- Add the asset to a collection.
- Publish a link to the asset.
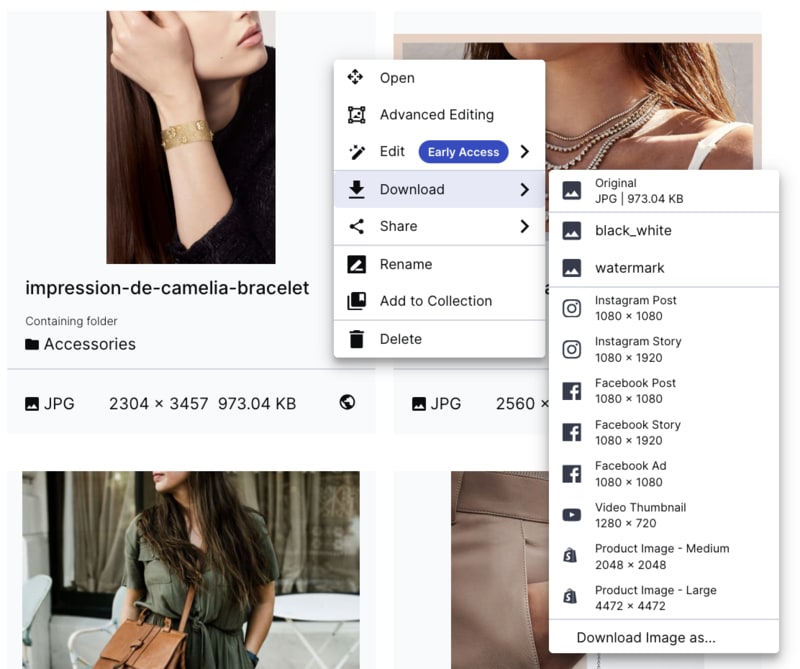
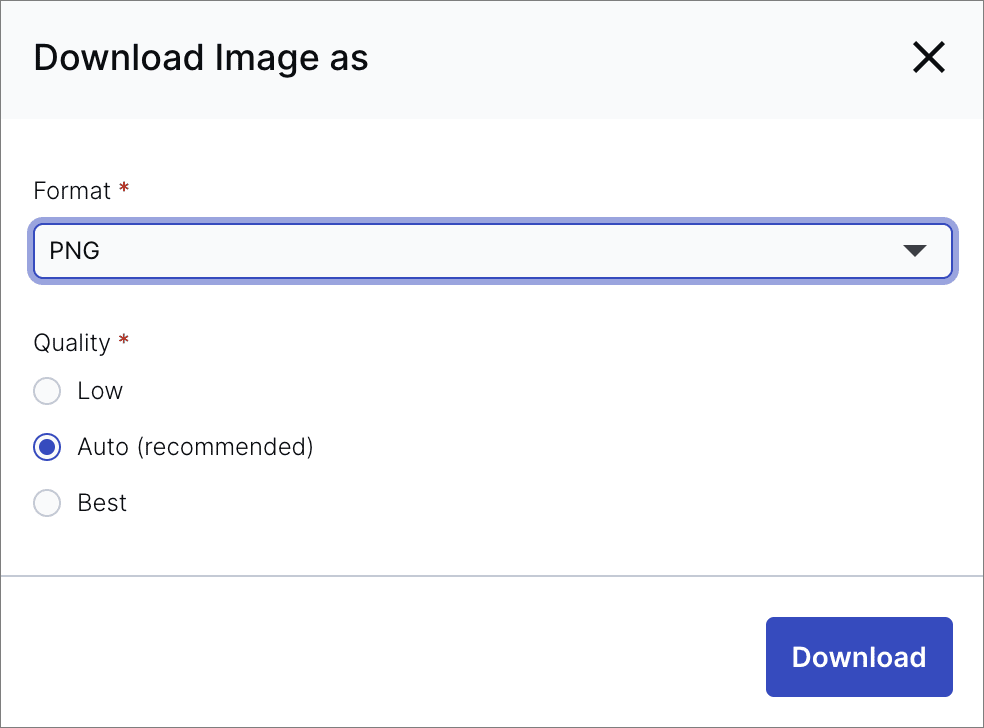
- Download either the original asset or a modified copy (Transformed asset) generated by applying a transformation preset.
- Delete the asset.

Asset management drill-down

For both video and image assets, the asset management drill-down page enables you to:

  • View, set, or adjust Summary information and Metadata for a specific media asset.
  • Preview the asset.
  • See how an asset would look with a variety of pre or custom-defined transformations applied using the Transformation Presets bar.
  • Collaborate on the asset with other DAM users in the Comments tab, including using the standard @username notation to mention (tag) other users. When you mention a user, they receive an email with your comments and a quick link to view the comments in the Asset Management page. The Comments tab is available only for accounts with multiple users.
  • Make simple edits to assets such as cropping, rotating, or flipping an image or trimming a video. Either download or save the updated version using the Media Editor.

When managing image assets, you can additionally:

  • View, set, or adjust Analysis data for a specific image.
  • Preview the image with indications for detected elements, such as detected faces.
  • View the actual size of the image.
  • Rotate 3D models to view them from all sides. (Supported file formats include GLTF, GLB, GLTZ, OBJZ and FBXZ.)

Note
Modifying an asset requires at least Can edit permissions. If you have a Media Library user role with Can view or Can contribute permissions for the folder where a particular asset is stored, some of the options described below will not be available to you. For details, see Folder sharing and permissions.

You can open the asset management drill-down page by double-clicking the asset, or by clicking the Open button Manage icon from the (3-dot) options menu on each asset.

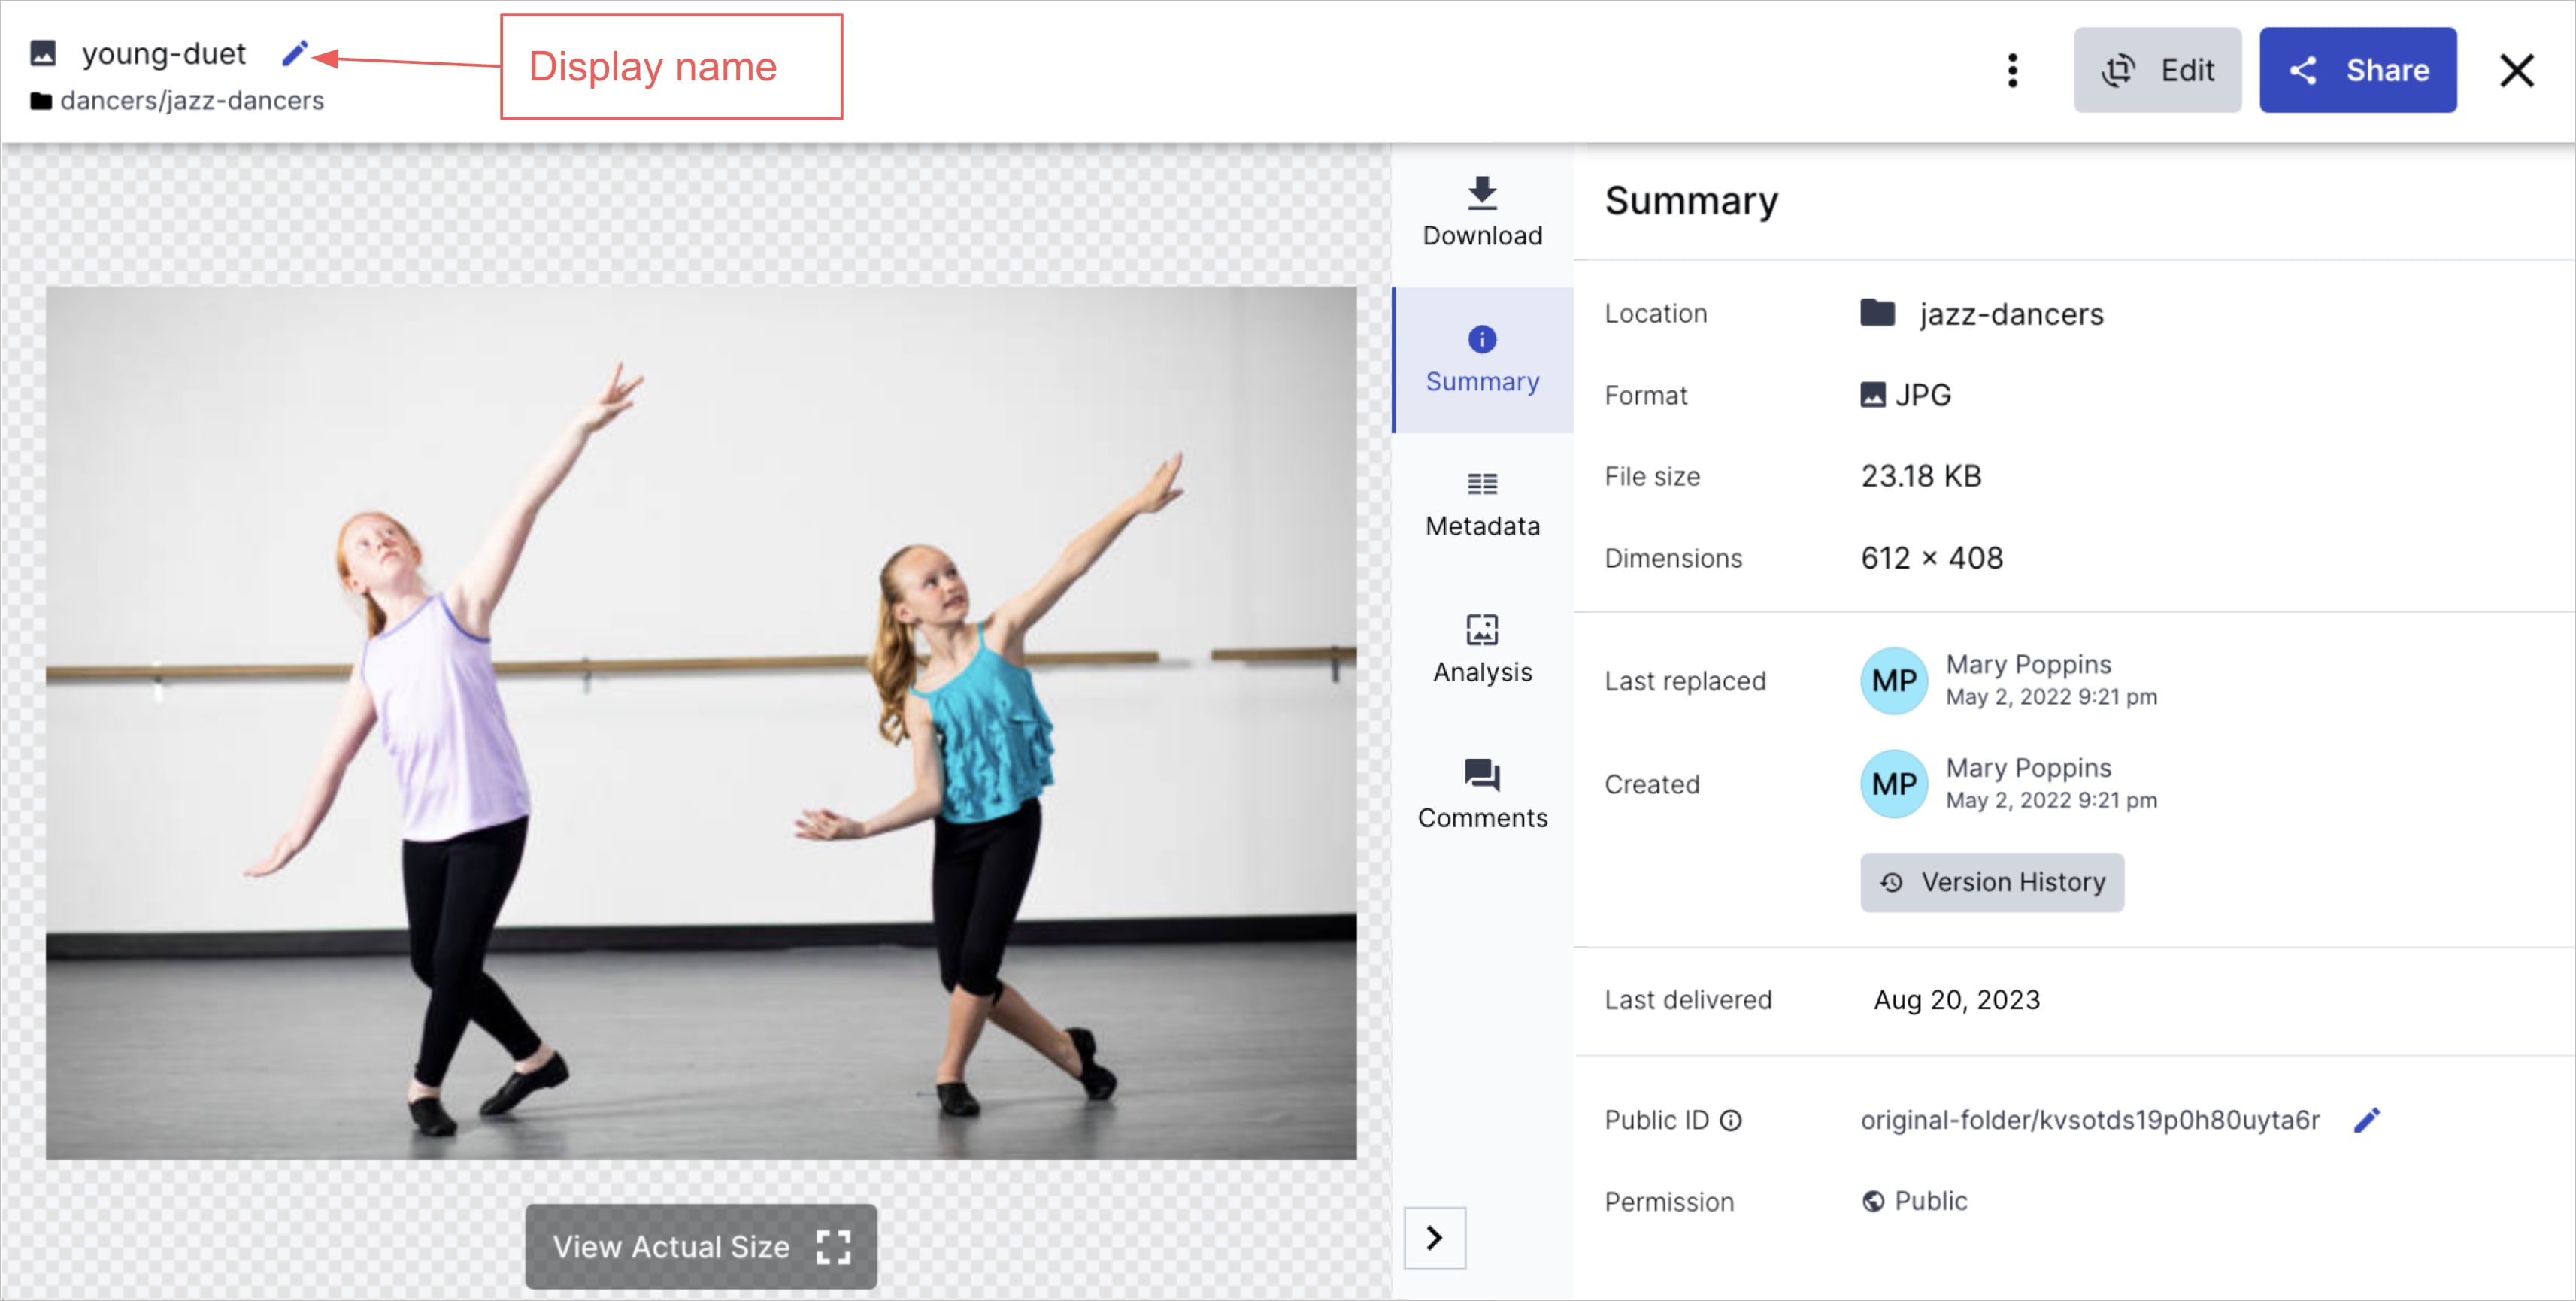
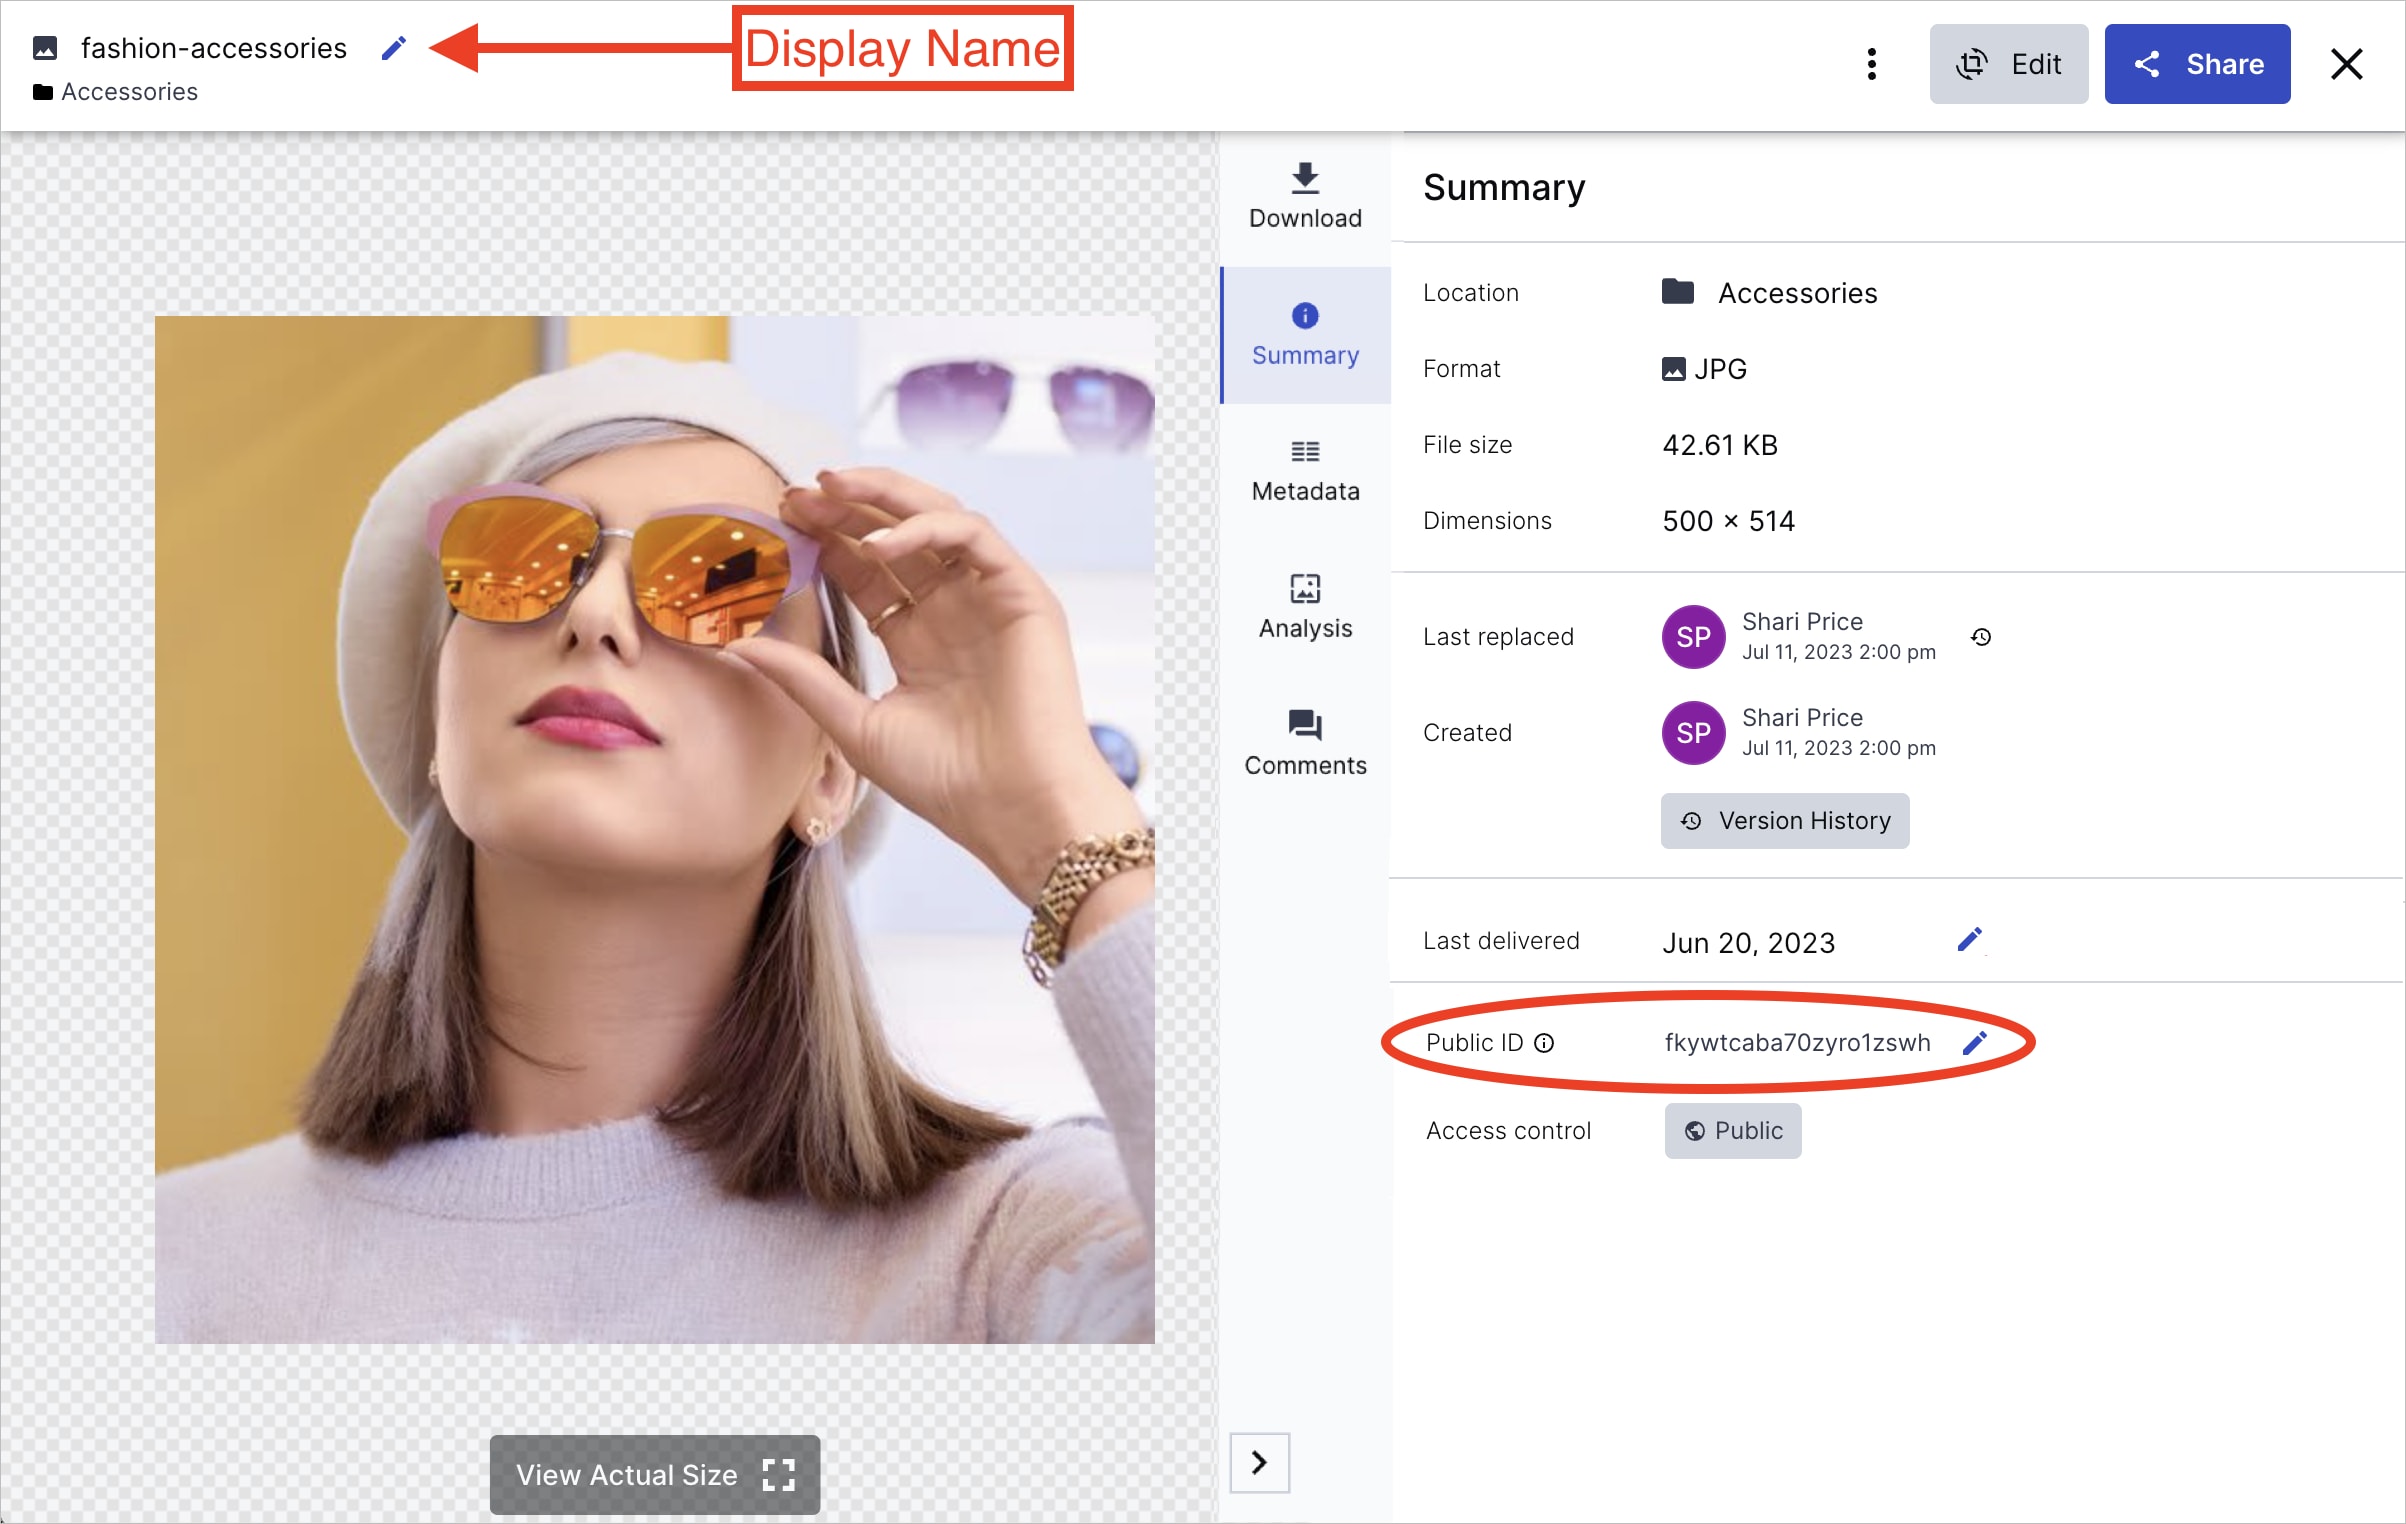
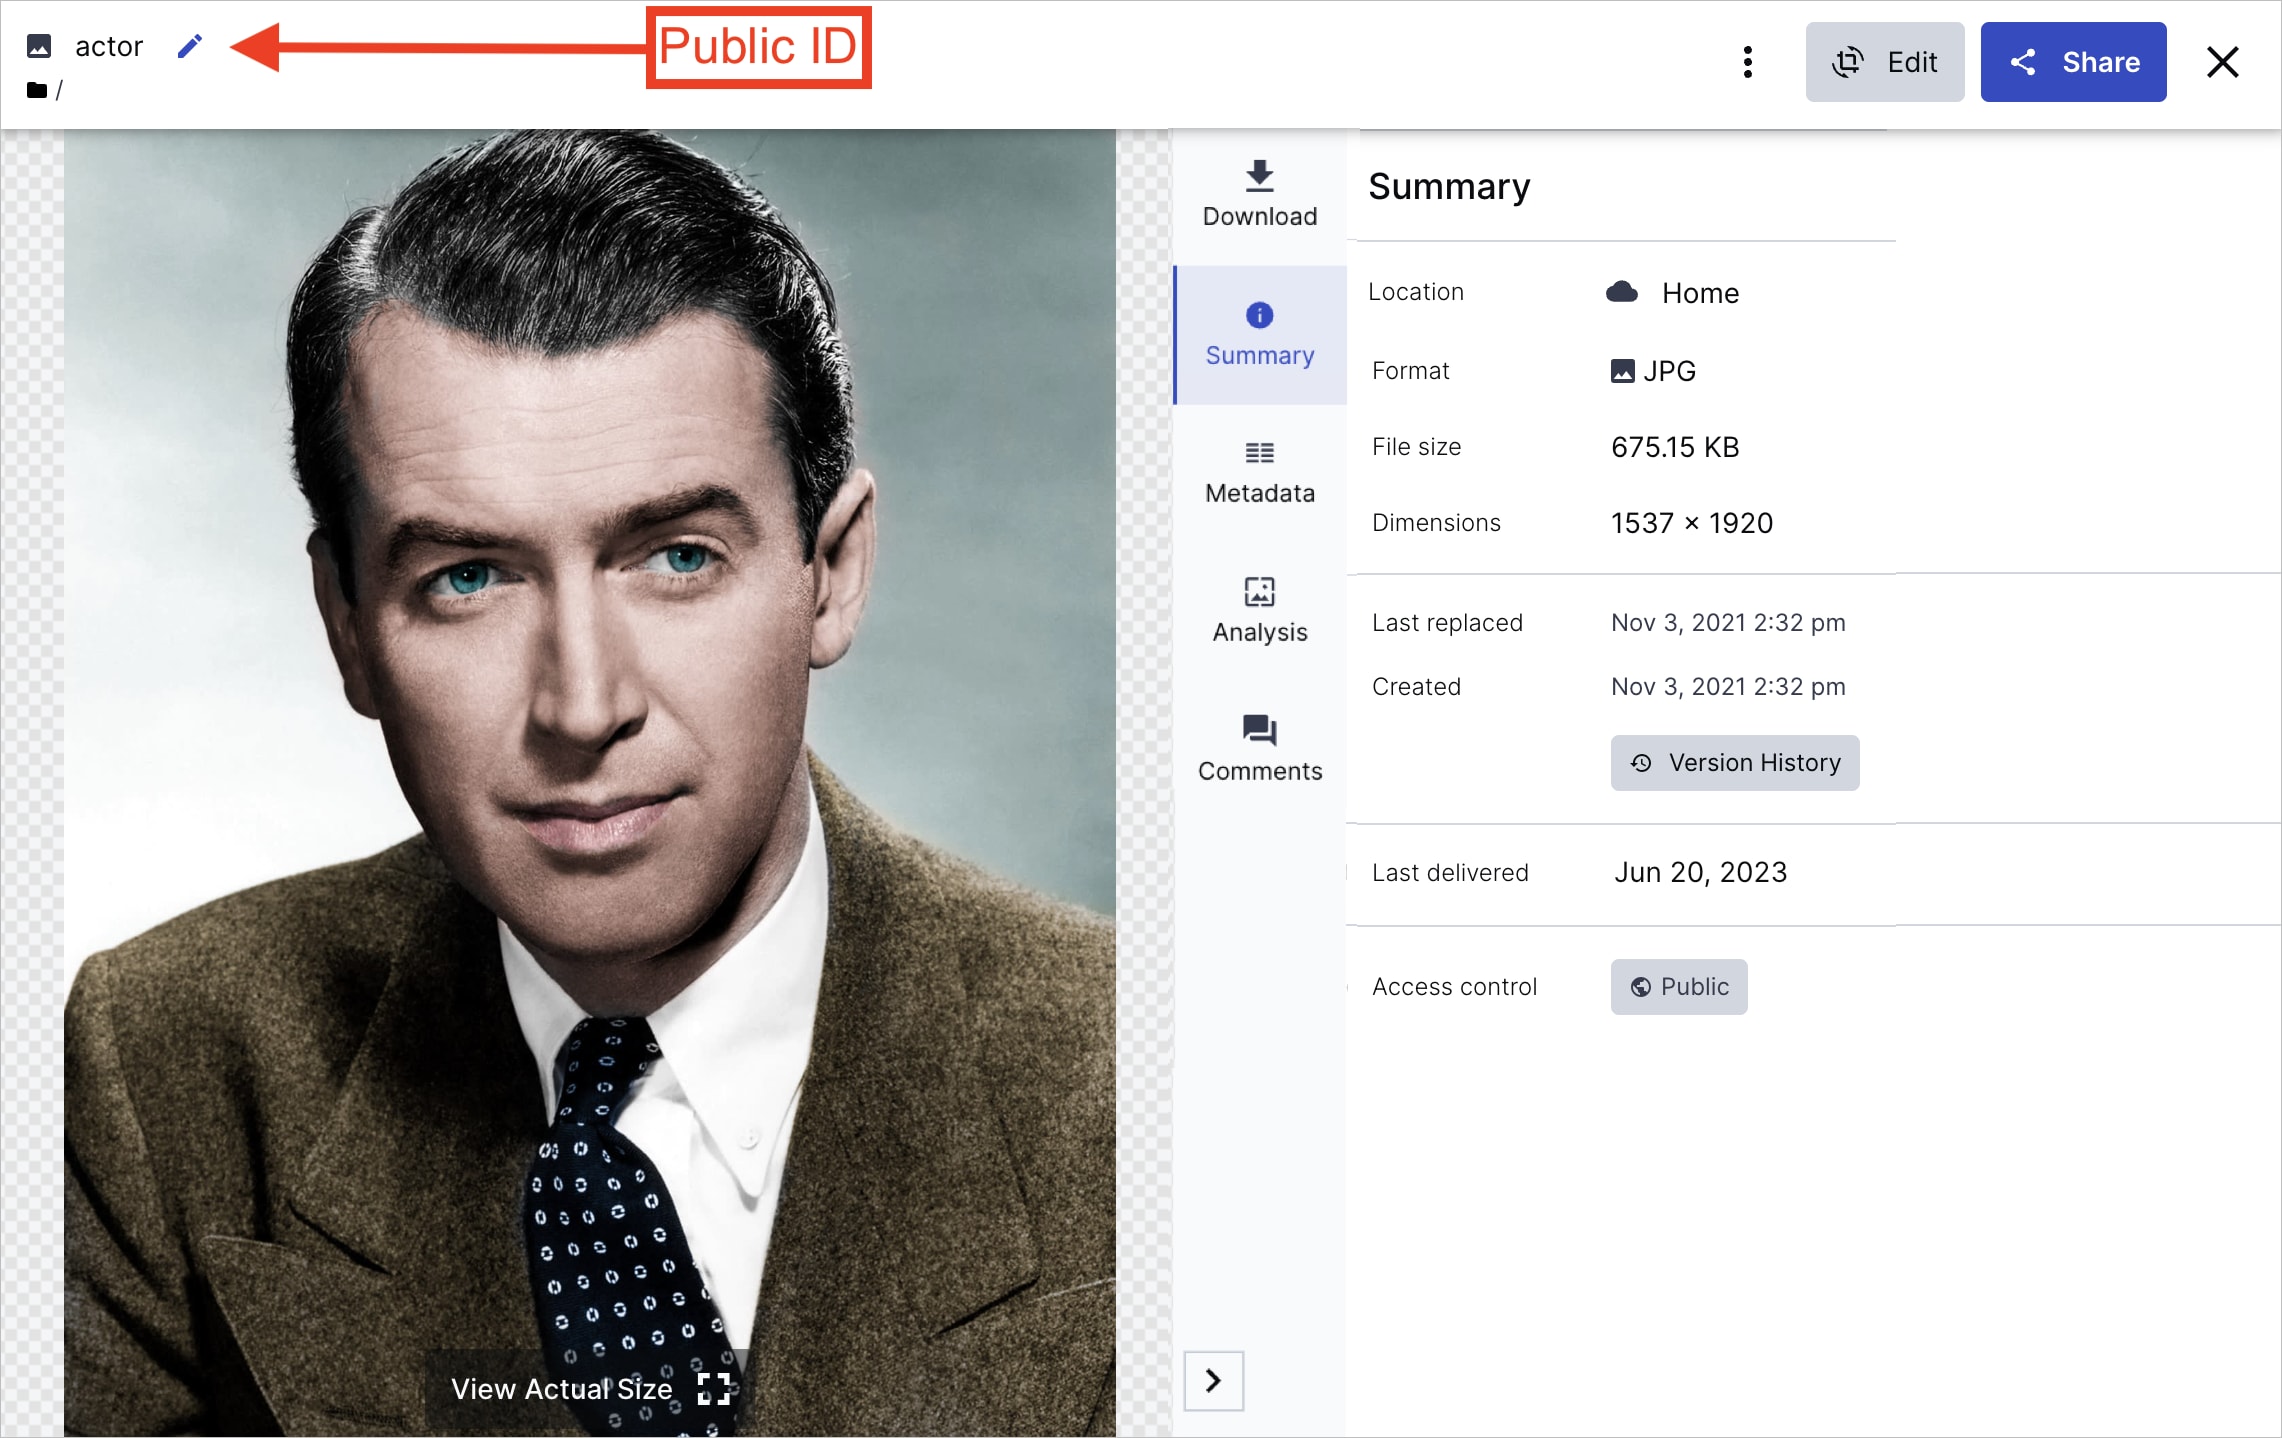
Summary tab

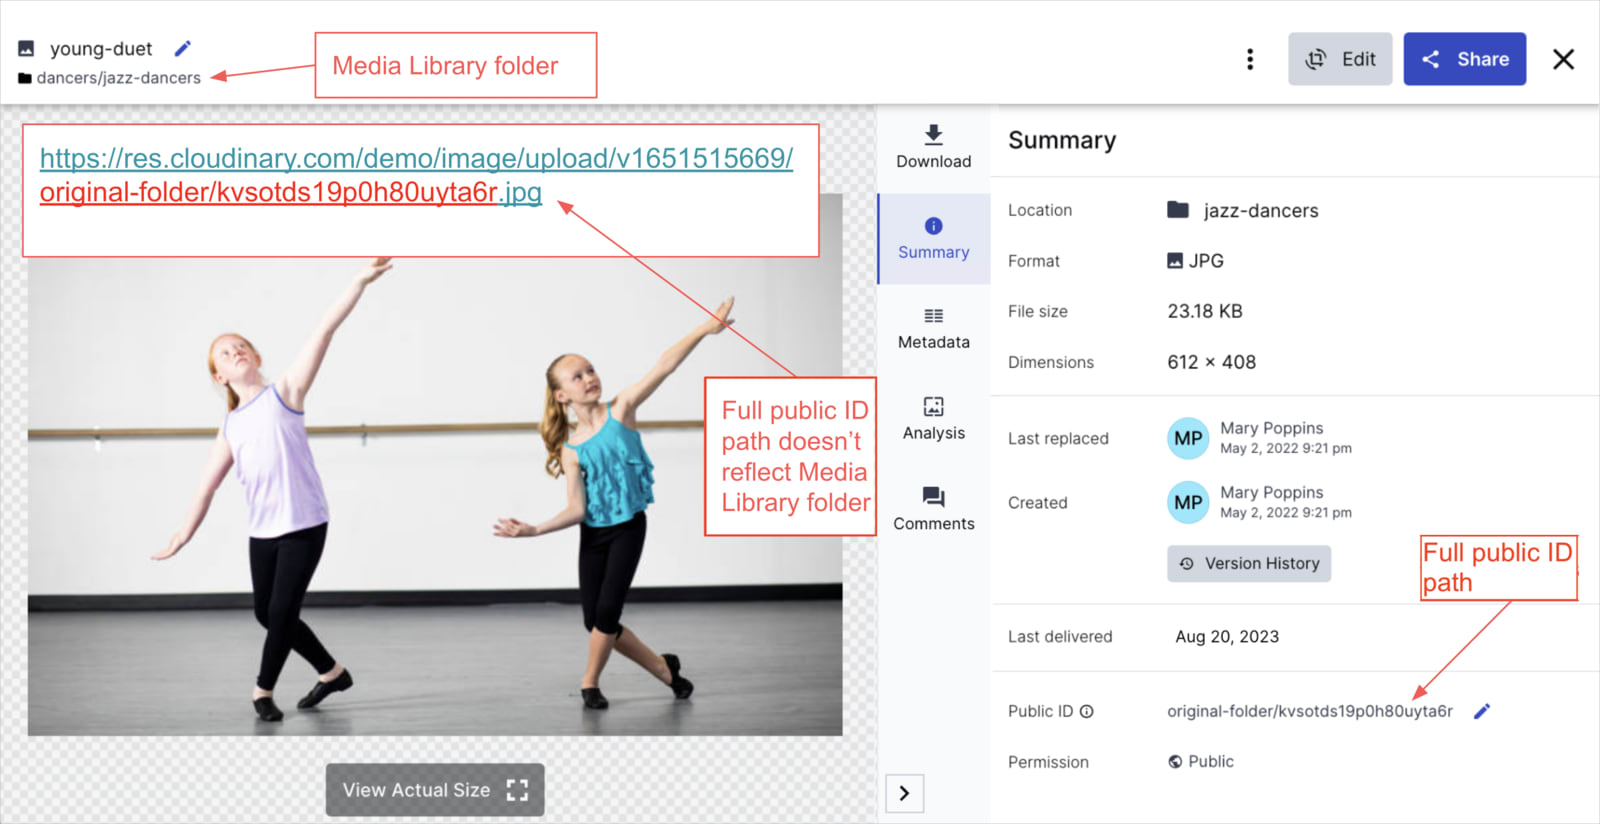
Enables you to view basic details about the asset, to view or set the asset's access control mode, or to view and restore previous versions of the asset.

Asset Management Summary tab

Summary tab

Metadata tab

Enables you to:

  • View or update the asset's custom metadata, including tags, structured metadata, and contextual metadata.
  • View the asset's embedded metadata (such as the EXIF data stored with photos).

Asset Management Metadata tab

Metadata tab

Metadata notes and tips

  • The tags shown in this tab include both tags that were added manually and any tags that were automatically generated by auto-tagging add-ons, either programmatically, during upload as defined by an upload preset or via the Analysis tab.
  • You can copy all the tags from one asset and paste them in another.
  • Depending on the Media Library preferences set for your product environment, this tab may show both structured and contextual metadata, or it may only show one or the other of these.

    • Structured metadata fields are defined globally for the product environment. Users with edit permissions for the asset can update the values in this tab.
    • Contextual metadata fields are defined individually for each asset. Users with edit permissions for the asset can add or remove fields and values.

    For more details, see Custom metadata.

  • When you add, remove, or change the values in any editable section of the Metadata tab, the section is marked as Editing... and the Save button becomes enabled. When you're finished with changes to that section, you should save your changes. If you try to close the browser tab or navigate to another area of the Media Library or Console, you'll be prompted to save your changes.

    If you decide to to close the tab or navigate away without saving, all changes to unsaved metadata sections will be reverted to their previous state.

  • For assets with long lists of embedded metadata, you can use the Filter data box to find the type of embedded metadata you're looking for. Additionally, depending on the Media Library preferences set for your product environment, it's possible that only a select set of embedded metadata fields will be included in the list.

Analysis tab (images only)

Enables you to view the results of automated AI analyses that have already been performed on the asset. Cloudinary runs some of these analyses automatically on every asset. Others require registration to an add-on. If you are not already registered for a particular add-on, you can register for the add-on's free tier and run the engine on the displayed asset directly from this pane.

Asset Management Analysis tab

Analysis tab

All analysis data is stored with your asset and can be used as the basis for a variety of asset management features:

  • Auto-tagging - Utilizes one or more auto-tagging add-ons, each of which apply deep learning AI models to identify types of objects in your image and return the list of categories it finds. You can adjust the confidence level to view additional categories or limit the list to those with a higher confidence level. You can then mark specific categories to add them as tags on your asset, or choose the option to add all the displayed categories as tags.

  • Face and Celebrity detection - Utilizes various algorithms and AI engines to determine the number and location of faces in your image. For celebrity detection, it also indicates the names of any celebrities detected and the accuracy confidence level. Each face/celebrity detection option displays the coordinates of the faces it finds in the form of color-coded frames within the preview area on the right. You can use the show/hide buttons for each engine to show or hide these frames. The detected faces data can be used for a number of face-detection options. For example, this data can be used to add overlays to every captured face, to blur or pixelate faces, or to apply face-detection based cropping so that you never crop out a face, and more. For the built-in face detection, you also have the option to adjust, add, or remove face coordinates (frames) and save the new face data with your image.

  • Area of interest - Enables you to define a custom-area of interest. This area will then be taken into account, or in some cases override other special areas, when Cloudinary programmatically crops, applies overlays, or performs other area-based transformations.

  • OCR - Captures text inside your images. Each phrase (line of text) that it captures is displayed in the tab and highlighted in the preview area. Similar to face-detection, you can add overlays to cover text, blur or pixelate text, or ensure that text doesn't get cut off if your images are automatically cropped for delivery.

  • Color analysis - Gives you information about the main colors in your image. Cloudinary can use these colors to automatically add background padding to images in a color that looks good with your image. If you have access to the Image Analysis filters (premium) of the Media Library's advanced search, you can search for images based on their predominant colors. And of-course your developers can retrieve these colors to implement color-related functionality in your application.

Notes
  • The information in the Analysis tab relates to the original image. Therefore, the information in this tab is displayed only when the Original asset is selected in the Transformation Presets bar.
  • Data returned from the Analysis tab is also available to developers via API, which enables them to use it to implement additional functionality in your user-facing applications. For example, they can extract the detected text returned from the OCR add-on or retrieve the colors returned from the color analysis to implement color-related functionality in your application UI.

Comments tab

Enables you to collaborate on the asset with other DAM users.

Asset Management Comment tab

Comments tab

Transformation presets

Note
Image transformation presets are supported for all Cloudinary accounts. However, video transformation presets are supported only for Cloudinary accounts on a paid plan.

Applying a transformation preset to an asset generates a transformed asset, which is a copy of the original, modified according to the pre-defined transformations set in the transformation preset.

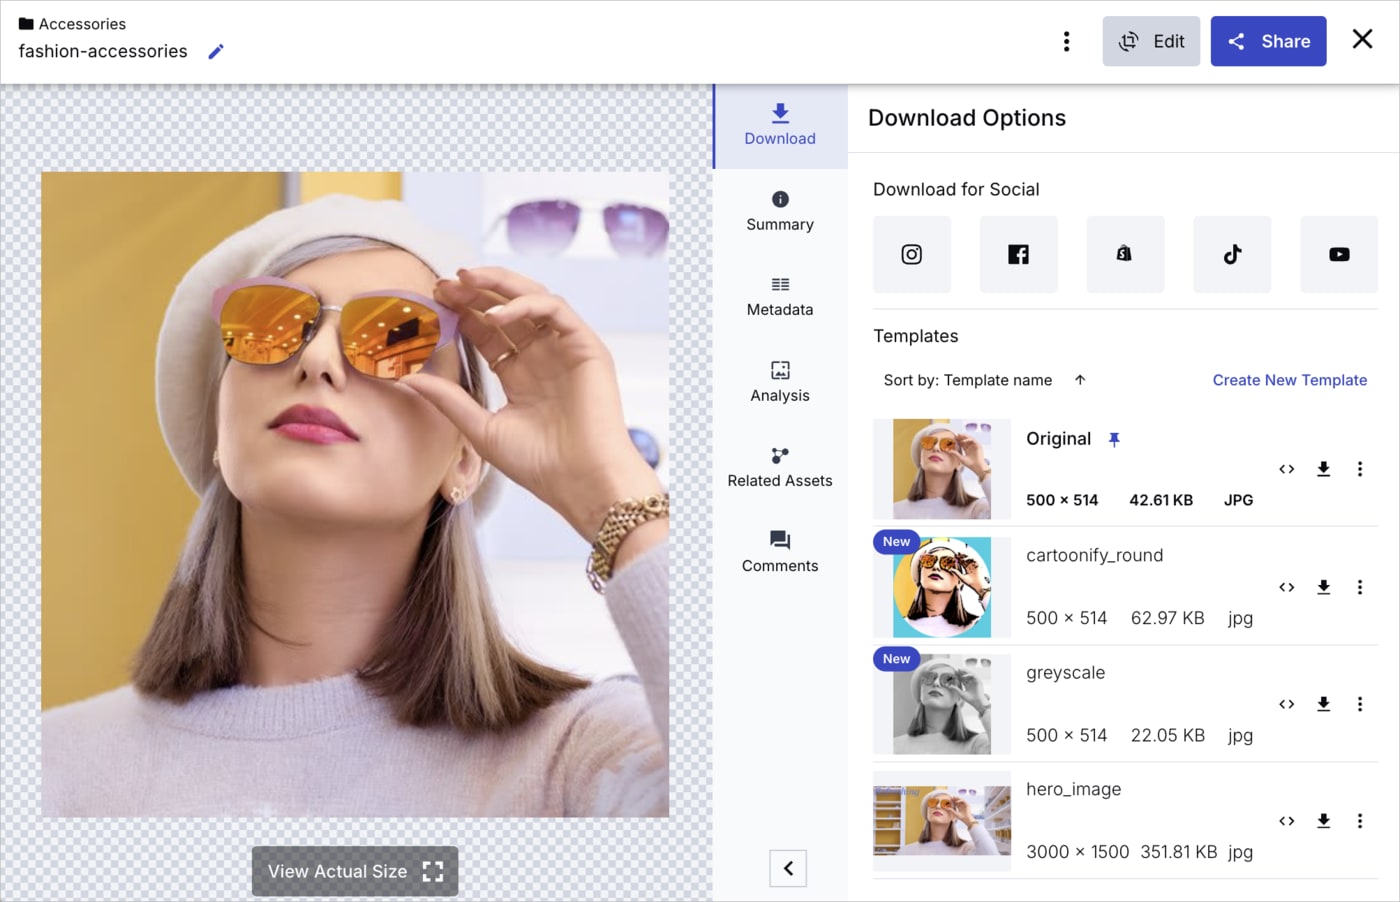
When an asset is displayed in the Management drill-down page, several transformation presets just below the asset preview area enable you to see how the selected asset would look with those transformations applied.

Asset Management transformation presets

You can click the preset thumbnails to preview the transformed asset. For any displayed transformation preset (or for the original), you can see basic asset details of the transformed asset it generates when applied to the original, such as asset format or file size, and you can perform operations such as opening the displayed asset in a new tab, downloading it, copying the URL, or further editing the transformed asset in the transformation editor.

For any displayed asset in any Media Library view, i.e., Assets, Folders, Collections, and Moderation, you can download an asset in its original form, or with a transformation preset applied. From the (3-dot) options menu on the asset, open the Download nested menu and click on the Transformed asset you want to download.

Download transformed assets

Tip
When you click a transformation preset in the Management drill-down page to preview an asset with that preset, it doesn't count against your transformation quota. However, the first time someone views that preset transformation for a specific asset outside the Media Library (open in a browser tab, download, etc.), a derived asset is generated and counts like any other transformation.

Several transformation presets are provided by default. Your administrator can replace these with their own by setting named transformations as transformation presets, up to a maximum of 30.

Note
If you can't preview assets when applying a certain transformation preset, it may be because:
  • The preset wasn't defined correctly (for example a video preset with a transformation that's only valid for images).
  • The preset contains a transformation that's not supported for preview.

If a preset can't be previewed, ask your administrator to make sure the preset was set up correctly. In either case, you can still download the asset or open it in a new tab.

Media Editors

From the Management drill-down page, you can navigate to a Media Editor for either images or videos, depending on the type of asset you're viewing.

The Media Editor enables you to make various types of edits on your images, and allows you to trim your videos.

When you're finished with your edits, you can either:

  • Download the edited version without modifying the original.
  • Click Save As to save the edited version as a new asset with the same metadata and in the same folder as the original. You can use the public ID that was generated for you based on the original asset with a random suffix added, or you can enter your own unique public ID.
  • Click Save to overwrite the original asset with your edited version while keeping its metadata. If backups are enabled for your product environment, then you'll be able to easily revert to a previous version if needed.

Edit images

When an image is displayed in the Management drill-down page, you can click the Edit pull-down button and select the Edit Image action to open the Media Editor for images.

From this view, you can easily crop an uploaded image based on one of the available crop preset aspect ratios, manually set a required crop width and height, or just manually resize the image using the crop handlebars. You can also choose to flip or rotate the image.

Tip
When manually setting width and height values, the aspect ratio is locked by default. If you want to adjust the crop to other sizes, toggle the icon to unlock the aspect ratio.

DAM Media Editor for images

Media Editor for images

The options in the Media Editor enable you to easily make these simple modifications without an external editing tool or the need to request a designer's assistance.

Trim videos

When a video is displayed in the Management drill-down page, you can click the Edit pull-down button and select the Trim Video action to open the Media Editor for videos.

From this view, you can easily take off part of the beginning or end of a video clip. Move the left or right handles of the slider to trim your video.

DAM Media Editor for videos

Media Editor for videos

Share options

The following options are available from the Share pull-down button located at the top of the Manage page:

  • Publish a Link: Share a link to the asset with stakeholders outside your organization.
  • Invite internal users to collaborate: Share a link to the selected asset's manage page with users who have access.
  • Copy URL: Access the asset's delivery URL. (This option is usually used by developers for rendering the asset in a website or app.)

Share menu

Publish a link

If you want to share an asset with a stakeholder outside your product environment, you can publish your asset by generating a public link that will enable external parties to view it in a dedicated web page.

To create a public link for the first time for the asset, click Publish and then click Create a Public Link to open the dialog box.

To copy or manage your public link, click Publish to open the dialog box.

Publish a link

From the Publish dialog box, you can:

  • Publish your asset: Click Copy URL to quickly copy the link to your asset and share with your selected audience.

  • Control the availability dates: Set the Start and Expiration dates. Even after publishing the link, you can change the availability dates at any time.

  • Delete the link: select Delete link from the kebab (3 dots) icon to immediately disable the web page.

Note
Depending on the settings configured for your product environment, you might not be able to share PDF or ZIP files.

Transformation and asset details editor

The Edit page enables you to experiment with the various transformations available for the selected image or video using simple UI elements in the transformation editor and to view and edit asset details.

Note
If your administrator enabled the new Transformation Builder (Beta) for early access, you'll be able to access the new Advanced Editor (Transformation Builder). In the asset (3-dot) options menu, the Advanced Editing option will be available instead of Edit.

To open the Edit page:

From the asset management drill-down page, select the Edit icon from the URL bar.

OR

Select Edit from the (3-dot) options menu on the asset itself.

Navigate to the Edit page

Using the transformation editor

Edit transformation UI

The most common transformations are displayed on the page. There are 3 additional links you can click to create more complex transformations:

  • More options: Set additional transformations or transformation flags.
  • Add overlay & watermark: Specify another asset in your Media Library to add as an overlay (or underlay) on the current asset, and specify transformations to apply to the selected overlay asset. You can also click the More options link within the overlay section to access additional transformations for the overlay.
  • Chain another transformation: Chaining enables you to define another set of transformations that will be applied on the result of the first set.

When you change settings on any of the transformation controls, a button is displayed on the preview prompting you to refresh the preview so that you can see the new variation of your asset. In most cases, it makes sense to first set all the transformation settings you want to apply, and only then refresh the preview. When you refresh the preview, the transformation code displayed below the preview is also updated, enabling you to copy the transformation URL or the transformation code for any SDK.

If you use the asset variation outside the Media Library (open in a browser tab, download, etc.), a derived asset is generated from the original asset based on applied transformations. It doesn't change the original asset, nor is it treated as a new asset in your Media Library. You can view all derived assets that were generated from a particular asset by clicking the View derived image/video button at the top of the Edit page.

Notes
  • When you modify a transformation and refresh the preview to view the resulting variation of the asset, you're not billed for previewing it. However, if you use the variation outside the Media Library (for example opening it in a new tab or downloading it) a 'derived asset' is generated and counted as part of the total number of transformations used during your billing cycle.
  • Because transformations do not impact the original asset, users with the Media Library user role can generate transformations, even if they have only Can View or Can Contribute permissions for the folder where the asset is stored.
  • The options on this page enable you to apply most of the available transformations, but not all of them. Some of the more complex transformations with many possible option values can be applied only using the delivery URL API.

For details on all available transformations and how they are used within delivery URLs, see the Image transformations and Video transformations guides.

Editing asset details

From the Edit page, users with a role that includes edit permissions for the asset can adjust data that is stored with your asset, including:

  • Add or edit face or custom coordinates. These coordinates are used to determine the area of focus for cropping, overlays, and other transformation features when the gravity parameter is set to face/faces or custom in a delivery URL.
  • Set an override quality level for a specific asset. The absolute quality level set here will be used for that asset instead of Cloudinary's auto-quality algorithm when quality is set to auto in a delivery URL.
  • List, preview and restore backed up versions. With backup enabled, uploaded assets are copied to a backup location and version history is maintained if an asset is overwritten or deleted. You can preview previous versions, even for deleted assets, helping you to choose which version to restore.

Users with an Admin role or with Can Manage permissions for the relevant folder can also Delete the asset.

Advanced Editor (Transformation Builder) Early Access

If your administrator enabled the Transformation Builder (Beta) for early access, you'll be able to use the new Advanced Editor (Transformation Builder) by selecting the Advanced Editing action from either the Edit pull-down button on the Manage page or the (3-dot) options menu on the asset. You can create variations of the selected image or video by applying transformations to it using simple UI elements.

Important
The Transformation Builder is currently in Beta. There may be minor changes in functionality or appearance before the general access release. We would appreciate any feedback via our support team.

The new Transformation Builder offers the same capabilities as the Transformation editor with an improved, simple and easy to use interface, and has support for most common transformation actions. If the transformation action you are trying to apply is not listed, you can add an Additional Transformation action to specify your transformation.

The additional functionality offered by the new Transformation Builder can streamline your workflow. Previously, when applying transformations to an asset using the Transformation Editor, you were only able to preview it, download it, or open it in a new tab. Now, with the new Transformation Builder, you can also easily save the asset variation to change/overwrite the original asset in the Media Library. In addition, you can save an image variation as a new asset.

The following sections help you get started with the Transformation Builder, and show how to work with several transformations. Follow the steps shown in the animations, or follow the written instructions below each animation. The written steps walk you through the process shown in each animation, with some additional clarifications.

How to apply transformations:

Jump to this spot in the video  0:00 To open the Transformation Builder, from the Manage page, select Advanced Editing (Transformation Builder) from the Edit Image drop-down (or, you can select Advanced Editing from the (3-dots) options menu of the asset you want to edit).
Jump to this spot in the video  0:06 Click Start Creating.
Jump to this spot in the video  0:08 If it's the first transformation you're adding, select a transformation from the Select Action pane.
Jump to this spot in the video  0:13 Depending on the action you select, there may be additional options that you can set. (You can click Discard changes to revert any transformations that you haven't yet applied.)
Jump to this spot in the video  0:24 If you've already added a transformation, you can add another transformation by clicking + Add Action from the Transformation pane to display the Select Action pane.
Jump to this spot in the video  0:34 Click Apply to add the new transformation to the URL and preview the asset with transformations applied. (Click Apply and Close to also close the Select Action pane.)


How to delete a transformation:

Jump to this spot in the video  0:00 From the Transformation pane, open the (3-dots) options menu next to the transformation you want to delete and click Delete.


How to apply an image overlay:

Jump to this spot in the video  0:00 From the Transformation pane, click + Add Action.
Jump to this spot in the video  0:07 From the Select Action pane, select Image Layer.
Jump to this spot in the video  0:11 Enter the Public ID of the image you want to overlay, and set the other available options (Type, what to Focus on, Placement, X/Y Offset, and Blend Mode), and apply those settings.
Jump to this spot in the video  0:35 To further format the overlay if it's, for example, too big, select +Add Layer Action.
Jump to this spot in the video  0:38 From the Select Action pane, select the transformation you want to apply to the image overlay, set any additional options for that transformation, and click Apply to add the new transformation to the overlay and preview the applied transformations.

You can repeat the last two steps to add more transformations to your overlay until it looks how you want it to.


How to apply an unlisted transformation:

Jump to this spot in the video  0:00 From the Transformation pane, click + Add Action.
Jump to this spot in the video  0:08 From the Select Action pane, click Additional Transformations.
Jump to this spot in the video  0:12 Add the string that specifies the transformation you want to add. Follow the examples to enter a valid transformation, or look up the available transformation options with examples and syntax details in the Transformation reference.


How to copy the URL, download, or save your transformation:

Jump to this spot in the video  0:00 Once you're satisfied with the variation you've generated by applying your desired transformations, save the changes you made to overwrite the original asset keeping the original metadata, download your derived asset, or copy the URL to the derived asset and open in a new tab. If you're working with an image, you can save the variation as a new original in the same folder and with the same metadata.

Related assets

This feature enables you to easily relate assets to each other. Here are some use cases where you might need to use related assets:

  • While looking at a logo, you want to easily access the 'Brand Guidelines' PDF, so you'll know how much spacing to use.
  • You want to see a video's peripheral assets (transcript, poster, etc.)
  • You want to access other images of the same product.

The related assets feature can help your team implement these and other use cases in your apps, as your developers can add, remove and view related assets programmatically.

Note
Only DAM customers on a paid plan can manage related assets in the Media Library. However, all customers can use the related asset feature programmatically.

You can select one or more assets and relate them to another asset. The asset(s) you selected initially now have a two-way relationship with the asset you related them to. In other words, any of the assets that you selected initially will give easy access to the asset that you related them to, and the asset you related to will give easy access to all the assets you selected initially. The assets you selected initially aren't related to each other.

Here's a diagaram that illustrates this relationship:

Related assets diagram

Relating assets

To relate assets:

  1. Select one or more assets in your Media Library.
  2. Select Relate To... from the (3-dots) option menu:
    • On the asset, if you've selected one asset.
    • On the asset toolbar, if you've selected more than one asset.
  3. Find the asset that you want to relate the selected assets to by typing the asset’s public ID in the dialog box.
  4. Create the relationship.

Viewing related assets

An asset's related assets are displayed in the Related... tab of the Preview pane and Manage page. From there, you can Open or Download a related asset, or you can Remove relationship so that the assets will no longer be related.

Related assets Preview pane

Custom metadata

There are three types of metadata that can be stored with your assets: structured metadata, contextual metadata, and tags. These types of metadata are useful for searching assets based on a value or field value pair, or as a method of marking assets for a particular purpose in your end-user application.

For example, your developer can set up a "Specials" page in your web store to display all assets where the structured metadata sale field is set to campaign-A. Or, all assets that show scarves can be auto-tagged with a value scarf to be displayed on your web store accordingly.

This enables DAM users from your creative, marketing, or sales teams to decide which assets get which field values or tags, while your developers take advantage of custom metadata API methods to implement the application side.

Overview

The following section describes each of the three types custom metadata that can be stored within each asset in your product environment and explains the differences between them:

  • Tags: individual text values that can be assigned to specific assets (up to 1000 tags allowed per asset).
  • Contextual metadata: custom key-value pairs that you can assign to individual assets.
  • Structured metadata: custom fields are defined, along with data types and validations, by a DAM administrator at a global level, and are added to all assets in the product environment. You assign their values per asset.

The Custom metadata comparison table compares the three types of metadata:

Custom metadata comparison table

Tags Contextual Structured
Scope Values are added individually to each asset, or to several assets in bulk, manually or through automatic tagging. Fields and values are added individually to each asset. Fields are defined for the entire product environment. The values are set individually for each asset.
Created by Fields and values can be added by any user with write-level permissions for a particular asset.

Your assets can also be automatically tagged using a Cloudinary add-on during upload or update using AI image recognition and categorization capabilities.

Fields and values can be added by any user with write-level permissions for a particular asset. Fields are created and managed globally either by a DAM administrator in the Manage Structured Metadata page, accessible from the Media Library Preferences or by a developer via the via the metadata API.

Any user with write-level permissions for a particular asset can add or edit the field values.
Value types All values are unvalidated, free-text strings. All fields are unvalidated, free-text strings. Each metadata field is defined with a specific type (string, number, single or multi-select list, or date).

The field can optionally be set with validation requirements (which can limit the values allowed in the field to, for example, a numeric range or number of characters).

Fields may also have conditional metadata rules applied that can change elements of their definition based on selections in other fields.

Programmatic equivalent - Add, remove, and replace tags: tags methods of the Upload API.

- Add tags: upload method of the Upload API.

- View and add tags: resource methods of the Admin API.

- Replace tags: explicit method of the Upload API.

- View tags: tags method of the Admin API.

- Add fields and values: context method of the Upload API.

- Add values: upload and explicit methods of the Upload API.

- View and add tags: resource method of the Admin API.

- Manage fields: metadata_fields method of the Admin API.

- Set field values: metadata, upload and explicit methods of the Upload API.

- View and set field values: resource methods of the Admin API.

Benefits This metadata type enables assets to be automatically classified and tagged, which is especially useful when managing assets in bulk. This metadata type gives more control and flexibility to individual DAM users. This metadata type enables more standardization across the organization.

Setting custom metadata values

You can set custom metadata values for an asset in the Media Library from the Metadata tab of the Preview pane, from the Metadata tab of the Asset Management drill-down. You can also set the same custom metadata for multiple assets at once.

After you set metadata values for your assets, you can search for assets by those values adding them as Custom filters using the Advanced Search. For details, see Search by metadata.

The following sections cover some additional clarifications for setting contextual metadata, structured metadata, and bulk updating metadata values.

Setting contextual metadata values

Note
This option may not be available if your DAM administrator has selected to hide it in the Media Library preferences.

In each of the areas where you can edit contextual metadata, you will always see two suggested contextual metadata fields: caption and alt. If you add values for these, then those fields are added to the asset's custom metadata with the values you set. You can additionally or alternatively add any other field names and values in the Custom metadata section.

Sample contextual metadata in Asset Management page

Note
There is no technical difference between the suggested caption and alt fields and any other custom fields you add. If you don't need these two fields, you can leave them blank and add any other fields as needed. The suggested fields are just intended as a quick way for you to potentially add standard custom fields to your assets that your developers might use, for example, to display a title and description for the assets when they are displayed in your application.

Setting structured metadata values

If your DAM administrator or a developer has defined structured metadata fields for your product environment, anyone with edit permissions for an asset can set the structured metadata field values in the Metadata tab of the Preview pane or from the Metadata tab of the Asset Management drill-down.

When working with structured metadata, the set of available fields is identical for all assets in your product environment.

  • Field types: Each field is predefined as one of the following types: free text field, multi-select list, single-selection list, number, or date.
  • Validation rules: Field values that can be manually entered, such as text, number, and date fields, may have been defined with validation rules, such as minimum or maximum values.
    If you enter a value that doesn't meet the validation rules, then when you click outside the field (which submits the value), an error message gives you information to help you correct the value.
  • Mandatory fields: Some fields may be defined as mandatory.
    • If an asset existed before your administrator defined the mandatory field, you are not immediately required to fill it in. However, if you click in a mandatory field and then click out of it (in essence submitting an empty value), you will receive a message that the value is mandatory.
    • Similarly, if a mandatory field has a value, and you delete it, you will be required to enter a new value. Otherwise, when you change views, the field will revert to its previous value.

  • Conditional metadata: The behavior of some fields may depend on the values you enter in other fields. A field might appear, receive a default value, or display different choices in its list, depending on the values you enter in another field. For example, if you select Employee from the Category field, this might cause the Department field to appear, whereas if you select Conference from the Category field, the Department field is not relevant and remains hidden.

    Note
    If you change the value of a field that has dependencies, the values that you previously set in those dependent fields may be automatically deleted.

    Field dependencies are available only to Cloudinary customers on an Enterprise plan.

sample structured metadata with errors

AND vs OR metadata search conditions

  • In general, when you perform an advanced search in the Media Library, if you select multiple values for a specific search criteria, you will get results for assets that have ANY of those values, meaning these are treated as OR search conditions. For example, if you select 2 values from the Tags filter, you will get assets that have either of those tags.
  • Conversely, if you add more than one different search criteria, such as searching by both Asset types and Formats, your results will include only assets that match both of those criteria, meaning these are treated as AND search conditions. If you add structured metadata fields in your search filters, and if you add a free text search, they are all considered separate AND search conditions, as well.
  • When searching by structured metadata fields, if you enter more than one value WITHIN a multi-select field when searching, you can choose whether they are treated as AND or OR conditions. In the following example, results would include only assets where Categories contains either Shoes OR Gifts, Product ID is less than 12345 AND Publish Date is before Aug 1, 2019.

    Search by structured metadata fields
  • Similarly, if you enter multiple contextual metadata fields in a search, you can choose whether the AND (assets returned have to match all fields) or the OR (assets returned have to match any of the fields) search condition is applied. In the following example, your search results would include any assets that have campaign = ABC OR discount_code = blue OR aaa = aaa.

    Search by contextual metadata fields

Bulk updating structured metadata

There are two ways to update structured metadata for multiple assets at a time: importing a CSV file and editing structured metadata by selecting assets from any view in the Media Library and then clicking the relevant option from the asset toolbar.

Bulk update metadata from a CSV file

You can update your assets' structured metadata in bulk by importing a CSV file that contains all the assets and field value changes you want to make. You can update up to 10,000 assets in a single import.

Note
This feature is available to DAM customers on a paid plan.

To bulk update structured metadata, follow these steps:

Step 1 - Prepare your CSV file

You can prepare your CSV file by downloading your current metadata using the Export Metadata DAM app:

  1. Select the assets you want to update, then select Export Metadata from the Asset toolbar.

    Export Asset Metadata DAM app
  2. From the Export Asset Metadata dialog box, select the required identifier fields:
    • If you want to use the asset's public ID as the identifier, you must select all three fields, Public ID, Asset Type, and Delivery Type, but NOT the Asset ID field.
    • If you want to use asset ID as the identifier, you must select the Asset ID field but NOT the Public ID, Asset Type, and Delivery Type fields.
  3. Select any structured metadata fields you want to update.
  4. Export your CSV file.
  5. Edit the field values in the CSV file that you want to update. Fields that are left blank won't be updated.

Note
If the Export Asset Metadata DAM app isn't activated, contact your administrator to enable it for you from the App Marketplace.

Alternatively, prepare a CSV file on your own:

  1. Click the (3-dots) options menu at the top right of the Media Library and select Bulk Update Metadata.

    Media Library (3-dots) options menu
  2. Download the sample file containing the required unique asset identifier column(s) that you want to use, either publicId or assetId.
  3. Edit the CSV file:
    • Add columns that map to the structured metadata fields you want to update.
    • Fill in the CSV file with the relevant asset details. Fields that are left blank won't be updated.

CSV file requirements:

In order for the import and update to succeed, the CSV file must contain:

  • Columns that map to and have the same name as the asset's unique identifier. Include only one of the following sets of columns in your CSV file, either:
    • assetId

      OR
    • publicId together with assetType and deliveryType
  • Additional columns that map to existing structured metadata fields.
    Note
    Make sure your CSV file contains only columns that correspond to one of the asset identifier sets, i.e., either assetId OR publicId, assetType and deliveryType, and structured metadata fields. Any extra columns, or duplicated columns, will cause the import to fail.
  • Rows that represent up to 10,000 assets, without duplicates.

For the asset to update successfully, its row must contain:

  • A valid value in the column(s) that map to the asset's unique identifier.
  • A unique identifier that matches an existing asset.
  • A valid value for each structured metadata field column, e.g., a column that maps to a structured metadata field of type date must contain a date in the required format.

Step 2: Import your CSV file and update your asset metadata

If you haven't yet opened the bulk update,the (3-dots) options menu at the top right of the Media Library and select Bulk Update Metadata.

Media Library (3-dots) options menu

Import your CSV file and run the update.

An email will be sent to you when the update is complete, containing a full report of the asset metadata. This report will show values for all the assets and metadata fields that had been listed in the CSV file, including values that were and weren't updated, and any errors that may have occurred.

Edit structured metadata

Click the Edit structured metadata option from the Assets toolbar to open the Edit structured metadata dialog box.

The placeholder for each field gives information about the previously existing metadata values stored in the selected assets, to help you verify the changes you're about to make:

  • If the field is empty, none of the selected assets have previously existing values in that field.
  • If Mixed values is displayed, the selected assets have different previously existing values, or no value, in that field.
  • If an actual value is displayed, that value exists in that field for all of the selected assets.

To update the values in a metadata field for all selected assets, select the field and then enter (or select) corresponding values.

If your administrator has configured conditional metadata for your assets, additional fields may appear, disappear, or change depending on the values you enter. For example, selecting Employee from a Category field might display a Department field, because employees are associated with departments. By the same token, selecting Conference from the Category field might hide the Department field because it is no longer relevant, and in that case, any values previously selected for the Department field would be automatically deleted.

When you update structured metadata in bulk, previously existing metadata values are not displayed. Also, only the highest-level fields appear initially, and any hidden fields are displayed only if the conditions that activate them are met. So, while you change values in higher-level fields, it's possible that this may automatically delete metadata in dependent, hidden fields. If at least one of the assets you are updating already contains a value in a hidden field, a message warns you that metadata in hidden fields may be deleted as you change values in fields they depend on.

Bulk updating tags and contextual metadata

You can also set custom metadata values for multiple assets at once by selecting the assets from any view in the Media Library and then clicking the relevant option from the asset toolbar.

Tags

Click the Tag option from the Assets toolbar to open the Manage tags dialog box, where you can add new tags and remove tags for the selected assets. The Remove tags option is included, but minimized, if at least one of the assets you selected has tags.

To remove tags from the selected assets, expand the Remove tags option and type or select the tag values you want to remove. The selection list shows tag values that exist for at least one of the currently selected assets. The values you include in the Remove tags field will be selectively removed from any assets that have them. If a selected asset does not have any of those tags, it is not affected by the Remove part of the operation. Tags you specify to add are added to all selected assets.

Contextual metadata

Note
This option may not be available if your DAM administrator has selected to hide it in the Media Library preferences.

Click the More option (...) from the Assets toolbar and then click Edit contextual metadata in the drop-down menu to open the Edit contextual metadata dialog box. Select an existing key and enter a matching value to add contextual metadata to your asset. You can also create a new key by entering a word in the Key textbox.

Access control modes

If your account is enabled for the access_control option (available to accounts with an Enterprise plan upon request), you can view an asset's access control mode directly from the Media Library.

A person can view a Restricted asset outside the Media Library only if that person has both the asset URL and an authentication token, except during an optional time-limited date range when the asset is defined as publicly accessible.

Time-limited restricted access can be useful for an image or video that's intended to be used for a special campaign or that shows a new product design, and it's imperative that the asset will not be shared outside the organization prior to an official launch date. Or conversely, it may be important to stop enabling the public to view or share an asset after the content is obsolete.

To view access control settings:

You can see whether your asset is set to Public Public access control or restricted Restricted Restricted access control in one of the following locations:

  • The Summary tab of the Media Library Preview pane
  • The Asset Management Summary tab

Note
If you need to change any asset's access control mode between Public and Restricted, contact your DAM administrator.

Uploading with access control

If you want to set the same access control settings for a set of assets you are uploading to the Media Library, a DAM administrator can apply the required access control settings in the upload preset(s) you are using as your Media Library upload preset defaults.

Alternatively, when you upload using the Media Library Upload Widget, you may be able to select an Upload Preset that has been set to upload with restricted access control settings.

Note
By default, the Upload Presets option is not available in the Advanced options of the Media Library Upload Widget. If it is not available in your upload widget, your DAM administrator can submit a support request to activate it.

Authentication tokens for access control

If you need to allow someone access to a restricted asset via a URL, outside the time range that an asset is set as public, you will need to provide that person with the relevant authentication token. You should work with your DAM administrator or developers on your team to generate and distribute the required token.

Asset moderation

It's sometimes important to moderate assets uploaded to Cloudinary. For example, you might want to keep out inappropriate or offensive content, reject assets that don't answer your needs (e.g., making sure there are visible faces in profile images), or make sure that photos are of high enough quality.

Assets can also be marked for manual moderation, which requires a moderator from your team to accept or reject the assets, or automatic moderation, which automate moderation functionality. In addition, several moderations can be applied to assets during a single upload, including a combination of manual and automatic moderations.

Assets are marked for moderation during upload using upload presets. If your administrator set an upload preset with the desired moderation settings as your Media Library default upload preset, your newly uploaded assets will be marked for moderation by default. Or, you can apply the moderation yourself by uploading assets using the Media Library Upload Widget and selecting the Upload Preset with the desired moderation settings.

Assets can be moderated, either by human experts or by deep learning algorithms, via Cloudinary add-ons. In addition, assets can be marked for manual moderation, which means a moderator from your team approves or rejects them.

Depending on your administrator and folder permission levels, you may be able to personally review pending assets, or override decisions made by automatic moderations.

Reviewing assets manually

You can manually review assets that are uploaded to Cloudinary and marked for moderation. Users with Master admin, Media Library admin, and Technical admin roles can moderate assets. In addition, Media Library users with the Moderate asset administrator permission can moderate assets in folders that they have Can Edit or Can Manage permissions to.

You can review assets marked for:

  • Manual moderation: Once manual moderation is set up, assets that are uploaded are marked Pending and are displayed on the moderation page. A moderator is responsible for reviewing the pending assets, and accepting or rejecting them based on the appropriateness of the content.

  • Automatic moderation: From this page, you can also view all assets marked for any type of moderation, per moderation type and status. As the decisions made by automatic moderation add-ons are based on advanced algorithms, in some cases you may want to manually override the moderation decision and either approve a previously rejected image or reject an approved one. You can always manually override any decision that was made automatically. If you approve or reject an asset manually, the asset will be considered manually moderated, regardless which automatic moderation it was marked for, and it will be displayed when the Manual filter is selected.

  • Multiple moderation: You can manually override moderation decisions for assets marked for multiple moderations, as well. As each moderation is applied and resolved, the moderation status of the asset changes per moderation, along with where you'll find it on the Moderation page. You can view an asset's moderation history to monitor this progress.

    For more information see Applying multiple moderations.

To review assets:

  1. From the Product Navigation menu, select Moderation.

    Moderation page
  2. Browse the assets. Use the filters to select the moderation type and status of the assets you want to review. Moderation kind filter

    To find assets marked for multiple moderations:
    • While the asset is being processed, filter pending assets under the moderation type currently applied.
    • If the asset's final status is rejected, the asset will be found under the moderation type that rejected it.
    • If the asset's final status is accepted, the asset will be found under the last moderation type that was applied.
    • If the final status was determined manually, the asset will be found under Manual moderation, regardless of whether the asset was originally marked for manual moderation.
  3. Decide to accept or reject them.

Note
Depending on your account or product environment setup, you may also be able to moderate assets that are pending manual moderation directly in the Media Library, and not just from the Moderation page, by selecting Approve or Reject from the (3-dots) options menu on the asset itself, or, after selecting one or more assets, on the asset toolbar.

To view an asset's moderation history:

Once you've opened the moderation page and found the asset you're looking for either:

  • Double click the asset to open the Management drill-down and select the Moderation icon.

    OR
  • Select the asset and open the Preview Pane, then click the Moderation tab.

See how the moderation changes after each moderation is applied:

Moderation history One moderation applied Moderation history Three moderations applied

✔️ Feedback sent!

Rate this page: