
From January 31, 2027, Google Merchant Center enforces a universal minimum image size of 500×500 pixels across all product categories. Google recommends 1500×1500 pixels, but 500×500 is the line that decides whether your products show up.
What happens depends on which image is too small:
-
Main image (
image_link): if it’s below 500×500, the product is disapproved and stops showing on Google. -
Additional image (
additional_image_link): if it’s below 500×500, that image doesn’t show, but the product survives.
Soft warnings are already appearing in merchant dashboards. If your catalog includes older SKUs that passed under Google’s previous, lower limits, now is the time to check.
This post walks through the whole fix: checking how many of your images are affected, bringing them up to size with a single Cloudinary transformation, and the two feed-side steps you need to finish before the deadline.
- Already a Cloudinary customer? Skim how many images are affected if you’re curious, then apply the transformation.
- New to Cloudinary? Read how transformations work first, then sign up for a free account and follow the same steps.
For image_link, Google Merchant Center asks for:
| Requirement | What It Means |
|---|---|
| At least 500×500 pixels | The image can’t fall below this size. Google recommends around 1500×1500. |
| A supported file type | AVIF, for example, isn’t accepted. |
| A matching file extension | The URL either has no extension or an extension that matches the actual format. |
| No more than 64 megapixels | Larger images are rejected. |
| No more than 16 MB | Larger files are rejected. |
| A valid URL | ASCII only, RFC 3986 compliant, and under 2,000 characters. |
| No added borders | Padding a small image onto a larger canvas isn’t allowed. |
The last point rules out a common shortcut. Padding a small image out to 500×500 can add a border, which Google forbids, or leave the product filling less than 75% of the image, which breaks another requirement. The image itself has to be made larger.
If you’re new to Cloudinary, the idea is simple: you keep one original of each product image, and Cloudinary generates the versions you need on demand, from instructions you put in the image’s URL. Your originals stay exactly as you uploaded them, so you can try a different version at any time without re-exporting anything.
Every delivery URL follows the same pattern:
https://res.cloudinary.com/<cloud_name>/image/upload/<transformation>/<public_id>
The <transformation> part is built from short parameters. Each parameter is a code and a value, such as w_300 for a width of 300 pixels or e_grayscale for a black and white effect. Use commas to group parameters that work together as one action into a single component, for example c_fill,g_auto,h_300,w_300 to crop to a 300×300 square. Use slashes to separate components, and Cloudinary applies them one after another, from left to right.
To see it in action, here is a product photo as uploaded:

And here is the same photo after adding c_fill,g_auto,h_300,w_300/e_grayscale to the URL. The first component crops it to a 300×300 square around the most interesting part of the image, and the second turns the result black and white:

The transformation later in this post works the same way. It’s a longer chain of instructions, with a few conditions so that it only changes the images that need it. To explore what else you can do, see Image transformations.
Your images don’t have to live in Cloudinary first. If they’re hosted somewhere else today, Cloudinary can fetch and transform them straight from their existing URLs, so you can start without a migration.
You don’t have to find your undersized images before you can fix them. The transformation in the next section only resizes images that fall below the minimum, so you can apply it to every product image URL in your feed and the rest pass through unchanged.
It can still be useful to see the extent of the issue. If only a handful of images are affected, you may decide to fix just those URLs rather than update the whole feed. If it’s thousands, apply the transformation across your whole feed so nothing slips through. You can search your product environment for undersized images in two ways.
-
Click Assets in the Product Navigation menu.
-
Enter this expression in the search bar and press Enter:
resource_type:image AND (width<500 OR height<500)
The results are every image where at least one side is under 500 pixels.
To list them programmatically, or to export the list, use the Search API with the same search expression:
The response includes total_count, so you can see the scale of the issue straight away. Narrow the search to the products that are in your feed by adding a tag, folder, or metadata condition, for example AND tags=google_shopping or AND asset_folder=products.
The originals aren’t the only source of small images. Google checks the image your feed URL actually delivers, so a URL that includes w_300 produces a 300-pixel image even when the original is 3000 pixels wide. Look at the transformations in your feed URLs and any named transformations they use. If a named transformation also serves other sites or channels, don’t change it: create a new one for your Google feed instead.
This transformation upscales only the images that need it, leaves compliant images at their original size, and keeps every output within Google’s limits:
$minSide_512/$maxMp_64000000/if_w_lt_$minSide_or_h_lt_$minSide/if_w_lt_h/c_scale,w_$minSide/e_unsharp_mask/if_else/c_scale,h_$minSide/e_unsharp_mask/if_end/if_end/c_limit,w_$maxMp_mul_0.99_mul_w_div_h_pow_0.5/c_limit,h_16000,w_16000/f_webp/q_auto
Add it to your delivery URL before the public ID:
https://res.cloudinary.com/<cloud_name>/image/upload/<transformation>/<public_id>
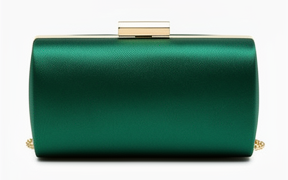
Here is a 288×180 product image, before the transformation:
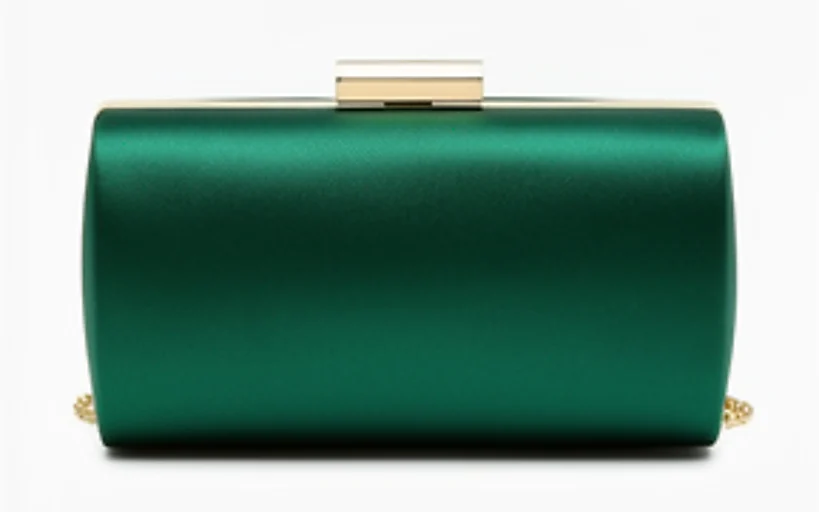
And after, at 819×512:
-
Two variables at the front.
$minSide(512) is the size the short side is scaled to, and$maxMp(64000000) is the pixel cap. Change them in one place rather than hunting through the string. - 512 instead of 500. Google says “at least 500” and may test with subtle cropping. A 512 target leaves a small margin, and it also absorbs upstream exports that round down to 499. It also keeps the upscale modest, because larger targets add pixels without adding detail.
-
A conditional resize. The
ifconditions check whether either side is under$minSide. If so, a nested condition finds the shorter side and scales it to exactly$minSidewithc_scale, keeping the aspect ratio. Images that are already large enough skip the resize and the sharpening entirely. -
Light sharpening.
e_unsharp_maskafter the upscale restores some of the crispness that plain scaling softens. The result looks closer to the original than plain scaling alone. The chain uses the default strength of 100. To make the effect stronger or softer, add a strength between 1 and 2000, for examplee_unsharp_mask:200, in both places it appears in the string. See e_unsharp_mask for details. -
A cap on total pixels (64 MP). Google rejects images over 64 megapixels. The first
c_limitcalculates the widest image that stays just under that limit (99% of$maxMp, to allow for rounding), keeping the aspect ratio.c_limitonly ever shrinks an image, so images already under the limit are left alone, and no condition is needed. -
A cap on each side (16,000 pixels). The second
c_limitis a separate safeguard, and it isn’t about Google. The WebP format can’t store an image more than 16,383 pixels wide or tall. A very wide banner can be far below 64 MP and still exceed that, so the pixel cap alone wouldn’t catch it. Without this limit, the image fails to deliver. - WebP for every output. The output format has to be the same for every image, because a condition can’t check the format of the source file. WebP is the best single choice: it keeps transparency, converts formats Google doesn’t accept (such as AVIF), and keeps files small. Even a 64 MP image stays well under Google’s 16 MB limit as WebP.
-
Automatic quality.
q_autolets Cloudinary choose the compression level for each image, balancing visual quality against file size.
Because the output is always WebP, JPEG and PNG sources are converted too. Google doesn’t require that change, but a transformation can’t read the source format, and PNG output for large transparent images can exceed the 16 MB limit.
The transformation targets the minimum requirement. If you want to go further toward Google’s recommended size, you can raise $minSide. Keep in mind that upscaling adds pixels, not detail, so a larger target doesn’t make the image look better.
-
Plan output limits. Some plans limit the output image size (for example, 25 MP). If yours does, set
$maxMpto that limit. Otherwise, a source above the limit fails before the cap can shrink it. -
No pass-through of original bytes. An image that’s already compliant isn’t resized, but it’s re-encoded once as WebP with automatic quality (
q_auto). - Very small sources. Sharpening has no measurable effect on sources under roughly 120 pixels. They’re still scaled up to the minimum size, but scaling can’t add detail that isn’t in the original, so a very small image looks soft at 512 pixels. If your originals are that small and you’re comfortable with AI-generated detail, you can add e_upscale at the start of the chain. It uses AI to predict extra detail and scales each dimension by four, so the result can look sharper. The trade-off is that the extra detail is AI-generated, so the image may show details your real product doesn’t have, which could mislead shoppers. It also uses more transformation credits than a plain resize, and it doesn’t preserve transparency, so a transparent background becomes white. For other limitations, see the notes in Upscaling with super resolution. Review the results before you publish them to your feed.
- File size isn’t checked per image. No property exposes file size, so the 16 MB limit is met through the 64 MP cap and WebP’s compression, not a per-image test.
-
Keep the nested condition intact. Don’t insert components before the inner
if, or the nested condition stops matching.
Applying the transformation isn’t the last step. Two things need to happen before January 31, 2027:
- Update the image URLs in your product feed. The URLs in the feed you share with Google can differ from the ones your website uses. If you only change your site, Google keeps fetching the old, undersized images.
- Give Google time to re-fetch the images. Even after the feed is updated, Google’s crawler has to fetch the new images before the products are re-evaluated.
Both steps need to be complete ahead of the deadline, so don’t leave them to the last week.
A practical way to make the change in one place is to save the transformation as a named transformation and reference it from your feed URLs. Create a new one for the Google feed rather than editing one that other sites or channels also use, because changing a named transformation affects every URL that references it.
- Optional: search for your undersized images to see how many are affected.
- Check the transformations in your feed URLs for any that downscale below 500 pixels.
- Add the transformation to the image URLs in your Google Merchant Center feed, either for every image or only for the ones you found.
- Check a sample of results against the requirements above.
- Submit the updated feed, wait for Google’s crawler to fetch the new images, and confirm in Merchant Center that the warnings clear.
Learn more about the transformation features used here:
Sign up for a free account to upload your product images and try the transformation on your own catalog before the deadline. If you’re ready to get started, the Developer kickstart shows you how to set up your product environment and upload your first images. If you work with an AI coding assistant, the AI Power Start page gives you a single prompt that installs the right SDK, sets up your credentials, and configures Cloudinary’s AI tools for you. The cloudinary-transformations skill also helps your assistant write correct transformation URLs, such as the one in this post.


