What Is an Interlaced GIF?
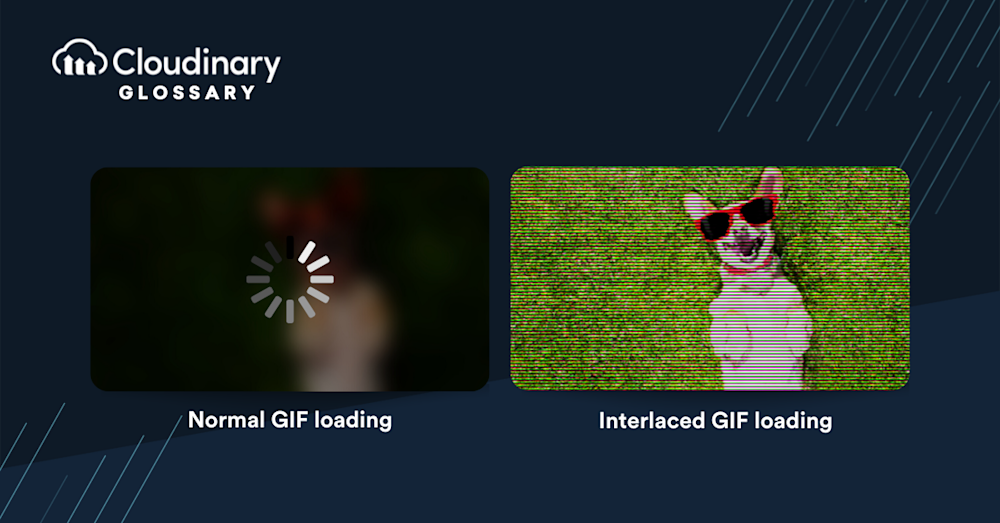
An Interlaced GIF is a particular type of GIF file designed to enhance the user experience while the GIF is being loaded. Unlike a standard non-interlaced GIF, which loads images from top to bottom, an interlaced GIF uses a progressive rendering technique. Essentially, the idea is displayed in a series of passes with increasing levels of detail until the image is fully-loaded. This ensures a faster-loading visual initially, albeit at a lower resolution, that becomes progressively clearer as it fills with data.
Interlaced GIFs were especially important in the early days of the internet, when slow connection speeds made extended load times an issue for online users. When you encounter interlaced GIFs, the “fuzzy” preview image starts to take shape relatively quickly, giving the user a general impression of the content even before it fully loads. This approach helps maintain the viewer’s attention, allowing the audience a glimpse of the image without having to wait for the connection to fetch every single line of data. As internet speeds have increased, interlacing has become less critical for most users, but it remains an interesting technique for optimizing the delivery of image content over the web.
What Is the Difference between Interlaced and Normal GIFs?
The primary difference between interlaced and normal (non-interlaced) GIFs is how they load and display images on a user’s screen. A normal GIF loads line by line, from top to bottom, which means the user must wait for the entire image to be downloaded before being able to fully view and appreciate the content. While this approach ensures a high-quality image, it can be time-consuming, especially over slower internet connections, and may lead to user disinterest or frustration.
On the other hand, an interlaced GIF employs a more dynamic loading technique called progressive rendering that enhances the user experience even with slower connections. Instead of waiting for the entire image to be downloaded, an interlaced GIF displays a low-resolution version with gradually increasing detail until the image is fully rendered. This process occurs in a series of passes, with each pass showcasing a clearer version of the image. This approach maintains user engagement by quickly offering a preview and allows viewers to determine the content’s relevance even before the GIF is completely loaded. Although modern internet speeds have minimized the need for interlaced GIFs, the technique still provides a valuable option for optimizing image delivery across various connection speeds.
How to Make an Interlaced GIF
Creating an interlaced GIF is a straightforward process that can be accomplished using a variety of image editing software. The general steps are as follows:
- Open your original image in the software of your choice.
- If necessary, resize the image or make any desired adjustments to ensure optimal quality and presentation.
- Export or “Save As” the image in GIF format, and during this process, look for an option to enable “Interlaced” or “Interlacing” (terminology might vary between software).
- Select the “Interlaced” or “Interlacing” option and save the file.
Now you have successfully created an interlaced GIF that will display progressively when viewed on the web, enhancing the user experience by providing a faster-loading preview as the image loads in detail.
Creating an Interlaced GIF with Cloudinary
Creating an interlaced GIF with Cloudinary – which offers an end-to-end solution for all your image and video needs – is also quite straightforward. If you’re already familiar with it, these steps are a breeze:
- Upload the original image: Navigate to your Cloudinary media library and upload your chosen image. Simple UI will guide you through the process in no time.
- Transform the image: Select the newly uploaded image from your media library and click on the ‘Transform’ button. This will lead you to Cloudinary’s powerful built-in image editor.
- Save as a GIF: In the ‘Format and Quality’ tab, select ‘gif’ from the dropdown menu. Here, you’ll also find the option for ‘Interlacing’.
- Enable Interlacing: Simply check the box next to ‘Interlacing’ to ensure your GIF will load progressively, enhancing user experience.
- Save your changes: All that’s left now is to finalize your transformation settings by clicking the ‘Save’ button.
Cloudinary makes the process of creating an interlaced GIF as seamless as possible, granting you the dual benefits of image optimization and enhanced viewer experience, even on slower connections.
Wrapping It Up
As we have explored, Interlaced GIFs offer a unique advantage in the engagement and user experience game, especially for audiences on slower web connections. Through progressive rendering, interlaced GIFs provide a ‘low to high’ resolution visual experience that keeps users interested and alert to the content, even as it loads in detail. No more waiting for line-by-line loading: as soon as an interlaced GIF starts to load, users can get a general idea of the content, which can be a game-changer in retaining viewer attention and improving overall user experience.
Make your next GIF a faster, sleeker, and more user-friendly visual experience by creating an Interlaced GIF, whether you prefer using classic image editing software or go with an all-encompassing web solution like Cloudinary. Remember, a well-crafted image can speak volumes about your content and keep your audience captivated, one pixel at a time. So why not take advantage of Cloudinary’s easy-to-use platform and transform an image into an interlaced GIF today?
Start benefiting from optimized website performance and an enhanced user experience now. Give Cloudinary a try. Your audience – and your loading times – will thank you!
Additional Resources You May Find Useful:


