
Compressing video files is one of the easiest ways to reduce size, speed up uploads, and make videos load smoothly on any device. FFmpeg, an open-source video processing tool, allows us to have complete control over video quality, resolution, bitrate, and more, all with just a few command-line options.
In this article, we will delve into the details of FFmpeg’s video compression techniques. You will also see how you can optimize videos using Cloudinary, an open source tool for video and image optimization at scale.
Key takeaways:
- FFmpeg provides us with complete control over video compression through options such as resolution, bitrate, and codec settings.
- Starting with H.264 + CRF is the easiest way to reduce file size while keeping good visual quality.
- Combining compression techniques, such as lowering the frame rate or using slower presets, can further reduce file size.
- The best compression settings depend on our use case, required quality, and device or platform compatibility.
In this article:
- Why Video Compression Matters
- How FFmpeg Helps
- Basic Compression: Start with H.264 + CRF
- Combining Compression Techniques
- Key Compression Methods
- Advanced FFmpeg Video Compression Options
- Best Practices for Testing Results
- Compression Strategy by Use Case
- Using Cloudinary for Video Optimization
- Final Tips
Why Video Compression Matters
The following are some of the reasons why video compression matters:
Save Storage Space
Uncompressed high-quality videos can occupy a significant amount of space on our hard drive and memory. Compressing videos allows us to store more footage on our hard drive or cloud storage without running out of space. Storing a large volume of videos, especially those being archived because they are no longer in active use, makes this especially critical.
Faster Uploads and Sharing
Uploading smaller videos is much faster. If you’re sharing a video online or sending it as an attachment, compressing a video prevents us from hitting the attachment size limits.
Smoother Streaming
Compressed videos consume less bandwidth, resulting in smoother playback with reduced buffering for viewers. Streaming platforms and social media often have file size limits or recommendations, so compression helps meet these requirements and ensures viewers with average internet speeds can watch without interruption.
Lower Bandwidth Costs
If you host videos on your own infrastructure (or pay for cloud storage), smaller files mean using less bandwidth and potentially saving on delivery costs associated with bandwidth usage.
Mobile Viewing and Data
People watching on mobile devices appreciate smaller videos because they consume less cellular data. A compressed video is more mobile-friendly and loads quickly on phones.
How FFmpeg Helps
FFmpeg is an open-source command-line tool used for handling video, audio, and other multimedia files and streams. FFmpeg enables us to compress videos using various techniques, including changing a video’s codec, resizing dimensions, adjusting the bitrate, stripping or compressing audio tracks, altering frame rates, and more.
FFmpeg supports virtually all codecs and formats, providing fine-grained control over compression settings. Whether you want a quick compression with default settings or to tweak every parameter, e.g., bitrate, frames, resolution, etc., FFmpeg can do it. And since it’s a command-line tool, we can also script and automate our compression tasks.
Let’s see an example. We must install FFmpeg before running the script that follows.
The following command re-encodes the input video using the H.264 codec (libx264) with a specific quality setting (-crf 23), utilizing a standard preset for encoding speed. It compresses the audio to AAC at 128 kbps. The result is a much smaller output_video.mp4 file.
With FFmpeg, we can mix and match various options to balance quality and size as needed, as we will see in a later section.
Basic Compression: Start with H.264 + CRF
When compressing a video with FFmpeg, a great starting point is to use the H.264 codec with CRF (Constant Rate Factor).
H.264 (also known as AVC) is one of the most widely supported codecs and offers a very good balance of quality and compression efficiency. Most devices and platforms can play H.264 videos, so it’s a safe choice for compatibility.
CRF, or Constant Rate Factor, is a convenient method for controlling quality in FFmpeg. Instead of manually setting a bitrate, we choose a CRF value and the encoder adjusts the bitrate adaptively. The CRF scale ranges from 0 (lossless, high-quality files) to 51 (very compressed, low-quality files). Lower CRF results in better quality and larger files, while higher CRF yields more compression and smaller files.
A good rule of thumb is to use a CRF value between 18-23, which is “visually lossless,” meaning it’s tough to tell the video was compressed, while 23-28 is a typical range for decent quality and smaller size.
The following command shows how to use a CRF value of 28, which results in almost 80% compression for one of our test videos.
ffmpeg -i input.mp4 -c:v libx264 -crf 28 -preset medium -c:a aac -b:a 128k output_smaller.mp4
Here is how the video looked before compression:

And here’s how it looks after compression. The compressed video is only 20% the size of the original video.

Combining Compression Techniques
While using a modern codec like H.264 and an appropriate CRF value is often enough to compress a video, we can often achieve better results by combining multiple compression techniques.
FFmpeg allows us to apply several compression techniques simultaneously. For instance, imagine you have a 1080p video at 60 fps. If it’s aiming for mobile devices or slow internet, you can achieve this by combining the following single command.
ffmpeg -i input_video.mp4 -c:v libx264 -crf 26 -vf "scale=720:-1,fps=30" -c:a aac -b:a 96k output_720p30.mp4
In the above command, we applied multiple compression steps: lowered the resolution to 1280×* (while maintaining the aspect ratio), limited the frame rate to 30 fps, increased the CRF to 26, and also compressed the audio to 96 kbps AAC. The combination yields a significantly smaller output file than would be achieved with either of these changes alone.
In practice, you will combine techniques based on what compromises you can afford. For example, some videos can lose resolution without issue, while others might need full frame rate, but we can sacrifice a bit of quality.
Common FFmpeg Video Compression Methods
Reduce Resolution
High resolution means more pixels in each frame, which means more data. Reducing video resolution removes pixels, significantly reducing the data required per frame.
In FFmpeg, we can downscale using the -vf "scale=w:h filter. For instance, to resize a video to 1280×720, we can use this command:
ffmpeg -i input.mp4 -c:v libx264 -crf 23 -vf scale=1280:720 -c:a aac -b:a 128k output_720p.mp4
Reducing resolution is effective because many videos are viewed on phones, tablets, or laptops, where 4K or even full HD might be overkill. If the target audience will not see the difference, we can save a lot of space this way.
Lower Bitrate
Bitrate refers to the amount of data transmitted per second of video. It’s usually measured in kilobits or megabits per second. If we reduce the bitrate, the encoder has to discard more information, resulting in a smaller file size. However, it can also reduce the video quality.
There are two main ways to lower the bitrate using FFmpeg:
- Use CRF (quality target)
Like we mentioned before, using a higher CRF value will cause a lower average bitrate output. This is an easy way, as we only choose the quality level and let FFmpeg determine the appropriate bitrate.
- Set a specific bitrate (ABR/VBR)
We can explicitly specify a target bitrate using the -b:v option. For example, -b:v 1000k aims for a video stream of ~1000 kbps, giving us more predictable file sizes.
For example, if we have a 1080p video that was originally 5 Mbps, we can re-encode it at 1 Mbps using the following command:
ffmpeg -i input.mp4 -c:v libx264 -b:v 1000k -c:a aac -b:a 128k output_lowbit.mp4
Lower Frame Rate
Another lever for compression is the frame rate of the video, which refers to the number of frames per second (fps) at which the video plays.
Higher frame rates make motion look smoother, but they require storing more frames. If your video does not require a high frame rate, dropping it can significantly reduce the file size, as you’re essentially cutting out frames.
In FFmpeg, we can set the output frame rate with the -r option. For instance, to convert a 60 fps video down to 30, you can use this command:
ffmpeg -i input_60fps.mp4 -c:v libx264 -crf 23 -r 30 -c:a aac -b:a 128k output_30fps.mp4
Videos that don’t need super smooth motion benefit from a lower frame rate. For example, a screen-recorded tutorial or a static lecture recording looks fine at 24 or 30 fps instead of 60. On the other hand, if you have very fast action sports or gaming videos, or you specifically want that super-smooth look in your videos, use a higher frame rate.
Use Encoding Presets
FFmpeg provides encoding presets that allow us to trade off encoding speed versus compression efficiency.
A slower preset means the encoder spends more time analyzing and optimizing the video compression, finding ways to encode more efficiently. The result is that for the same quality, for example, the same CRF value, a slower preset will probably produce a smaller file than a faster preset.
Depending upon the compression speed, FFmpeg allows the following presets:
- ultrafast
- superfast
- veryfast
- faster
- fast
- medium (this is the default preset)
- slow
- slower
- veryslow
- placebo
You choose a preset with -preset <option> in the FFmpeg command.Here is an example command.
ffmpeg -i input.mp4 -c:v libx264 -crf 23 -preset slow -c:a aac -b:a 128k output_slowpreset.mp4
The above command will encode the x264 slow preset. If you compare the output video from the above command with another with the -preset ultrafast option, the slow preset file will likely be smaller and/or of better quality, but longer in processing time.
In practice, a good approach is to use the slowest preset that you can tolerate in terms of time. For a short video, even a very slow one might be fine, but for a longer video or a batch of videos, you may want to stick with medium or fast settings so that it finishes in a reasonable amount of time.
Advanced FFmpeg Video Compression Options
Besides the basic compression techniques presented in the previous section, several advanced techniques can further enhance your compression outcomes. They’re especially helpful when aiming for goals, like a specific file size or the best compression using new codecs.
Two-Pass Encoding
Two-pass encoding is useful when we need to hit a specific file size or average bitrate. With it, FFmpeg analyzes the video in the first pass and allocates bits more intelligently in the second pass across both complex and simple scenes, resulting in a more consistent quality at the exact bitrate we choose.
Using two-pass in FFmpeg involves running two commands (with -pass 1 and -pass 2). For example, to compress a video to around 1000 kbps (1 Mbps):
First pass (no output file yet, just analysis)
ffmpeg -i input.mp4 -c:v libx264 -b:v 1000k -pass 1 -an -f null /dev/null
Notice we disable audio (-an) and output to null: we’re just creating the log file with statistics. After that finishes, we run the second pass.
ffmpeg -i input.mp4 -c:v libx264 -b:v 1000k -pass 2 -c:a aac -b:a 128k output_two_pass.mp4
Here, we include audio encoding and produce the final file. The encoder will use the log from pass 1 to guide compression in pass 2.
Two-pass encoding is especially useful if you need to file with a specific size or are preparing a video for streaming with limited bandwidth. The downside, of course, is that it takes roughly twice as long, since you’re encoding the video twice.
Use More Efficient Codecs
Beyond H.264, we also have newer codecs that can deliver the same quality at a significantly smaller file size. The most common options are H.265 (HEVC), VP9, and AV1.
- H.265 (HEVC): H.265 gives us around 50% better compression than H.264 for the same quality. FFmpeg supports it through libx265, and we typically use a higher CRF (around 28) to match the quality of H. 264. The trade-off is that HEVC is slower to encode and not all devices can play it, so we must consider compatibility.
- VP9: VP9 is another efficient codec and is widely used on the web. It’s royalty-free and supported by most modern browsers. Like HEVC, it’s slower to encode but offers much smaller files compared to H.264.
- AV1: AV1 gives us the best compression of all, but encoding is extremely slow unless we have hardware support. It’s great when we want maximum compression and we know our audience can play it.
Best Practices for Testing Results
Once we compress our videos, we want to make sure that the video is of acceptable quality and the desired size. Here are some best practices for testing your compressed videos before finalizing or sharing them.
- Compared to the Original (A/B Testing): The easiest way is to play the original and the compressed video side by side to spot differences. Look at them on the same screen and note where you see a drop in quality. If you have to squint to see a difference, your compression settings are probably fine.
- Check Complex Scenes: Pay close attention to sections with fast motion, intricate details, or complex patterns such as water, confetti, or crowd scenes. These are the areas where compression effects are most often noticeable when the bitrate is insufficient. Additionally, dark scenes and gradients, such as a sunset sky, are notorious for exhibiting banding or blocky patches after compression.
- Watch for Color Banding: As mentioned, color banding (as in rings or steps in what should be a smooth color transition) can occur when compression reduces color detail. Look for this in skies, shadows, or out-of-focus backgrounds.
- Test on Multiple Devices: A video might look fine on your computer screen, but try playing it on a phone, a big TV, or other devices, especially if you’ve reduced the resolution. This helps ensure your chosen resolution/bitrate works for the target viewing conditions.
- Listen to the Audio: Ensure the audio sounds okay and is in sync with the video content. A very low audio bitrate can cause tinny or muffled sound, so ensure speech is clear or music hasn’t lost too much fidelity.
Compression Strategy by Use Case
The “best” compression settings often depend on how we plan to use the video.
Web or social media
For websites and social media, we usually target small file sizes and broad compatibility. H.264 with a moderate CRF (22–25), 30 fps, and a reasonable resolution (720p or 1080p) works well. This keeps video loading fast without sacrificing too much quality.
Archival or professional use
For professional use, our priority shifts toward quality. Here, we want to use a lower CRF (15–18) and a slower preset. H.265 is an option if we control the playback environment, since it saves space while keeping quality high. Additionally, if you plan to use a video in the future, it’s a good practice to archive the original high-quality video.
Low-bandwidth sharing
If you want to offer videos that are easier to share, such as via email, social media, or messaging apps, aim for the smallest file size possible. That often means dropping the resolution to 480p, using a higher CRF (30+), lowering the frame rate, and compressing audio more aggressively.
Using Cloudinary for Video Optimization
Cloudinary is an image and video API platform that lets us upload, store, transform, and optimize images and videos programmatically. Instead of running manual compression scripts on our machines, Cloudinary handles optimization on the fly through simple URLs or SDK calls.
It enables the easy automation of video delivery, reduces file sizes, and ensures consistent quality across various devices and network conditions.
Let’s see how to optimize videos using Cloudinary.
Step 1: Setting up the environment
You can use multiple front-end and back-end programming languages to optimize images and videos using Cloudinary. Select the programming language of your choice and see the documentation. For the sake of this article, we demonstrate examples in Python; you can use any other programming language if you want.
Don’t forget to sign up for Cloudinary and get your Cloudinary credentials before you get started!
We will set up a Python environment to run the examples. The first steps are:
- Downloading the code from this repository.
- Creating an
.envfile in your environment. - Copying the environment variables from the
.env.examplefile into the.envfile, then add your credentials to the environment variables.
Next, create a new Python environment named venv and activate this environment. Finally, run the following command in the venv environment to install dependencies.
pip install -r requirements.txt
You will also need to create a folder named video-samples and download the videos from the following links into this folder. We will use these video samples in the code.
## Video download links:
# https://pixabay.com/videos/dinner-food-restaurant-meal-table-312856/
# https://pixabay.com/videos/sea-ocean-seagulls-birds-sunset-140111/
# https://pixabay.com/videos/basketball-hoop-net-urban-street-208442/
# https://pixabay.com/videos/birds-nesting-breeding-season-276047/
# https://pixabay.com/videos/drones-dji-drone-camera-flight-23338/
# All videos downloaded in 1280 x 720 resolution and placed in video-samples/ directory
Your final project structure should look like this:

Step 2: Run example codes
Run the following script to import Cloudinary modules we will use in the code examples.
from dotenv import load_dotenv
import os
import glob
import cloudinary
import cloudinary.uploader
from cloudinary import CloudinaryVideo

load_dotenv()

cloudinary.config(
  cloud_name = os.getenv("CLOUD_NAME"),
  api_key = os.getenv("API_KEY"),
  api_secret = os.getenv("API_SECRET")
)
You can upload and optimize videos in one or two steps. Let’s first see the two-step approach.
Uploading and Optimizing Videos
The following code uploads a video to the Cloudinary cloud. Note that you can also upload a video directly to the Cloudinary dashboard.
# Video link: https://pixabay.com/videos/birds-nesting-breeding-season-276047/
response = cloudinary.uploader.upload("../video-samples/276047_tiny.mp4",
resource_type = "video",
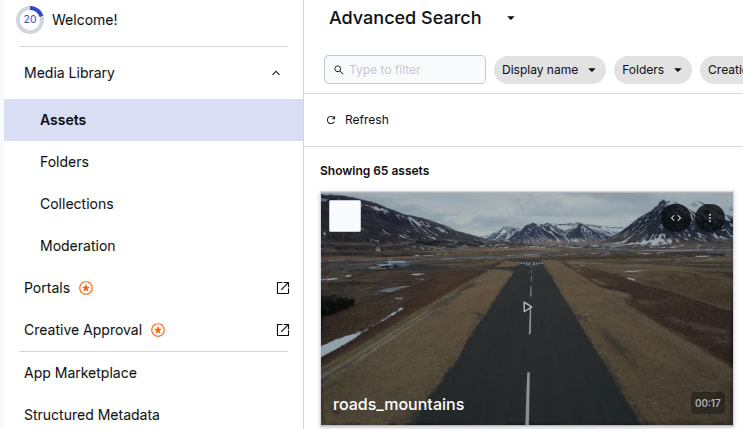
public_id = "roads_mountains"
)
Once you run the above script, you will see a video uploaded with the ID “roads_mountains” in your “Assets” folder of the Cloudinary dashboard.
Next, you can apply various types of video optimization techniques to it. For example, you can modify the video quality using the quality attribute in Python. The value of the quality ranges between 1 (the lowest quality, with the smallest size) to 100 (the highest quality, but a larger size).
response = CloudinaryVideo("roads_mountains").video(quality=10)

The above video has been compressed by 90%.
You can also apply optimizations directly via the URL.
https://res.cloudinary.com/your_cloud_name/video/upload/q_10/roads_mountains.mp4.
Another optimization technique you can apply is to adjust the bitrate, either increasing or decreasing it.
Here is an example:
response = CloudinaryVideo("roads_mountains").video(bit_rate="64k")
You can change the resolution by setting the width, height, or both, as shown in the example below.
response = CloudinaryVideo("roads_mountains").video(width=480, crop="scale")
You can set the video optimization settings during video upload as the following code shows:
cloudinary.uploader.upload("../video-samples/276047_tiny.mp4",
  resource_type = "video",
  public_id = "roads_mountains",
  transformation = {"quality": 30}
)
Uploading and Optimizing Multiple Videos
With Cloudinary, you can scale your video optimization process and process multiple videos together. Here’s how:
folder = "../video-samples"
video_paths = glob.glob(os.path.join(folder, "*.mp4"))
for file_path in video_paths:
public_id = os.path.splitext(os.path.basename(file_path))[0]
print(f"Uploading {file_path} as {public_id}...")
cloudinary.uploader.upload(
file_path,
resource_type="video",
public_id=public_id,
transformation={"quality": 30}
)
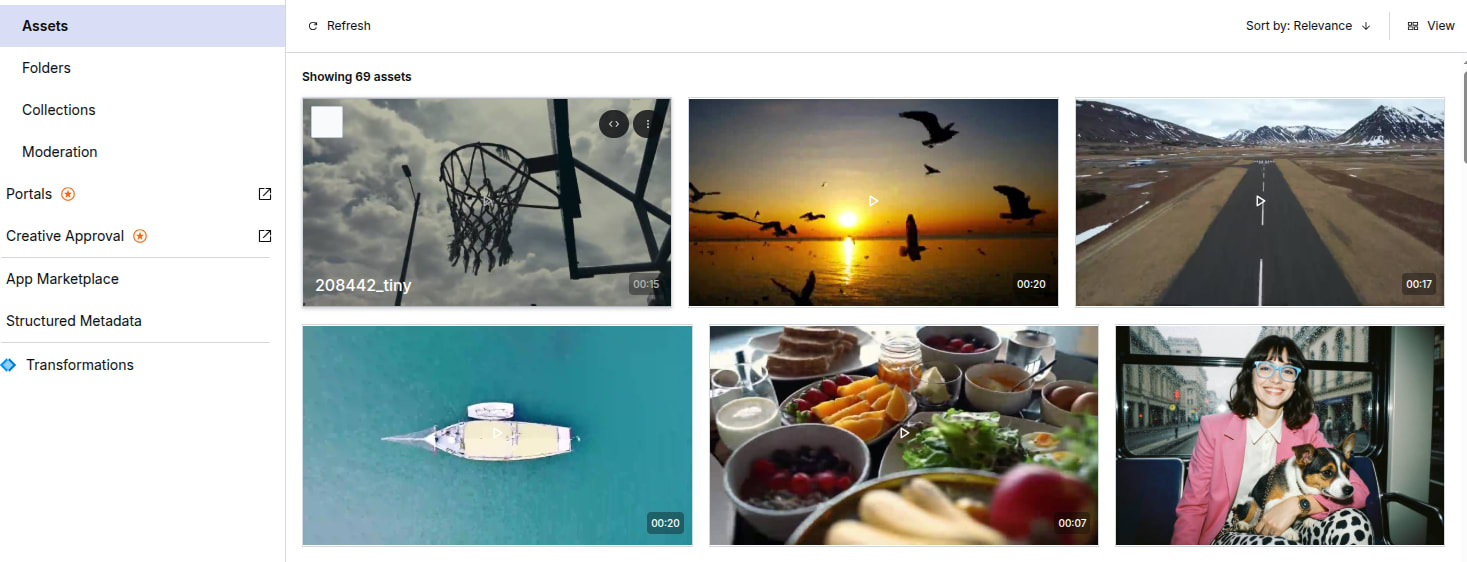
print("All uploads completed!")
You will see all your videos optimized and uploaded to the Cloudinary dashboard.
And this is just the tip of the iceberg. You can do a lot more with Cloudinary. Check the Cloudinary video optimization documentation to learn more about various optimization techniques.
Final Tips
To wrap up, here are a few quick recommendations for compressing videos effectively with FFmpeg:
- Start with H.264 and a reasonable CRF: For most videos, CRF 22–24 with the medium preset balances quality and size well.
- Use slower presets when size matters:
-preset sloworveryslowcan noticeably shrink files if you have time. - Don’t forget audio: Re-encode audio to AAC at a sensible bitrate (128 kbps for music, 64 kbps for speech) to save extra space.
- Use H.265 or VP9 for better compression: They can cut file size significantly, but remember the compatibility and encoding-time trade-offs.
- Use two-pass encoding for strict size targets: It delivers more consistent quality at a fixed bitrate.
- Always test your results: Scrub through complex scenes, listen to the audio, and check playback on multiple devices.
- Keep your originals: Compression is lossy, so always save a master version before producing smaller copies.
These tips will help you produce smaller, smoother videos while maintaining the necessary quality.
Frequently Asked Questions
What is the easiest way to compress a video with FFmpeg?
The simplest method is to use H.264 with a CRF value. A command like -c:v libx264 -crf 23 gives solid quality at a much smaller size without needing to set bitrates manually.
Does lowering the resolution or bitrate result in a greater reduction in quality?
Both affect quality, but bitrate usually has a bigger impact. A low bitrate will make even a 1080p video look bad, while a sufficiently high bitrate can make a lower-resolution video look surprisingly sharp.

