
Since the beginning of the rise of the web, images have become a common and integral part of modern websites and website applications. Images are used for various purposes, such as conveying concepts and information that can help improve comprehension by reinforcing information provided in text.
Images can also represent a brand’s identity and improve the user experience by providing additional context or explanation for various website contents. They also play a vital role in a website’s SEO, which can help grab the attention of website visitors, improve user engagement, and ultimately drive conversions.
While images can help improve the quality of a website’s content, they can also be disadvantageous when misused. For example, using an image with a large file size that takes too long to load on a webpage is one of the most common ways images hamper a website’s performance and usability.
Why is Image Optimization Necessary?
Image optimization is a technique for delivering high-quality images in the right format, dimension, and resolution while keeping the file size as small as possible. Image optimization is particularly useful for websites presenting high-quality images to users without sacrificing performance metrics such as page load time.
Types of Image Compression
Two major techniques are used in image compression: lossy and lossless. Lossy compression reduces image file size by permanently removing or ‘losing’ certain information in the image that is not useful.
Lossless compression, on the other hand, reduces an image file size by rebuilding and restoring its original data so it can take up less space. Because no data is lost in this compression method, the process is reversible, also known as reversible compression.
Depending on the compression method you decide to use, there are advantages and disadvantages. Lossy compression gives you a smaller file size than the lossless method but with a trade-off of image quality and vice versa. Some common trade-offs associated with lossy compression are color degradation, the introduction of visual artifacts like blockiness and blurring, and the irreversibility of the compressed images.
Image Optimization with JavaScript Library
There are several libraries and packages that can be used to compress images in JavaScript applications. Some of the most popular ones are discussed below.
TinyPNG
TinyPNG offers a versatile toolkit for various image manipulation tasks. It has a browser-based interface for uploading images directly for compression and an API supporting programming languages like JavaScript, Python, PHP, Java, and more. Apart from image compression, TinyPNG also allows you to convert images from one format to another, resize, crop, or perform simple image editing operations like background removal and addition.
Compressing an image in Node.js using TinyPNG is straightforward:
const tinify = require("tinify");
const fs = require("fs");

tinify.key = "YOUR_API_KEY";

// Function to compress an image file
function compressImage(inputFilePath, outputFilePath) {
  fs.readFile(inputFilePath, function (err, sourceData) {
    if (err) {
      console.error("Error reading input file:", err);
      return;
    }

    // Compress the image data
    tinify.fromBuffer(sourceData).toBuffer(function (err, resultData) {
      if (err) {
        console.error("Error compressing image:", err);
        return;
      }

      // Write the compressed image data to the output file
      fs.writeFile(outputFilePath, resultData, function (err) {
        if (err) {
          console.error("Error writing output file:", err);
          return;
        }
        console.log("Image compressed successfully:", outputFilePath);
      });
    });
  });
}

// Example usage
const inputFilePath = "unoptimized.jpg";
const outputFilePath = "optimized.jpg";
compressImage(inputFilePath, outputFilePath);
Other notable packages include UPNG.js, compressor.js, and browser-image-compression.js.
Image Compression using Canvas Element
The HTML <canvas> element’s toBlob method is a handy tool for image compression using vanilla JavaScript and good old HTML. In this example, we’ll show you how to compress an image using the canvas element.
The main tool for the image compression is the toBlob method. It has the following syntax:
toBlob(callback, type, quality);
To get started, create a new folder and an index.html file in it with the following code:
    <meta name="viewport" content="width=device-width, initial-scale=1.0" />
    <title>Image Compression</title>
    <style>
      body {
        display: flex;
        align-items: center;
        flex-direction: column;
      }
      button {
        background: purple;
        border-radius: 4px;
        padding: 4px;
        color: white;
        cursor: pointer;
      }
    </style>
  </head>
  <body>
    <input type="file" id="fileInput" accept="image/*" />
    <br />
    <canvas id="canvas" style="display: none"></canvas> /* Hidden Canvas Element
    */
    <br />
    <button onclick="compressImage()">Compress</button>
    <br />
    <a id="downloadLink" download="compressed_image.jpg" style="display: none"
      >Download Compressed Image</a
    >

    <script>
      function compressImage() {
        var fileInput = document.getElementById("fileInput");
        var canvas = document.getElementById("canvas");
        var ctx = canvas.getContext("2d");
        var downloadLink = document.getElementById("downloadLink");

        var file = fileInput.files[0];
        var reader = new FileReader();

        reader.onload = function (e) {
          var img = new Image();
          img.onload = function () {
            canvas.width = img.width; // Set canvas size to the image original size to ensure enough space for the image
            canvas.height = img.height;
            ctx.drawImage(img, 0, 0); // Draw the image onto the canvas without resizing

            canvas.toBlob(
              function (blob) {
                var url = URL.createObjectURL(blob);
                downloadLink.href = url;
                downloadLink.style.display = "inline";
              },
              "image/jpeg",
              0.7 // Adjust the compression quality here. Possible values are within 0.0 and 1.0.
            );
          };
          img.src = e.target.result;
        };

        reader.readAsDataURL(file);
      }
    </script>
  </body>
</html>
TIP: You can use the Live Server extension in VS Code to quickly create a server to launch the code.
Once the code is launched, you should see a page like the following in the browser:
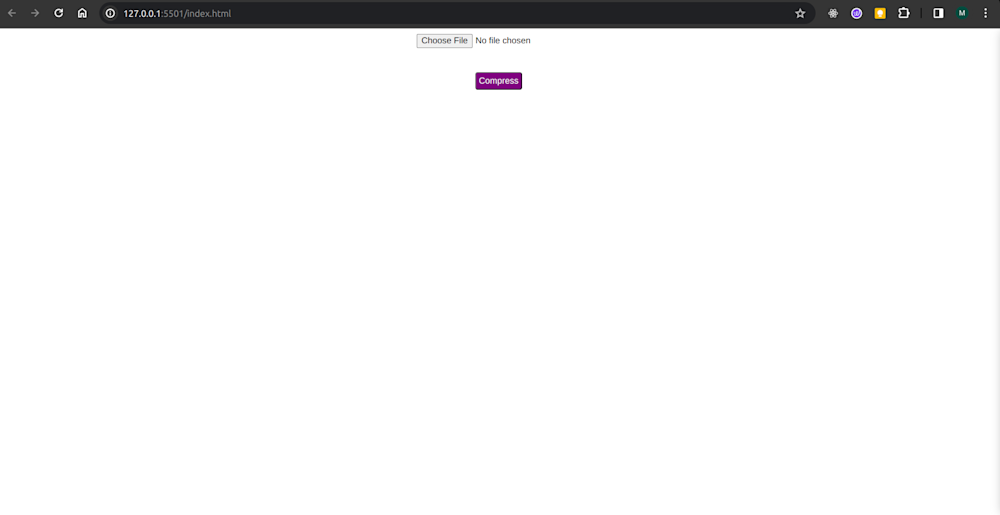
Pretty neat trick, right?
Image Optimization in JavaScript with Cloudinary
Image optimization is one of the many features that Cloudinary has to offer. With Cloudinary, you can perform different kinds of optimizations such as image compression, resizing, format conversion, metadata removal, and many more.
Cloudinary provides an easy and convenient way of compressing images on the fly by letting you specify an image quality setting that defines the compression level to apply to an image. You can apply a value between 1 (lowest image quality) and 100 (highest image quality) or let Cloudinary handle the compression for you automatically.
In this section, we’ll show you how to use Cloudinary Node.js SDK to compress any image in your JavaScript application.
Step 1 – Setting up a Node application
Create a new folder and run the following command to initialize a Node application:
npm init
Answer the prompts to configure the application accordingly and then run the following command to install the necessary packages to run the application:
npm install express multer cloudinary
Next, open the package.json file in the project root directory and modify the scripts field to the following:
"scripts": {
	"dev": "node --watch --env-file=.env index.js
 },
Create a file named index.js in the root directory and add the following code to create an Express server:
const express = require("express");
const app = express();

app.get("/", (req, res) => {
  res.send("The app is running!");
});

app.listen(3000, () => {
  console.log("App is running!");
});
Step 2 – Configure environment variables
To access Cloudinary programmatically using the Node.js SDK, we need to use our Cloudinary API credentials. To get your credentials, log into your Cloudinary account and navigate to your dashboard as shown below:
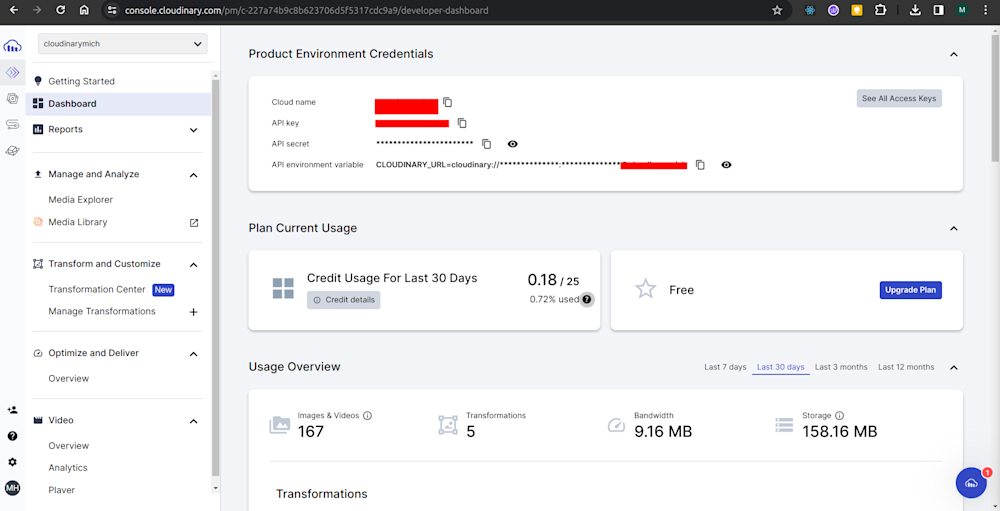
Copy your Cloud name, API key, and API secret. Next, create a .env file in the project root directory and add the corresponding values as follows:
CLOUDINARY_API_KEY =
<YOUR_CLPOUDINARY_API_KEY>CLOUDINARY_CLOUD_NAME =
<YOUR_CLOUDINARY_CLOUD_NAME>CLOUDINARY_API_SECRET =
<YOUR_CLOUDINARY_API_SECRET>
Next, run npm run dev on the command line to start up the server. When you navigate to localhost:3000, you should see The app is running! rendered.
NOTE: Make sure the version of Node.js you’re using is not later than 18.11.0 to avoid unexpected errors when using the –watch flag. You can check the version of Node.js installed on your computer by running node -v in your terminal.
Step 3 – Compress the uploaded image
In this step, we’ll update index.js with the main code to compress the quality of any image uploaded to the server.
const express = require("express");
const multer = require("multer");
const path = require("node:path");
const cloudinary = require("cloudinary").v2;

cloudinary.config({
  cloud_name: process.env.CLOUDINARY_CLOUD_NAME,
  api_key: process.env.CLOUDINARY_API_KEY,
  api_secret: process.env.CLOUDINARY_API_SECRET,
  secure: true,
});

const app = express();

app.get("/", (req, res) => {
  res.send("Welcome to the homepage!");
});

// Function to check if the uploaded file is an image file
const fileFilter = (req, file, cb) => {
  const extname = path.extname(file.originalname).toLowerCase();
  if (extname === "jpg" || "jpeg" || "png" || "webpm" || "tiff" || "bmp") {
    return cb(null, true);
  }
  const error = new Error("Only image files are allowed!");
  error.status = 400;
  cb(error, false);
};

const upload = multer({ dest: "uploads/", fileFilter });

// The server endpoint to upload the image file
app.post("/upload", upload.single("image"), async function (req, res, next) {
  if (req.file !== undefined) {
    console.log(req.file);
    try {
      const imgFile = await cloudinaryImageUpload(req.file.path);
      const compressedFile = compressImage(imgFile);

      res.status(200).json({
        success: true,
        file: compressedFile,
      });
    } catch (error) {
      res.status(400).json({
        success: false,
        error,
      });
    }
  } else {
    res.status(400).json({
      success: false,
      error: "No image file was uploaded",
    });
  }
});

// Function to upload the image file to Cloudinary
const cloudinaryImageUpload = (file) => {
  return new Promise((resolve, reject) => {
    cloudinary.uploader
      .upload(file)
      .then((result) => {
        console.log(result);
        resolve(result.public_id);
      })
      .catch((error) => {
        reject(error);
      });
  });
};

// Function to compress the image quality
const compressImage = (img) => cloudinary.url(img, { quality: 60 });

app.listen(8080, () => {
  console.log("App is running!");
});
Here’s a breakdown of what’s going on above.
- In the first few lines, we imported the packages for running the application and also configured the necessary Cloudinary credentials using environment variables.
- Next, we defined a
fileFilterfunction to check if the uploaded file is an image file. If the file is an image, it calls the callback functioncbwithnullandtrueto allow the file upload. Otherwise, it creates an error object and calls the callback with the error andfalseto reject the file upload. - Next, we defined a route handler for the
/uploadendpoint. This code block uploads the image file to Cloudinary using thecloudinaryImageUploadfunction. If the upload is successful, thecompressImagefunction is called to compress the image quality, and the compressed file URL is finally sent as a JSON response.
Step 4 – Trying it out
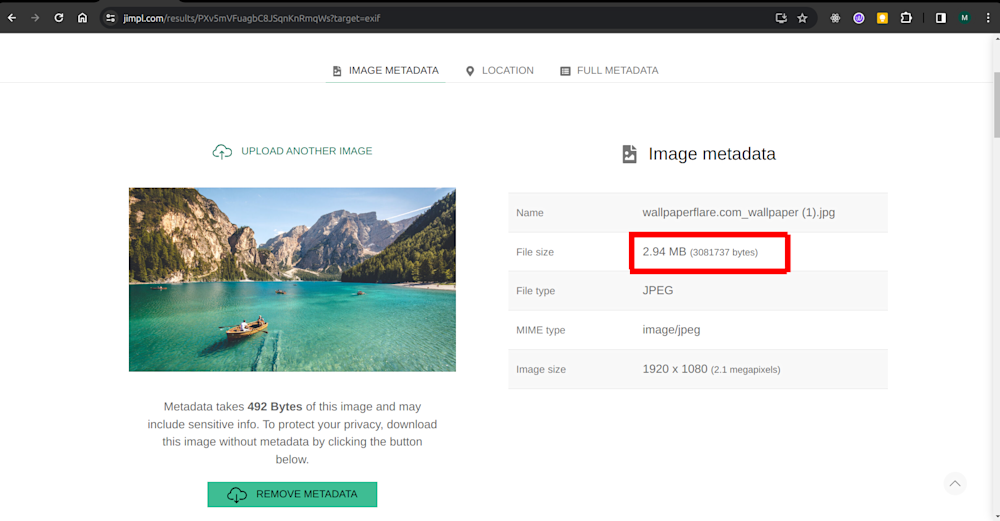
Let’s try out our code by uploading an image file for compression using the Postman VS Code extension. The image we’ll be uploading has an original file size of 2.94 MB, as shown below:
Next, we’ll open the Postman extension and upload the image to the server:
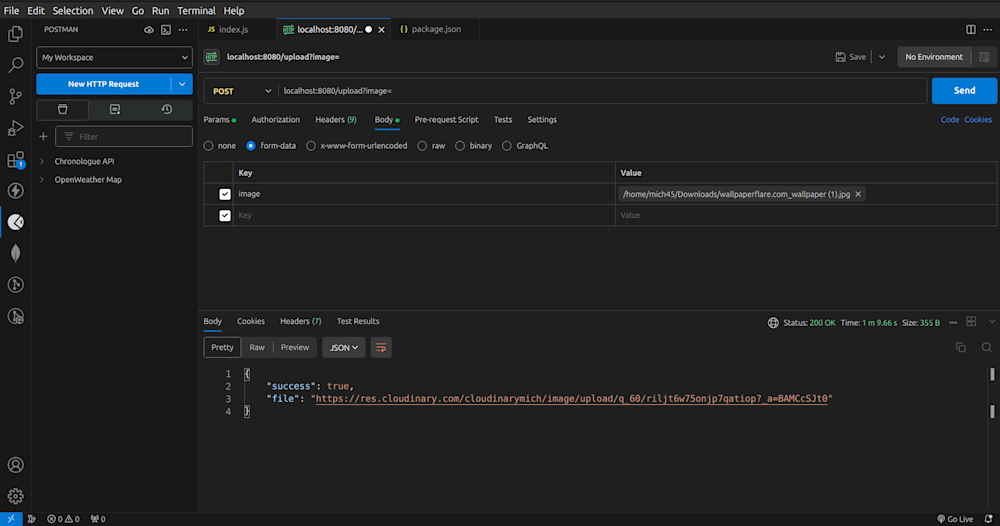
Next, we’ll upload the URL of the compressed image to Jimpl.com to see if the image has really been compressed by checking its file size.
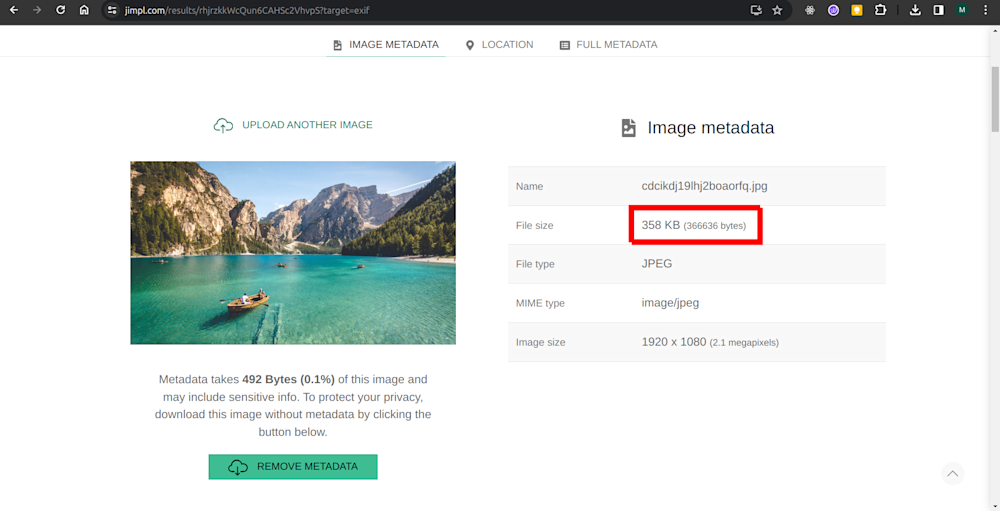
Indeed! The file size has been reduced from a whopping 2.94 MB to 358 KB—that’s about an 88.1% reduction! And the image still maintains its original quality. Isn’t that awesome!?
Now, you can go on to compress the images on your website with Cloudinary for improved performance and user experience!
Wrapping Up
Optimizing images is crucial for enhancing any website’s performance, user experience, and search engine optimization (SEO). In this article, we explored various JavaScript-based image optimization techniques, including lossy and lossless compression, using libraries like TinyPNG, UPNG.js, compressor.js, and browser-image-compression.js, as well as leveraging the HTML <canvas> element.
Finally, we explored how you can leverage Cloudinary, the cloud-based image management solution, to compress images in JavaScript. Hopefully, this article has given you a glimpse into what’s possible with Cloudinary. Feel free to sign up for a free account today to explore more about what Cloudinary has to offer.

