Did you know that, according to HTTP Archive, images typically comprise 51% of an average website’s total weight? That’s right, images alone could take up over half of your website. To developers or business owners, this isn’t just a quirky stat – it represents the critical importance of optimizing these assets for effective website performance. Poorly optimized images can hurt your site speed, user experience, and SEO rankings. Asset optimization has become a fundamental best practice in modern web development.
For a time, Netlify’s built-in Asset Optimization feature promised a turnkey solution for this, but recent changes mean it’s no longer offering that support. If you used Netlify’s asset optimization, you might be scratching your head, wondering how to fill this gap. So, let’s dive in and explore the potent potential of Cloudinary and how it smoothly blends with your existing Netlify setup.
In addition to asset optimization, Netlify’s framework provides opportunities for enhancing SEO through specific strategies. One such approach is enabling prerendering. Prerendering is crucial for single-page applications developed on Netlify, as it helps search engine crawlers index and navigate your site effectively. By generating a static HTML version of the web pages, prerendering ensures that the content is accessible to crawlers, improving website SEO.
In this article:
- What is Netlify?
- A Glimpse at Netlify’s Asset Optimization Sunset
- The Importance of Asset Optimization in Modern Web Development
- Embracing Cloudinary for Image Asset Optimization
- Hands-on: Transitioning from Netlify’s Asset Optimization to Cloudinary
- Final Thoughts
What is Netlify?
Netlify is a developer-focused platform that empowers teams to build and deploy highly performant websites, e-commerce stores, and web applications efficiently. By seamlessly integrating various technologies, services, and APIs into a single workflow, Netlify enhances team collaboration, productivity, and cost-effectiveness.
Netlify enables developers to create modern, scalable web projects with ease. With millions of developers and businesses leveraging its capabilities, Netlify has established itself as a solid solution for deploying and managing web projects at scale.
A Glimpse at Netlify’s Asset Optimization Sunset
Netlify offered a built-in asset optimization feature encompassing a set of processes, including bundling and minifying CSS and JavaScript files and compressing images. These optimizations aimed to improve website performance by reducing the size of assets, thereby leading to faster load times and better user experiences. However, the company decided to depreciate the feature in 2023.
The timeline of the sunset of Netlify’s Asset Optimization feature is as follows:
- July 17, 2023: The feature was officially deprecated, marking the beginning of its phasing out.
- August 24, 2023: New websites created on the Netlify platform could no longer include the asset optimization feature, effectively cutting off its availability for newcomers.
- September 19, 2023: Netlify disabled mixed content detection and other related checks associated with asset optimization, further signaling its discontinuation.
- October 17, 2023: The feature was entirely discontinued, ceasing to provide asset optimization services to existing websites hosted on Netlify.
Netlify’s sunset of the asset optimization feature has significant implications for websites that depend on it to enhance performance. One of the most immediate impacts is that slower load times become possible. Without asset optimization, websites might undergo longer load times because of larger file sizes. This may cause a less responsive user experience, potentially resulting in higher bounce rates and diminished user satisfaction.
In this context, focusing on performance improvements is crucial. An often overlooked aspect of this is the effective use of metadata. You can significantly improve the click-through rates from search engine results by providing accurate and compelling metadata, such as title tags and meta descriptions. This not only aids in SEO but also contributes to a better user experience.
The Importance of Asset Optimization in Modern Web Development
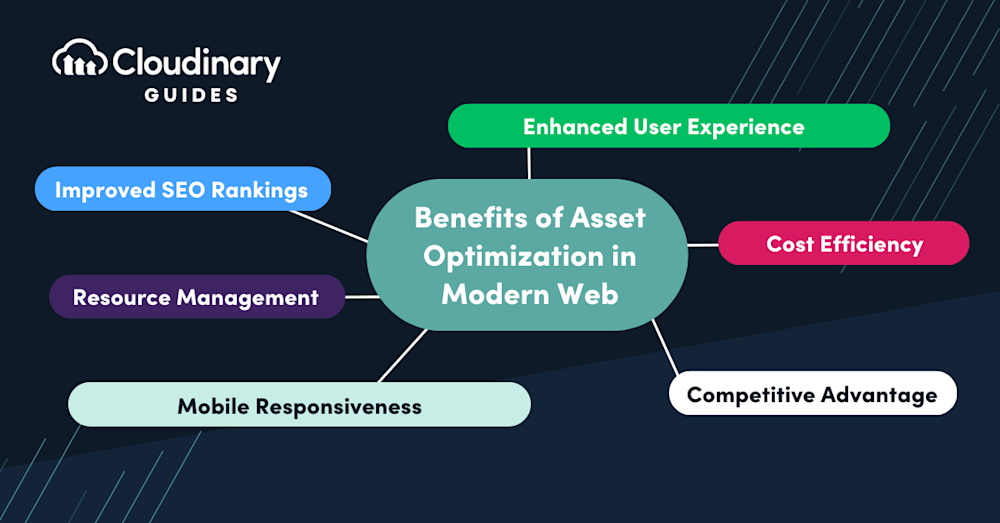
While Netlify’s decision to step back from native asset optimization may initially seem like a curveball, it can serve as the perfect prompt to take a step back and refocus on why asset optimization is so critical in the first place. Understanding the core benefits can assist us in not only adapting to these changes but also harnessing them to become even more effective in our roles:
- Enhanced User Experience. Asset optimization is crucial for achieving faster load times, leading to a significantly improved user experience. Quick-loading websites reduce bounce rates and keep users engaged.
- Improved SEO Rankings. Efficient site performance, driven by asset optimization, is pivotal in improving SEO rankings. Search engines favor websites that load quickly, positively impacting rankings.
- Cost Efficiency. Asset optimization results in smaller file sizes, reducing the resources required to serve web content. This translates into lower server and bandwidth costs, making it a cost-effective choice for website owners.
- Competitive Advantage. Websites prioritizing asset optimization gain a competitive edge by providing a smoother and faster user experience. This can lead to increased user retention and customer satisfaction.
- Mobile Responsiveness. With the increasing use of mobile devices, asset optimization is essential for ensuring that websites load quickly and efficiently on various screen sizes and network conditions.
- Resource Management. Optimized assets consume fewer server resources, allowing website owners to allocate resources more efficiently and handle increased traffic without compromising performance.
Embracing Cloudinary for Image Asset Optimization
By integrating Cloudinary into your Netlify workflows, developers and technical professionals can take advantage of a suite of powerful features covering asset optimization basics and providing advanced capabilities for fine-tuning performance.
Here’s a quick rundown of the benefits you can expect from embracing Cloudinary for your asset optimization needs:
- Automatic Format Adaptation. Deliver the image format best suited to individual end-users and their devices.
- Responsive Images. Quickly generate multiple image sizes to ensure your website looks great on all screen resolutions.
- Smart Content-Aware Compression. Maintain image quality while reducing file size to help improve load times and save on bandwidth.
- Lazy Loading. Prioritize loading the most critical images, enhancing user experience without compromising overall page aesthetics.
- Image Transformations. Easily transform and manipulate images, adding watermarks, overlays, text, and more directly within Cloudinary.
Pro Tip!
Transform Images On-The-Fly
Manually transforming a large number of images can be tasking and time-consuming. Cloudinary allows you to easily transform your images on the fly to any required format, style and dimension, and apply effects and other visual enhancements.
Hands-on: Transitioning from Netlify’s Asset Optimization to Cloudinary
With Netlify’s decision to sunset its asset optimization feature, navigating this transition smoothly is essential to ensure your website’s performance. Here’s a practical guide to help you make the switch to Cloudinary’s automatic image optimization and explore other asset optimization techniques and tools.
Step 1: Deploy a Website Using Netlify With Static Local Assets
Start by deploying a website using Netlify. For this tutorial, let’s fork a sample website code from a public GitHub repository like this one.
Now, go to the homepage of your Netlify account and look for the Sites section. Select Add new site > Import an existing project > Deploy with GitHub. After you connect to your GitHub and select a repository, you will configure your site by specifying details, including the build command, which in this case would be yarn. Once you proceed, Netlify will take a few minutes to deploy the site.
Now, you can use the generated URL to visit your fully functioning site. Note that if you inspect this webpage, the current images are being served statically.
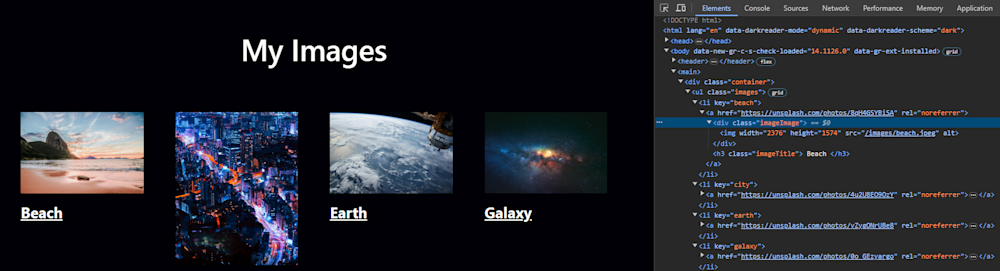
To optimize these images, we can use Cloudinary.
Step 2: Transition to Cloudinary’s Automatic Image Optimization
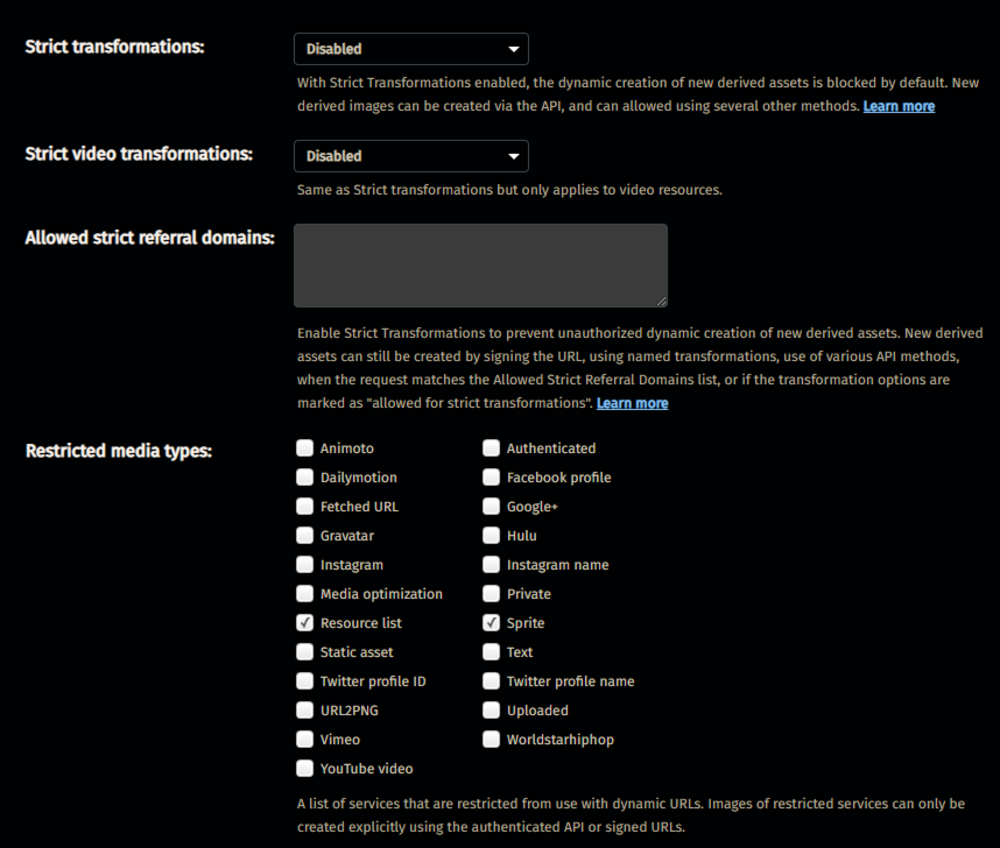
If you haven’t already, create a free account on Cloudinary’s website. Then, you will have to ensure that in your Cloudinary account settings, Strict Transformations and Fetched URL options are disabled.
Step 3: Install Cloudinary Plugin
Now, clone your forked repository, and then to install the Cloudinary plugin, run the following command in your terminal:
npm install netlify-plugin-cloudinary
Step 4: Add a Netlify Configuration File and Redeploy
Create a netlify.toml file in your project’s root directory if you don’t already have one. You have to add some configurations to enable the Cloudinary plugin. Replace <your_cloud_name>, with your Cloudinary account cloud name:
[[plugins]]
  package = "netlify-plugin-cloudinary"

  [plugins.inputs]
  cloudName = "<your_cloud_name>"
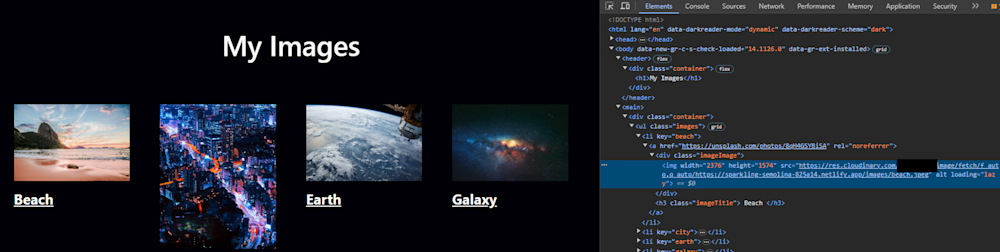
Save the netlify.toml file and commit your changes. This will trigger the redeployment of your website. Netlify will detect the netlify.toml file and configure the Cloudinary plugin according to your settings. Once the deployment is completed, your website will now use Cloudinary’s automatic image optimization. So, now, if you visit the respective URL, you will find the images to be optimized as they are being delivered via Cloudinary if you inspect again.
Follow these steps to smoothly transition from Netlify’s Asset Optimization to Cloudinary’s automatic image optimization and ensure your website maintains top-notch performance and user experiences. Regularly review and update your optimization strategies to stay at the forefront of web performance.
Final Thoughts
Netlify’s decision to sunset its asset optimization feature was a big issue for many developers. Remember, optimizing images and assets remains a cornerstone in creating a swift, user-friendly website experience. This benefits your users and the website’s performance and strengthens your site’s SEO rankings.
By integrating Cloudinary with Netlify, you can still unlock all the benefits of efficiently optimized assets. Cloudinary excels in this domain, providing exceptional features designed to meet the diverse needs of our tech-savvy audience. Now is the perfect time to take action: dive into Cloudinary and explore how this solution can simplify and improve your website’s optimization workflow.
Learn more:
Upload Images to Cloudinary with Netlify Functions
Video tagging made easy: Google-powered add-on for automatic video tagging

