
Python is a versatile programming language beloved for its simplicity and efficiency, enabling developers to perform complex tasks with relatively straightforward code. It also excels in image processing—a critical operation for web developers who frequently need to optimize images for speed, size, and compatibility across different web browsers and devices.
Converting images, for example, from JPEG to PNG or resizing them to fit various screen resolutions not only enhances website performance but also significantly improves user experience. This can also be pivotal in content management systems where dynamic image handling is required. In this article, we’ll walk you through a step-by-step process of converting images in Python from one format to another.
Step by Step Image Conversion with Python
In this tutorial, we’ll be using Pillow (a fork of Python Imaging Library) to convert images from one format to another. Pillow can be used for a variety of basic image processing functionalities, including image resizing, point operations, filtering with a set of built-in convolution kernels, color space conversions, and so on.
Create a virtual environment
It’s often a good practice to create every Python project in a virtual environment so the dependencies of every project are isolated from the system and one another. Create a new directory where you’d like to have the project and run the following command to create a virtual environment:
python3 -m venv env
source env/bin/activate
On Windows, the command may slightly vary
python -m venv env
env/Scripts/activate
Run the command below in your terminal to install Pillow:
python3 -m pip install --upgrade pip
python3 -m pip install --upgrade Pillow
Now, let’s shift our focus from setup to action. With just a few lines of code, you can load an image, display it on your screen, and begin exploring the many ways you can manipulate it to suit your needs.
Loading and presenting an image’s properties
Next, create a file named `converter.py` and add the following code to it:
from PIL import Image

# Define the path to the input image
input_image_path = "Image-1.jpg"

# Open the image using Pillow
image = Image.open(input_image_path)

# Display basic properties of the image
print("Image format:", image.format)
print("Image mode:", image.mode)
print("Image size:", image.size)
When you run the above code, it should print out the properties of the images similar to the following:
Image format: JPEG
Image mode: RGB
Image size: (500, 281)
Changing the Format of Every Image in a Directory
First, you’ll need to create a folder structure for the project. Let’s assume you’ll be working with the following folder structure:
image_converter/
    ├── input_images/
    └── output_images/
The images we want to convert will be placed in the `input_images` folder, and the converted images will be saved into the `output_images` folder.
In the root of the `image_converter` directory, create a file named `batch_converter.py` and add the following code to it:
# Step 1
from PIL import Image
import os

# Step 2
input_dir = "input_images/"
output_dir = "output_images/"

# Create output directory if it doesn't exist
if not os.path.exists(output_dir):
    os.makedirs(output_dir)

# Get all files in the input directory
files = os.listdir(input_dir)

# Iterate through each file in the input directory
for file in files:
    # Check if the file is an image
    if file.endswith(".jpg") or file.endswith(".png"):
        # Open the image
        image_path = os.path.join(input_dir, file)
        image = Image.open(image_path)

        # Convert the image format (e.g., from JPEG to PNG)
        new_file = os.path.splitext(file)[0] + ".png"
        output_path = os.path.join(output_dir, new_file)
        image.save(output_path, format="PNG")

        print(f"Converted {file} to PNG")

print("Conversion complete!")
Although the example above only converts JPG or JPEG images to PNG, you can modify the code to change the format of any image depending on the format of the input image and the output format you want to convert to.

Converting Image with Python with Cloudinary
While Pillow offers a robust toolkit for image conversion, there are scenarios where it may not be efficient or suitable for the task at hand. Cloudinary is a cloud-based software solution that provides image and video management services. Cloudinary allows users to upload, store, manage, manipulate, and deliver images and videos for websites and applications.
One of the advantages of using Cloudinary over Pillow is ease of use. Cloudinary provides a simple to use Python SDK and API for uploading images and performing transformations in the cloud. With Cloudinary, there is no need to write custom or complex image processing code as a wide array of pre-built image manipulation functions are available through simple API calls. This makes Cloudinary much easier to implement than handling image processing manually with Pillow.
Another major instance where Cloudinary outshines Pillow or other Python-based image processing libraries is scalability. Cloudinary performs all of its image processing operations in the cloud, using its own high-performance infrastructure. Pillow, on the other hand, uses your system’s resources to carry out its processing operations. Using Pillow for intensive tasks can negatively impact the performance of your website or application. With Cloudinary, the cloud infrastructure is responsible for processing the load, so your application performance remains unaffected.
In the next sections, we’ll walk you through how you can convert images in Python using the Cloudinary Python SDK.
Step 1 – Create a virtual environment and install package dependencies
First of all, create a new folder where you’d like to have the project and create a virtual environment in the directory.
python3 -m venv env
source env/bin/activate
This will create a new `env` directory and activate the environment. Then, run the following command to install the necessary packages for the application:
python3 -m pip install fastapi python-multipart pydantic-settings python-dotenv uvicorn[standard]
Here’s a quick breakdown of the packages we’re using and what they do:
- FastAPI – FastAPI is a Python framework for creating web servers and APIs.
- Python-multipart – A Python library for handling multipart/form-data POST requests.
- Python-dotenv – A Python library that reads key-value pairs from a `.env` file and adds them to the environment variables.
- Pydantic-settings – A Python library that provides a way to manage application settings and configurations using Pydantic models.
- Cloudinary – A cloud-based service that provides an end-to-end image and video management solution. It offers features such as image upload, storage, manipulation, optimization, and delivery.
- Uvicorn – An ASGI web server implementation for Python. We’ll use it to create a server environment for our application.
Also, create a `.gitignore` file in the root directory and add the following into it:
__pycache__/
*.py[cod]
*$py.class

venv/
env/
Now, create a file named `main.py` in the project root and add the following code in it:
# Step 1 - import the fastapi class
from fastapi import FastAPI

# Step 2- create a `FastAPI` instance:
app = FastAPI()

# Step 3 - define a path operation decorator and function
@app.get("/")
async def root():
return {"message": "Hello World"}
Next, run the following command in the terminal to start up the server:
uvicorn main:app --reload
Now, if you go to http://127.0.0.1:8000 in your browser, you should see the following JSON response:
{ "message": "Hello World" }
Great! Our application is now up and running.
Step 3 – Add environment variables
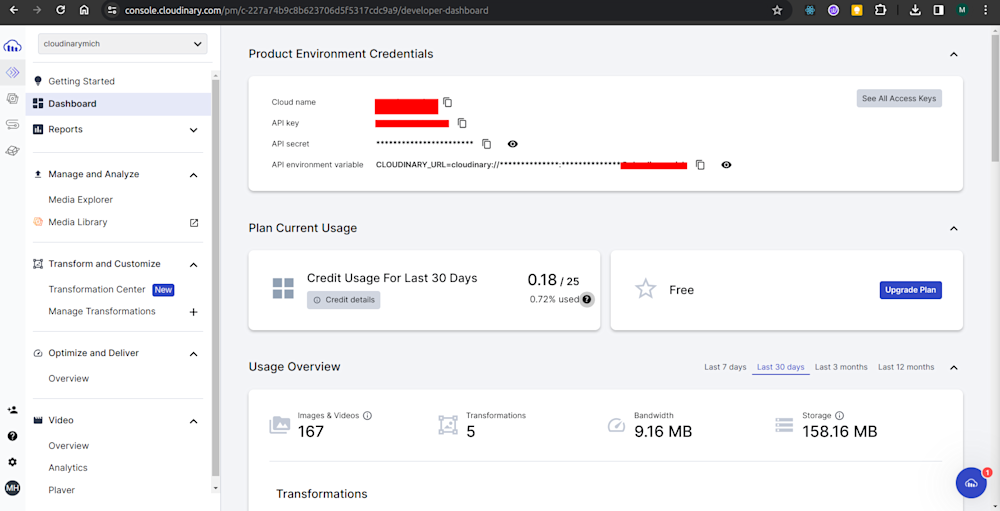
When accessing Cloudinary programmatically, we must provide certain credentials to authenticate our requests to the service. Log in to your Cloudinary dashboard and copy your API key, Cloud name, and API secret.
Next, create a `.env` file in the root of the project and add your credentials as follows:
CLOUDINARY_API_KEY =
CLOUDINARY_CLOUD_NAME =
CLOUDINARY_API_SECRET =
Step 4 – Converting an image to another format
Open the `main.py` file and add the following code to it:
from fastapi import FastAPI
from fastapi import FastAPI, File, UploadFile
from pydantic_settings import BaseSettings
import cloudinary
import re
import os


class Settings(BaseSettings):
    CLOUDINARY_CLOUD_NAME: str
    CLOUDINARY_API_KEY: int
    CLOUDINARY_API_SECRET: str
    class Config:
        env_file = ".env"

settings = Settings()

config = cloudinary.config(cloud_name = settings.CLOUDINARY_CLOUD_NAME, api_key = settings.CLOUDINARY_API_KEY, api_secret = settings.CLOUDINARY_API_SECRET)

import cloudinary.uploader
import cloudinary.api

app = FastAPI()

async def cloudinary_upload(file):
    # Regex to check for the file extension format
    match = re.search(r'\.([^.]+)$', file)
    file_format= match.group(1)
    try:
        # If the uploaded image is PNG, convert it to JPG
        if file_format.lower() == "png":
         imageURL =  cloudinary.uploader.upload(file, fetch_format = "jpg")
         return imageURL
        # If the uploaded image is JPG, convert it to PNG
        elif file_format.lower() == "jpg" or file_format.lower() == "jpeg":
         imageURL =  cloudinary.uploader.upload(file, fetch_format = "png")
         return imageURL
        # If the uploaded image is neither PNG nor JPG, convert it to PNG
        elif file_format.lower() not in ["jpg", "png", "jpeg"]:
         imageURL =  cloudinary.uploader.upload(file, fetch_format = "png")
         return imageURL

    except:
        print("An errror occured while converting the file.")


@app.get("/")
async def root():
    return {"message": "Hello World"}

@app.post("/upload")
async def create_image(image: UploadFile = File(...)):
    os.makedirs("images", exist_ok=True)

    file_location = f"images/{image.filename}"
    with open(file_location, "wb+") as file_object:
        file_object.write(image.file.read())

    result = await cloudinary_upload(file_location)

    converted_file = result["secure_url"]


    return f"The converted file can be found here: {converted_file}"
Here’s what is going on in the code above.
- In the first few lines of the code, we imported the necessary modules for creating our application, such as the `
File` and `UploadFile` modules from FastAPI for file uploads. We also imported the `BaseSettings`module from `pydantic_settings` for defining the application settings. - In the next lines, we defined a `
Settings` class that defines the settings required for accessing the Cloudinary service using environment variables. - Next, we created a `
cloudinary_upload` function for uploading the image file to Cloudinary. The function takes the image’s path as input, checks for its file format using regular expression, and uses the `cloudinary.uploader.upload` method to specify the format we want the image to be returned in (this is the part of the code that changes the image’s file format). - Finally, we defined a route handler for the `
/upload` endpoint, which expects an image file as input. It saves the uploaded file locally, uploads it to Cloudinary, converts it to another format, and finally returns the URL of the converted file.
Putting it to the test
Now, let’s examine the output of our code so far. To test our application, download Postman. This program allows us to test and send HTTP or API calls for our local projects.
Any image file you upload to the endpoint will be converted to either a PNG or JPG format or as you specify in your code. Just make sure to set up the request parameters as shown below:
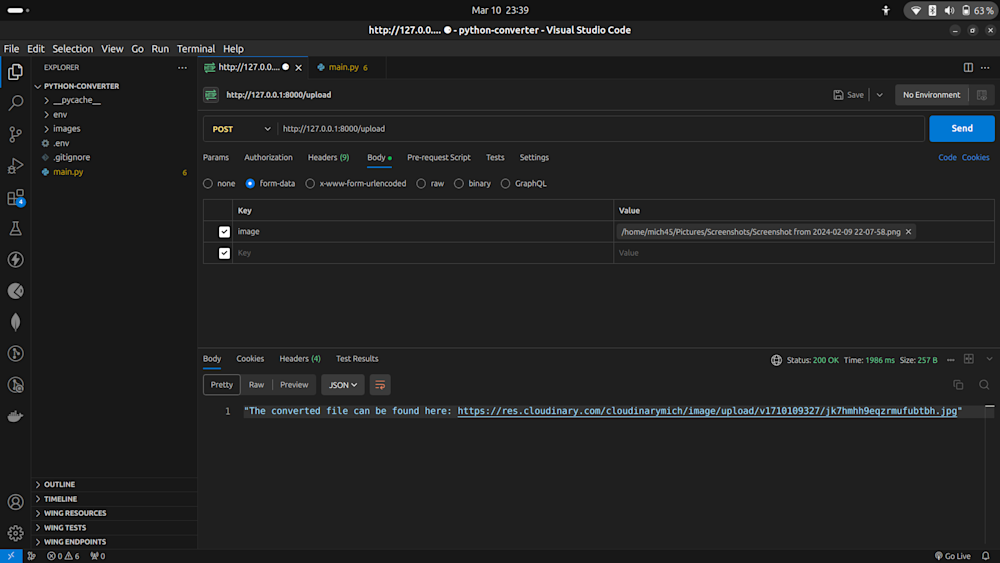
Once you send the request, you should receive a link to the file that has been converted in the API response. Hooray!
Wrapping Up
Congratulations if you made it this far! This tutorial has just scratched the surface of the many possible things with Cloudinary. You’ll find Cloudinary useful and suitable for many other use cases. To get started, feel free to sign up for an account today to enjoy the world-class features and flexibility that Cloudinary has to offer.

