What is a README.md in GitHub?
GitHub is a popular platform for storing, managing, and sharing source code. A README.md is your GitHub repository’s welcome mat, showing users what your project can do and even serving as a form of documentation. It’s formatted using Markdown, a lightweight markup language that allows you to style your writing with special characters that can be interpreted and formatted by browsers.
The README.md is usually the first file visitors see when they visit your repository. It should provide an overview of your project, instructions on how to install or use it, and any other essential information. It can also include examples of use cases, highlight specific features, or even provide information on how to contribute to your project if it’s open source.
The README.md is not just a plain text file; it’s a canvas where you can embed images, GIFs, and videos to make your repo easier to understand and use. Adding visual elements provides context to your code and can be the difference between a passerby and a new contributor or user.
This is part of a series of articles about image optimization.
In this article:
4 Methods to Add an Image to GitHub README
Let’s look at four ways to add images to your GitHub repository’s README file. All these methods require editing your README file.
To edit your README file:
- Sign into GitHub.
- Access your GitHub repository.
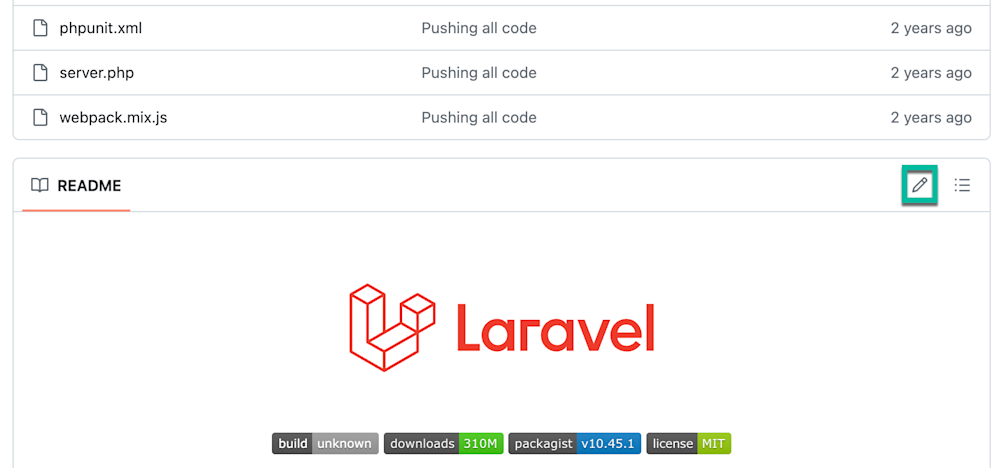
- Scroll down past the list of folders and file.
- Click the pencil icon at the top right of the README frame.
1. Adding Images with Drag and Drop
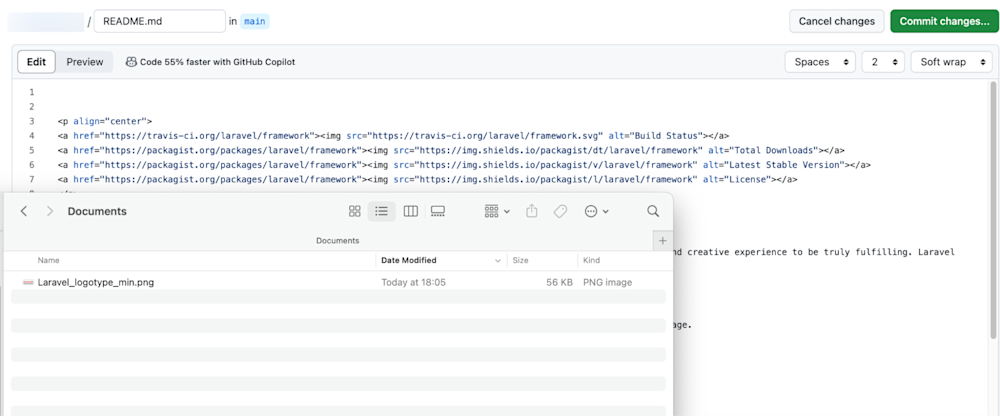
The easiest way to add images to your README.md is to drag and drop an image file directly into the README editor.
Open the folder containing the image you want to add. Click the image and drag it into the README.md code in the position you want it to appear.
GitHub will upload the image to your repository and then display Markdown code that displays the image:
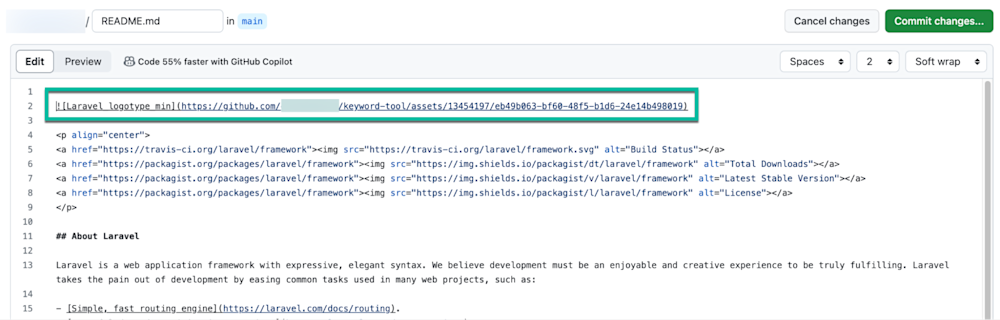
Click Preview to see how the image looks, or Commit changes if you want to update the README with the new image.
2. Adding Images using Relative Paths in Markdown
Another option is manually uploading the image file to a folder in your GitHub repository. Then, you can reference it in your README.md using relative links.
For example, if you have an image named example.png and upload it to an images folder, you can add it to your README.md like this:

The Alt text is the alt attribute for the image, which is useful for accessibility and when the image cannot be displayed. The path inside the parentheses is the relative path to the image in your repository.
3. Adding Images using External URLs in Markdown
Sometimes you might want to reference an image hosted outside your repository. This can be an image from a website, a cloud storage service, or a CDN. The process is similar to adding images with relative paths, but you’ll use the external URL instead of the path.
Here’s how you can do it:

Just replace the URL within the parentheses with the direct link to your image. Be mindful of the rights and permissions associated with the external image you are using. Ensure the URLs are stable and won’t change over time, as broken images in your README can make your project look neglected.
4. Using Base64 Encoding in Markdown
Base64 encoding is another method for adding images to your README.md. This technique involves converting your image into a Base64 string and embedding it directly into your Markdown file. Although this is a fairly uncommon practice, it’s a neat option that may be useful.
Note: While Base64 encoding makes your README.md self-contained, it also makes the file considerably larger and more cumbersome to edit. This method is generally recommended for small images like icons or badges.
You first need to convert the image to a Base64 string, which can be done with a variety of free Base64 encoders. Then, embed the image in your README like this:

5. Bonus Method: Use an Image Hosting Service
You can use an external image hosting service if you don’t want to include images directly in your repository or embed them with Base64. Services like Cloudinary let you upload images and serve them in any size and format with automated transformations. Get a free Cloudinary account and try it out.
Note: This method is useful if you have large images that would bloat your repository size or want an easy way to manage and transform your images.
After uploading your image to the hosting service, you’ll be given a direct link that you can use in your README.md file. In Cloudinary, the URL will look like this:
https://res.cloudinary.com/demo/image/upload/sample.jpg
The process is similar to using external URLs:

How to Resize an Image in GitHub README
Once you’ve added an image to your README.md, you might want to resize it to fit properly within the file. Markdown itself doesn’t offer a native way to resize images, but you can leverage HTML tags within your Markdown file to achieve this.
Here’s how to resize an image using HTML:
<img src="images/example.png" width="300" />
In this example, the width attribute is set to 200 pixels. You can adjust the width to suit your needs, and the height will scale accordingly to maintain the aspect ratio.
Note: Including HTML tags can make your README file difficult to read. Also, it resizes the images on the client side, which is wasteful because users need to download the full size of the original image.
If you use Cloudinary to host your images, resizing them on the server side is easy, just by changing the URL. Here is how to resize the image above to 200 pixels wide directly in markdown:

Cloudinary can do much more than resize your images. For example, you can automatically crop your image with content-aware, AI-based features. For example, this code crops the image to the most interesting area, as determined by AI:
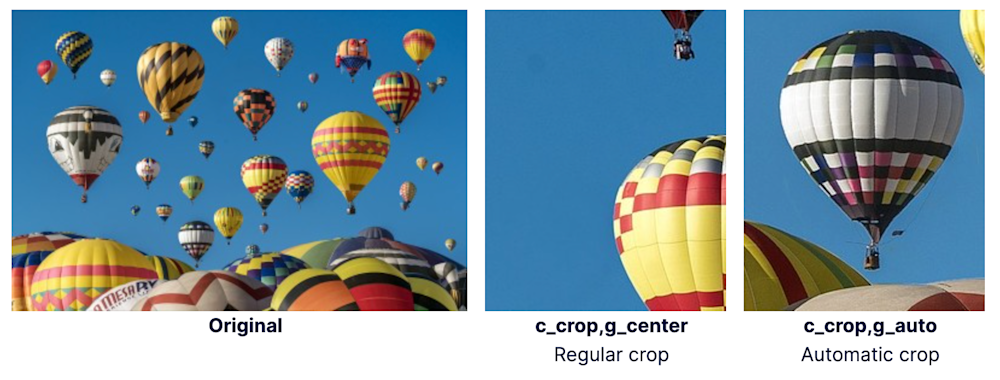
https://res.cloudinary.com/demo/image/upload/c_crop,g_auto,h_250,w_200/docs/hot-air-balloons.jpg
Cloudinary offers a generous free plan—get a free account and host, deliver, and transform images for your software and web projects.

