Adding videos is one of the best ways to provide engagement with your customers as well as update them on product launches. Delivering a memorable and engaging customer experience is the key to success. Videos play a crucial role in achieving this, as they dynamically showcase your products and increase conversion rates by providing instant visual information on product features, benefits, and functionality.
With the rise of social media platforms and mobile devices, videos have become the most preferred form of content consumption, making them an essential tool for connecting with customers and driving sales. And within Magento, you can utilize videos to the fullest, catching your customers and driving sales.
However, adding and managing video content on Magento isn’t always easy, especially when you need to do it at scale. This article will detail how to add and edit videos within Magento, ensuring you make the most of this powerful medium to impress your customers and elevate your e-commerce experience.
How To Add Images Via Products
Strategically placed images on your Magento product page can dramatically boost the effectiveness of your online store. Images breathe life into your products by providing a visually appealing showcase and imparting critical information about product features, sizes, colors, and more. To add videos to your Magento store, you want to navigate Catalog → Products. From this point, you can click on the product you wish to add to your video.
Once you are within the ‘Edit Product’ page, you will need to scroll down to a section labeled “Image And Videos”.
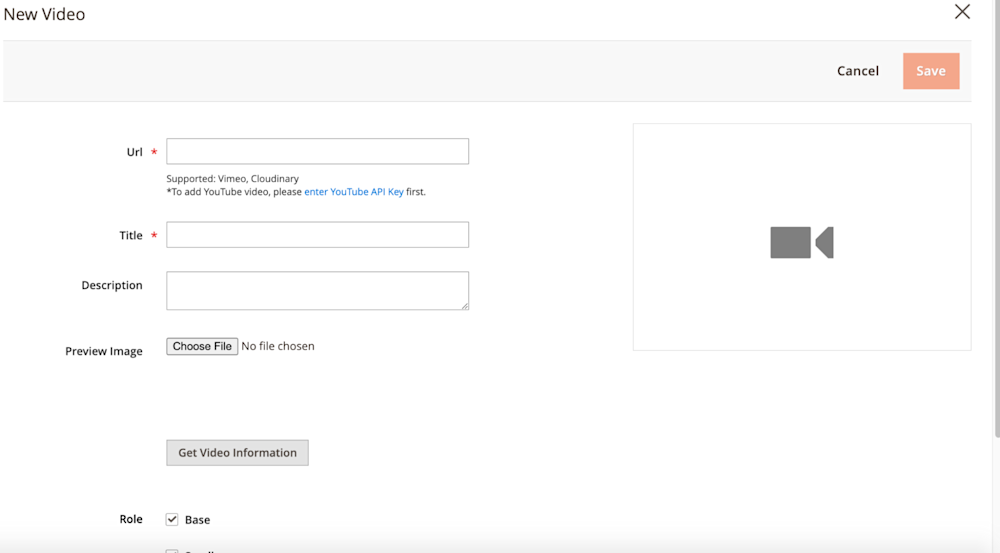
You will see a button labeled “Add Video” toward the right side of this section. Click on this button, and you will be able to manually enter a video by URL. as shown in the image below:
Upon entering the page, you will be presented with a few options:
- URL
- Title
- Description
- Preview Image
Note: Two Key Points
1.) These fields usually populate once you enter the video URL.
2.) For YouTube videos, you’ll need to use an API key
Before You Enter Video URL:
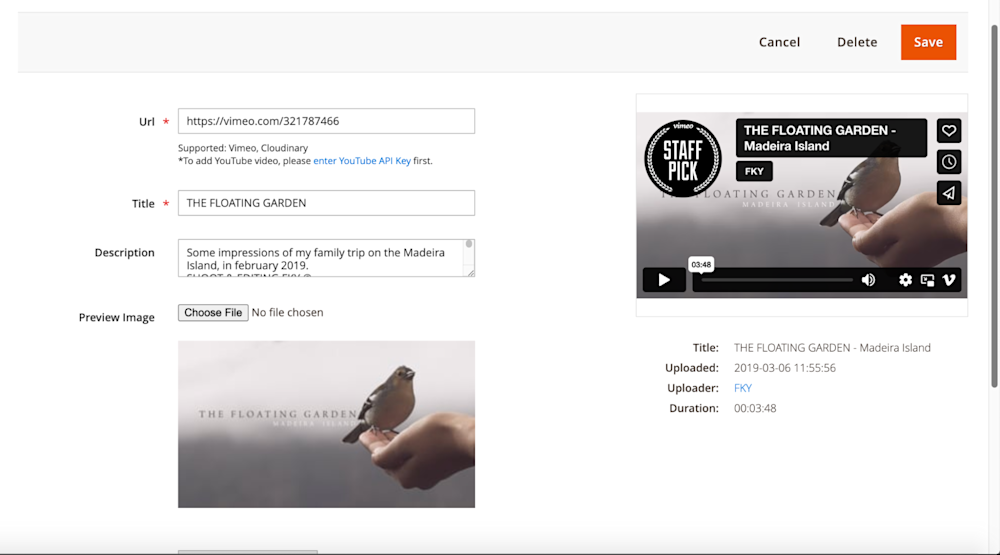
After Adding Your Video URL:
As you can see, the video settings auto-populate for you. From this point, you can save, and you’re all set!
Adding Magento Videos To Content Pages
In order to upload videos to your content or product pages, you’ll use the Page Builder within your Magento admin dashboard. When using this interface, it’ll request a URL for your video instead of allowing you to upload videos.
When you are ready to add videos, you will select “Content → CMS Block” on the left side navigation. Choose the CMS block you wish to add content to or create one if you are starting from scratch.
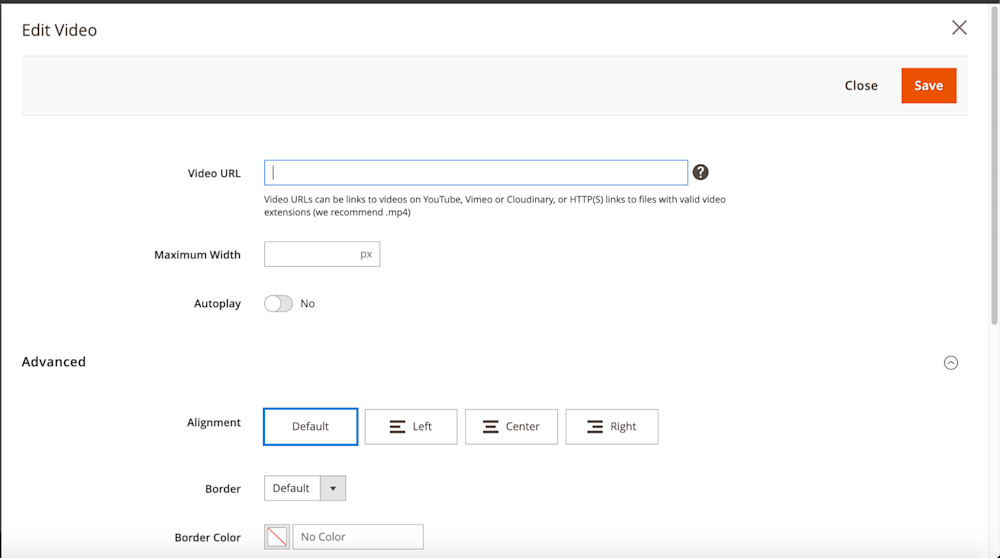
Once you’re in the edit page for your CMS block, scroll down to the “Edit Video” section:
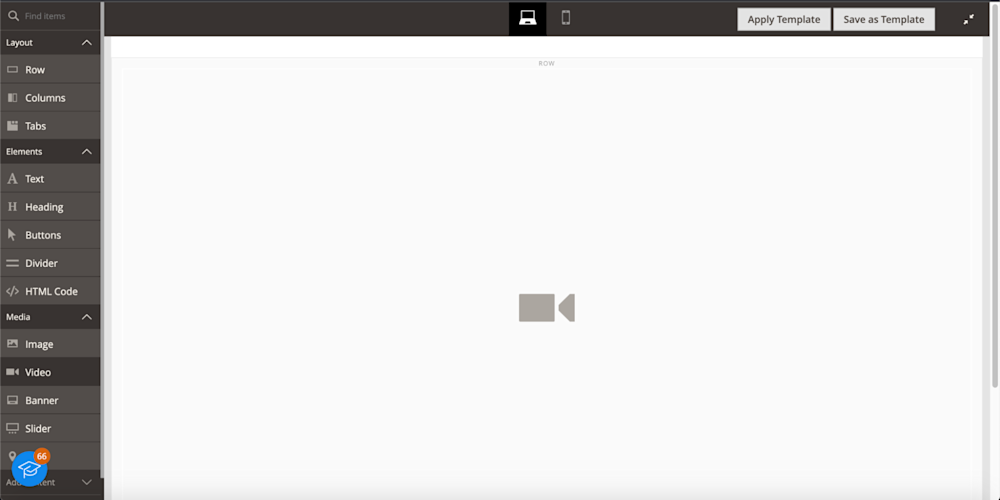
Before you attempt to add your video, you’ll need to create a ‘Row’ that will hold your content. Using the left navigation in the Page Builder, select “Layout → Row” and place it in the specific area of your page that you want it to stay.
In this example, we created a new page to move the ‘Row’ block to the top. With your row created, now you can select “Media → Video” to add the Video widget to your content row.
In order to edit your video, you’ll have to move your cursor over the newly added video block. You will see a tooltip allowing you to add or edit your video. Click on the cog, and you’ll see the video content settings. However, please remember these videos must be an .mp4 for them to work with Magento.
Once you have the video URL, enter it into the “Video URL” field and review the other settings before saving. When you’re done with your video settings, click Save in the top right. And that’s it!
Now, you know how to add videos to your product gallery and display them on content pages. The question is, what if you want a solution to allow a more flexible environment to upload, store, edit, and transform your videos?
A More Reliable Way To Add Videos To Your Magento Store
While Magento is capable of serving videos to your visitors via the edit page or page builder, Magento is not built for image and video rendering and storage. What you can use, however, is third-party tools like Cloudinary. It’s a full-service image and video platforming service that offers control over storage, deliverability, and optimization.
In order to add videos via Cloudinary, you need to do two things first:
- Create a Cloudinary account (it’s free!)
- Download Our Magento Extension
Once that’s out of the way, you’ll need to configure everything through System → Configuration → Cloudinary Settings. After that, you’ll see the ‘Add From Cloudinary’ option.
From this point on, you’ll see the Cloudinary interface is tied to your account. Now, you can upload videos, and once you select one, you’ll see the option to insert it into your product or CMS page.
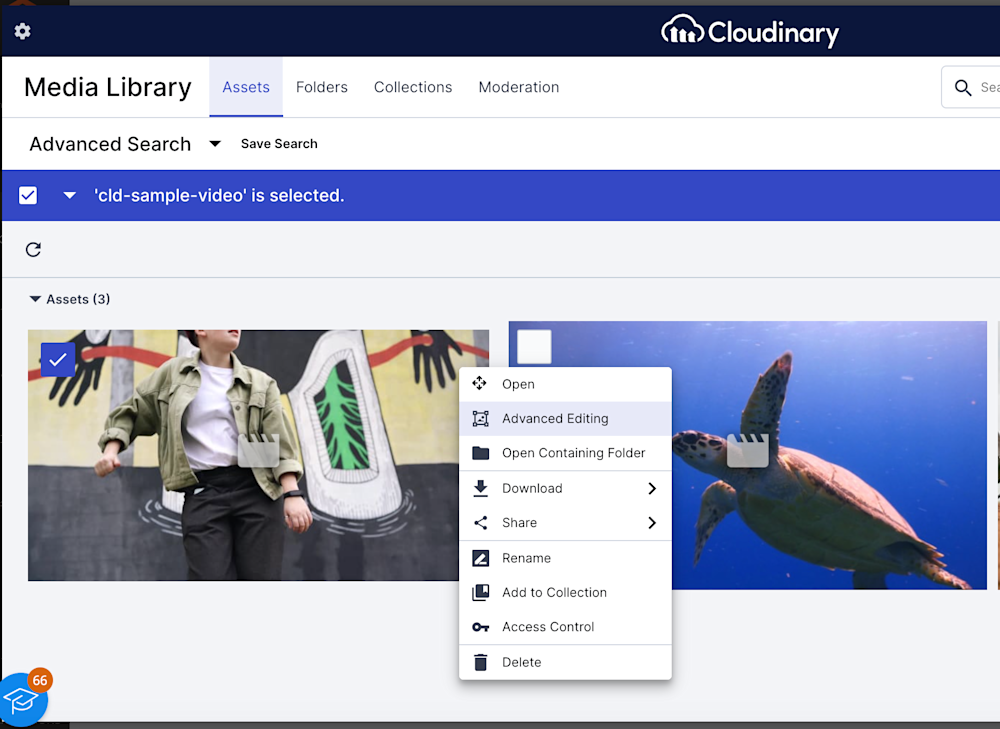
The great thing about this interface is that it allows you to transform videos. Simply select a video by right-clicking, and you’ll see the following:
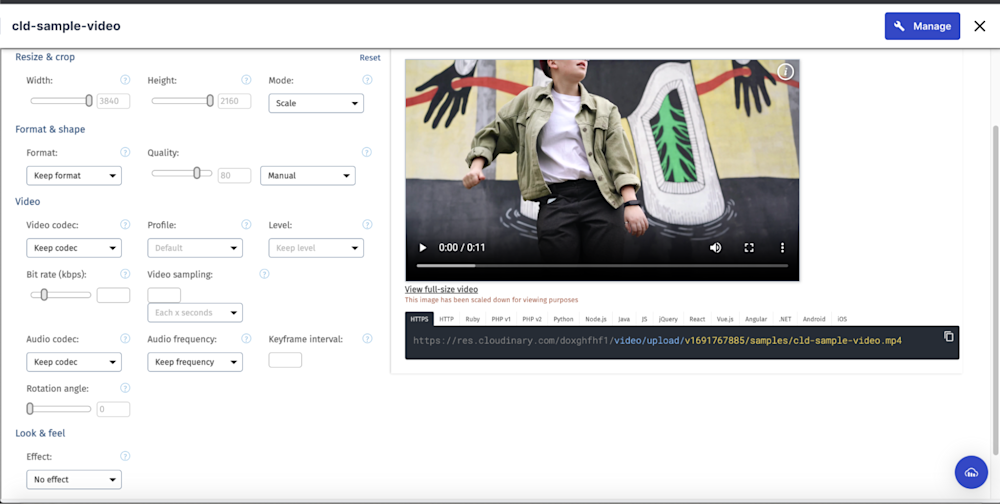
After you click ‘Advanced Editing’ you will see an interface that will allow you to transform the appearance of your video, allowing you full visual control unlike Magento.
Want to crop a video or change the format? No problem! With Cloudinary, nothing is impossible.
When you are done, you simply click Insert to insert the video from the Cloudinary Library to your product or content page.
Once you are done, you’ll be returned to the Magento admin where you can save the product or content page you were adding video to.
Wrapping Up
The power of videos in e-commerce cannot be understated, dramatically transforming the customer experience by providing rich, detailed, and engaging views of products. Videos in e-commerce platforms have revolutionized shopping experiences, bridging the gap between virtual and physical stores by providing comprehensive, engaging, and instant product insights.
Transform your Magento store today by seamlessly integrating captivating videos, and leverage Cloudinary’s robust features to optimize your multimedia content. Explore the vast possibilities that Cloudinary offers and take your e-commerce business to the next level. Remember, the quality and effectiveness of your multimedia content can make or break the customer shopping experience, so make it count with Cloudinary!


