
High-quality images are essential for websites, marketing, and social media in today’s digital age. Nobody likes to read large chunks of text, it’s the images that capture users’ attention and help convey information effectively. But poor resolution, damage, or unintentional changes can severely affect the stability and visual appeal of the images.
That’s exactly why developers need to restore images if they want to keep them effective and eye-catching. This process involves bringing damaged, pixelated, or distorted images back to life and to their original quality. It takes a few right techniques to ensure that your content remains impactful and visually appealing.
In this article, we’ll discuss some commonly faced challenges that require image restoration, along with practical solutions to address those effectively.
Why Image Restoration is Important
Image restoration is key to professionals keeping large volumes of media assets or digital content containing images. For industries where visuals are central to communication (like marketing, e-commerce and media production) the quality of your images directly influences community engagement, brand perception and even revenue.
With time, images may lose quality because of poor storage methods, outdated formats, or unintentional changes. When you restore images, it helps preserve their value within a content library. Let’s dig a little deeper into how impactful it can be:
Enhancing User Experience
High-quality images play a pivotal role in capturing and maintaining users’ attention. Websites with visually appealing content perform better in terms of longer session durations and higher satisfaction. This also helps in creating a user-friendly experience that encourages users to come back.
Media-rich websites and platforms need clear, high-quality images. Low quality and pixelated images may result in a poor user experience and even harm the brand image. On the other hand, professional and crisp images convey reliability, create trust and improve the overall brand impression.
Supporting Brand Consistency and Quality
Businesses need to maintain a consistent brand image to gain their customers’ trust and credibility. Restored and high-quality images ensure that every visual element reflects the company’s commitment to excellence.
Poor quality images deteriorate a brand’s image and its messaging impact. Such visuals showcase a negative impression, showing a lack of attention to detail. That’s why image restoration prevents such issues, so that every content piece aligns perfectly with brand standards and enhances overall communication.
Improving SEO and Content Visibility
High-quality and optimized SEO images contribute to faster page load times, adding a positive effect to overall SEO and decreasing bounce rates. Besides that, search engines prefer websites that offer smooth UI and optimized and compressed images play a key role in achieving this.
When you restore images efficiently, these are more likely to appear in the search engine results, which drives organic traffic to the site. This added exposure helps attract a wider audience and improves online visibility beyond improving overall content performance.
Why Use AI to Restore Image Quality?
AI-powered restoration tools, like those available in Cloudinary, dramatically reduce the time and effort required to enhance image quality. Benefits include:
- Speed: Restore hundreds of images in seconds.
- Accuracy: Machine learning models trained on millions of photos deliver consistent results.
- Scalability: Automate restoration as part of your image pipeline.
- Accessibility: No need for manual editing skills or third-party software.
Common Image Issues and How to Fix Them
Many problems can affect the quality and stability of your images. From blurriness to faded colors that just don’t look right, these issues can affect your brand’s online presence in several ways. That’s where image restoration comes into play, and with powerful tools like Cloudinary, a leading media management platform, resolving such issues becomes much easier. Not only can you fix such issues, but also optimize your images exactly like you want to ensure seamless delivery across different devices.
Let’s examine some common image restoration problems and their fixes:
Blurry or Out-of-Focus Images
Problem:
Blurry images are quite common, and this usually happens when the camera shakes while clicking images, with excessive compression or when they’re stretched beyond their original dimensions. This makes them almost useless for professional use or in high-resolution displays.
Solution:
Most image editing software comes with some way to sharpen images, whether it’s through brushes or manually adding filters. Cloudinary’s Image API offers powerful transformations that can sharpen blurry images through e_sharpen. It can automatically add a sharpening filter to any image by simply changing the URL, like so:
https://res.cloudinary.com/demo/image/upload/e_sharpen:400/horses.jpg
Color Fading and Discoloration
Problem:
Over time, images can lose their vibrancy or be impacted by incorrect color profiles when editing or converting files. As a result, you end up with images that lack the desired pop or completely fail to match your brand guidelines.
Solution:
Cloudinary helps create color adjustments with its Generative Recolor feature. It uses AI to intelligently restore and enhance colors in faded or discolored images (or even completely change them to suit your needs), bringing them back to life with remarkable accuracy. Reviving historical photos or simply correcting a color imbalance in a photo? Generative Recolor saves hours of work on manual retouching and aligns your images with professional standards.
You can experiment with Cloudinary’s Generative Recolor feature in our Generative AI Playground to see it in action for yourself.
Pixelation in Low-Resolution Images
Problem:
Pixelization happens when the images are scaled beyond their actual resolution. It makes the image feature lack clarity and also creates visible blocky artifacts, making the image useless for professional use.
Solution:
Cludinary’s e_sharpen transformation can help fix pixelated images too, simply through sharpening. However, to prevent pixelation issues altogether, it’s best to use high-resolution images for scaling or opt for formats that offer optimization for scalability.
Here’s a before and after comparison of an image sharpened and adjusted by Cloudinary’s e_sharpen tool:
Before

After

Scratches, Dust, and Artifacts on Scanned Images
Problem:
Scans of older prints and photos typically include dust spots, scratches, and other imperfections. These severely impact image quality, making them look outdated and unprofessional—especially in media where high quality is crucial.
Solution:
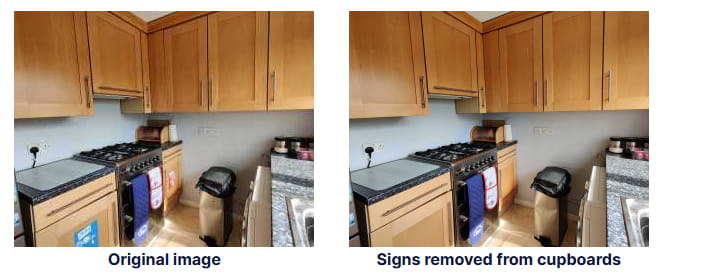
The Cloudinary’s generative restore feature can minimize or completely remove the visual defects and gives the images a fresh look. Using AI-driven technology, it efficiently analyzes and repairs the affected areas and keeps the image’s original details.
Here’s an example of a scanned picture that is completely transformed with Cloudinary’s Generative Restore tool.
Original

Transformed with Cloudinary

Overexposure and Washed-Out Highlights
Problem:
When an image has been exposed to too much light, image details may appear faded or washed out, making it look flat and unnatural. This is a rather common issue in photographs taken in harsh lighting.
Solution:
Cloudinary has an e_gamma property that helps adjust the color balance. It even adds depth to the areas with overexposure. For dynamic restoration, you can choose tools that offer HDR support and exposure recovery.
Noise and Grain in Low-Light Images
Problem:
In low-light photos, high ISO settings can cause film grain and noise to appear. Its gritty texture and poor image quality render it less than ideal for professional work.
Solution:
Cloudinary’s Generative Restore reduces the noise without compromising the details. When you combine it with advanced optimization tools, you can safely expect enhanced clarity and quality of low-light images.
Compression Artifacts and Loss of Detail
Problem:
Over-compression leads to compression artifacts and a loss of detail in files. These usually appear as blocky or blurry areas, especially around edges, and can reduce overall picture quality.
Solution:
Cloudinary offers advanced support for modern formats to achieve superior compression with minimal loss of quality. Simply put, a switch to WebP or another advanced format allows you to reduce file size while maintaining visual integrity of your images.
Step-by-Step: How to Restore an Image with Cloudinary
- Upload the image to your Cloudinary account.
- Apply the restore transformation by modifying the delivery URL or using the SDK with
e_gen_restore(URL API) orgen_restore(SDKs). - Preview and test different results using Cloudinary’s Media Library or browser-based UI.
- Combine with other transformations if needed (e.g., e_auto_contrast, c_fill, q_auto).
- Embed or deliver the restored image in your application.
Tip: The restore effect works best with images that are low-resolution, grainy, or blurred due to compression or poor capture conditions.

Wrapping Up
Image restoration is an important process for improving image quality, enhancing user experience and maintaining brand consistency. Addressing common challenges such as blurriness, color fading, pixelation, and compression artifacts helps keep your visuals remain compelling, professional, and accessible. High-quality images not only boost audience engagement but also reflect a commitment to excellence, which is essential for building trust and credibility.
By leveraging Cloudinary’s powerful automated tools, anyone from developers to content managers can streamline the image restoration process to save time and achieve great results. From AI-driven features to real-time transformations and format optimizations, Cloudinary simplifies the complexities of image management, allowing you to focus on delivering stunning, high-performing visuals.
Ready to take your media management to the next level? Try Cloudinary today and discover how it can revolutionize your image restoration and optimization workflows, ensuring consistent quality across all your media assets.


