
React has revolutionized how we build user interfaces on the web. Stack Overflow’s report shows over 40% of developers use React, making it the second most popular web framework behind Node.js. React offers a ton of flexibility and functionality and can integrate with APIs to create simple static sites or fully-fledged web applications.
In this article, we’ll explore how you can create your own web application to overlay images with React and Cloudinary. Whether you’re a seasoned developer or starting out, this article will provide valuable insights to help you understand and effectively use overlays in your projects.
In this article:
Creating an Image Overlay App with React
Creating an image overlay app with React may seem daunting at first, but it’s a fantastic project for sharpening your React skills and understanding more about handling images and user interactions within a web app. At its core, an image overlay app allows users to place one image on top of another, adjusting properties such as opacity, position, and size to create a single composite image.
This could be used for a variety of purposes, from designing social media content to creating personalized greeting cards. The beauty of using React for this project lies in its component-based architecture, which makes it simple to manage the state of each image and re-render the view whenever the user makes adjustments.

Step-by-Step Guide to Implementing Overlay in React
Before we can learn more about adding overlays to media assets programmatically, we need to create an account on Cloudinary. So head over and sign up for free.
For this tutorial, we will be using React to create our scripts. So ensure you have Node.js installed on your system, with Node version >= 19.9.0 and npm version >= 9.6.3. If you don’t have Node.js installed, download it from the official Node.js website.
Setting Up Cloudinary
With our prerequisites in place, it’s time to upload our images to the Cloudinary cloud. Cloudinary offers two methods for uploading images: directly through the Cloudinary Console or via API calls. For now, we will be uploading our assets through the Cloudinary Media Console.
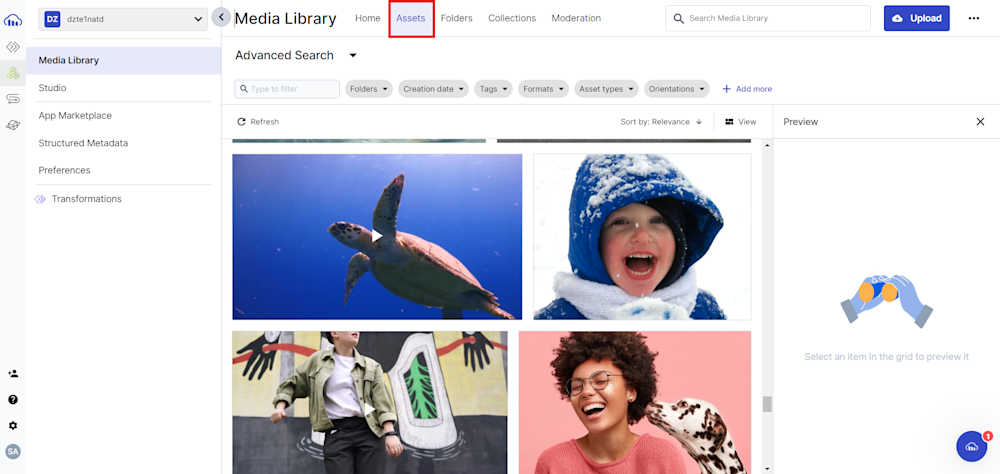
To upload images through the website interface, open Cloudinary’s website and log in to your account. Upon logging in, you’ll land on the Media Library Dashboard. From there, click on the Upload button:

Next, drag and drop an image file or click Browse to select the assets you want to upload.

Finally, verify your uploads by navigating to the Assets tab, which shows all your assets on the cloud.
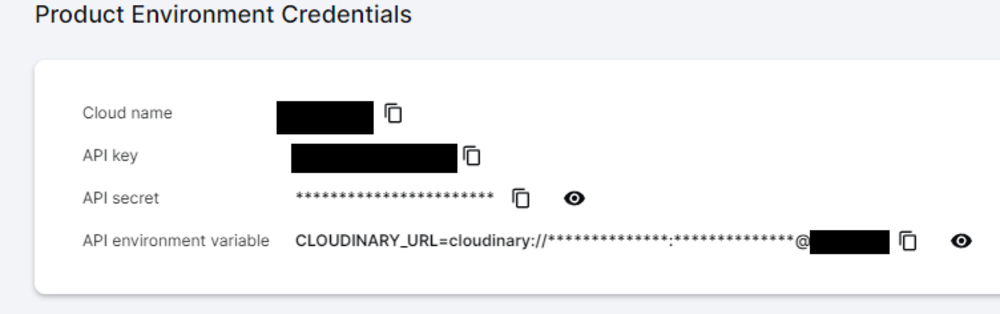
Next, open the Programmable Media button at the top left corner of your screen and go to the Dashboard tab. Here, you will need to copy your Cloud Name, API Key, and API Secret, which we will use later.
With this, we are ready to begin creating our React application.
Creating our React Application
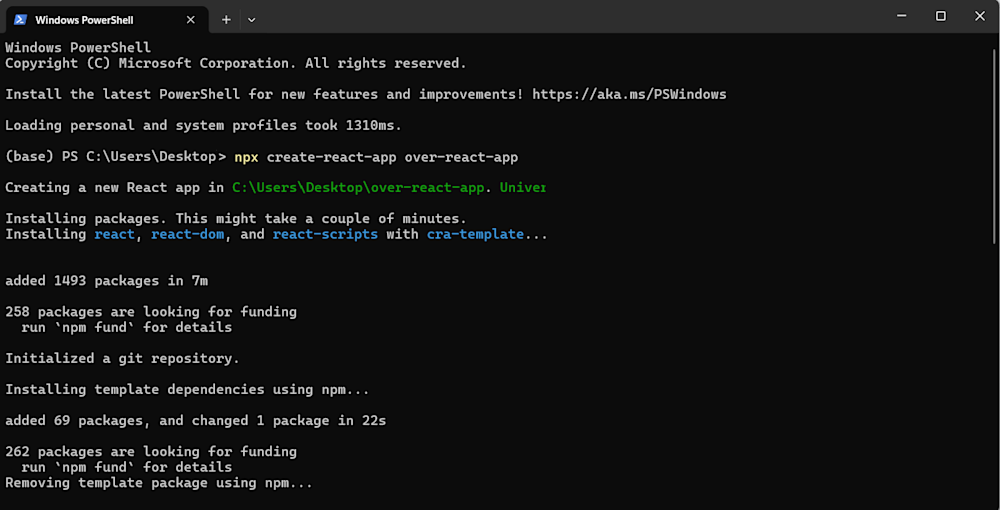
Let’s kick things off by creating a new React application. Open your terminal and run the following commands:
npx create-react-app overlay-react-app
Next, we want to set our project up to use Cloudinary. To do this, first, navigate to the directory of your project and run the following command to install Cloudinary’s JavaScript and React SDK using the NPM package manager:
npm i @cloudinary/url-gen @cloudinary/react
Now open up your project in your favorite IDE, and open up the App.js file located in the src folder of your project.
As you can see, React generates a basic JavaScript structure for your app. However, we won’t need any of this in our app. So, open App.js in your code editor and copy and paste the following code:
import React from 'react'
import {Cloudinary} from "@cloudinary/url-gen";

const App = () => {

  // Create a Cloudinary instance and set your cloud name.
  const cld = new Cloudinary({
    cloud: {
      cloudName: 'your_cloud_name',
      api_key: 'your_api_key',
      api_secret 'your_api_secret'
    }
  });

};
export default App;
Note: Make sure to replace your_cloud_name, your_api_key, and your_api_secret with your actual Cloudinary credentials.
Adding Image on Image Overlays
Image overlay involves superimposing one image onto another, creating a composite image. This technique is commonly used in graphic design and web development to create artistic effects, highlight specific elements, or brand images.
Let’s take a look at how we can achieve this transformation using Cloudinary.
But before we can add any image overlay in React, we must first add an image to our application and import several transformations:
// Import required actions.
import React from 'react'
import { AdvancedImage, AdvancedVideo, responsive } from '@cloudinary/react';
import { Cloudinary } from "@cloudinary/url-gen";
import { Transformation } from "@cloudinary/url-gen";
import { scale } from "@cloudinary/url-gen/actions/resize";
import { source } from "@cloudinary/url-gen/actions/overlay";
import { video, image, text } from '@cloudinary/url-gen/qualifiers/source';
import { TextStyle } from "@cloudinary/url-gen/qualifiers/textStyle";
Next, let’s retrieve an image from the Cloudinary cloud:
const myImage = cld.image('samples/animals/cat');
Now, we will overlay an image and define it in an overlay transformation:
myImage.overlay(source(image('samples/cloudinary-logo-vector').transformation(
    new Transformation().resize(scale().height(100).width(200))
  )));
Here, we start by selecting an image from Cloudinary’s media library, cloudinary-logo-vector, available in our cloud. We then apply a transformation and resize it using the .resize() method to reduce its height and width to 100 and 200, respectively. We then overlay the image, superimposing it onto the original image using Cloudinary’s .overlay() method.
Finally, we return the image in Cloudinary’s AdvancedImage component, with the responsive plugin. Here, we define the steps as 5, which will resize the image once the viewport has changed by 5 pixels:
  return (
    // For Images
    <div>
      <AdvancedImage cldImg={myImage} plugins={[responsive({ steps: 5 })]} />
    </div>
  )
Here is what our code looks like:
import './App.css';

// Import required actions.
import React from 'react'
import { AdvancedImage, AdvancedVideo, responsive } from '@cloudinary/react';
import { Cloudinary } from "@cloudinary/url-gen";
import { Transformation } from "@cloudinary/url-gen";
import { scale } from "@cloudinary/url-gen/actions/resize";
import { source } from "@cloudinary/url-gen/actions/overlay";
import { video, image, text } from '@cloudinary/url-gen/qualifiers/source';
import { TextStyle } from "@cloudinary/url-gen/qualifiers/textStyle";

const App = () => {

  // Create and configure your Cloudinary instance.
  const cld = new Cloudinary({
    cloud: {
      cloudName: cloud_name,
      api_key: "api_key",
      api_secret: "api_secret"
    }
  });

  const myImage = cld.image('samples/animals/cat');

  // Image Overlay on Image
  myImage.overlay(source(image('samples/cloudinary-logo-vector').transformation(
    new Transformation().resize(scale().height(100).width(200))
  )));

  // Render the transformed video in a React component.
  return (
    // For Images
    <div>
      <AdvancedImage cldImg={myImage} plugins={[responsive({ steps: 5 })]} />
    </div>
  )
};
export default App;
Finally, open your terminal and start your React application:
npm start
Here is what our image looks like:
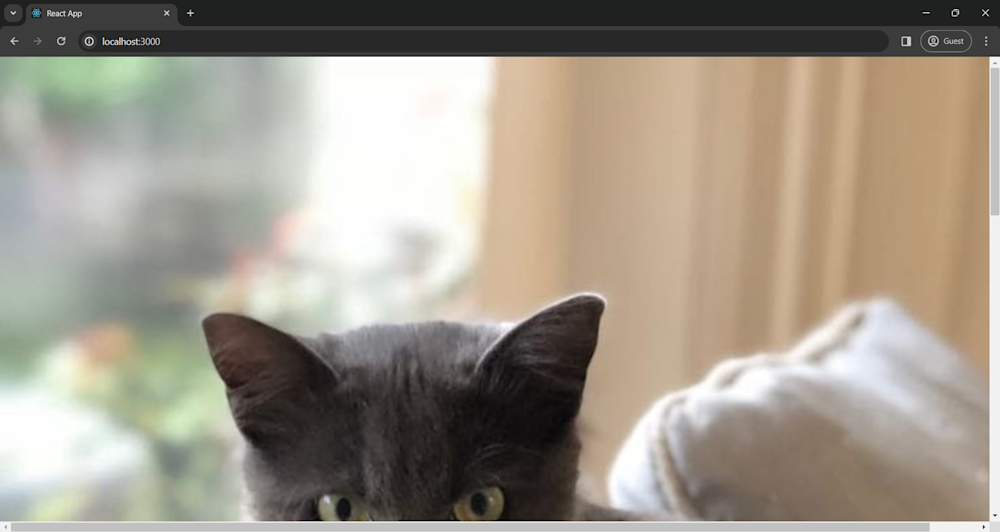
We can now change the size of our window, and our image will adjust itself to it:

Adding Text Overlay on Images
Text overlay is a powerful technique for adding context, branding, or captions to images within web applications. This is commonly used in various scenarios, such as displaying product names, adding watermarks, or incorporating captions for social media posts.
To add text overlays, let’s start by retrieving an image from the cloud:
const myImage = cld.image('cld-sample-5');
Next, we define a text overlay as follows:
  // Text Overlay on Image
  myImage.overlay(
    source(text("Snickers", new TextStyle("Arial", 80)))
  );
Here, we call the overlay method on the original image (myImage). We define the source of the overlay as a text and define its font as arial with size 80. This will apply the text overlay to the original image.
Finally, like before, we return the image in Cloudinary’s AdvancedImage component:
  // Render the transformed video in a React component.
  return (
    // For Images
    <div>
      <AdvancedImage cldImg={myImage} plugins={[responsive({ steps: 5 })]/>
    </div>
  )
Here is what our image looks like:

Adding Image Overlay on Videos
Now, let’s talk about overlays on videos. Image overlay on videos is a crucial technique in web development, particularly for watermarking purposes. Watermarking adds a layer of protection to videos by embedding visible or invisible marks, typically logos or text, to deter unauthorized use and piracy.
Cloudinary makes it easy for developers to watermark videos by simply overlaying an image on top of your video.
To do this, start by retrieving an image and a video from your Cloudinary cloud:
const myVid = cld.video('samples/sea-turtle');
Now, simply define an overlay for an image to put on top of the video:
  myVid.overlay(source
    (image('samples/cloudinary-logo-vector').format("png")));
It is important to note that we have defined the format as png. This will allow us to add images with a transparent background to our videos.
Finally, we return the video to Cloudinary’s AdvancedVideo component:
  // Render the transformed video in a React component.
  return (
    <div>
      <AdvancedVideo cldVid={myVid} controls />
    </div>
  )
Here is what our video looks like:

Final Thoughts
Mastering overlays in React is a powerful skill that can significantly enhance the responsiveness and interactivity of our web applications. They provide a dynamic way to present information and interact with users, making our applications more engaging.
Cloudinary offers a wide range of capabilities that enhance the use of overlays in React. It allows you to add image or text overlays to images and videos, providing a dynamic way to present information and interact with users. In addition to overlays, Cloudinary also offers other features, such as image transformations, optimizations, and delivery, which can significantly enhance the performance and user experience of your React applications.
Empower your development team with Cloudinary’s easy-to-use APIs and SDKs. Sign up for free today!
More from Cloudinary:
Image Opacity Transformation and Dynamic Watermark Generation
Build a Vue File Upload App for a Simplified Watermarking Process

