Knowing an image’s dimensions is often necessary when working with photos on the web to optimize them for display or to ensure they adhere to strict size guidelines. What happens if you can’t access the original image file and have nothing but a URL?
This is exactly where an image management solution like Cloudinary comes in handy. With a platform like Cloudinary, you can have more information about the media on your site, which you can leverage to make it more accessible or speed up page loading.
This article will look at situations where this functionality might be beneficial and investigate how to get image dimensions from a URL utilizing Cloudinary’s robust image management tools.
In this article:
- When Do You Need to Get Image Dimensions from a URL?
- How to Get Image Dimensions from URLs with Cloudinary
When Do You Need to Get Image Dimensions from a URL?
There are several situations when getting the picture dimensions from a website can be helpful, such as:
- Web development. To ensure images are shown properly on a web page, you may need to get image dimensions from the URL as a web developer. You can change the size and style of your web page and ensure photos are scaled appropriately by being aware of the image dimensions.
- Image optimization. It’s crucial to ensure photos don’t have excessive file sizes while optimizing them for the web. Doing so can make web pages take far longer to load.
- Content moderation. Retrieving picture dimensions from a URL can be useful when you filter user-generated material (such as social media) to ensure that images adhere to specific size or quality standards.
- Analytics. Occasionally, you wish to keep tabs on how well your website or app’s photos perform. You may learn more about the most popular image sizes and their performance in engagement or other metrics by obtaining the image dimensions from a website.
In general, obtaining image dimensions from a URL can be useful in various contexts, offering important data for web construction, image optimization, content control, and data analysis.
How to Get Image Dimensions from URLs with Cloudinary
Many free tools are available to help you get your images’ dimensions. However, many of these require open access to your drive or uploading your image to retrieve your dimension results. This is where Cloudinary comes in.
Cloudinary lets you quickly and easily retrieve the dimension of your image. It allows you to change your format, style, and dimension and apply effects and other visual enhancements. You can also optimize your images to deliver them with a small file size while maintaining high visual quality for a better user experience and less bandwidth. All of this is possible with dynamic image transformation and delivery URLs.
Get Image Dimensions from URLs
So, let’s create a script that allows us to retrieve the dimensions of our images.
Prerequisites
In this tutorial, we will create a Node.js script to extract dimensions from our images. If you don’t have Node.js installed, install it from the official Node page.
You’ll also need to sign up for a Cloudinary account to get started. Thankfully, it’s free to sign up, and the free tier will be more than enough for this guide.
To set up our API, we will need to set up a way to call the Cloudinary API and authenticate our API requests. We’ll be doing this through the Cloudinary Node.js SDK. To install this library, create a project folder in a directory of your choice. Next, open up your terminal and type the following command:
npm install cloudinary
With this, we’re ready to make API calls to the Cloudinary cloud. Let’s start by uploading sample images to the cloud. With Cloudinary, you can upload images via their Node.js SDK or the Cloudinary website.
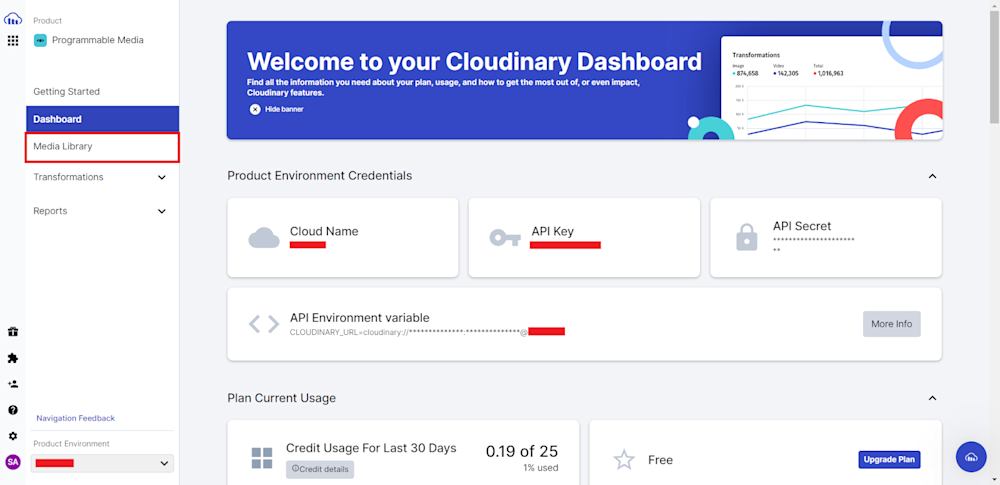
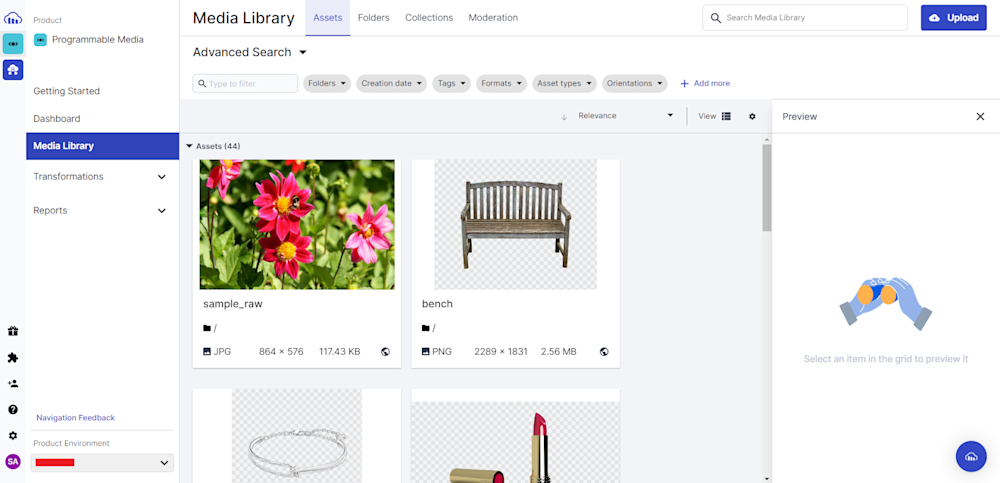
To upload images using the Cloudinary Dashboard, head to the website and login into your account. Here you will be greeted with the Dashboard. Next, navigate to the Media Library tab, as shown below.
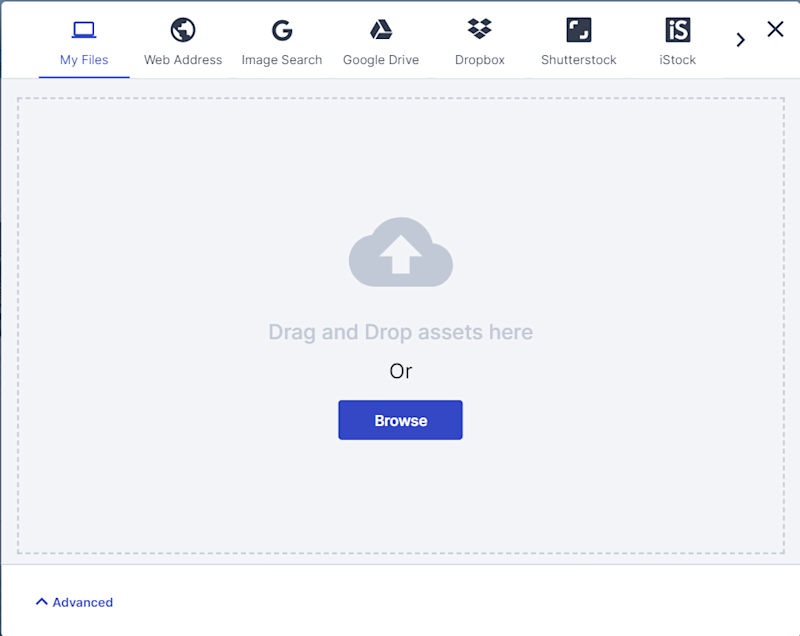
The Media Library tab shows all your assets on the cloud. To upload new assets, click the Upload button in the top-right corner.

Finally, drag and drop your assets or click Browse to select the assets you want to upload.
Another way to upload images to the cloud is by using the Cloudinary API. Let’s create a Node.js script to upload our assets to the cloud.
First, open up your project’s directory and create an assets folder. Now add the images you want to upload:

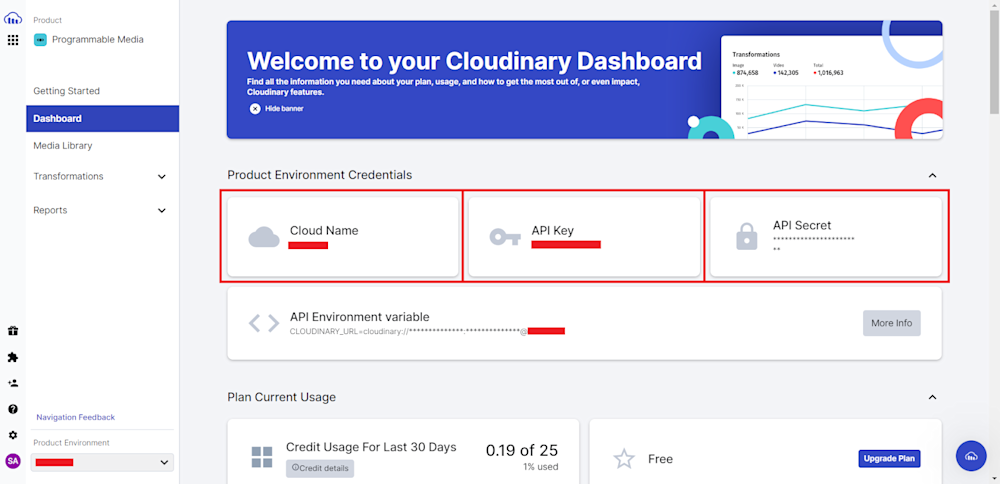
Next, log in to your Cloudinary account and head to the Cloudinary Dashboard. Copy your Cloud Name, API Key, and API Secret:
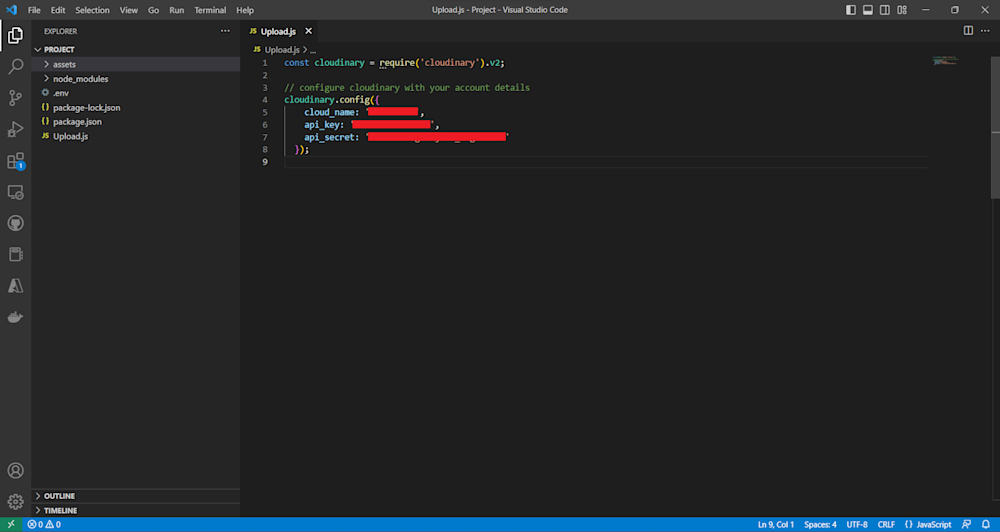
Now, open up the project folder in your favorite IDE, and create a new file named Upload.js. Open up the file and start by importing the Cloudinary SDK and defining our API with our account details:
const cloudinary = require('cloudinary').v2;

// configure cloudinary with your account details
cloudinary.config({
    cloud_name: 'CLOUD_NAME',
    api_key: 'API_KEY',
    api_secret: 'API_SECRET'
  });
Next, call the Cloudinary upload API with the assets you want to upload. As you can see in the code below, we are defining two extra parameters, namely, resource_type and public_id.
The resouce_type, as the name implies, allows us to define explicitly the type of asset we want to upload. Here we are defining our asset as an image (by default, it is defined as an image). The public_id parameter is a unique identifier that helps us keep track of our resources in the Cloudinary cloud. Defining it explicitly will help us keep track of our resources.
Otherwise, Cloudinary will assign a random public_id that we will have to check in our Cloudinary Media Library:
// Calling upload API
cloudinary.uploader
.upload("assets/upload.png", {
    // Specifying the resource type of the image
    // image is the default resource type even if
    // you don't specify
    resource_type: "image", public_id: "nothing",
})
.then((result) => {

    // JSON.stringify will provide output in a formatted
    // string
    console.log("success", JSON.stringify(result, null, 2));

})
.catch((error) => {
    console.log("error", JSON.stringify(error, null, 2));
});
Here is what our Upload.js file should look like:
const cloudinary = require('cloudinary').v2;

// configure cloudinary with your account details
cloudinary.config({
    cloud_name: 'CLOUD_NAME',
    api_key: 'API_KEY',
    api_secret: 'API_SECRET'
  });

// Calling upload API
cloudinary.uploader
.upload("assets/upload.png", {
    // Specifying the resource type of the image
    // image is the default resource type even if
    // you don't specify
    resource_type: "image", public_id: "nothing",
})
.then((result) => {

    // JSON.stringify will provide output in a formatted
    // string
    console.log("success", JSON.stringify(result, null, 2));

})
.catch((error) => {
    console.log("error", JSON.stringify(error, null, 2));
});
Now you can simply run the code using Node:
node Upload.js
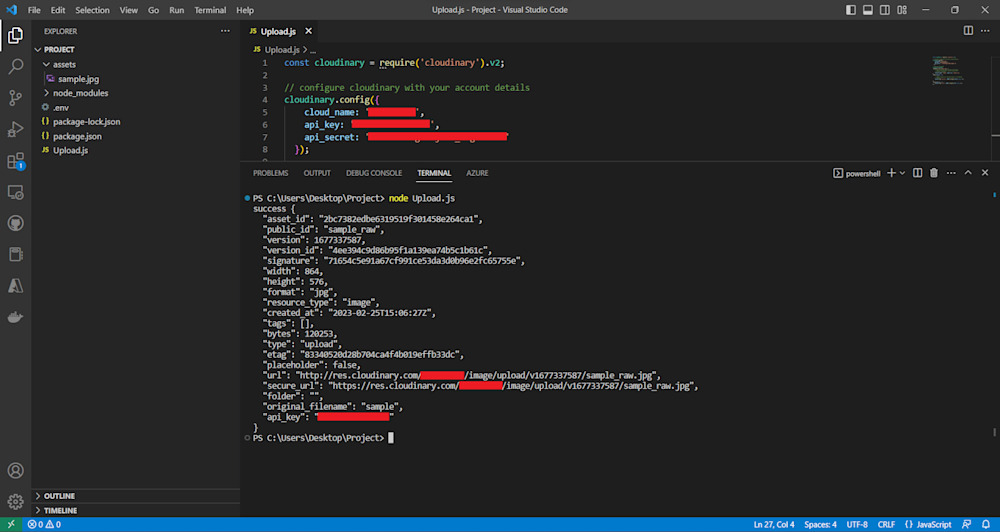
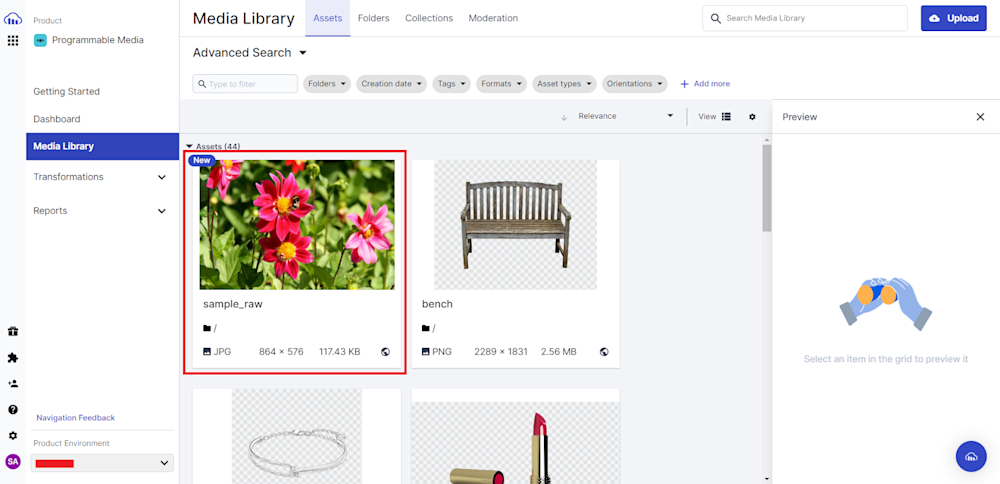
To verify your upload, you can either follow the URL given in the terminal output or head to the Media Library tab on your Cloudinary account:
Get Image Dimensions From URLs in Javascript
Now that we have our image in the cloud, we can retrieve it to get its dimensions. Create a new file in your projects folder named Retrieve.js. We’ll use the same authentication method as Upload.js, so copy and paste it into your new file.
Next, we obtain the URL of the image we want to get the dimensions of, so log into your Cloudinary account and head to the Media Library. Right-click on your resource image and copy the image URL.

Next, we then use the cloudinary.api.resource() method to fetch the details of the image with the given image URL or public id. The method takes a callback function that will be called once the API call is completed. If there’s an error, we log it to the console. Otherwise, we log the dimensions of the image to the console.
const cloudinary = require('cloudinary').v2;
// configure cloudinary with your account details
cloudinary.config({
cloud_name: 'dzte1natd',
api_key: '558364876947471',
api_secret: 'Llc8TFU56g17mjPWK_kEgNd--mE'
});
// specify the URL of the image you want to get the dimensions of
const imageUrl = 'https://res.cloudinary.com/dzte1natd/image/upload/v1677337587/sample_raw.jpg'
// call the getImage method to get the dimensions of the image
cloudinary.uploader.explicit(imageUrl, {type: 'fetch'}, function(error, result) {
if (error) {
console.log(error);
} else {
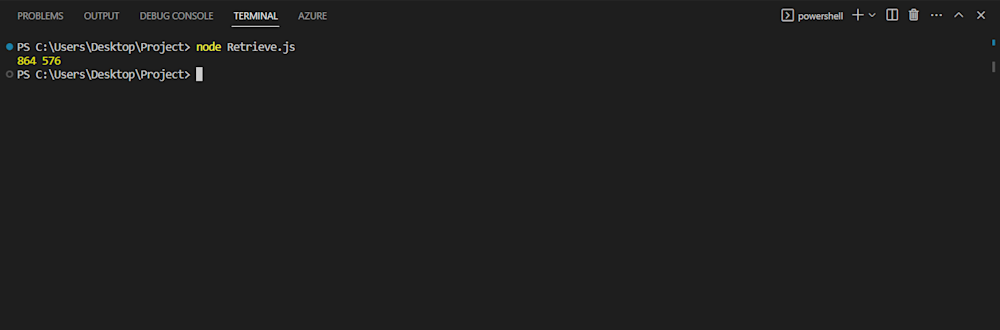
console.log(result.width, result.height);
}
});

Running the code gives the dimensions of your image:
Get Image Dimensions from the Cloudinary Console
Cloudinary makes it even easier for users to retrieve the dimensions of their images using the Cloudinary console. To get the size from your pictures, head to Cloudinary and log into your account. You’ll be greeted with the Cloudinary Dashboard.
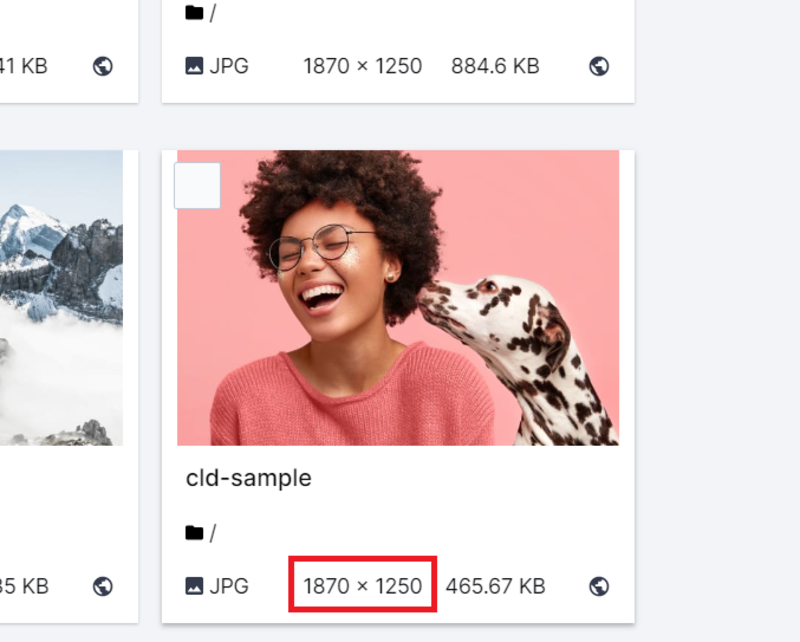
Next, click on the Media Library tab on your Dashboard. Here you’ll see all your assets.
You can find the dimensions of your images by searching for their public IDs in the search bar on the top-right corner of the page or by scrolling in your media library. The dimensions of your image are located in the bottom center of your asset object.
Final Thoughts
Cloudinary’s image management tools make it simpler and more accessible than ever to get image dimensions from URLs when working with photos on the web. The image dimension extraction capabilities of Cloudinary can be a useful tool for a variety of users, including web developers who want to improve image display, content moderators who need to enforce size and quality criteria, and data analysts who want to learn more about image performance.
The solutions from Cloudinary can help you optimize your image management process and save you time and effort by enabling you to rapidly and precisely extract image dimensions from a URL. Get started with Cloudinary today, it’s free!
More from Cloudinary:
Getting the Size or Dimensions of an Image by its Public ID
Use Cloudinary to Get Dimensions of Any Remote Image by its URL

