Image Effects How to Make a Low-Quality Image Look Better Understanding Lossless Image Compression How to Set Up Image Registration in Python 8 Different Image Processing Techniques You Can Use 4 Ways to Make an Image Larger without Losing Quality 3 Easy Ways to Eliminate Duplicate Images The Basics of Face Detection in Python How to Implement Multiple File Upload in PHP Like a Pro Creating Custom Image Cropping Interfaces in Android How to Create Simple Yet Effective PHP Overlay Understanding Real-Time Image Recognition How to add a shadow effect to an image with CSS How to crop an image in Flutter with Cloudinary How To Rotate an Image with Java Image Processing with Python Rotating an image with CSS Enhancing User Experience with a Responsive Image Slider Building a Python Image Recognition System Building an Interactive JavaScript Image Manipulation Tool Image Align Centering with HTML and CSS Efficient Image Cropping Techniques with Angular and Cloudinary Ultimate Guide to Photo Gallery on Android A Comprehensive Guide to Adding Text to Images on Android Mastering Background Changes in React Applications Comprehensive Guide on Changing Background on Android Devices Mastering Image Rotation in Java A Guide to Adding Text to Images with Python A Guide to Converting Images to Grayscale with Python Introduction Creating an Image Overlay with JavaScript Rotating an Image in Python Creating a Dynamic Photo Gallery with jQuery Creating An Interactive Photo Gallery Using JavaScript Mastering Overlay in Android Mastering Angular Overlay: A Comprehensive Guide Comprehensive Guide to Overlay in Flutter Mastering Overlay React for Responsive Design Solutions Create a Blurred Image with PHP: A Comprehensive Guide Guide to Using Blur Image in Flutter Mastering Blur Image in React Native Mastering Image Blurring in Python Mastering the Art of Image Blurring Mastering the Art of Image Blurring in Java The Ultimate Guide to Blurring Images on Android Understanding and Implementing Blur Image in JQuery An Extensive Walkthrough of Blurring Images with JavaScript How to Use HTML, CSS, and JavaScript to Make an Image Slider HTML Image Tag How to Crop GIFs? How to Align Images with CSS Ken Burns Effect – Complete Guide and How to Apply It Cartoonify – Complete Guide on Cartoonify Image Effect Mastering Web Aesthetics: A Comprehensive Guide to Gradient Fades Sepia Effect: The Ultimate Guide to the Sepia Photo Effect What is Vignette? Guide to Vignette Image Editing Pixelate – The Ultimate Guide to the Pixelation Effect How to Outline an Image: Enhancing Visual Appeal and Depth Make Your Photos Pop with Image Effects Upscale Image – Developers guide to AI-driven image upscaling Image Manipulation: History, Concepts and a Complete Guide A Full Guide to Object-aware Cropping Simplify Your Life with Automatic Image Tagging How To Resize Images In WordPress How To Create a Progress Bar For Asset Uploads Animated GIFs – What They Are And How To Create Them How To Automatically Improve Image Resolution AI Drop Shadow Get Image Dimensions From URLs Automatically Add Sepia Effect To Images Automatically Make an Image a Cartoon Automatically Add Blur Faces Effect To Images Automatically Add Background Removal Effect to an Image How to Resize an Image with React How to Easily Resize an Image with React Native

Mastering the Art of Image Blurring

blur image

Mixing beauty with accuracy in all kinds of art is essential, and photography is no different. Being able to blur an image on purpose is a key skill. Understanding the right time, way, and reasons for blurring parts of your photos can make a big difference, making them look better and more enjoyable. It also turns photography into a way to tell stories. With this in mind, this article will show you how to get into the exciting but simple world of blurring images.

A blurring effect in an image, or a blur image as often termed, refers to a technique widely employed in digital photography. This technique involves rendering a specific part of the image, or sometimes the entire image, out of focus. By doing this, you create an impression of movement, gift the image an artistic touch, and instigate the viewer’s curiosity about the photograph in several instances.

In this article:

Understanding the Motives for Blurring An Image

Choosing to blur part of an image isn’t just a random creative choice—there are strong reasons to do it. Blurring can be used for practical things like keeping information private. It’s also a great way to highlight a specific part of the image, making sure people look at what’s most important.

Enhancing Focus with Image Blur Technique

Blurring parts of your photo is a smart way to get people to look at what’s important. When you blur everything except the main subject, you say, “Hey, look here, this is what matters.” It’s a simple trick to make sure people notice the key part of your picture.

This method also makes your photo look deeper, as if there’s more behind the scenes. A sharp subject against a blurry background makes the photo pop more, giving it an excellent 3D effect. It makes the picture nicer to look at and helps tell your story better. Learning to blur the right way lets you control where people look first and makes your photos more exciting and fun.

Using the Blur Effect as a Means of Privacy Protection

Blurring parts of your photos isn’t just about making them look better; it’s also a great way to keep things private. If your photo shows personal stuff or people who shouldn’t be recognized, you can blur those bits to keep them hidden without ruining the rest of the image.

It’s not just about faces or personal info, either. You can blur out things like car license plates, signs in the background, or any items that might give away too much information. This way, you focus the viewer’s attention on what you want to show and keep everything else private.

This blurring trick is also handy for following privacy laws, like the GDPR in Europe, which protect people’s data. Knowing how to blur images properly can help photographers and companies stay on the right side of these rules. So, blurring does more than just tweak your photo’s looks—it also helps protect privacy and meet legal requirements.

blur image

Understand the Importance of Manipulating Depth with the Blur Tool

By adjusting the intensity of the applied blur, it’s possible to generate various effects. This variety can profoundly influence the viewer’s perception of depth and the focus foreground in your visual narrative. Consequently, learning how to manipulate depth with the blur tool astutely can impart a more substantial visual relevance to your image.

The impact of the blur’s intensity on the depth of field becomes apparent when you increase the blur’s intensity. This creates what photographers call a ‘shallow depth of field’. The image’s background now appears blurred out, effectively making the primary subject stand out against the blurred backdrop. This contrast creates a powerful visual that arrests the viewer’s attention and brings the subject into sharp focus.

Blur Image Techniques with Cloudinary

If you’re looking for online tools to easily add blur effects, Cloudinary can help you. It’s packed with features that let you blur or pixelate faces in your photos, which is excellent for keeping things private while still making your photos look good.

Using Cloudinary to Blur Image

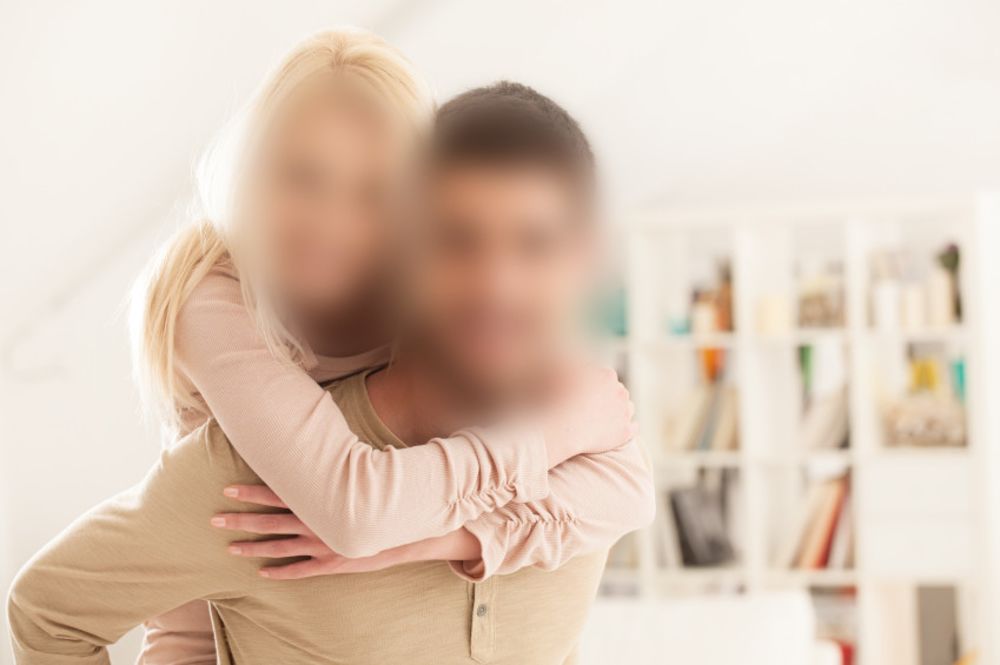
Cloudinary offers straightforward ways to cover up faces in your pictures, whether for artistic reasons or to keep people anonymous. You can blur or pixelate faces using a simple URL setting. This is super helpful for photographers who want to keep people’s identities secret without ruining the story or look of their photos.

To blur faces in Cloudinary:

  • First, we need to upload an image to Cloudinary and grab it’s URL:
https://res.cloudinary.com/demo/image/upload/young_couple.jpg

blur image

https://res.cloudinary.com/demo/image/upload/e_blur_faces/young_couple.jpg

blur image

  • Customize the blurring value from 1 to 2000 (the default is 100). The number will affect how strong the blur is. If we want to slightly obscure their faces, we can use 1000. However, if we want to completely blur image to protect their privacy, we can go up to 2000.
https://res.cloudinary.com/demo/image/upload/e_blur_faces:1000/young_couple.jpg

blur image

Using Cloudinary to Pixelate Faces

In addition to the blur_faces effect Cloudinary offers a pixelate_faces effect to pixelate all detected faces. To apply the pixelate_faces effect, use the following URL

https://res.cloudinary.com/demo/image/upload/e_pixelate_faces/young_couple.jpg

blur image

This option also allows for customization. You can set the size of the pixel squares to achieve larger or smaller squares, depending on your specific requirements. In the following example, the pixelation effect is set to 50.

https://res.cloudinary.com/demo/image/upload/e_pixelate_faces:50/young_couple.jpg

blur image

Wrapping Up

Learning image blurring opens many creative possibilities, offering fresh perspectives and adding depth to your images. Tools like Cloudinary simplify this, providing features for improving artistic appeal, directing focus, or ensuring privacy. By incorporating Cloudinary’s capabilities for blurring and pixelating into your workflow, you achieve your photographic goals and improve creative expression and technical skills. So, experiment with these techniques and have fun making your images better.

Optimize, transform, and manage your media assets like a pro with Cloudinary. Sign up for free today!

QUICK TIPS
Colby Fayock
Cloudinary Logo Colby Fayock

In my experience, here are tips that can help you better utilize image blurring for both creative and functional purposes:

  1. Use Gaussian Blur for Natural-Looking Backgrounds
    When aiming to blur backgrounds or create a shallow depth-of-field effect, opt for a Gaussian blur. Gaussian blur uses a weighted average that creates a softer and more natural transition between blurred and non-blurred areas. Adjust the radius parameter based on the image size to avoid overly aggressive blurring.
  2. Combine Blur with Masking for Selective Blurring
    If you want to blur only specific regions (e.g., faces, license plates), combine blur effects with masks. Libraries like OpenCV allow you to create binary masks that highlight specific areas. This way, you can blur selective regions without affecting the entire image, giving you granular control over the effect.
  3. Experiment with Bokeh Effects for a Cinematic Look
    Blur techniques can be creatively used to produce bokeh effects. Bokeh refers to the aesthetic quality of the blur in out-of-focus areas of an image, creating soft circles or shapes of light. Use this technique to add a cinematic touch to portraits or night-time photography.
  4. Balance Blur Intensity and Subject Sharpness
    When highlighting a subject, ensure that the subject is in sharp focus, while the background or foreground is blurred. Use a high blur radius to create a clear contrast, but avoid overdoing it. The goal is to make the subject pop, not create a jarring visual effect.
  5. Use Motion Blur for a Sense of Speed and Movement
    Motion blur simulates the look of an object moving quickly, making it ideal for sports photography or action scenes. Tools like OpenCV’s cv2.filter2D function can be used to apply a custom kernel to simulate motion blur. Experiment with different angles and intensities to achieve a realistic effect.
  6. Apply Image Blurring for Noise Reduction in Machine Learning
    Blurring is effective for noise reduction in image preprocessing for machine learning models. Use light blurring (e.g., a Gaussian kernel of (3,3)) to smooth out noise without losing critical details. This technique is particularly useful in preparing images for edge detection or segmentation tasks.
  7. Use Pixelation for Stronger Privacy Protection
    While blurring is effective for masking, it can sometimes be reversed or manipulated. Pixelation, on the other hand, reduces the image resolution to a point where facial features or text become unrecognizable. Use pixelation when dealing with sensitive data or when compliance with privacy regulations is crucial.
  8. Combine Blur and Sharpen Effects for a Tilt-Shift Look
    Use a combination of blur and sharpen filters to create a tilt-shift effect. This effect simulates a miniature look by blurring the top and bottom portions of an image while keeping a central strip in sharp focus. Experiment with vertical or horizontal gradients for unique perspectives.
  9. Blur Overlays to Create Soft Backgrounds for Text
    Blurred overlays are ideal for placing text over images. Use a slightly blurred background to ensure the text is legible without obscuring the context of the image. This technique is commonly used in hero banners and social media graphics where clarity and aesthetics are equally important.
  10. Optimize Blur Performance for Real-Time Applications
    For real-time image processing (e.g., web or mobile apps), blurring can be computationally intensive. Use smaller blur radii and pre-process images when possible. Alternatively, implement blurring through CSS (filter: blur();) in web applications for faster results without sacrificing visual quality.

By applying these expert strategies, you can make the most of image blurring techniques for artistic enhancements, privacy protection, and optimizing images for machine learning or real-time applications.

Last updated: Oct 2, 2024