Creating visually appealing applications is essential in mobile app development, playing a crucial role in keeping users interested and engaged. Grabbing and keeping user attention with attractive visual design is critical. One powerful tool in enhancing UI/UX design is image blurring techniques. Within React Native, a versatile framework for building native apps, implementing image blurring can add a layer of sophistication and interactivity to your projects. Whether it’s for background elements, creating a focus on specific UI components, or adding a stylistic flair to image galleries, blurring can significantly elevate the user experience.
This guide offers detailed information on how to understand, apply, and solve problems related to blur image effects in React Native. It aims to help developers build great-looking mobile interfaces.
In this article:
- Understanding Blur Image Effects in React Native
- Implementing Blur Image Effects in React Native Applications
- Creating A Background Blur Effect in React Native
- Other Options for Blurring Images in React Native
- Enhancing User Privacy with Cloudinary: Blur or Pixelate Faces in React Native
Understanding Blur Image Effects in React Native
A blurred image in React Native refers to an image that has been intentionally blurred or rendered unclear to create a unique aesthetic visual effect. This blurring effect can be implemented on any image to create an atmospheric, visually appealing, user-centered design. The best part of using blurred images in React Native is allowing developers to draw the user’s attention to a specific part of the screen, changing the overall user interaction and experience.
Using blur effects in mobile apps can add a new layer and depth to designs that might look simple or flat. This effect can make your app look more modern and improve the user interface by creating a clear visual order. Additionally, blur effects can help emphasize certain parts of the screen, making it easier for users to navigate the app intuitively.
Implementing Blur Image Effects in React Native Applications
Creating blur effects in React Native can be done in many ways, including manual programming or external libraries. Both methods have their benefits; manual programming offers in-depth customization and control while utilizing external libraries fastens the development process and can offer additional advanced features. Understanding these methods is essential to achieving a successful application of blur effects.
Creating A Background Blur Effect in React Native
We begin our journey with a simple approach to implementing a basic blur effect in React Native. Here is the code snippet to implement the blur effect in React Native:
This code uses the 'ImageBackground' component, a standard part of the React Native package. The 'blurRadius' prop is set to determine the extent of the blur effect here.
React Native’s 'blurRadius' prop can add blur effects to images without requiring external packages. This approach significantly minimizes the dependence on third-party libraries, thus making the implementation process cleaner, lighter, and more efficient. Although this method may not offer an array of advanced functions like the external packages, it provides a highly effective tool for developers seeking a no-frills implementation of blur effects.
Other Options for Blurring Images in React Native
While React Native’s 'blurRadius' prop offers a simple and effective way to add blur effects, for more complex needs, there are several excellent external libraries that specialize in enhancing blur effects in React Native applications. These libraries help streamline the development process while offering greater customization than possible with manual programming alone.
One library is ‘Kureev/react-native-blur,’ a reputable open-source project that enables users to apply an array of blur effects. The ‘react-native-blur’ library is also highly configurable and provides diverse types of blur, including light, extra light, and dark. This varied functionality makes it a flexible tool for developers aiming to prioritize user experience in their designs.
Enhancing User Privacy with Cloudinary: Blur or Pixelate Faces in React Native
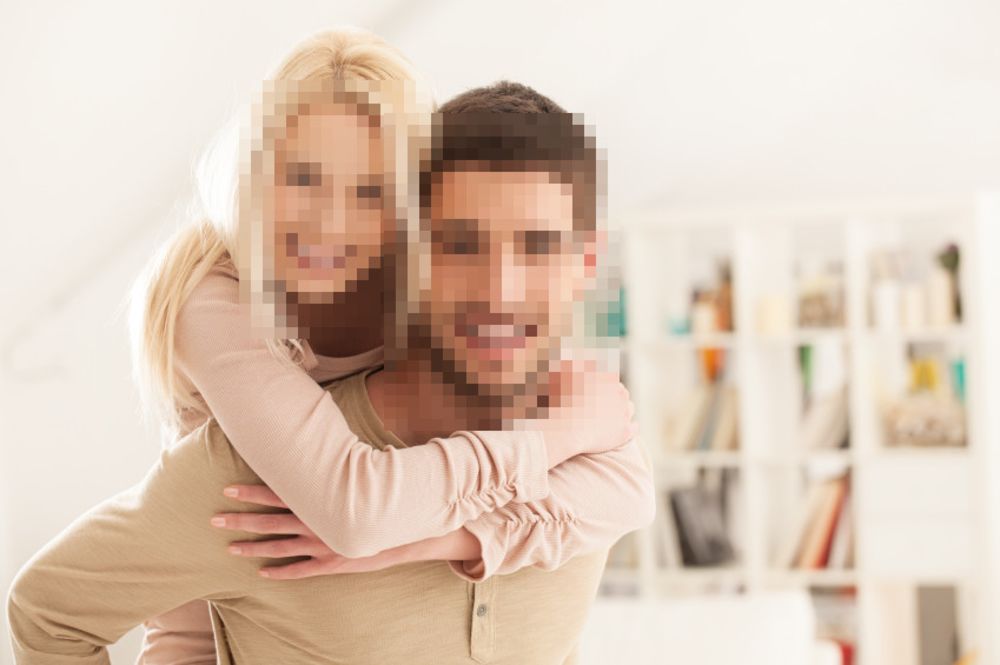
Cloudinary offers a powerful feature for React Native developers looking to enhance privacy within their applications: the ability to blur or pixelate faces in images. This feature adds to the application’s aesthetic value and addresses privacy concerns by hiding faces in your images.
Cloudinary simplifies blurring or pixelating faces in images by utilizing the effect parameter. You can choose to blur faces (blur_faces) or pixelate them (pixelate_faces) by setting this parameter in your code. Here’s a quick guide on how to implement these effects in your React Native application:
To blur all detected faces in an image, set the effect parameter to blur_faces. Cloudinary allows you to customize the level of blurriness, with values ranging from 1 (least blurry) to 2000 (most blurry). Here’s an example of how to blur faces in an image
First, upload the image:
new CloudinaryImage("young_couple.jpg");
Then add the blur effect:
import { blur } from "@cloudinary/url-gen/actions/effect";
import { faces } from "@cloudinary/url-gen/qualifiers/region";
new CloudinaryImage("young_couple.jpg").effect(
blur().region(faces())
);
For a more pronounced blur effect, you might adjust the strength parameter to 1000:
New CloudinaryImage("young_couple.jpg").effect(
blur()
.strength(1000)
.region(faces())
);
To pixelate faces, set the effect parameter to pixelate_faces. This method replaces the facial regions with pixel squares, whose size can be adjusted for different visual effects. Here’s how to pixelate faces:
import { pixelate } from "@cloudinary/url-gen/actions/effect";
import { faces } from "@cloudinary/url-gen/qualifiers/region";
new CloudinaryImage("young_couple.jpg").effect(pixelate().region(faces()));
Adjust the size of the pixel squares for larger or smaller squares as per your design needs:
// For larger squares
new
CloudinaryImage("young_couple.jpg").effect(pixelate().squareSize(50).region(faces()));
// For smaller squares
new
CloudinaryImage("young_couple.jpg").effect(pixelate().squareSize(10).region(faces()));
Integrating Cloudinary’s face blurring and pixelation features into your React Native application enhances the visual appeal and boosts user privacy. By customizing the level of blurriness or the size of the pixel squares, you can achieve the perfect balance between aesthetics and privacy.
Final Thoughts
Using blur effects in React Native apps can make a difference. They help make apps look better, enhancing the overall user experience. Adding blur to backgrounds and other parts makes essential parts stand out and grab users’ attention. This improves the app and guides users smoothly, making everything more straightforward.
Blur effects also add depth and make the app more enjoyable to interact with. By blurring some parts, you can focus users on the main content or actions, making them more likely to keep using the app. In short, blur effects are helpful for app developers who want to make their apps more engaging and visually appealing. Using these effects wisely can lead to happier users and make your app stand out.
Optimize, transform, and manage your media assets like a pro with Cloudinary. Sign up for free today!


