
Grayscale images, also known as black-and-white or monochrome images, are images with shades of gray from black to white, with each pixel having a single intensity value. Grayscale images are widely used in various applications such as image enhancement, compression, and feature extraction. Below is an example of a grayscale image:
Image Credits: Jocelyn Morales on Unsplash
There are extensive libraries and tools in Python for converting colored images into grayscale. Examples include PIL (Python Imaging Library), OpenCV, and so on. In this guide, we’ll explore some popular libraries and approaches for converting images to grayscale in Python.
In this article:
Using the Pillow Library
Pillow is a fork of PIL (Python Imaging Library) with a robust tool-set for image processing in Python. It provides a wide range of functions for loading, manipulating, and saving images in various formats.
Here’s an example of how to convert an image to grayscale using Pillow:
from PIL import Image

# Open the image
image = Image.open("nature.png")

# Convert the image to grayscale. The `"L"` argument in Pillow represents grayscale mode.
grayscale_image = image.convert("L")

# Save the grayscale image
grayscale_image.save("grayscale_image.jpg")
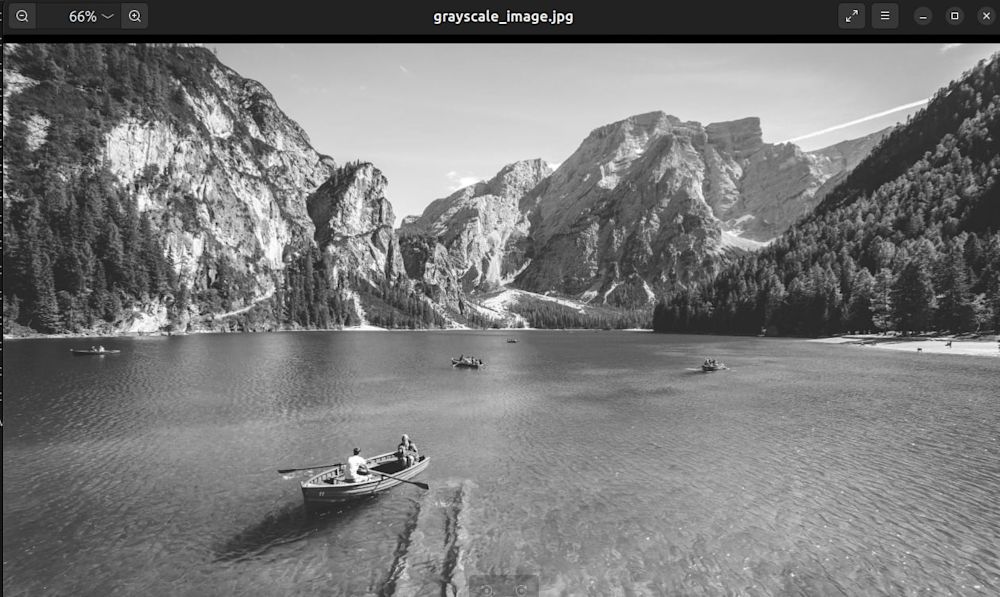
Here’s the input nature.png file we want to convert to grayscale:
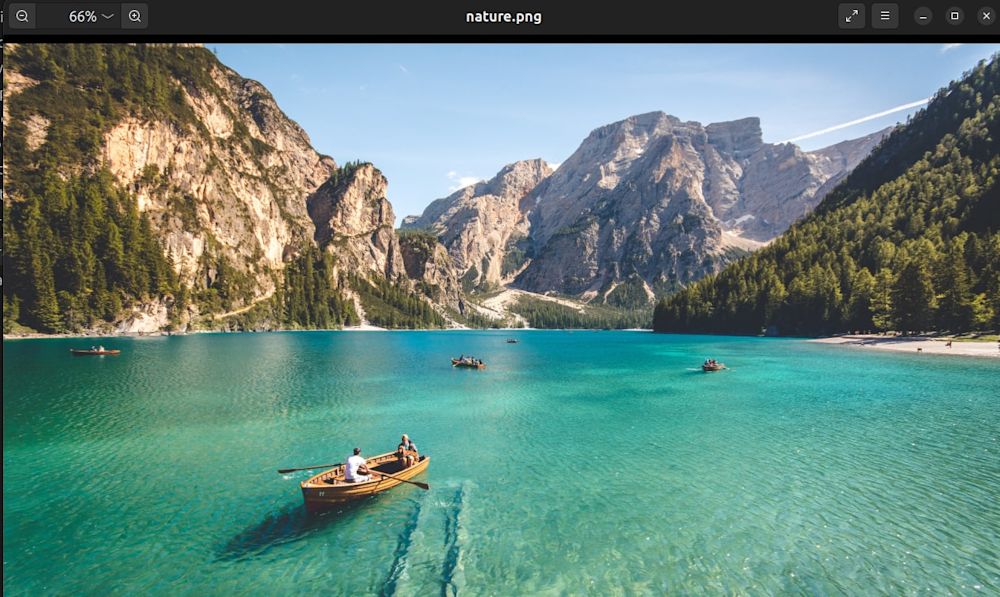
And here’s the output after we converted it to grayscale:
Using OpenCV
OpenCV (Open Source Computer Vision Library) is a free, cross-platform, and open-source library for computer vision and various image processing tasks. It provides many functions for reading, writing, and manipulating images.
Here’s how we can use OpenCV to convert images to grayscale in Python:
import cv2
# Load the image
image = cv2.imread("input_image.jpg")

# Convert the image to grayscale
grayscale_image = cv2.cvtColor(image, cv2.COLOR_BGR2GRAY)

# Save the grayscale image
cv2.imwrite("grayscale_image.jpg", grayscale_image)
We can use several other methods and libraries for grayscale conversion in Python. Examples include Scikit-py and Mahotas, and the list goes on and on.

Converting Images to Grayscale with Cloudinary
Cloudinary is a cloud-based media management platform that simplifies the process of storing, managing, and delivering digital media assets such as images and videos. One of the key features of Cloudinary is its support for on-the-fly image manipulation.
Grayscale conversion is one of the many image manipulation features supported in Cloudinary. Compared to other solutions, it’s simple and efficient to implement. Let’s look at the two approaches for applying the grayscale effect to images with Cloudinary.
Applying Grayscale Transformation to URLs
The first method directly applies the transformation parameter to the image URL. For example, suppose you have an image uploaded to Cloudinary with the following URL:
https://res.cloudinary.com/demo/image/upload/happy_dog.jpg
We can simply tweak the URL by adding e_grayscale to apply the grayscale effect as follows:
python3 -m pip install fastapi python-multipart cloudinary
pydantic-settings python-dotenv uvicorn[standard]
Below is the complete code for the application:
# main.py
from fastapi import FastAPI
from fastapi import FastAPI, File, UploadFile
from pydantic_settings import BaseSettings
import cloudinary
import os

class Settings(BaseSettings):
    CLOUDINARY_CLOUD_NAME: str
    CLOUDINARY_API_KEY: int
    CLOUDINARY_API_SECRET: str
    class Config:
        env_file = ".env"

settings = Settings()

config = cloudinary.config(cloud_name = settings.CLOUDINARY_CLOUD_NAME, api_key = settings.CLOUDINARY_API_KEY, api_secret = settings.CLOUDINARY_API_SECRET)

import cloudinary.uploader
import cloudinary.api

app = FastAPI()

@app.get("/")
async def root():
    return {"message": "Hello World"}
The above code imports a few libraries to configure the application. We also defined a class to load the environment variables containing our Cloudinary credentials.
We can now create an endpoint to upload an image to Cloudinary and convert it to grayscale.
# main.py
async def cloudinary_upload(file):
    grayscale_image =  cloudinary.uploader.upload(file, effect="grayscale")
    return grayscale_image

@app.post("/upload")
async def create_image(image: UploadFile = File(...)):
    os.makedirs("images", exist_ok=True)
    # Here we save the image to disk so we can upload it to Cloudinary
    file_location = f"images/{image.filename}"
    with open(file_location, "wb+") as file_object:
        file_object.write(image.file.read())

    result = await cloudinary_upload(file_location)


    grayscale_img = result["secure_url"]


    return f"The converted image can be found here: {grayscale_img}"
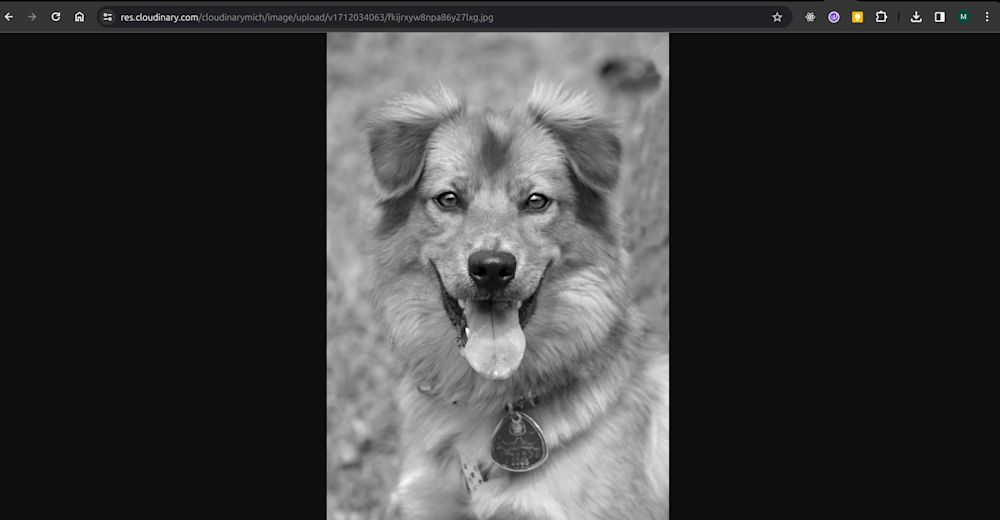
Now, uploading the same image from the previous example to our application returns the following URL:
https://res.cloudinary.com/cloudinarymich/image/upload/v1712034063/fkijrxyw8npa86y27lxg.jpg
Here’s the output in the browser:
Wrapping Up
In this article, we explored different methods of adding grayscale effects to images in Python. We explored popular options such as Pillow, OpenCV, and Cloudinary. We also saw how Cloudinary compares to the other methods in simplicity and efficiency.
Transform and optimize your images and videos effortlessly with Cloudinary’s cloud-based solutions. Sign up for free today!

