In web development, Angular is a robust framework millions of developers use worldwide. One of its many powerful features is the ability to create overlays, a crucial component in crafting interactive and dynamic web applications. Overlays in Angular allow us to add content on top of existing components without disturbing the overall layout, making our applications more interactive and user-friendly.
In this article, we’ll explore overlay in Angular using a step-by-step example using the Cloudinary API. Whether you’re a seasoned Angular developer or just starting out, this article will provide valuable insights to help you take your Angular development skills to the next level.
In this article:
- Creating an Image Overlay App with Angular
- Step-By-Step Guide to Implement Angular Overlay
- Final Thoughts
Creating an Image Overlay App with Angular
Building an image overlay app with Angular combines the dynamic capabilities of web applications with the creative manipulation of graphics. As a robust front-end framework, Angular brings structure and scalability to your project, allowing for rich interaction with images. It revolves around components and services, perfect for maintaining clean code while handling the overlay features.
Image overlay, in the context of web apps, refers to the process of superimposing one image onto another, usually to add text or make a composite of two or more images. This can be a highly sought-after functionality in apps for branding, creating memes, or designing social media posts. Let’s dive into setting up the fundamental structure of an Angular app, where the core functionality will be to add an overlay to a selected image, enabling users to customize and blend images seamlessly.
Step-By-Step Guide to Implement Angular Overlay
Before we can add an overlay to an asset, we need to create a Cloudinary account. So head on over to sign up for free.
For this tutorial, we will be using Angular to create a script, which requires Node.js to be installed. If you don’t have Node.js installed, you can install it from their official web page. You can check if you have it installed by running the following command in your terminal:
node -v
And for NPM, use:
npm -v
You should see the version numbers for Node.js and NPM if you have both installed.
Once you have both installed, you can install the Angular CLI (Command Line Interface) globally on your system using the following command:
npm install -g @angular/cli
After the installation is complete, you can verify it by checking the version of Angular CLI using the following command:
ng --version
If you don’t see the version, your Angular path is most likely not recognized. The system might not be looking in the right place for the ng command. This happens when you install packages globally with NPM. They are usually installed in a directory added to your PATH environment variable. If this variable wasn’t updated correctly, or if there was a problem with the installation, the system might be unable to find the ng command.
To fix this issue, first, use the following command to check where global NPM packages are installed:
npm config get prefix
The ng command should be located in the bin subdirectory of the directory printed by this command. You can check if it’s there by navigating to the directory and searching for the ng.cmd file.
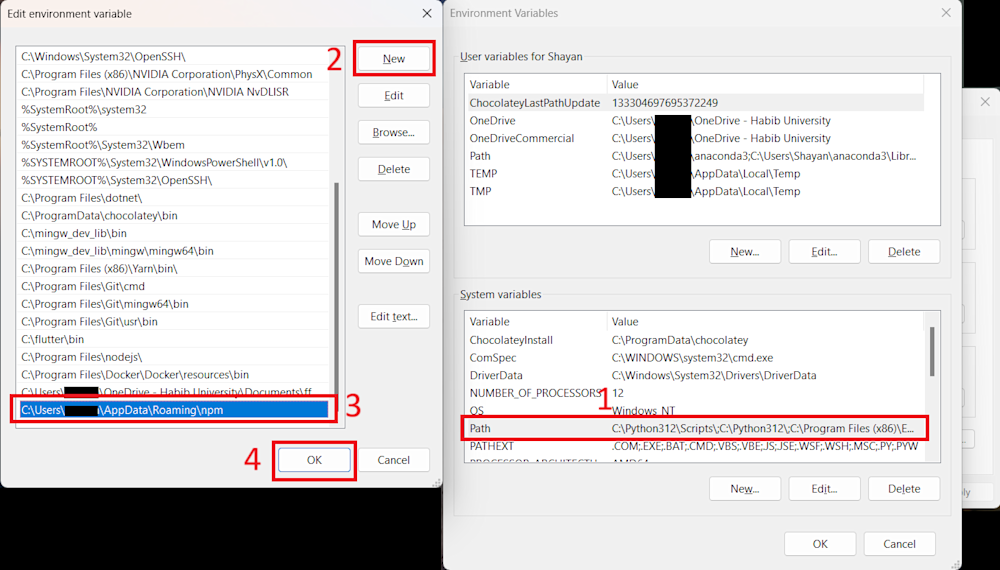
Next, copy this path and open Environment Variables on your Windows PC. Now, under System Variables, double-click on Path. Next, click on New and paste the path directory. Finally, click on OK to save your changes.
With this ng should start working on your system.
With Angular installed, the final step is to install Cloudinary’s JavaScript and Angular packages using the NPM package manager:
npm i @cloudinary/url-gen @cloudinary/ng
Create an Angular Project
Now that we have our requirements set up, we must upload our images to our Cloudinary cloud. With Cloudinary, you can upload an image directly to your Cloudinary Media Library or use an API call to upload.
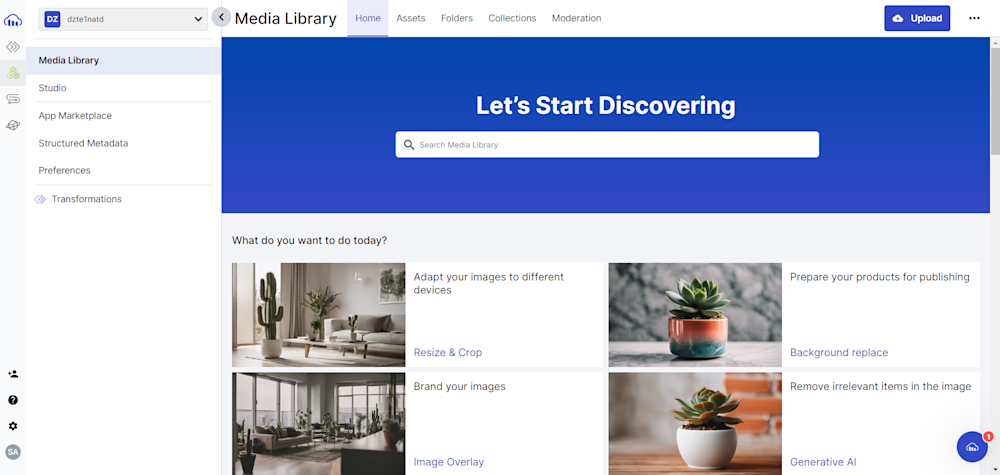
To upload your images using the website, head to Cloudinary and log in to your account. Here you will be greeted with the Dashboard. Head to the Media Library tab located as shown below:
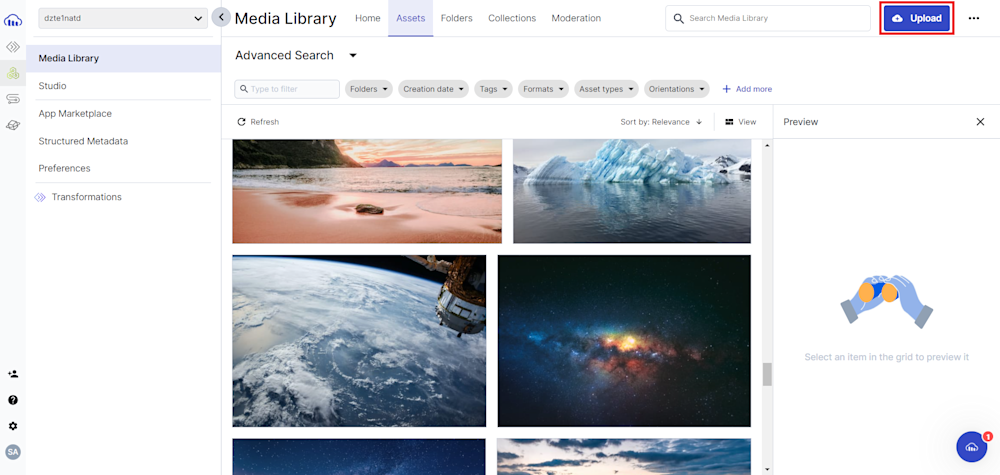
The Assets tab shows all your assets on the cloud. To upload new assets, click the Upload button in the top-right corner.
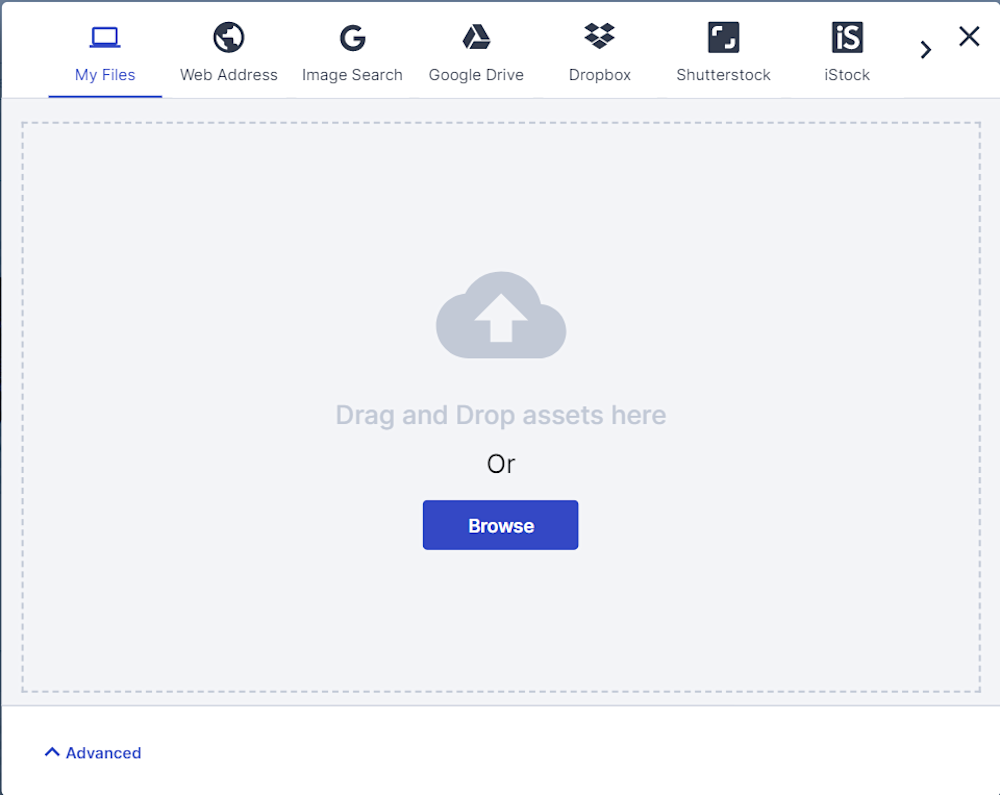
Finally, you can drag and drop an image file or click Browse to select the assets you want to upload.
For this project, we will use cat and cloudinary-logo-vector, which are available in the Cloudinary cloud, to add an Angular overlay.
Next, open the Programmable Media button at the top left corner of your screen and go to the Dashboard tab. Here, you will need to copy your Cloud Name, API Key, and API Secret, which we will use later.
Now, open up the project folder and start by creating a new Angular project using the following command:
ng new overlay-project
Make Changes to app.component.ts
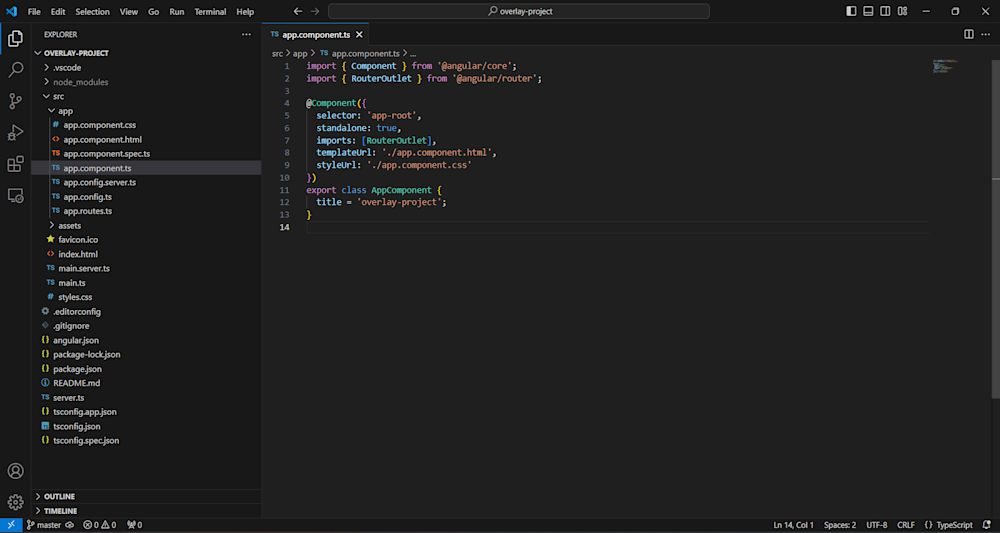
Now that we’ve created everything open your project folder in your favorite IDE and navigate to the app.component.ts file, located in the src folder. Here is what our file looks like:
Here, we will start by importing the necessary modules for the project:
// Import necessary Angular modules and components.
import { Component, OnInit } from '@angular/core';
import { CommonModule } from '@angular/common';
import { RouterOutlet } from '@angular/router';

// Import CloudinaryModule for Angular.
import { CloudinaryModule } from '@cloudinary/ng';

// Import Cloudinary classes for URL generation.
import { Cloudinary, CloudinaryImage } from '@cloudinary/url-gen';
import { source } from '@cloudinary/url-gen/actions/overlay';
import { image } from '@cloudinary/url-gen/qualifiers/source';
For now, we are importing the CloudinaryModule for angular along with other Cloudinary modules for URL generation. We also import source and image for image overlay.
Next, we define the Component decorator:
@Component({
  // Define component selector and attributes.
  selector: 'app-root',
  standalone: true,

  // Import necessary modules.
  imports: [CommonModule, RouterOutlet, CloudinaryModule],

  // Define component template and styles.
  templateUrl: './app.component.html',
  styleUrl: './app.component.css'
})
Here @Component is a decorator that marks the class as an Angular component. The selector parameter acts as a CSS selector that identifies the components in the template. The standalone parameter indicates whether the component is standalone or part of a larger application. The imports parameter helps import the necessary modules, while the templateUrl parameter defines the URL of the template file for the component. Finally, styleUrl is used to define the stylesheet for this component.
With our decorator ready, we now define an AppComponent class that will be used to display our image. We define our AppComponent class and extend it using the ngOnInit hook. ngOnInit is a lifecycle hook called after Angular has initialized all data-bound properties of a directive. We will do this as follows:
// Define AppComponent class.
export class AppComponent implements OnInit {

}
Now, let’s start by declaring a variable called img variable that will hold our Cloudinary image object:
// Define AppComponent class.
export class AppComponent implements OnInit {
  // Declare img variable of type CloudinaryImage.
  img!: CloudinaryImage;

}
Next, we initialize our ngOnInit lifecycle hook and define the Cloudinary API with our account credentials
// Define AppComponent class.
export class AppComponent implements OnInit {
  // Declare img variable of type CloudinaryImage.
  img!: CloudinaryImage;

  // Lifecycle hook: ngOnInit
  ngOnInit() {
    // Create a Cloudinary instance with configuration parameters.
    const cld = new Cloudinary({
      cloud: {
        cloudName: 'your_cloud_name',
        apiKey: "your_api_key",
        apiSecret: "your_api_secret"
      }
    });
}
Finally, we create a Cloudinary image object with cld.image and use the overlay method to overlay one image on top of the other. Here is what our final code looks like:
// Import necessary Angular modules and components.
import { Component, OnInit } from '@angular/core';
import { CommonModule } from '@angular/common';
import { RouterOutlet } from '@angular/router';

// Import CloudinaryModule for Angular.
import { CloudinaryModule } from '@cloudinary/ng';

// Import Cloudinary classes for URL generation.
import { Cloudinary, CloudinaryImage } from '@cloudinary/url-gen';
import { source } from '@cloudinary/url-gen/actions/overlay';
import { image } from '@cloudinary/url-gen/qualifiers/source';

@Component({
  // Define component selector and attributes.
  selector: 'app-root',
  standalone: true,

  // Import necessary modules.
  imports: [CommonModule, RouterOutlet, CloudinaryModule],

  // Define component template and styles.
  templateUrl: './app.component.html',
  styleUrl: './app.component.css'
})

// Define AppComponent class.
export class AppComponent implements OnInit {
  // Declare img variable of type CloudinaryImage.
  img!: CloudinaryImage;

  // Lifecycle hook: ngOnInit
  ngOnInit() {
    // Create a Cloudinary instance with configuration parameters.
    const cld = new Cloudinary({
      cloud: {
        cloudName: cloud_name,
        apiKey: "api_key",
        apiSecret: "api_secret"
      }
    });
    // cld.image returns a CloudinaryImage with the configuration set.
    this.img = cld.image('samples/animals/cat').overlay(source(image("samples/cloudinary-logo-vector"))); // Overlay image on image
  }
}
Here, we are overlaying cloudinary-logo-vector over our cat image. You can optionally use the .resize() method to resize your images or the .position() method to specify their position. You can learn more about this by visiting the Cloudinary Angular JS documentation.
Make Changes to app.component.html
Lastly, all we need to do is to display our image. To do this, open up your app.component.html file and navigate to the <main> div. Here, we will replace all the code with Cloudinary’s advanced-image component. Here is what our main div looks like:
<main class="main">
  <!-- In your view add the advanced-image component and pass your Cloudinary image.-->
  <advanced-image [cldImg]="img"></advanced-image>
</main>
Now, all we need to do is execute the Angular application using the ng:
ng serve --open
Here is what our image looks like:
Final Thoughts
Mastering overlays in Angular is a powerful skill that can significantly enhance the interactivity and dynamism of our web applications. They provide a dynamic way to present information and interact with users, making our applications more engaging.
In this context, Cloudinary plays a crucial role. It streamlines the overlay creation and management process, proving to be an essential resource for developers. With its robust features and easy-to-use interface, Cloudinary can help us create more engaging and visually appealing Angular applications.
Transform and optimize your images and videos effortlessly with Cloudinary’s cloud-based solutions. Sign up for free today!
More from Cloudinary:


