With more than 26,458 Android developers in the United States alone, the Android platform offers a vast landscape for innovation and creativity. One area of exploration is the embedding of video watermarks in applications on Android devices. This technique, especially when leveraging a service like Cloudinary, allows developers to protect and personalize video content, enhancing both security and user experience.
In this article, we will learn how to conveniently create an Android app that uses Cloudinary to manage media and add watermarks to videos. Let’s dive right in!
How to Create Video Watermarks in Andoird
To add watermarks in Android, you will first need to set up Android Studio on your system. You can download the latest version from the Android Studio website if you don’t have it installed.
We’ll also use Cloudinary to power our app and host our videos. Go ahead and sign up for a free account if you haven’t already done so. For this tutorial, we will need our Cloudinary API credentials.
To retrieve your Cloudinary credentials, log in to your Cloudinary account and head to the Programmable Media Dashboard by clicking on the Programmable Media button at the top left corner of the window. Here, you will see your Cloud Name, API Key, and API Secret. Copy these, as we will need them later.

With this, we’re ready to start creating our Android app.
Creating an Android Studio Project
After you’ve retrieved your Cloudinary credentials, open Android Studio. In the New Project window, select an Empty Activity project and click Next to proceed to the next window.

Next, rename your project. Here, we have named our project VideoWatermark. Select your desired project directory and choose Java as the project language. Finally, click on Finish to finish setting up your project.

It will take some time to build your project and download your requirements, but your project should open once completed.

When your project has finished building, head over to the gradle.build file located in the Gradle Scripts directory and add the Cloudinary Android module:
implementation("com.cloudinary:cloudinary-android:2.5.0")
Next, open AndroidManifest.xml in the manifests directory and add permissions for reading device storage and requesting internet access.
<!-- Read Storage -->
<uses-permission android:name="android.permission.READ_MEDIA_IMAGES" />
<uses-permission android:name="android.permission.READ_MEDIA_VIDEO" />
<uses-permission android:name="android.permission.READ_EXTERNAL_STORAGE" />

<!-- Access Internet -->
<uses-permission android:name="android.permission.INTERNET" />
With this, we are done with setting up our Android project and can begin creating a UI for our app.
Creating a Simple Android UI for Embedding Watermarks
Android Studio makes it easy to create an appealing UI by allowing you to easily drag and drop components on the fly. To create a UI, head over to activity_main.xml, which is located in the res/layout directory of your project. Selecting this file will open up Android Studio’s UI editor.

Here, we will start by searching and adding two VideoView components to our UI. The top view will help us select our base video, whereas the bottom view will open up the resulting video after adding the watermark. Next, we will use an ImageView to help us select an image to overlay on top of our video. We will also add some TextView components to help the user know the purpose of each component. Finally, we will add a button to help the user transform our video.
Once completed, select each UI and open up the XML code by clicking the Code button on the top right corner of your editor. Here, redefine your UI objects according to your needs. For example, here we have defined two TextView components which dictate what each component does by changing the text in each component:

Here is what our UI looks like:

Coding our Video Watermark App
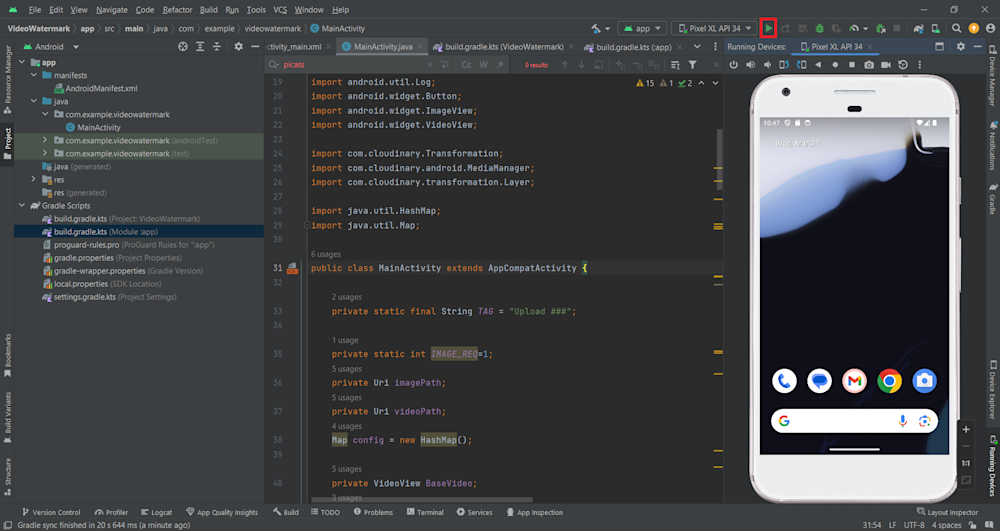
With our UI now complete, we can begin writing the main code for our app. So head over to MainActivity.java, which is located in the com.example.cloudinary folder of our project. Here, we will begin by creating several new environment variables for the program:
private static final String TAG = "Upload ###";

private static int IMAGE_REQ=1;
private Uri imagePath;
private Uri videoPath;
Map config = new HashMap();

private VideoView BaseVideo;
private VideoView Result;
private ImageView OverlayImage;
private Button button;
In the code above, we have defined two VideoView variables for our base video as well as our resultant video. We have also defined a variable for our overlay image. The Button variable refers to our Transform button, which triggers the overlay transformation. Finally, the HashMap() will be used to configure our Cloudinary API.
Now that we’ve set up our variables let’s go to the onCreate() function. Here, we will start off by retrieving our objects from the XML UI document using the findViewById() function, as well as configure our Cloudinary API:
@Override
protected void onCreate(Bundle savedInstanceState) {
   super.onCreate(savedInstanceState);
   setContentView(R.layout.activity_main);

   BaseVideo=findViewById(R.id.videoView);
   Result=findViewById(R.id.videoView2);
   OverlayImage=findViewById(R.id.OverlayImage);
   button=findViewById(R.id.button);

   config.put("cloud_name", "...");
   config.put("api_key","...");
   config.put("api_secret","...");
   MediaManager.init(this, config);
Finally, we will add an on-click function to our button, BaseVideo, as well as our OverlayImage components:
       BaseVideo.setOnClickListener(v -> {
           requestPermission(null, BaseVideo);
           Log.d(TAG, ": "+"request permission");
       });
       OverlayImage.setOnClickListener(v -> {
           requestPermission(OverlayImage, null);
           Log.d(TAG, ": "+"request permission");
       });

       button.setOnClickListener(v -> {

           Log.d("Selection", "Selected Button");

           String vidID = videoPath.getLastPathSegment();
           String imgID = imagePath.getLastPathSegment();

           MediaManager.get().upload(videoPath).option("public_id", vidID).option("resource_type", "video").dispatch();
           MediaManager.get().upload(imagePath).option("public_id", imgID).dispatch();
           new Handler(Looper.getMainLooper()).postDelayed(() -> {

               String url = MediaManager.get().url().transformation(new Transformation()
                       .overlay(new Layer().publicId(imgID)).chain()
                       .flags("layer_apply")).resourceType("video").generate(vidID);

           Log.d("URL", url);
           Result.setVideoPath(url);
           Result.start();
           }, 15000); // Delay in milliseconds

       });
Here, our BaseVideo and OverlayImage will call another function called requestPermission(), which we will define later. The button’s on-click function, however, starts by retrieving the last segment of the video and image’s path and stores it in new variables called vidID and imgID, respectively. This helps us create unique public IDs for our assets when we upload them to the Cloudinary cloud using the MediaManager.
Once our assets are uploaded, we create a new Handler. After a 15-second delay, this uses the MediaManager to create a new transformation that overlays an image over the video. It then retrieves the URL of the resultant video and displays it in the Result VideoView.
Here is what our complete onCreate() function looks like:
   @Override
   protected void onCreate(Bundle savedInstanceState) {
       super.onCreate(savedInstanceState);
       setContentView(R.layout.activity_main);

       BaseVideo=findViewById(R.id.videoView);
       Result=findViewById(R.id.videoView2);
       OverlayImage=findViewById(R.id.OverlayImage);
       button=findViewById(R.id.button);

       config.put("cloud_name", "...");
       config.put("api_key","...");
       config.put("api_secret","...");
       MediaManager.init(this, config);

       BaseVideo.setOnClickListener(v -> {
           requestPermission(null, BaseVideo);
           Log.d(TAG, ": "+"request permission");
       });
       OverlayImage.setOnClickListener(v -> {
           requestPermission(OverlayImage, null);
           Log.d(TAG, ": "+"request permission");
       });

       button.setOnClickListener(v -> {

           Log.d("Selection", "Selected Button");

           String vidID = videoPath.getLastPathSegment();
           String imgID = imagePath.getLastPathSegment();

           MediaManager.get().upload(videoPath).option("public_id", vidID).option("resource_type", "video").dispatch();
           MediaManager.get().upload(imagePath).option("public_id", imgID).dispatch();
           new Handler(Looper.getMainLooper()).postDelayed(() -> {

               String url = MediaManager.get().url().transformation(new Transformation()
                       .overlay(new Layer().publicId(imgID)).chain()
                       .flags("layer_apply")).resourceType("video").generate(vidID);

           Log.d("URL", url);
           Result.setVideoPath(url);
           Result.start();
           }, 15000); // Delay in milliseconds

       });

   }
Next, we will create our requestPermission() function. As the name suggests, this function triggers an Android System request to the user, requesting permission to access user files and usage for the internet. If the permission is granted, the function calls in a select() function. Here is what our function looks like:
private void requestPermission(ImageView img, VideoView vid) {
   if(ContextCompat.checkSelfPermission(MainActivity.this, Manifest.permission.READ_MEDIA_IMAGES)
           == PackageManager.PERMISSION_GRANTED &&
           ContextCompat.checkSelfPermission(MainActivity.this, Manifest.permission.READ_MEDIA_VIDEO)
                   == PackageManager.PERMISSION_GRANTED) {
       // Both permissions are granted, proceed with accessing the images and videos
       select(img, vid);
       if (img ==null)
       {
           Log.d("Selection", "Video Selected");
       }
       else {
           Log.d("Selection", "Image Selected");
       }

   } else {
       // Request for permissions
       ActivityCompat.requestPermissions(MainActivity.this, new String[]{
               Manifest.permission.READ_MEDIA_IMAGES,
               Manifest.permission.READ_MEDIA_VIDEO,
               Manifest.permission.READ_EXTERNAL_STORAGE
       }, IMAGE_REQ);
   }


}
Before we create our select() function, we first need to define two new variables, selectedImage and selectedVideo. These variables will serve as a flag allowing us to control our Activity, which we will define later:
private ImageView selectedImage = null;
private VideoView selectedVideo = null;
...
Now, we will define our select() function. Here, we will start by creating a new intent inside the function, which we will use to launch an activity. Next, we use the .setType() method to filter based on which of our view variables is defined. Finally, we use the .launch() method to launch our activity. Here is our complete select() function:
private ImageView selectedImage = null;
private VideoView selectedVideo = null;
private void select(ImageView img, VideoView vid) {
   Intent intent=new Intent();
   if (img != null)
   {
       intent.setType("image/*");// if you want to you can use pdf/gif/video
       Log.d("Selection", "Filtering Image");
   }
   else {
       intent.setType("video/*");
       Log.d("Selection", "Filtering Video");
   }
   intent.setAction(Intent.ACTION_GET_CONTENT);
   selectedImage = img;
   selectedVideo = vid;
   someActivityResultLauncher.launch(intent);
}
Finally, we can define our activity. The activity is simply used to define our video path. It uses the result of the user’s selection to get the video’s data. It then uses the data to populate either the videoPath or the imagePath variable with the actual path of our asset:
ActivityResultLauncher<Intent> someActivityResultLauncher = registerForActivityResult(
       new ActivityResultContracts.StartActivityForResult(),
       new ActivityResultCallback<ActivityResult>() {
           @Override
           public void onActivityResult(ActivityResult result) {
               if (result.getResultCode() == Activity.RESULT_OK) {
                   // There are no request codes
                   Intent data = result.getData();
                   if (selectedVideo == null)
                   {
                       Log.d("Selection", "Selecting Image");
                       imagePath = data.getData();
                       OverlayImage.setImageURI(imagePath);
                       Log.d("Selection", String.valueOf(imagePath));
                       selectedImage = null;
                   }
                   else
                   {
                       Log.d("Selection", "Selecting Video");
                       videoPath = data.getData();
                       BaseVideo.setVideoURI(videoPath);
                       BaseVideo.start();
                       Log.d("Selection", String.valueOf(videoPath));
                       selectedVideo = null;
                   }

               }
           }
       });
With this, our code is now complete. Here is what our final MainActivity.java file looks like:
package com.example.videowatermark;

import androidx.activity.result.ActivityResult;
import androidx.activity.result.ActivityResultCallback;
import androidx.activity.result.ActivityResultLauncher;
import androidx.activity.result.contract.ActivityResultContracts;
import androidx.appcompat.app.AppCompatActivity;
import androidx.core.app.ActivityCompat;
import androidx.core.content.ContextCompat;

import android.Manifest;
import android.app.Activity;
import android.content.Intent;
import android.content.pm.PackageManager;
import android.net.Uri;
import android.os.Bundle;
import android.os.Handler;
import android.os.Looper;
import android.util.Log;
import android.widget.Button;
import android.widget.ImageView;
import android.widget.VideoView;

import com.cloudinary.Transformation;
import com.cloudinary.android.MediaManager;
import com.cloudinary.transformation.Layer;

import java.util.HashMap;
import java.util.Map;

public class MainActivity extends AppCompatActivity {

   private static final String TAG = "Upload ###";

   private static int IMAGE_REQ=1;
   private Uri imagePath;
   private Uri videoPath;
   Map config = new HashMap();

   private VideoView BaseVideo;
   private VideoView Result;
   private ImageView OverlayImage;
   private Button button;

   @Override
   protected void onCreate(Bundle savedInstanceState) {
       super.onCreate(savedInstanceState);
       setContentView(R.layout.activity_main);

       BaseVideo=findViewById(R.id.videoView);
       Result=findViewById(R.id.videoView2);
       OverlayImage=findViewById(R.id.OverlayImage);
       button=findViewById(R.id.button);

       config.put("cloud_name", "...");
       config.put("api_key","...");
       config.put("api_secret","...");
       MediaManager.init(this, config);

       BaseVideo.setOnClickListener(v -> {
           requestPermission(null, BaseVideo);
           Log.d(TAG, ": "+"request permission");
       });
       OverlayImage.setOnClickListener(v -> {
           requestPermission(OverlayImage, null);
           Log.d(TAG, ": "+"request permission");
       });

       button.setOnClickListener(v -> {

           Log.d("Selection", "Selected Button");

           String vidID = videoPath.getLastPathSegment();
           String imgID = imagePath.getLastPathSegment();

           MediaManager.get().upload(videoPath).option("public_id", vidID).option("resource_type", "video").dispatch();
           MediaManager.get().upload(imagePath).option("public_id", imgID).dispatch();
           new Handler(Looper.getMainLooper()).postDelayed(() -> {

               String url = MediaManager.get().url().transformation(new Transformation()
                       .overlay(new Layer().publicId(imgID)).chain()
                       .flags("layer_apply")).resourceType("video").generate(vidID);

           Log.d("URL", url);
           Result.setVideoPath(url);
           Result.start();
           }, 15000); // Delay in milliseconds


       });

   }

   private void requestPermission(ImageView img, VideoView vid) {
       if(ContextCompat.checkSelfPermission(MainActivity.this, Manifest.permission.READ_MEDIA_IMAGES)
               == PackageManager.PERMISSION_GRANTED &&
               ContextCompat.checkSelfPermission(MainActivity.this, Manifest.permission.READ_MEDIA_VIDEO)
                       == PackageManager.PERMISSION_GRANTED) {
           // Both permissions are granted, proceed with accessing the images and videos
           select(img, vid);
           if (img ==null)
           {
               Log.d("Selection", "Video Selected");
           }
           else {
               Log.d("Selection", "Image Selected");
           }

       } else {
           // Request for permissions
           ActivityCompat.requestPermissions(MainActivity.this, new String[]{
                   Manifest.permission.READ_MEDIA_IMAGES,
                   Manifest.permission.READ_MEDIA_VIDEO,
                   Manifest.permission.READ_EXTERNAL_STORAGE
           }, IMAGE_REQ);
       }


   }

   // select the image from the gallery
   private ImageView selectedImage = null;
   private VideoView selectedVideo = null;
   private void select(ImageView img, VideoView vid) {
       Intent intent=new Intent();
       if (img != null)
       {
           intent.setType("image/*");// if you want to you can use pdf/gif/video
           Log.d("Selection", "Filtering Image");
       }
       else {
           intent.setType("video/*");
           Log.d("Selection", "Filtering Video");
       }
       intent.setAction(Intent.ACTION_GET_CONTENT);
       selectedImage = img;
       selectedVideo = vid;
       someActivityResultLauncher.launch(intent);

   }


   // You can do the assignment inside onAttach or onCreate, i.e, before the activity is displayed
   ActivityResultLauncher<Intent> someActivityResultLauncher = registerForActivityResult(
           new ActivityResultContracts.StartActivityForResult(),
           new ActivityResultCallback<ActivityResult>() {
               @Override
               public void onActivityResult(ActivityResult result) {
                   if (result.getResultCode() == Activity.RESULT_OK) {
                       // There are no request codes
                       Intent data = result.getData();
                       if (selectedVideo == null)
                       {
                           Log.d("Selection", "Selecting Image");
                           imagePath = data.getData();
                           OverlayImage.setImageURI(imagePath);
                           Log.d("Selection", String.valueOf(imagePath));
                           selectedImage = null;
                       }
                       else
                       {
                           Log.d("Selection", "Selecting Video");
                           videoPath = data.getData();
                           BaseVideo.setVideoURI(videoPath);
                           BaseVideo.start();
                           Log.d("Selection", String.valueOf(videoPath));
                           selectedVideo = null;
                       }

                   }
               }
           });
}
Testing Our Android Video Watermark App
Now, all we need to do is run our app. To do this, simply click the Play button at the top-right corner of your screen. Your mobile emulator will launch and run your Android flip video app.

Now click on the Base Video view to select a video. Next, click on the Overlay Image view to select an image you want to overlay:

Finally, click on the Transform button to generate your watermarked video:

Here is what our video looks like:

Adjusting the Size and Position of Your Watermark
Up till now, in this tutorial, we have created a basic Android app that selects an image and video from the phone’s local storage and overlays the image on the video using Cloudinary’s Android Java SDK. Cloudinary offers several advanced options in overlays that can make your watermarks more appealing and appropriate.
With Cloudinary, you can apply resizing and other transformation options on your overlays just like any other asset delivered from Cloudinary. You can apply multiple (chained) transformations to overlays by adding them in separate components before the layer_apply component. All chained transformations, until a transformation component that includes the layer_apply flag, are applied on the last added overlay or underlay instead of applying them on the base asset.
Here’s an example of how you can adjust the size and position of your watermark:
MediaManager.get().url().transformation(new Transformation()
  .overlay(new Layer().publicId("image_pid")).chain()
  .width(0.5).crop("scale").chain()
.flags("layer_apply").gravity("north_east")).resourceType("video").generate("video_pid");
In this example, a logo (or image) overlay is added, scaled down to 50% of its original width using the width parameter and made into a watermark. The transformed image is then placed as a layer in the top-right corner of the base video using the gravity parameter.
Using Opacity and Adding Effects for Better Watermarks
You can adjust the transparency of the watermark for a more subtle effect. This can be done by setting the opacity parameter. This allows you to create watermarks that are less distracting, blending more seamlessly with the video content. Cloudinary even allows you to add effects to it for a more visually appealing and effective watermark with the effect parameter.
Here’s an example of how you can adjust the opacity of your watermark and add an effect:
MediaManager.get().url().transformation(new Transformation()
  .overlay(new Layer().publicId("image_pid")).chain()
  .opacity(70).chain()
  .effect("grayscale").chain()
.flags("layer_apply").resourceType("video").generate("video_pid");
In this example, the opacity of the watermark is reduced to 70%, making it semi-transparent. Additionally, a grayscale effect is applied to the watermark, giving it a classic black and white look. This can help the watermark blend more seamlessly with a variety of video content, while still being noticeable.
Remember to replace "image_pid" and "video_pid" with the respective public IDs. You can refer to this Cloudinary documentation to learn about the numberous other transformations regarding watermarking that the platform supports.
Final Thoughts
Embedding video watermarks on Android devices, particularly with the use of Cloudinary, is a significant skill in the digital age. It not only ensures the authenticity of content but also enhances user experience by adding a layer of personalization. Cloudinary simplifies the process of creating and managing video watermarks, making it an invaluable tool for developers. Its robust features and easy-to-use interface can help us create more secure, personalized, and user-friendly applications.
As we conclude this guide, we hope you’ve gained a deeper understanding of the importance and application of video watermarks in Android development. So, sign up for Cloudinary today and learn how simple adding video watermarks becomes through this platform.
More from Cloudinary:
Accelerating Mundane Video Workflows
Build a Vue File Upload App for a Simplified Watermarking Process

