 Ask AI
CI HUB Cloudinary Connector
Last updated: Jul-29-2026
The CI HUB Cloudinary connector lets you access, edit, and sync your Cloudinary assets directly from the creative and productivity tools you use every day, such as Adobe Creative Cloud, Microsoft 365, and Google Workspace.
Overview
CI HUB develops connectors between digital asset management systems and popular creative, productivity, and work management applications. With the CI HUB Cloudinary connector, you can work with your Cloudinary assets without leaving the application you're working in.
Use the connector to:
- Bring Cloudinary assets directly into your working platform, then make edits, changes, and designs, and push them back to your Cloudinary Media Library, including thumbnails, versioning, structured metadata, and tags.
- Sync and streamline asset workflows between Cloudinary and third-party platforms.
- Manage your Cloudinary assets from within your day-to-day tools.
- Maintain Cloudinary as the single source of truth for all your digital assets.
The connector is available for:
- Creative tools: Adobe Creative Cloud (InDesign, Photoshop, Illustrator, Premiere Pro), Adobe Express, Canva, Sketch
- Productivity tools: Microsoft 365 (PowerPoint, Excel, Word), Google Workspace (Sheets, Slides, Docs)
Permissions
The assets that users can see and manage through the CI HUB connector are based on their Cloudinary user permissions:
- If your product environment uses Cloudinary's granular Roles and Permissions model, each user sees only the assets their permissions allow.
- If your product environment uses the legacy permissions model, all users see all assets.
To find out whether your account uses the granular Roles and Permissions system, and for more information about it, see Roles and Permissions. For details on the legacy permissions model, see Role-based permissions.
Prerequisites
Make sure you have a Cloudinary account. If you don't have one yet, sign up for a Free plan.
The CI HUB connector is licensed separately by CI HUB and is available with all Cloudinary plans. Sign up for a CI HUB plan or free trial (a 30-day free trial is available). For pricing details, see CI HUB pricing.
Installation
- Install the connector in your application, as described in the CI HUB getting started guide. The Cloudinary connector is supported in CI HUB Connector Professional and CI HUB Brand Connector.
- Add the CI HUB connector to your platform as an extension, following your platform's own instructions for adding extensions (see the CI HUB Help Center for platform-specific instructions).
- Open the CI HUB panel in your application and select Cloudinary as your asset source.
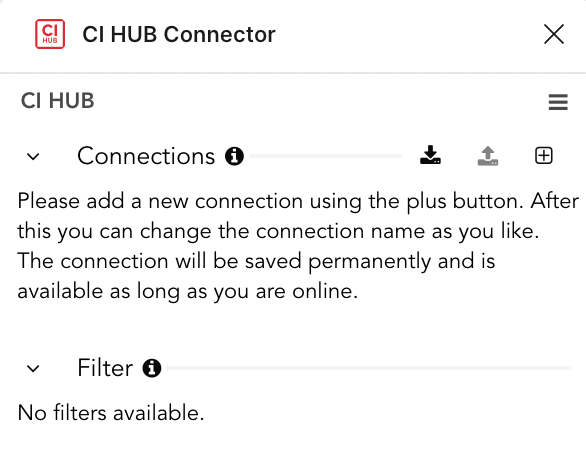
Add Cloudinary as a source 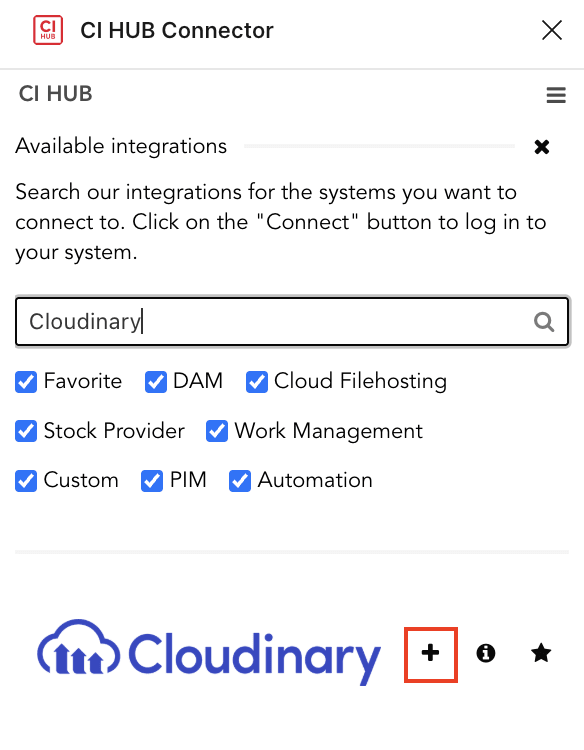
Select Cloudinary as a source -
In the OAuth Application Login page, enter your Cloudinary email and password, and click LOG IN.

-
From the drop-down list in the An application requests access to your data! page, select the cloud name for the product environment you want to connect (find your product environment's Cloud Name on the Dashboard).

-
Choose the additional data the connector can access (you can reconnect later to change your selection):
- Include metadata and versions: Retrieves detailed EXIF, XMP, and IPTC metadata and asset version history, shown in the connector's detail view. For more information, see Image metadata and Asset versions.
-
Include restricted assets: Resolves thumbnail and download URLs for restricted assets. For more information, see Access-controlled assets.
The panel then connects to your product environment.


How to use
Once connected, the CI HUB panel gives you a file-browser view of your Cloudinary Media Library from inside your application. From there you can search, filter, and preview assets, insert them into your document or design, upload new files, and push edits back to Cloudinary, all without switching windows.
Browse and find assets
Manage folders
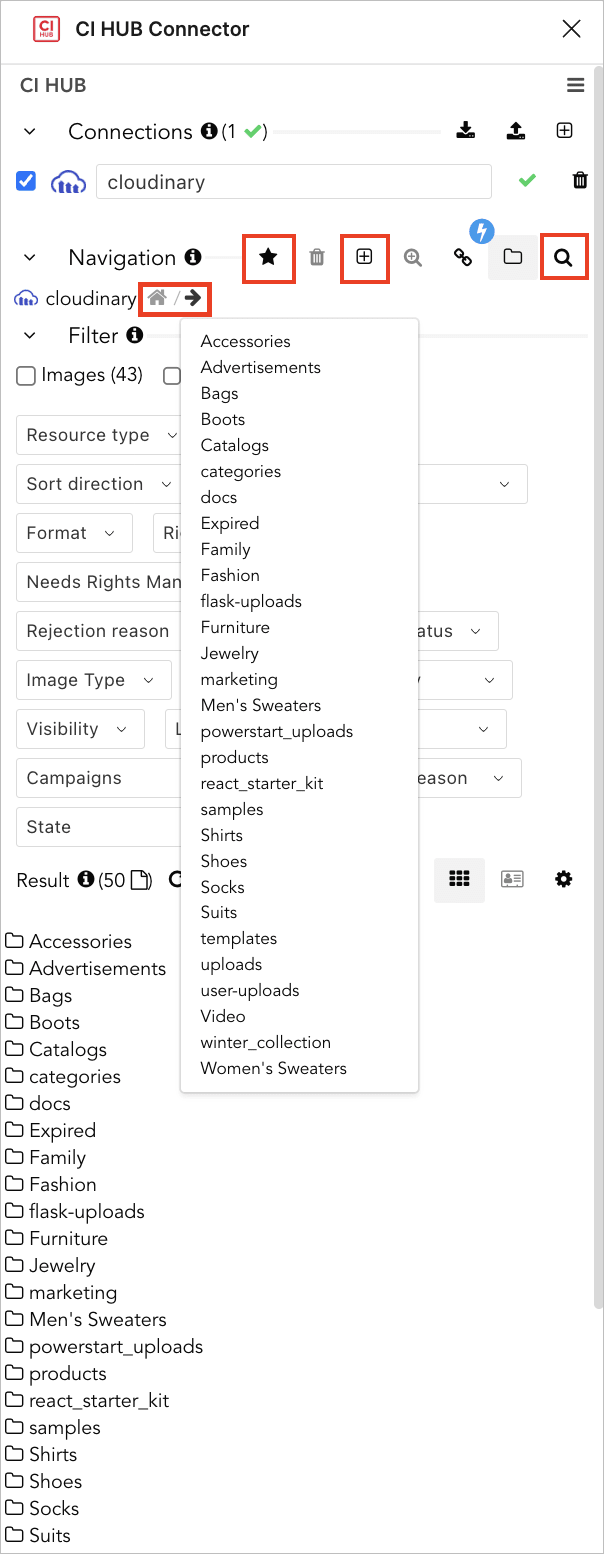
The panel opens at the root of your Media Library and shows your folders.
- View and select folders from the main area or the breadcrumb dropdown.
- From the Navigation toolbar:
- Bookmark a folder for quick access
- Add a folder
- Search for a folder
Switch between list and grid view
Browse assets in whichever format you prefer.

Find and view assets and their details
Click a folder to view the assets it contains, or filter by structured metadata fields set within Cloudinary. Once you've found your asset, click to view it.
Click Detail view to see its metadata and other details. Use Next asset and Previous asset to step through assets one at a time.

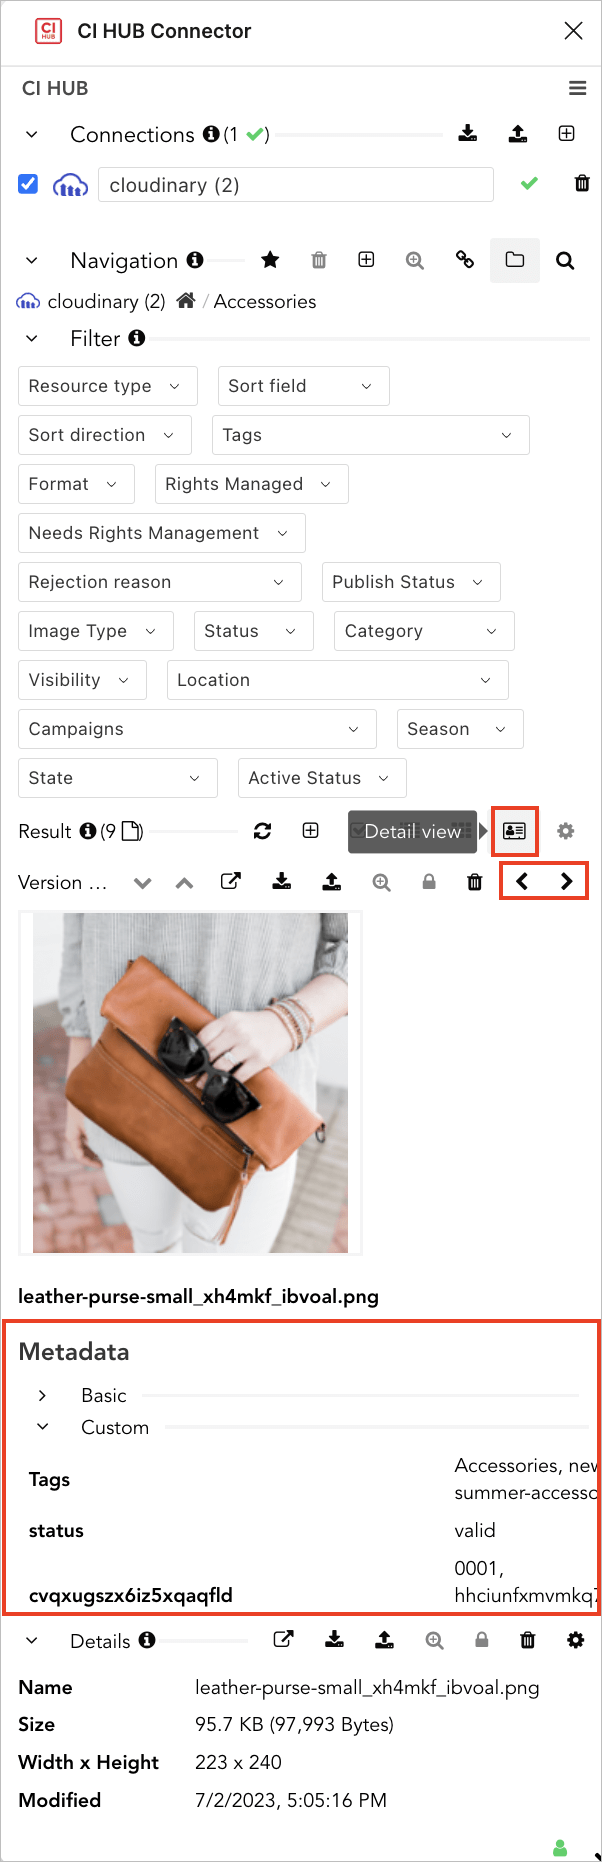
To choose which fields to display, click Settings in the bottom panel and select the columns you want from the dropdown. The metadata and version fields available here depend on whether you selected Include metadata and versions in step 6 of the installation.

Insert and manage assets
Insert one or more assets into your project
To insert a single asset, select an asset and click Use file in the bottom panel.
To insert several assets at once, select Multiple selection, choose the assets you want, then click Use file.
In both cases, you can then choose whether to insert the original asset or a Rendition created by applying one of your Cloudinary transformation templates.


Upload a file to the current folder
Click Add file to upload a file to the current folder in Cloudinary. Confirm the target folder, then optionally choose the file to upload from your application or local file system, set the file name and upload preset, and add tags.

Open the asset in Cloudinary
Click Open in browser in the bottom panel to view the asset in your Cloudinary Media Library.

Update a file
Click Update file in the bottom panel to push a new version of the asset to Cloudinary, taking the update either from within your application or from your local file system.
Delete an asset
Select an asset and click Delete asset to remove it from your Cloudinary Media Library.
Manage your connection
View and repair your connection
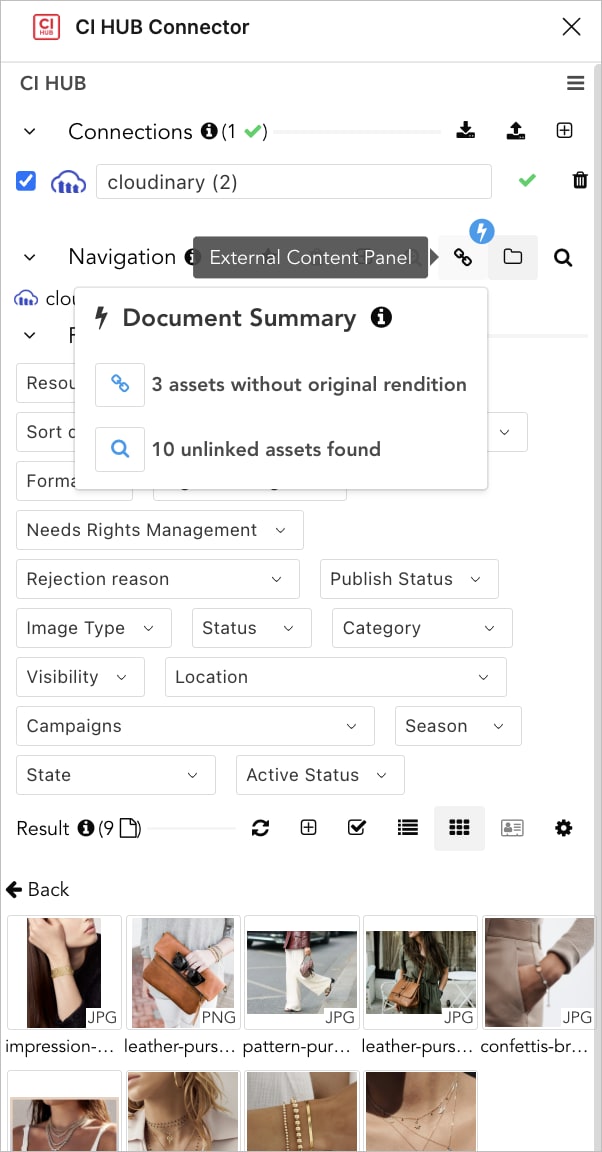
To diagnose your asset connection to Cloudinary, click External Content Panel from the Navigation toolbar. You'll see how many assets are without an original rendition and how many unlinked assets were found.
Click either ...assets without original rendition or ...unlinked assets found to open a list of those. Click Relink to relink your local asset to Cloudinary.

CI HUB in InDesign video tutorial
In this video tutorial, you'll learn how to use the CI HUB interface to import an image from Cloudinary into InDesign, apply an image overlay, and upload the saved .indd file back to Cloudinary.
This video is brought to you by Cloudinary's video player - embed your own!
Use the controls to set the playback speed, navigate to chapters of interest and select subtitles in your preferred language.
Get the connector
To learn more about CI HUB and get started, visit the CI HUB website.
For step-by-step installation instructions, see the CI HUB getting started guide.
For video walkthroughs, see the CI HUB video tutorials.
For support, contact Cloudinary Support.
Cloudinary Professional Services configuration support
The CI HUB connector is part of Cloudinary's Standard Professional Services integration configuration package.
If you need assistance setting up this integration:
- The CI HUB integration partner/third-party support includes configuration support.
- If you're on an Enterprise plan with a professional services package in your contract, Cloudinary's professional services can also help you set it up as part of your contracted package.
Learn more: Cloudinary Professional Services packages
Error
Rate this page:
