Videos have emerged as a compelling medium to convey stories, share knowledge, and engage audiences. Whether you’re a seasoned blogger, a budding entrepreneur, or a brand aiming to connect with your audience, integrating videos into your WordPress site can significantly amplify your message.
But here’s the catch: uploading videos isn’t just about hitting an ‘upload’ button. It’s about ensuring optimal performance, compatibility, and user experience. In this guide, we’ll walk you through the nuances of uploading videos to WordPress.
Why Add Videos to Your WordPress Site?
Before diving deeper, let’s take a moment to explore why uploading videos to WordPress is such a powerful move. Visual content continues to grow across digital spaces, from ecommerce to social media, and audiences now expect to see more videos wherever they go online.
No matter the type of website you run, videos can boost engagement and help visitors stay on your site longer. They’re particularly effective at simplifying complex topics, humanizing your brand, and catering to various learning preferences.
Many creative and professional websites feature high-quality video content across their pages. From tutorials and product demos to lifestyle reels and independent films, video offers countless opportunities to connect with your audience.
Uploading Videos Manually to WordPress.
You’ve got your video ready, and now, let’s get it up on your WordPress site. It’s simpler than you might think, even if you don’t consider yourself super tech-savvy. Follow this step-by-step guide and your video will be showcased on your page in no time.
1. Access Your Dashboard. First, log in to your WordPress dashboard. This is your control room, where all the magic happens.
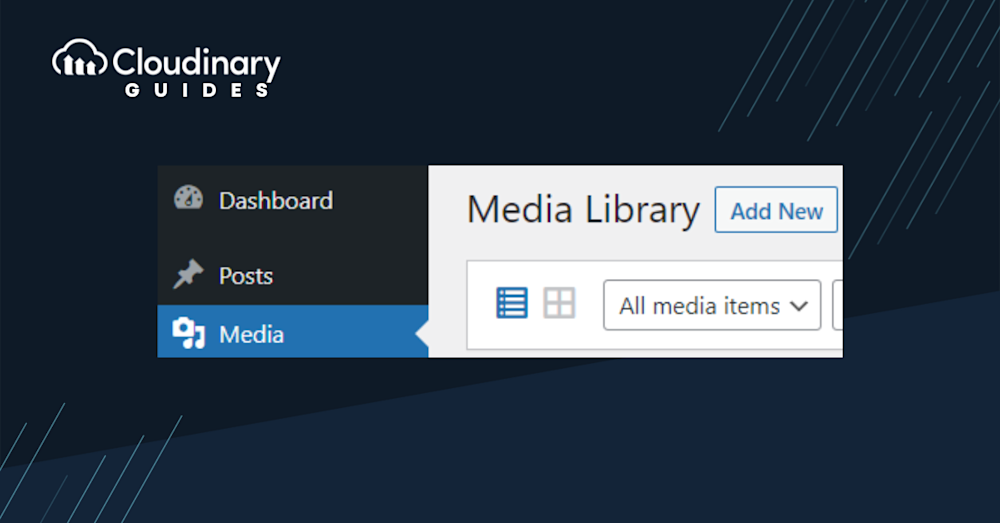
2. Head to Media. On the left-hand side, you’ll see a menu. Click on ‘Media’ and then ‘Add New’. This is your media library, where all your images, videos, and other media files live.
3. Upload Your Video: Now, you’ll see a box that says ‘Drop files to upload’ or ‘Select Files’. You can either drag and drop your video file here or click to browse and select your video.
Got a video on YouTube or Vimeo that you’d love to share on your site? Copy the video URL, head back to your WordPress editor, and paste it. WordPress is smart enough to embed it for you automatically.

Pro Tip!Improve Core Web Vitals with Cloudinary
If you want to improve your Core Web Vitals metrics and make your website faster, we recommend you to deliver responsive images. Cloudinary allows you to dynamically resize your images on the fly as needed, with added features such as size optimization and format conversion.
How to Upload a Video to the WordPress Media Library
Method 1: Using the Cloudinary Plugin for WordPress
One of the easiest ways to upload a video to WordPress is by using a video hosting plugin. Like YouTube or Vimeo, these tools let you host content externally, but Cloudinary is specifically designed to optimize visual media performance within WordPress.
The Cloudinary plugin integrates seamlessly with your WordPress dashboard and allows you to manage video assets with ease. It ensures fast playback, adaptive bitrate streaming, and high-quality visuals; all without affecting your server’s performance. Plus, you can customize the player with your branding, and your videos stay ad-free.
Steps to Get Started:
- From your WordPress dashboard, navigate to Plugins → Add New.
- Use the search bar to find the Cloudinary plugin.
- Install and activate it. Once activated, follow the prompts to connect your Cloudinary account to your WordPress site.
If your site is already connected to Cloudinary for managing images or other assets, you can skip this step.
- After setup, go to Media → Cloudinary or Media Library to upload your first video.
- Either drag and drop your video into the interface or click Select File to Upload.
- Your video will be stored in your Cloudinary Media Library and remain accessible via the WordPress interface.Method 2: Using Your Site’s Hosting Server (Not Recommended)You can upload a video directly into your Media Library, but this method stores the file on your WordPress server, which isn’t ideal. Video files are large and will quickly consume valuable server space, potentially slowing down your site.Worse, this could affect your Core Web Vitals and lower your SEO rankings, creating a poor experience for your visitors. Your hosting provider may also impose file size limits.To upload this way:
- Go to Media → Add New, and drag your video into the box or click Select Files.
- After uploading, verify your video is visible under Media → Library.
Note: Videos will be mixed in with all media types. WordPress does not separate them by file type.
Method 3: Using an External Hosting Server
Another option is using a general-purpose external host like Amazon S3. While powerful, this method requires technical knowledge to set up and manage the hosting environment. S3 doesn’t offer native WordPress integration or a built-in video player, so it’s not ideal for most users.
How to Add a Video to a WordPress Post or Page (2 Ways)
After uploading your video, you can embed it into WordPress content using one of two main methods in the Block Editor.
Method 1: Using the Cloudinary Video Block
- Add the Cloudinary Video Block: Navigate to the post or page you’d like to edit, or create a new one. Open the Block Editor and click the + icon to add a new block. Search for Cloudinary Video and select it when it appears. Alternatively, you can use the shortcut /cloudinary to quickly insert the block.
- Add and Customize Your Video: In the Cloudinary Video block, choose Upload, Media Library, or Insert from URL. For this guide, let’s pick Media Library. Select the uploaded video from your Cloudinary library and click Select.Once added, you can configure settings like:
- Autoplay
- Looping
- Mute on load
- Player controls
- Progress bar color and style
- Publish and Preview: Click Publish in the top-right corner, then Preview your page. Viewers will be able to adjust playback speed, switch to full-screen, or pop out the player while browsing your site.Method 2: Using the Default WordPress Video BlockThis method uses the built-in Video block, which stores videos on your server (and is less optimized).
- Open the Block Editor and add the Video block via the + icon or shortcut.
- Click Media Library and select your video.
- Adjust available settings such as autoplay or controls.
After publishing, you’ll notice that the built-in player offers fewer customization options and potentially lower video quality compared to Cloudinary’s block.
How to Embed a Video in WordPress
Embedding videos is a fantastic way to enhance content without bogging down your server. Instead of uploading large video files directly to WordPress, you can embed them from platforms like YouTube, Vimeo, or even Cloudinary. Here’s how:
- Choose Your Video. Find the video you want to embed on platforms like YouTube or Vimeo. Click on the ‘Share’ button below the video.
- Copy the Embed Code. Once you click ‘Share’, you’ll see an option for ‘Embed’. Click on it, and you’ll be presented with a code. Copy this code.
- Back to WordPress. Add a new block to your post or page editor and search for ‘Custom HTML’. Paste the embed code here, and voila! Your video is now embedded in your post.
- Preview and Adjust. Preview your post to ensure the video displays correctly. You can adjust the size and alignment as needed.
How to Embed a Video with Cloudinary
Cloudinary isn’t just another cloud storage solution; it’s a game-changer for optimizing and managing their media content. If you’re using Cloudinary, embedding videos on your WordPress site is a breeze.
- Upload to Cloudinary. Start by uploading your video to your Cloudinary account. Once uploaded, you’ll receive a unique URL for your video.
- Copy the URL. Head to the ‘Media Library’ in Cloudinary and select your video. Copy the URL provided.
- Embed in WordPress. Just like embedding from YouTube or Vimeo, go to your WordPress editor, paste the Cloudinary video URL, and it will automatically be embedded in your post.
The Perks of Cloudinary
Having your videos run smoothly on WordPress is a priority, right? But what if you could achieve that and so much more? This is where Cloudinary comes into play, offering a suite of advantages for video handling.
- Optimized Performance. Have you ever noticed how some videos buffer endlessly, ruining the viewer’s experience? Cloudinary ensures your videos are delivered in the most optimized format, tailored to the viewer’s device and bandwidth.
- Adaptive Streaming. Cloudinary’s adaptive bitrate streaming adjusts the video quality in real-time based on the viewer’s network conditions. Whether on a high-speed connection or a slower mobile network, they get the best viewing experience.
- Automatic Transcoding. Different devices and browsers support various video formats. Cloudinary automatically transcodes your videos to ensure they play seamlessly everywhere.
- Scalability. Whether you’re a blogger sharing occasional videos or a large enterprise with massive video content, Cloudinary scales to meet your needs. Its robust infrastructure can handle everything from a few uploads a day to thousands per hour.
- Insightful Analytics. Knowledge is power. Cloudinary provides detailed analytics on video views, bandwidth usage, and more. This data can be invaluable in understanding your audience’s preferences and optimizing your content strategy.
- Storage and Bandwidth Savings. Hosting your videos on Cloudinary saves valuable server space and bandwidth on your WordPress site. This can lead to cost savings and improved site performance.
- Dynamic Video Manipulation. Want to add text overlays and watermarks or apply filters to your videos? With Cloudinary, you can do all this and more on the fly without needing any video editing software.
- Responsive Delivery. Cloudinary detects the viewer’s device and screen size to deliver the video in the perfect resolution. The video looks crisp and clear whether they watch on a 4K monitor or a smartphone.
- Seamless CMS Integration. Cloudinary offers a WordPress plugin that integrates seamlessly with your CMS. This means you can manage, upload, and embed videos right from your WordPress dashboard.
Can uploading a video slow down your WordPress site?
Yes, uploading a video directly to your WordPress Media Library can slow down your site. When videos are stored on your server, they consume significant storage space and resources, which can lead to slower loading times and inferior Core Web Vitals scores. This decline in performance may negatively impact your search engine rankings and frustrate both new and regular visitors. To avoid these issues, it’s advisable to use a third-party video hosting provider, allowing your videos to leverage external server resources while maintaining excellent front-end display and performance.
Final Thoughts
We can’t deny the impact of videos on enhancing website engagement; the power these dynamic elements hold is tremendous. Videos, done right, serve as captivating tools to convey complex concepts, animate your pitch, interact with your visitors, and seize their attention. Luckily, WordPress provides native video content support, making the video incorporation process fairly straightforward.
Yet, there’s always room for improvement, and this is where Cloudinary steps in. With optimal resolution deliveries and seamless WordPress integration, this platform promises to elevate your WordPress video experience.
So why wait? Enhance your video strategy today by giving Cloudinary a try. That impressive, user-friendly video-handling experience you’ve been yearning for is just a few clicks away.
Frequently Asked Questions
Can self‑hosting my video slow down my WordPress site?
When you upload large video files to your Media Library without using a tool like Cloudinary, they’ll occupy space on your website’s server. So, this video hosting option can slow down your website, hindering the overall user experience. But this won’t be an issue if you use a video hosting tool like Cloudinary. This is because the heavy files will be hosted on a separate, more robust server.
What is the best option to upload a video to WordPress?
Using Cloudinary is hands down the best option to upload a video to WordPress. The platform provides the best experience for viewers because it can handle and maintain the highest-quality video content. Additionally, Cloudinary is very practical for WordPress creators because it fully integrates with the dashboard and the Block Editor.

