If you plan to move your site, you may have several reasons. Maybe your site needs to handle more traffic, you want better security, or you’re looking for a more cost-effective hosting solution. Whatever your reasons, it’s essential to approach the migration process carefully to avoid common pitfalls like site downtime, data loss, or a dip in your search engine rankings.
This guide will provide a step-by-step checklist to help you move your WordPress site smoothly. From preparing for the move with thorough backups and site audits to the actual migration, including how tools like Cloudinary can help manage your media files more efficiently. We’ll also cover what to do after the migration to ensure everything runs correctly.
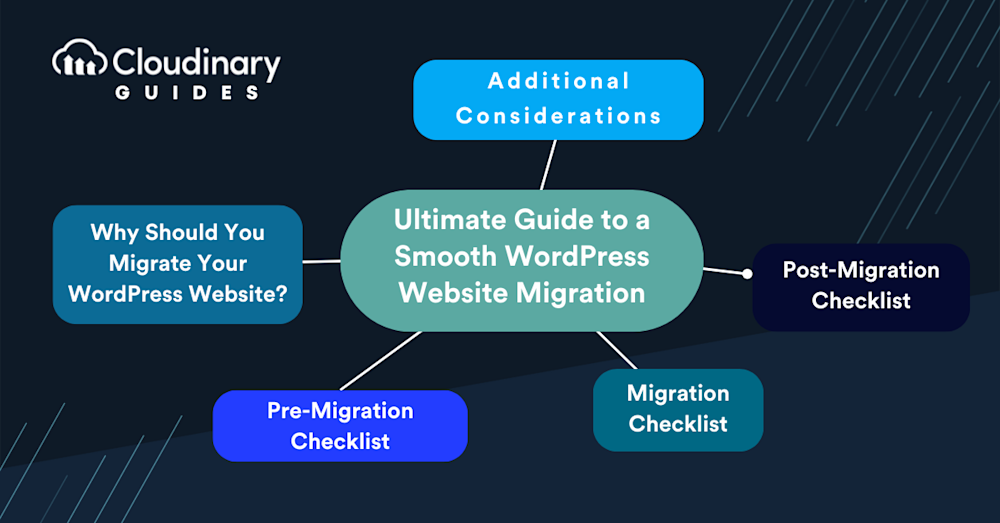
In this article:
- Why Should You Migrate Your WordPress Website?
- Pre-Migration Checklist
- WordPress Migration Checklist
- Post WordPress Migration Checklist
- Other Things to Consider After Migrating
Why Should You Migrate Your WordPress Website?
One of the main reasons is performance. If your current hosting provider can’t keep up with your site’s traffic, it’s time to move. Performance directly affects how users interact with your site. Slow page load times can frustrate users and increase bounce rates, meaning potential customers may leave your site before seeing what you offer. Search engines like Google consider site speed when ranking websites, so a slow site could lower search results visibility. By migrating to a more robust hosting solution, you can enhance site responsiveness, improve user experience, and potentially boost your SEO performance.
Security is also crucial. Moving to a hosting provider that offers advanced security measures can significantly reduce the risks of cyber attacks, data breaches, and unauthorized access. Enhanced security protocols such as automated backups, SSL certificates, malware scanning, and firewalls are essential components that protect your site’s integrity and user data. With robust security, you can spend less time worrying about potential breaches and more time developing and enhancing your website’s content and user experience.
Other reasons are cost and features. Maybe you’ve outgrown your current plan, or there’s a better deal out there that is more cost-efficient. Or perhaps you need specific features your current host doesn’t offer, like advanced caching, staging environments, or direct support for technologies that speed up and protect your website.
A WordPress migration presents an opportunity to audit your site. It’s the perfect time to declutter, reorganize, and upgrade. You can take inventory, discard what’s no longer needed, and maybe even organize your assets more efficiently.
Pre-Migration Checklist
Ensuring everything is in place before the move is crucial for a trouble-free transition. You should start with a thorough backup. Everything from your website’s database to themes, plugins, and media files must be saved. Tools like Cloudinary come in handy here, especially for media files. By offloading your images and videos to Cloudinary before migration, you ensure they’re backed up and optimized for performance on your new site.
Next, review your website’s plugins and themes. This is an excellent opportunity to discard outdated or no longer in-use plugins and themes and ensure those you keep are updated to the latest versions. This step can prevent compatibility issues on the new host. Also, take this time to document your current site’s structure and settings, including custom codes or specific configurations you’ve applied. It will make replicating the setup in the new environment much smoother.
Lastly, consider your SEO. Ensure you have a record of your current site’s SEO setup and performance. Tools like Google Analytics and Search Console should be configured to continue tracking without hitches post-migration. Planning for redirects, particularly if URL structures might change, is essential to maintain your search engine rankings.
WordPress Migration Checklist
Begin by setting up your new hosting environment. This involves choosing a plan that suits your needs. Once your new hosting account is ready, you should install WordPress. Many hosts offer one-click installations. After installation, don’t rush to go live. First, replicate your site’s settings and structure based on the documentation you prepared earlier. Import your themes and plugins, then test each to ensure they function as expected in the new environment.
Now, bring over your content. If you’ve offloaded media to Cloudinary, much of the heavy lifting is done. Integrating Cloudinary with your new WordPress site can streamline media management, ensuring your images and videos are optimized and load fast immediately. For your website’s database, use a migration plugin or manual export/import method, depending on your comfort level and the size of your site.
After importing your database, don’t forget to update the WordPress configuration file with the new database details. Then, a thorough site test in its new home will be conducted. Check for broken links, load times, and functionality across all pages. It’s also a good idea to set up a temporary domain or a staging environment for this testing phase, keeping the transition invisible to your audience until you’re ready to go live.
With everything in place and functioning as it should, it’s finally time to update your DNS settings to point to your new hosting provider. DNS propagation can take anywhere from a few hours to 48 hours, so plan this step accordingly. During this window, monitor your site’s performance and be ready to troubleshoot any issues that might arise as the new settings take effect.
Quick WordPress Migration Checklist Reference
Want a simpler reference for your WordPress Migration Checklist? Follow these simplified steps to ensure a smooth migration:
- Set Up New Hosting Environment:
- Choose a hosting plan that meets your needs.
- Install WordPress, potentially using one-click installation options provided by many hosts.
- Before going live, replicate your site’s settings and structure as per your earlier prepared documentation.
- Import your themes and plugins into the new environment and test each to confirm they work properly.
- Migrate Content and Media:
- If using Cloudinary for media storage, integrate it with your new WordPress installation to manage media files efficiently and ensure fast loading times.
- Migrate your website’s database using either a dedicated migration plugin or a manual export/import process, based on what you are most comfortable with and the scale of your website.
- Configure and Test in New Environment:
- Update the WordPress configuration file with new database details after the import.
- Perform comprehensive testing in the new environment, including:
- Checking for broken links and loading times.
- Verifying the functionality across all pages.
- Optionally, use a temporary domain or staging environment for these tests to keep changes invisible to your live audience.
- Go Live with DNS Update:
- Update your DNS settings to redirect to your new hosting service.
- Allow for DNS propagation, which might take a few hours up to 48 hours; plan this step considering potential downtime.
- Continuously monitor your site’s performance during this period and be prepared to address any issues as the new settings take effect.
These steps are designed to guide you through each phase of the migration, minimizing disruptions and ensuring all components of your WordPress site perform optimally in their new home.
Post WordPress Migration Checklist
After successfully migrating your WordPress site, a few critical steps remain to ensure it operates flawlessly in its new environment. First, conduct a final round of testing, focusing on functionality, load times, and mobile responsiveness. Every element must work as intended, from contact forms to social media integration.
Next, reconfigure your SEO settings if necessary and implement any redirects you’ve planned. This step is crucial to maintaining your search engine rankings and providing a seamless user experience. Additionally, reconnect your site to Google Analytics and Search Console to continue tracking its performance accurately.
Don’t forget to inform your audience about the move, especially if they need to update bookmarks or if there are significant changes to the site structure. A brief announcement can go a long way in maintaining trust and transparency.
Other Things to Consider After Migrating
A successful migration isn’t just about moving data; it’s about enhancing your site’s performance and security. If you haven’t already, consider setting up a content delivery network (CDN) after the migration. CDNs like the ones Cloudinary includes can significantly improve your site’s load times by serving your media from servers closest to your users.
Regularly back up your site to avoid data loss in unforeseen situations. Many hosting providers offer automatic backup services, but it’s wise to have an independent backup solution.
Finally, monitor your site’s performance and security. Regular updates to WordPress, themes, and plugins are essential to safeguard against vulnerabilities. Consider using a web application firewall (WAF) for an added layer of security.
Wrapping Up
Migrating a WordPress site requires careful planning, execution, and follow-up. Adhering to the pre-migration, migration, and post-migration checklists ensures a smooth transition to a new hosting that offers better performance, enhanced security, and an improved user experience.
The goal of migration is not just to move your site from point A to point B but also to optimize and secure your digital presence. With the right approach, migration can be an opportunity to audit your site, streamline operations, and leverage powerful tools like Cloudinary for media management. Staying informed and prepared is crucial to success. With each move, you learn, adapt, and improve, ensuring that your site continues to serve your audience effectively, no matter where it resides on the internet.
Get started with Cloudinary today and revolutionize your digital asset strategy. Sign up for free today!


