Is your WordPress site feeling sluggish? Are your images taking forever to load, causing potential visitors to bounce off before they even see your content? You’re not alone. Every second counts, and optimizing your website’s image size is a crucial step toward ensuring a seamless user experience.
In this guide, we’ll walk you through the common challenges WordPress users face with image optimization and how Cloudinary can help improve how you serve your images, and improve your user experience.
What Is an Image Size?
Image size generally refers to the dimensions of an image, measured in pixels, such as 1600×900 pixels, indicating it is 1600 pixels wide and 900 pixels high. These dimensions, often called image dimensions, directly impact the image file size, which is the space the image occupies on a computer and is measured in bytes (e.g., 100 KB).
Larger dimensions typically increase the file size, potentially slowing download times and affecting website performance. Hence, it is crucial to balance dimensions and file size, often achieved by selecting appropriate image file formats like JPEG for photographs with many colors, and PNG for illustrations with fewer color details, to retain quality while minimizing file size.
How WordPress Handles Images
Your WordPress website is your brand, and those captivating images are the products displayed on the shelves. But here’s the catch: images that are too large can slow down your site’s loading speed significantly. This leads to frustrated users and lower search engine rankings.
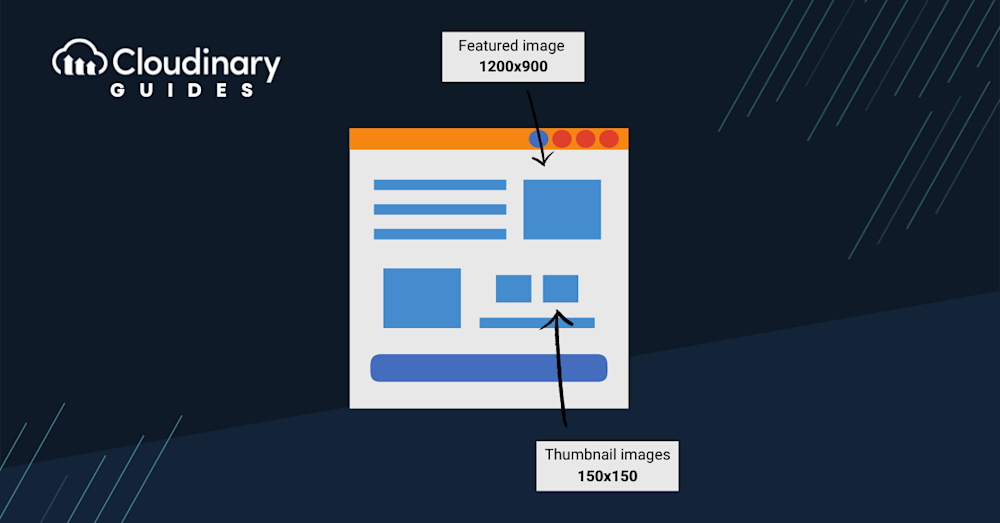
When you add an image to WordPress, it creates 4 different default sizes automatically:
- Full size (the original size of the uploaded image)
- Large size (up to 1024 x 1024 pixels)
- Medium size (up to 300 x 300 pixels)
- Thumbnail size (150 x 150 pixels)
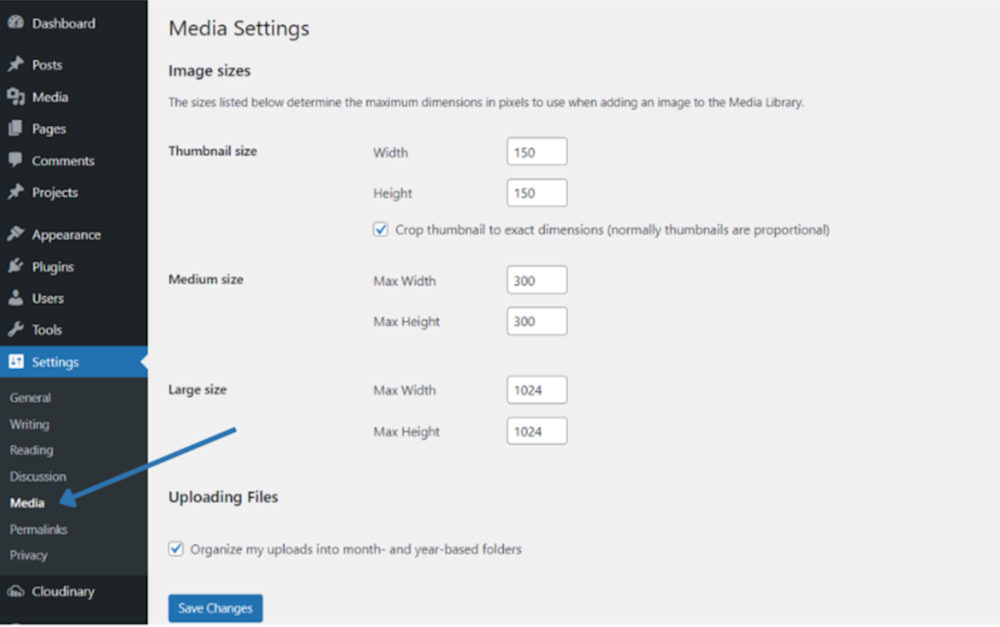
You don’t need to worry about adjusting image sizes manually or ensuring they fit well in various parts of your site – WordPress takes care of that for you. It automatically ensures the right size is displayed in different areas of your website. In addition to the preset image sizes, you have the flexibility to upload custom sizes that align with your specific needs, like so:
- Head to your WordPress Admin Dashboard.
- Click on Settings and then select Media.
- Within Media Settings, tweak the default image settings to suit your preferences.
Optimal Image Sizes for WordPress
What’s the ideal image size for achieving rapid, high-quality visuals that appear crisp and adaptable on desktops, tablets, and mobile devices? WordPress has a few recommended sizes, such as:
- WordPress Background Images: 1920 x 1080
- Header Banner Images: 1048 x 250
- Thumbnail Images: 150 x 150
- Landscape Featured Images: 1200 x 900
- Portrait Featured Images: 900 x 1200
- Blog Post Images: 1200 x 630
- Logo Images: 200 x 100
- Hero Images: 2880 x 1500
- Fullscreen slideshows: 2800 x 1500
- Gallery Images: 1500 pixels x auto width
By embracing these dimensions, you’re not only enhancing your site’s visual appeal but also ensuring a seamless user experience across a diverse array of devices.

How Can Cloudinary Help You Optimize Image Size in WordPress?
Manually resizing and compressing images for various devices and screen sizes can be a daunting task. It’s time-consuming and requires technical know-how.
Cloudinary takes the hassle out of image optimization. Its seamless integration with WordPress allows you to upload images as usual while Cloudinary’s behind-the-scenes magic takes care of the rest. Whether your visitors are using smartphones, tablets, or desktops, Cloudinary ensures that the images are delivered in the optimal size and format, resulting in faster load times and a better user experience.
Pro Tip!Improve Core Web Vitals with Cloudinary
If you want to improve your Core Web Vitals metrics and make your website faster, we recommend you to deliver responsive images. Cloudinary allows you to dynamically resize your images on the fly as needed, with added features such as size optimization and format conversion.
Your Guide to Optimal Image Size with Cloudinary
Now that you understand the significance of image optimization and how Cloudinary can revolutionize your WordPress site, let’s dive into the practical steps to achieve optimal image size.
Step 1: Signing Up for Cloudinary
No worries, this isn’t another complex process to add to your list. Signing up for Cloudinary is a breeze. Head over to the sign-up page, follow the steps, and voilà – you’re ready to supercharge your WordPress images.
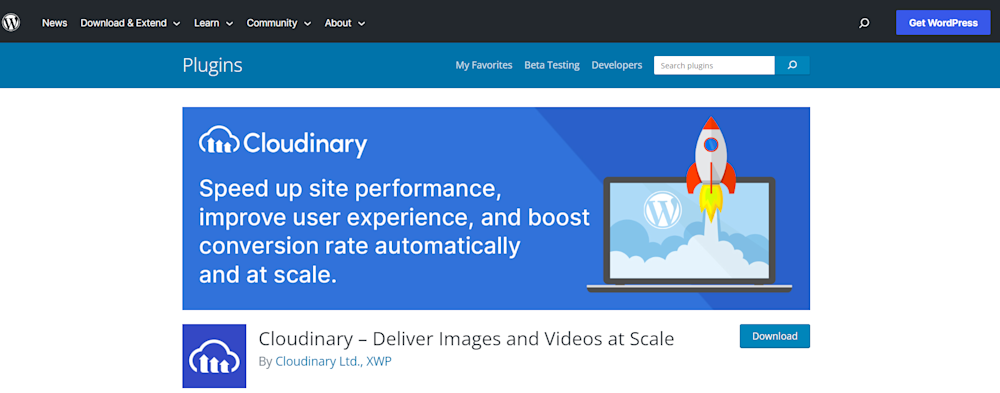
Step 2: The Cloudinary Plugin from WordPress
Integrating Cloudinary with WordPress is simpler than you might think. Cloudinary provides a dedicated plugin crafted exclusively for WordPress, enabling the seamless integration of its potent image optimization features. You can install it for your own WP server, or do it through WordPress’ built-in tools on the dashboard.
Step 3: Installing the Cloudinary Plugin to WordPress
Installing plugins has always been easy, it’s one of the biggest advantages of the WP platform. You might be pleasantly surprised at how straightforward the installation process is. This is how you can install the Cloudinary plugin:
- Log in to Your WordPress Dashboard: Enter your WordPress admin panel by logging in with your credentials.
- Navigate to Plugins: On the left-hand side of your dashboard, find the “Plugins” tab and click on it. This will take you to the Plugins page.
- Add New Plugin: On the top of the Plugins page, click on “Add New”.you’ll find the “Add New” button. Click on it to proceed to the plugin installation page.
- Select the Cloudinary PluginUpload the Plugin: On this page, you’ll need to search for the Cloudinary plugin via the search bar. Alternatively, you can download it here and install it manually, if you prefer. Now, click on the “Upload Plugin” button at the top of the page. This will open a new section where you can upload the Cloudinary plugin that you downloaded earlier.
- Choose the Plugin File: If you didn’t download the plugin, you can simply click “Install Now” on the plugin, and WordPress will do the rest. However, if you did download it, click on the “Choose File” button and select the Cloudinary plugin file you downloaded. Once selected, click “Install Now.”
- Activate the Plugin: After the plugin is successfully installed, you’ll be prompted to activate it. Click on the “Activate Plugin” link to enable the Cloudinary plugin on your WordPress site.
- Configure the Plugin Settings: Once installed, the Cloudinary plugin will begin optimizing your media automatically. You can also configure individual settings within the Plugin page itself, if you want deeper customization. Depending on the Cloudinary plugin’s features, you may need to configure its settings. This could involve connecting your Cloudinary account, adjusting image optimization preferences, and more. Follow the on-screen instructions to set it up according to your needs.
Congratulations! You’ve now successfully integrated the Cloudinary plugin into your WordPress website. This marks the beginning of a smoother, more efficient image optimization journey, boosting your site’s loading speed and overall user experience.
Step 4: Uploading Images the Cloudinary Way
Uploading images with Cloudinary is as easy as uploading them directly to WordPress. The difference? Cloudinary automatically takes care of the resizing and optimization. No more manual work, no more guessing optimal dimensions — Cloudinary’s got your back.
Step 5: Embracing the Speed
With Cloudinary in action, you’ll notice the difference in loading speed. Your images will be delivered in the perfect size and format for each user’s device, resulting in quicker load times and happier visitors.
Final Thoughts
Optimizing image size on WordPress doesn’t have to be a headache-inducing ordeal. Say goodbye to slow-loading pages, plugin clashes, and manual resizing. Cloudinary is the ultimate solution that streamlines the entire process, giving you back valuable time to focus on what truly matters—creating remarkable content and delivering an exceptional user experience.
Ready to transform your WordPress site? Embrace Cloudinary today and witness the remarkable difference in performance. Say hello to faster loading times and happier visitors. Your website will thank you.

