The performance of your WordPress website can make or break the user experience. Fast loading times are fundamental to successful online engagement, affecting everything from user satisfaction to search engine rankings. Effective caching is a key technique that can significantly enhance how content is delivered to your visitors.
Caching in WordPress is a critical optimization strategy, helping alleviate the load on your server and streamline content delivery. By storing copies of files and database queries, caching reduces the number of requests that a server needs to process, which in turn speeds up the loading time of your website. However, as beneficial as caching is, it also introduces complexities, mainly when updates are made to your site. A stale cache can lead to outdated content being served to your users, damaging their experience and your brand’s credibility.
This guide will start with the basics of how caching works in WordPress and then show you how to clear the cache manually without relying on plugins. You’ll learn how to fix common caching problems, boost your site’s performance, and ensure your visitors see your newest content right away.
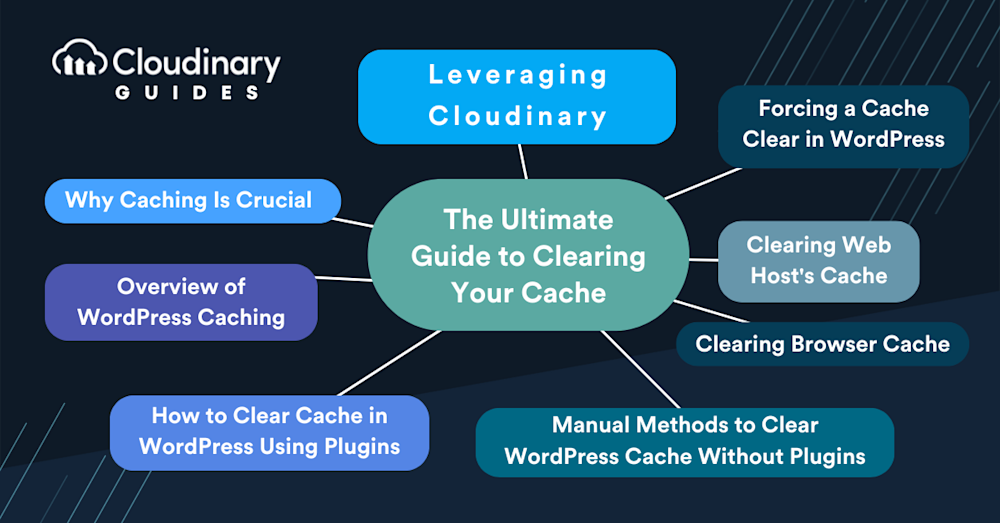
In this article:
- Why Caching Is Crucial for WordPress Websites
- Overview of WordPress Caching
- How to Clear Cache in WordPress Using Plugins
- Manual Methods to Clear WordPress Cache Without Plugins
- Clearing Browser Cache
- Clearing Web Host’s Cache
- Forcing a Cache Clear in WordPress
- Leveraging Cloudinary
Why Caching Is Crucial for WordPress Websites
WordPress is dynamic. Whenever someone visits your page, WordPress compiles lots of information from your database, merges it with your theme, applies plugins, and serves it to your visitor. This process is resource-intensive and, without caching, can slow your site down as traffic increases.
Caching mitigates this by ensuring that most visitors get the pre-compiled version of your site. This speeds up their experience and means your server isn’t doing unnecessary work with each new visitor. This results in faster load times, a better user experience, and less strain on your hosting environment. Search engines love fast websites. A quicker site often ranks better, leading to more visitors and customers if you run a business.
Overview of WordPress Caching
There are essentially two layers to consider: client-side and server-side caching.
Client-side caching stores parts of your site in the visitor’s browser, reducing loading times for repeat visitors. On the other hand, server-side caching involves various methods like page caching, object caching, database query caching, and full-page caching at the server level to speed up your content delivery to any visitor, not just those returning.
WordPress doesn’t come with built-in caching solutions that are robust enough for most sites, which is why there are many WordPress plugins for that purpose. Plugins like W3 Total Cache, WP Super Cache, and others provide comprehensive caching solutions that can be tailored to your website’s specific needs. They handle everything from minifying CSS and JavaScript to caching database queries and full-page caches.
Unfortunately, relying solely on plugins can sometimes add complexity or potentially conflict with other aspects of your site. Manual cache management allows a more tailored approach to optimizing your site’s performance. Also, integrating solutions like Cloudinary can further enhance your site’s speed and efficiency, particularly regarding media management, which is often a bottleneck for WordPress performance.
How to Clear Cache in WordPress Using Plugins
Clearing your WordPress site’s cache is relatively straightforward, especially with the right plugin. Plugins can simplify this process, thankfully. Typically, after installing one of these plugins, you’ll find a straightforward option within your WordPress dashboard to clear your site’s cache. This button is your go-to for immediate performance improvements, significantly after you’ve updated content, and you need those changes to be reflected immediately.
However, while plugins are convenient, they’re not a one-size-fits-all solution. Each website has unique needs and configurations, and it’s crucial to configure your caching plugin to match your site’s specific requirements. This might mean tweaking file minification settings, configuring page cache rules, or setting up a content delivery network (CDN) through the plugin.
Manual Methods to Clear WordPress Cache Without Plugins
For WordPress, you can clear cache manually if you prefer not to use a plugin or need to clear cache beyond what your plugin handles. For instance, you might need to clear your theme’s cache, which can be done by going into your theme’s folder via FTP and removing the cached files directly. Similarly, if you’re using a caching plugin that stores cached files in a specific directory, you can manually delete those files through FTP.
Another manual method involves accessing your WordPress database via phpMyAdmin and clearing out the wp_options table’s cache values. This method requires caution: always back up your database before making direct changes to avoid accidental data loss.
Clearing Browser Cache
Their browser cache also shapes your visitors’ experience. While you can’t clear this cache for them, you can guide them on how to do it themselves, which is particularly useful if you’ve made changes to your site that aren’t reflecting on their end. Each browser has its steps for clearing the cache, but the concept remains the same: go into the browser’s settings or preferences, find the history or cache section, and clear the cached images and files. Encouraging users to do this, especially after significant site updates, helps ensure they see the latest version.
Clearing Web Host’s Cache
Web hosting environments often come with caching mechanisms to improve performance at the server level. Hosting services like SiteGround, WP Engine, and others have control panels that allow you to clear the cache directly from their interfaces. This step is crucial because even after you’ve removed your site and browser caches, your host’s cache might still serve the old version of your site to visitors. Typically, you’ll find a clear cache option within your hosting account’s dashboard or control panel—using it ensures that the latest version of your site is being served.
Clearing the cache at various levels—plugin, manual methods, browser, and web host—ensures your WordPress site is as fast and efficient as possible. Each technique plays a critical role in website performance and, ultimately, in how users experience your site.
Forcing a Cache Clear in WordPress
Sometimes, standard cache-clearing methods might not be enough, especially during critical updates or when dealing with stubborn caching issues that affect how changes are displayed on your WordPress site. In such cases, forcing a cache clear becomes necessary.
You can use several different approaches to force-clear the cache in WordPress. If you’re using a caching plugin, look for an option labeled ‘Purge All Caches’ or similar. This option is usually more thorough than regular cache-clearing options, ensuring that all cached data, including page, object, and database query caches, are completely refreshed.
For those not using a plugin, or if plugin options don’t fully resolve the issue, modifying the .htaccess file can be effective. By temporarily disabling caching via .htaccess, you can force the server to serve fresh versions of your pages. Be sure to revert any changes after confirming the issue is resolved to avoid negatively impacting your site’s performance.
Finally, consider setting up a development environment or staging area for your WordPress site. This allows you to make and test changes without affecting your live site, including force clearing the cache and ensuring smooth updates and maintenance tasks.
Troubleshooting Common Caching Issues in WordPress
There are many typical issues regarding caching. For example, changes to your site (like updates to posts or design tweaks) might not immediately show up. This delay is often due to a cache not being cleared properly. To solve this, ensure you’ve cleared all levels of cache: your WordPress plugin cache, browser cache, and your web host’s cache.
Another common issue is the dreaded “white screen of death,” which can occur if a caching plugin conflicts with another plugin or theme. To troubleshoot, deactivate your caching plugin and see if the problem resolves. If it does, consider using a different caching plugin or manually configuring your caching settings to avoid conflicts.
Lastly, overly aggressive caching might prevent dynamic content, such as user comments or forum posts, from updating in real-time. In such cases, adjusting your caching rules to exclude certain pages or sections of your site from being cached can help maintain the dynamic nature of these elements.
Leveraging Cloudinary
In the context of WordPress performance and caching, incorporating Cloudinary can significantly boost your site’s speed, especially regarding image and video content. Cloudinary automates optimizing and delivering visual content, ensuring your images and videos load quickly without sacrificing quality. This is crucial because media files often account for most of your site’s load time.
Integrating the Cloudinary WordPress Plugin with your site allows you to use features like automatic image format selection and responsive images. These ensure that visitors receive images optimized for their devices, further speeding up content delivery. By reducing the size and number of requests for visual content, Cloudinary enhances user experience and reduces the load on your server, complementing your caching strategy.
Final Thoughts
Caching in WordPress is essential for anyone serious about delivering a swift, efficient, and enjoyable online experience. While plugins offer a straightforward approach to caching, understanding and occasionally using manual methods can give you greater control over your site’s performance.
Integrating Cloudinary into your WordPress site brings an additional layer of optimization, particularly for your site’s images and videos. This integration complements your caching strategy and significantly contributes to faster page load times, reduced server load, and an overall smoother experience for your visitors.


