With the growing demand for real-time entertainment, education, and communication, video streaming has become ubiquitous, transforming how we consume and share content online. While the fundamentals of video streaming are now readily accessible, implementing a successful and scalable video streaming service can be quite complex, especially when aiming for high quality and reliability.
Video streaming typically involves transmitting video data continuously over a network, and displaying it without the viewer waiting for the entire video to be downloaded on their device. In Java, video streaming can be implemented by leveraging built-in features or by integrating external tools and libraries like FFmpeg or Cloudinary.
In this tutorial, you’ll learn how to:
- Set up a Spring Boot backend for video streaming
- Upload videos on Cloudinary
- Stream videos directly in your web interface
In this article:
Why Use Java for Video Streaming?
Java is a high-level, general-purpose, and object-oriented programming language widely used for creating various types of applications such as web apps, video games, Internet of Things (IoT) apps, enterprise software, and more.
Some of the key properties of Java that make it a great choice for handling backend logic when building video streaming platforms include, high performance, reliability, and scalability. Implementing video streaming with Java requires a good understanding of HTTP range requests, setting up both server and client applications, efficient video processing, as well as using the right tools for the implementation.
Despite the complexities involved in building a streaming application, Cloudinary makes the whole process simpler with adaptive bitrate streaming. Adaptive bitrate streaming is a video streaming feature that continuously analyzes the connection strength of the user’s device to detect any fluctuations in the bandwidth, and then automatically adjusting the video quality to deliver a streamlined streaming experience.
Cloudinary enables adaptive video streaming through the following protocols:
- HTTP Live Streaming (HLS)
- Dynamic Adaptive Streaming over HTTP (MPEG-DASH)
To deliver videos from Cloudinary using HLS or MPEG-DASH, you can either let Cloudinary automatically choose the best streaming profile, or manually select your own.
In the following sections, we’ll walk you through the steps to implement video streaming in Java using Spring Boot: a Java-based framework that provides a quick and easy way to create and run Java applications with minimal setup and configuration, and Cloudinary, a cloud-based media management platform.
Set up a Java Application
To set up a Java application, ensure you have the following:
- A Java Development Kit (JDK): Bellsoft Liberica JDK version 17 or 21 is recommended for Spring Boot. You can confirm if the JDK has been installed by running
java -versionin the terminal. You should see the Java version displayed. - An Integrated Development Environment (IDE): You can use IntelliJ IDEA, Eclipse, or VS Code with the Spring Boot Extension Pack. We’ll be using VS Code as the IDE of choice in this tutorial.
- A Cloudinary account. If you don’t have one yet, you can register for free.
- Your product environment credentials. You can find your credentials on the API Keys page of the Cloudinary Console Settings.
- Maven, a build automation and dependency management tool for Java projects.You can verify if Maven is installed by running
mvn -version.
The Spring Book Extension Pack for VS Code is bootstrapped with Spring Initializr Java, which provides support for generating quickstart Spring Boot Java projects with Spring Initializr API. Follow the steps below to create a project using the extension in VS Code.
- Open the Command Palette in VS Code by pressing
Ctrl+Shift+P(orCmd+Shift+Pon macOS). - Type “Spring Initializr” and select Spring Initializr: Generate a Maven Project
- Follow the wizard:
- Spring Boot Version: Choose a stable version (e.g.,
3.5.4). - Select Project Language: Java.
- Project Metadata:
- Group Id:
com.videostreamingapp - Artifact Id:
video-streaming-app(or a descriptive name for your project) - Packaging:
Jar - Java Version: Make sure this matches your installed JDK version (e.g.,
17or21) - Package Name:
com.example.videostreamingapp - Project Name:
video-streaming-app
- Group Id:
- Dependencies: Type
Spring Weband select it from the options. Spring Web allows us to create web applications like REST APIs. We’ll install Cloudinary dependencies in a moment. - Select a folder to save your project.
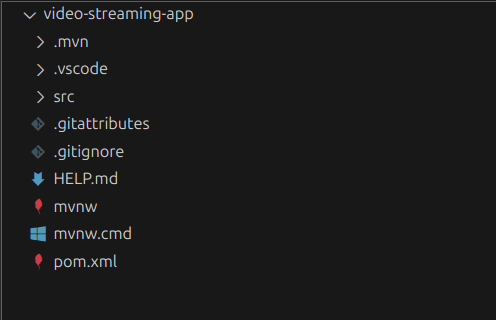
The folder structure should be similar as shown in the image below:
Finally, open the main application file in src/main/VideoStreamingAppApplication.java.You’ll see a “Run” button or “Run Java” link in the top right of the file editor in VS Code. Click it. The application should now be running on the default port at localhost:8080.
Step 1 – Configure Cloudinary
Next, let’s add the required dependencies for our app to work:
dotenv-java: For loading environment variables safely in Java applications.cloudinary-http5:Cloudinary Java library that specifically utilizes Apache HTTP Client 5 for making HTTP requests to the Cloudinary API.- spring-boot-starter-thymeleaf: This configures Thymeleaf, a server-side template engine for Java that allows us to serve static files like HTML, CSS, JavaScript, and more.
Edit the pom.xml file in the root of the project and add the following inside the <dependencies> block:
       <dependency>
            <groupId>com.cloudinary</groupId>
            <artifactId>cloudinary-http5</artifactId>
            <version>2.3.0</version>
        </dependency>
        <dependency>
    		    <groupId>org.springframework.boot</groupId>
    		    <artifactId>spring-boot-starter-thymeleaf</artifactId>
		    </dependency>
        <dependency>
            <groupId>io.github.cdimascio</groupId>
            <artifactId>dotenv-java</artifactId>
            <version>3.2.0</version>
        </dependency>
Finally, reload the project in VS Code by right-clicking on pom.xml → Reload Projects to download the dependencies and synchronize the changes.
Step 2 – Add Environment Variables
To connect to Cloudinary, you need to authenticate your requests using your account’s credentials. Create a file named .env in your project’s root directory. Inside the file, add the following lines, replacing the placeholder values with your actual cloud_name, api_key, and api_secret from your Cloudinary dashboard:
CLOUDINARY_CLOUD_NAME=<your_cloud_name>
CLOUDINARY_API_KEY=<your_api_key>
CLOUDINARY_API_SECRET=<your_api_secret>
Note: Ensure you add the.env file to .gitignore to avoid committing it to a version control such as GitHub.
Next, update VideoStreamingAppApplication.java to the following:
package com.videostreamingapp.video_streaming_app;

import io.github.cdimascio.dotenv.Dotenv;
import org.springframework.boot.SpringApplication;
import org.springframework.boot.autoconfigure.SpringBootApplication;
import org.springframework.context.annotation.Bean;
import org.springframework.context.annotation.Configuration;

@SpringBootApplication
public class VideoStreamingAppApplication {

    public static void main(String[] args) {
        // Load .env file at application startup
        Dotenv dotenv = Dotenv.load();
        dotenv.entries().forEach(entry -> System.setProperty(entry.getKey(), entry.getValue()));

        SpringApplication.run(VideoStreamingAppApplication.class, args);
    }

  }
The above code serves as the main entry point for the application and configures how dotenv loads the variables and sets them as system properties, which Spring Boot can then pick up using @Value.
Step 3 – Create a Cloudinary Service
Here, we’ll define a Spring service class to handle all the business logic for interacting with the Cloudinary video platform. Create a new package service inside src/main/java/com/videostreamingapp/video_streaming_app/ and inside it, create a file named CloudinaryService.java with the following content:
package com.videostreamingapp.video_streaming_app.service;

import com.cloudinary.Cloudinary;
import com.cloudinary.Transformation;
import com.cloudinary.utils.ObjectUtils;
import org.springframework.beans.factory.annotation.Value;
import org.springframework.stereotype.Service;
import org.springframework.web.multipart.MultipartFile;

import java.io.File;
import java.io.FileOutputStream;
import java.io.IOException;
import java.util.Map;
import java.util.Objects;

@Service
public class CloudinaryService {

    private final Cloudinary cloudinary;

    // Initialize cloudinary with credentials from environment variables
    public CloudinaryService(@Value("${CLOUDINARY_CLOUD_NAME}") String cloudName,
                             @Value("${CLOUDINARY_API_KEY}") String apiKey,
                             @Value("${CLOUDINARY_API_SECRET}") String apiSecret) {
        this.cloudinary = new Cloudinary(ObjectUtils.asMap(
                "cloud_name", cloudName,
                "api_key", apiKey,
                "api_secret", apiSecret
        ));
    }

    // Upload video file to Cloudinary

    @SuppressWarnings("unchecked")
    public Map<String, Object> uploadVideo(MultipartFile multipartFile) throws IOException {
        File fileToUpload = convertMultiPartToFile(multipartFile);

        try {
            Map<String, Object> uploadResult = (Map<String, Object>) cloudinary.uploader().upload(fileToUpload,
                    ObjectUtils.asMap("resource_type", "video"));


            return uploadResult;
        } catch (IOException e) {
            System.err.println("Cloudinary upload failed: " + e.getMessage());
            throw e;
        } finally {
            if (fileToUpload != null && fileToUpload.exists()) {
                fileToUpload.delete();
            }
        }
    }
    // Generates an HLS streaming URL for a video using the 'auto' streaming profile.
     public String generateHlsStreamingUrlWithAutoProfile(String publicId) {
        return cloudinary.url()
                .transformation(new Transformation<>().streamingProfile("auto"))
                .resourceType("video")
                .format("m3u8")
                .generate(publicId);
    }

    // Helper method to convert MultipartFile to a temporary File
    private File convertMultiPartToFile(MultipartFile file) throws IOException {
        String fileName = System.currentTimeMillis() + "_" + Objects.requireNonNull(file.getOriginalFilename());
        File convFile = new File(System.getProperty("java.io.tmpdir"), fileName);
        try (FileOutputStream fos = new FileOutputStream(convFile)) {
            fos.write(file.getBytes());
        }
        return convFile;
    }
}
Here’s what the code is doing.
- First, the
CloudinaryServiceclass is initialized with Cloudinary credentials (cloud_name,api_key,api_secret), which are automatically injected from your environment variables via@Value. - Next, the
uploadVideomethod handles uploading a video file to Cloudinary. It takes aMultipartFile, converts it to a temporaryFileobject using theconvertMultiPartToFilehelper method, uploads it to Cloudinary withresource_typeset to “video”, and then returns the upload result. - The
generateHlsStreamingUrlWithAutoProfilemethod creates an optimized URL for video streaming. It instructs Cloudinary to generate an adaptive bitrate stream using the HLS protocol (.m3u8) and an intelligentautostreaming profile, which automatically delivers the best video quality based on the viewer’s device and network conditions.
Step 4 – Create a REST Controller for Video Upload
Next, let’s create a REST controller that provides an API endpoint for uploading video files. Create a new package controller inside src/main/java/com/videostreamingapp/video_streaming_app/ and then create VideoController.java inside it. Add the code below to it:
package com.videostreamingapp.video_streaming_app.controller;

import com.videostreamingapp.video_streaming_app.service.CloudinaryService;
import org.springframework.http.HttpStatus;
import org.springframework.http.ResponseEntity;
import org.springframework.web.bind.annotation.*;
import org.springframework.web.multipart.MultipartFile;

import java.io.IOException;
import java.util.Map;

@RestController
@RequestMapping("/videos")
public class VideoController {

    private final CloudinaryService cloudinaryService;

    public VideoController(CloudinaryService cloudinaryService) {
        this.cloudinaryService = cloudinaryService;
    }

    // Endpoint to handle video upload requests.
    @PostMapping("/upload")
    public ResponseEntity<String> uploadVideo(@RequestParam("file") MultipartFile file) {
        if (file.isEmpty()) {
            return new ResponseEntity<>("Please select a file to upload.", HttpStatus.BAD_REQUEST);
        }
        try {
            Map<String, Object> uploadResult = cloudinaryService.uploadVideo(file);
            if (uploadResult != null && uploadResult.containsKey("secure_url")) {
                String videoUrl = (String) uploadResult.get("secure_url");
                String publicId = (String) uploadResult.get("public_id");
                return new ResponseEntity<>("Video uploaded successfully. Public ID: " + publicId + ", URL: " + videoUrl, HttpStatus.OK);
            } else {
                return new ResponseEntity<>("Video upload failed or no URL returned.", HttpStatus.INTERNAL_SERVER_ERROR);
            }
        } catch (IOException e) {
            return new ResponseEntity<>("Error during file upload: " + e.getMessage(), HttpStatus.INTERNAL_SERVER_ERROR);
        }
    }
}
In the above code, we define a POST /videos/upload endpoint to receive a video file from the user, which it then passes to the CloudinaryService class to upload and store the video in the cloud. After the upload is complete, the method checks the result from Cloudinary. If successful, it returns a 200 OK response with the video’s public ID and URL. If not, a 500 Internal Server Error status code is returned.
Before we continue, it’s important to note that the maximum file size accepted by Spring Boot is 1MB. Since we’re building a video streaming app, users will typically upload files larger than that. We can increase the maximum file size to an arbitrary value of 100MB by adding the following lines to the src/main/resources/application.properties file:
spring.servlet.multipart.max-file-size=100MB
spring.servlet.multipart.max-request-size=100MB
You can change these values if you’re building an app where the expected upload size may be larger than 100MB.
Step 5 – Create a Web Controller and HTML Pages for Playback
Next, we’ll create a web controller to serve HTML pages using the Thymeleaf templating engine. Create a new class WebController.java inside the controller package.
package com.videostreamingapp.video_streaming_app.controller;

import com.videostreamingapp.video_streaming_app.service.CloudinaryService;
import org.springframework.stereotype.Controller;
import org.springframework.ui.Model;
import org.springframework.web.bind.annotation.GetMapping;
import org.springframework.web.bind.annotation.RequestParam;

@Controller
public class WebController {

    private final CloudinaryService cloudinaryService;

    public WebController(CloudinaryService cloudinaryService) {
        this.cloudinaryService = cloudinaryService;
    }

    @GetMapping("/")
    public String index() {
        return "index"; // Renders index.html
    }

    @GetMapping("/player")
    public String videoPlayer(@RequestParam(name = "publicId", required = false) String publicId, Model model) {
        if (publicId != null && !publicId.isEmpty()) {
            // Generate an Streaming URL for playback in the browser
            String videoUrl = cloudinaryService.generateHlsStreamingUrlWithAutoProfile(publicId);
            model.addAttribute("videoUrl", videoUrl);
            model.addAttribute("publicId", publicId);
        } else {
            model.addAttribute("videoUrl", null);
            model.addAttribute("publicId", "No video selected.");
        }
        return "player"; // Renders player.html
    }
}
Create Home Page With Upload Form
Now let’s create the home page, which has a form the user can use to upload a video to the app. Create the following file src/main/resources/templates/index.html and add the code below to it:
<!DOCTYPE html>
<html lang="en">
  <head>
    <meta charset="UTF-8" />
    <meta name="viewport" content="width=device-width, initial-scale=1.0" />
    <title>Video Streaming In Java</title>
    <style>
      body {
        font-family: Arial, sans-serif;
        margin: 20px;
      }
      .container {
        max-width: 800px;
        margin: auto;
        padding: 20px;
        border: 1px solid #ddd;
        border-radius: 8px;
      }
      h1 {
        text-align: center;
      }
      form {
        margin-bottom: 20px;
      }
      input[type="file"] {
        margin-bottom: 10px;
      }
      button {
        padding: 10px 15px;
        background-color: #007bff;
        color: white;
        border: none;
        border-radius: 5px;
        cursor: pointer;
      }
      button:hover {
        background-color: #0056b3;
      }
      #uploadStatus {
        margin-top: 15px;
        padding: 10px;
        border-radius: 5px;
      }
      .success {
        background-color: #d4edda;
        color: #155724;
        border: 1px solid #c3e6cb;
      }
      .error {
        background-color: #f8d7da;
        color: #721c24;
        border: 1px solid #f5c6cb;
      }
      .info {
        background-color: #cfe2ff;
        color: #084298;
        border: 1px solid #b6d4fe;
      }
      a {
        color: #007bff;
        text-decoration: none;
      }
      a:hover {
        text-decoration: underline;
      }
    </style>
  </head>
  <body>
    <div class="container">
      <h1>Upload Your Video</h1>

      <form id="uploadForm">
        <input
          type="file"
          id="videoFile"
          name="file"
          accept="video/*"
          required
        />
        <button type="submit">Upload Video</button>
      </form>

      <div id="uploadStatus" class="info">Waiting to upload...</div>

      <h2>View Uploaded Video</h2>
      <p>Enter a public ID to view a video:</p>
      <input
        type="text"
        id="publicIdInput"
        placeholder="e.g., my_uploaded_video"
      />
      <button onclick="viewVideo()">View Video</button>

      <script>
        document
          .getElementById("uploadForm")
          .addEventListener("submit", async function (event) {
            event.preventDefault();
            const fileInput = document.getElementById("videoFile");
            const statusDiv = document.getElementById("uploadStatus");
            const submitButton = document.getElementById("submitButton").disabled = true; // Disable button during upload

            if (fileInput.files.length === 0) {
              statusDiv.className = "error";
              statusDiv.textContent = "Please select a file to upload.";
              return;
            }

            const formData = new FormData();
            formData.append("file", fileInput.files[0]);

            statusDiv.className = "info";
            statusDiv.textContent = "Uploading... Please wait.";

            try {
              const response = await fetch("/videos/upload", {
                method: "POST",
                body: formData,
              });

              const text = await response.text();

              if (response.ok) {
                statusDiv.className = "success";
                statusDiv.innerHTML =
                  text +
                  '<br>You can now view it using the public ID below or <a href="/player?publicId=' +
                  extractPublicId(text) +
                  '">Click here to play</a>.';
                document.getElementById("publicIdInput").value =
                  extractPublicId(text);
              } else {
                statusDiv.className = "error";
                statusDiv.textContent = "Upload failed: " + text;
              }
            } catch (error) {
              statusDiv.className = "error";
              statusDiv.textContent =
                "An error occurred during upload: " + error.message;
            }
          });

        function extractPublicId(text) {
          const match = text.match(/Public ID: ([w/]+)/);
          return match ? match[1] : "";
        }

        function viewVideo() {
          const publicId = document.getElementById("publicIdInput").value;
          if (publicId) {
            window.location.href = `/player?publicId=${publicId}`;
          } else {
            alert("Please enter a Public ID to view the video.");
          }
        }
      </script>
    </div>
  </body>
</html>
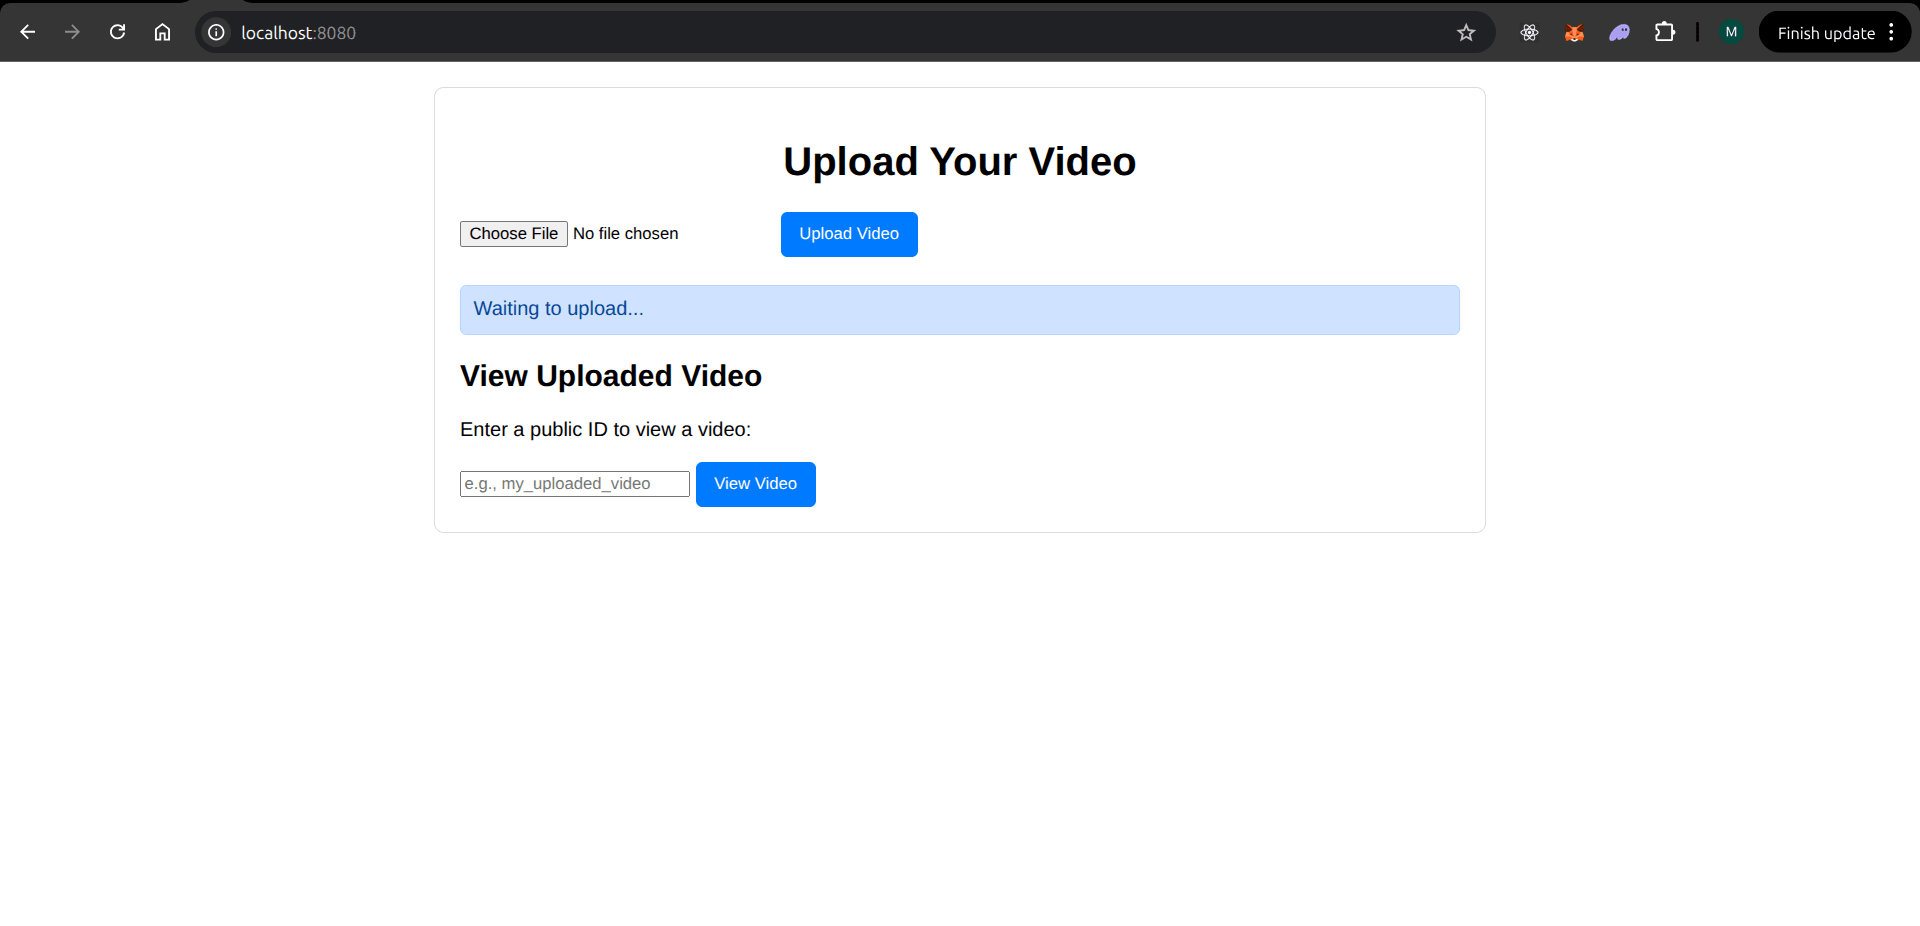
The above HTML and JavaScript code creates a simple web interface that allows users to upload a video file to a server endpoint (/videos/upload) and view the uploaded video by entering its public ID.
This is what the home page looks like so far:
Create Video Player Page To Stream Videos
Now let’s create a page where the user can view/play the uploaded video. Create the following file src/main/resources/templates/player.html and paste the code below in it:
<!DOCTYPE html>
<html lang="en" xmlns:th="http://www.thymeleaf.org">
  <head>
    <meta charset="UTF-8" />
    <meta name="viewport" content="width=device-width, initial-scale=1.0" />
    <title>Cloudinary Video Player</title>
    <style>
      body {
        font-family: Arial, sans-serif;
        margin: 20px;
        text-align: center;
      }
      .video-container {
        max-width: 800px;
        margin: 20px auto;
        border: 1px solid #ddd;
        border-radius: 8px;
        overflow: hidden;
      }
      .info {
        margin-top: 10px;
        font-size: 0.9em;
        color: #555;
      }
      a {
        color: #007bff;
        text-decoration: none;
      }
      a:hover {
        text-decoration: underline;
      }
      .cld-video-player {
        width: 100%;
        height: auto;
      }
    </style>

    <link
      rel="stylesheet"
      href="https://cdn.jsdelivr.net/npm/cloudinary-video-player@3.0.2/dist/cld-video-player.min.css"
      crossorigin="anonymous"
      referrerpolicy="no-referrer"
    />
  </head>
  <body>
    <h1>Video Playback with Cloudinary Player</h1>

    <div th:if="${publicId}">
      <div class="video-container">
        <video
          id="my-video-player"
          controls
          autoplay
          class="cld-video-player"
        ></video>
      </div>
      <p class="info">Playing video: <span th:text="${publicId}"></span></p>
    </div>
    <div th:unless="${publicId}">
      <p>No video selected for playback or video not found.</p>
    </div>

    <p><a href="/">Go back to upload</a></p>

    <script
      src="https://cdn.jsdelivr.net/npm/cloudinary-video-player@3.0.2/dist/cld-video-player.min.js"
      crossorigin="anonymous"
      referrerpolicy="no-referrer"
    ></script>

    <script th:if="${publicId}">
      const cloudName = "cloudinarymich"; // Replace with your actual Cloudinary cloud name

      // Initialize Cloudinary with your cloud name
      const cld = cloudinary.Cloudinary.new({ cloud_name: cloudName });

      // Initialize the Cloudinary video player on the video element
      const player = cld.videoPlayer("my-video-player", {
        controls: true,
        fluid: true,
        adaptiveStreaming: true
      });

      // Set the video source using its public ID from the Thymeleaf model
      const publicId = "[[${publicId}]]";
      player.source(publicId, { sourceTypes: ['hls']});
    </script>
  </body>
</html>
There are a few things going on in the above code. Let’s go through it.
Since the native HTML 5 video player doesn’t support video streaming, we’re using the adaptive HLS streaming-enabled Cloudinary Video Player to playback the videos. The Cloudinary Video Player library is loaded from a CDN, including the CSS and JavaScript required for the core functionality of the video player:
<link rel="stylesheet" href="https://cdn.jsdelivr.net/npm/cloudinary-video-player@3.0.2/dist/cld-video-player.min.css" crossorigin="anonymous" referrerpolicy="no-referrer" />
<script src="https://cdn.jsdelivr.net/npm/cloudinary-video-player@3.0.2/dist/cld-video-player.min.js" crossorigin="anonymous" referrerpolicy="no-referrer"></script>
Next, the code dynamically checks if a publicId is present and, if so, initializes the Cloudinary Video Player with that video, enabling adaptive HLS streaming. If no video ID is passed, it shows a message saying no video was selected for playback.
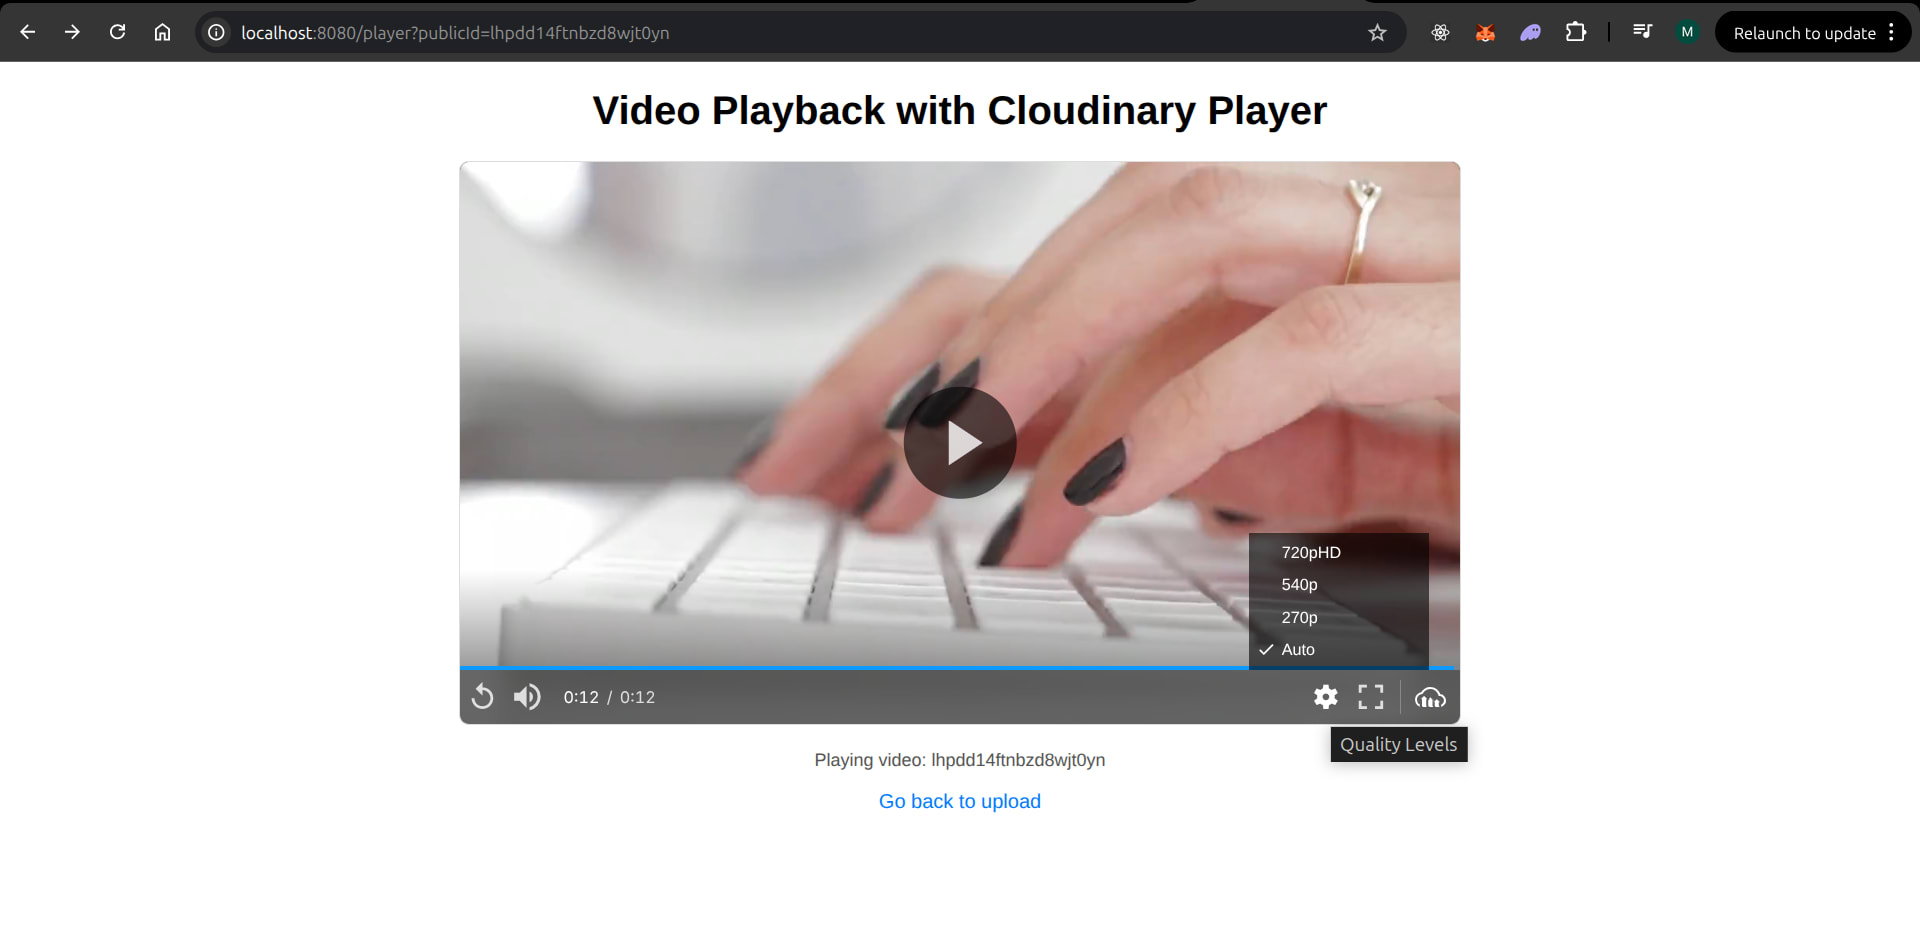
Setting adaptiveStreaming: true enables adaptive bitrate streaming via HLS, while sourceTypes: ['hls'] forces the player to use the HLS format, which is efficient for streaming large files across devices. This also gives the user the option to select a viewing resolution (e.g., 1080p, 720p, 320p, etc) based on their network conditions.
(To ensure the video player works as intended, ensure you replace YOUR_CLOUD_NAME with your own Cloudinary cloud name.)
Now, restart the project, upload a video and you should be able to stream the video as shown below:
Wrapping Up
Congratulations if you made it this far! You can find the complete source code for this tutorial here on GitHub.
As you have learned, building a video streaming app requires using the right tools and having the required expertise to achieve optimal results. Java’s powerful backend capabilities combined with Cloudinary’s flexible video delivery platform enables you to build scalable and high-performance streaming applications without getting bogged down in complex media-handling tasks.
You can learn more about video streaming and the Cloudinary Video Player in the API reference and the docs.
Frequently Asked Questions
What streaming protocols can I implement with Java?
Java provides several options for implementing streaming protocols (often through the use of libraries and frameworks), depending on your use case. Some of the common video streaming protocols supported in Java include: HLS, WebRTC, Real-Time Messaging Protocol (RTMP), and MPEG-DASH.
How do I handle video encoding/decoding in Java?
Java doesn’t natively support advanced video encoding or decoding, but you can integrate tools like FFmpeg or Cloudinary to handle these tasks for you.
How do I optimize Java applications for video streaming?
Building a high-performance video streaming application in Java can be complex, but by adopting some key strategies, you can significantly improve its efficiency and user experience.
- Offload resource-intensive tasks by using external libraries like FFmpeg or cloud services like Cloudinary for video encoding or transformation in your app.
- Deliver videos through a CDN to reduce latency and implement caching layers like Redis for video metadata.
- Regularly monitor the performance of the application using observability tools like Prometheus/Grafana to track memory, CPU, and request latency. This can help you identify and resolve performance issues before they escalate.

