
Fetching images with JavaScript is a common task for web apps, whether you’re grabbing photos from an API, rendering static assets, or optimizing media at scale. JavaScript’s Fetch API makes this simple. But when you move beyond hobby projects, raw fetches aren’t enough. You need transformations, optimization, and fast delivery.
That’s where Cloudinary shines: it’s not just a CDN, it’s a complete media platform and API that can fetch images from your own cloud storage or directly from the web, apply transformations, and serve them globally.
By the end of this guide, you’ll know how to:
- Fetch simple images with JavaScript.
- Work with third-party APIs like Unsplash.
- Fetch images using Cloudinary by public ID.
- Fetch remote images with the Cloudinary Fetch API and optimize them automatically.
What Is the JavaScript Fetch API?
The JavaScript Fetch API is a modern interface that allows developers to make network requests directly from the browser. It provides a simple, promise-based approach to retrieving data from APIs, sending information to servers, or managing files like images and videos. This makes it especially useful for creating dynamic web applications that need to load or update content without refreshing the page.
By using the Fetch API, you can connect your web application to services that store and process media, such as Cloudinary, enabling seamless video delivery and transformation. It works with standard HTTP methods like GET and POST, returning data that can easily be handled in JSON or other formats.
Using the Javascript Fetch API gives you:
- Promise-based syntax for cleaner, more readable code
- Native browser support with no extra libraries required
- Support for handling different response types such as JSON, text, and Blob
- Integration with modern async/await workflows for better control over asynchronous tasks
How to Use JavaScript to Extract Images
We’ll start with using JavaScript to fetch images, then move on to how Cloudinary makes this process production-ready.
Step 1: Pick the Right API
When using JavaScript to fetch images, we have three main options:
- The first is a Direct Image URL, which is the quickest approach for static images whose paths we already know.
- The second is Third-Party Sources, which can be accessed either through APIs that return image URLs in JSON, or directly via public image URLs.
- The third option is Cloudinary’s Image API, which fetches images from our own cloud by public ID or directly from anywhere on the internet, while automatically applying transformations, optimizations, and delivering them via Cloudinary’s CDN.
Before we move on to the code, it is important to prepare a simple project structure. For that, we will create a new folder (e.g., fetch-images-demo) and add the following files:
index.html: For the basic page and<img>element where images will appear.style.css: For the basic styling of the HTML.app.js: For your JavaScript code that will handle fetching images.myimage.jpg: A test image placed in the same folder.
Step 2: Making your HTML File
Here’s a simple HTML file, index.html, with buttons for all three fetch types and a placeholder <img>:
<!DOCTYPE html>
<html lang="en">
<head>
  <meta charset="UTF-8" />
  <meta name="viewport" content="width=device-width, initial-scale=1.0" />
  <title>Fetch Images with JavaScript</title>
  <link rel="stylesheet" href="style.css" />
</head>
<body>
  <h1>Fetch Images with JavaScript</h1>

  <!-- Buttons for all three fetch types -->
  <button id="loadLocalBtn">Load Local Image</button>
  <button id="loadWikiBtn">Load Wikipedia Image</button>
  <button id="loadCloudBtn">Load Cloudinary Image</button>

  <!-- Placeholder -->
  <div>
    <img id="outputImage" alt="Image will appear here" />
  </div>

  <!-- Cloudinary SDK via CDN -->
  <script src="https://widget.cloudinary.com/v2.0/global/all.js"></script>

  <!-- App logic -->
  <script src="app.js"></script>
</body>
</html>
In this code, we added three buttons for different image sources and a single <img> where the fetched image will appear.
We don’t need fancy CSS for this demo, so here’s some minimal styling for style.css:
body {
  font-family: Arial, sans-serif;
  margin: 2rem;
  text-align: center;
}

button {
  margin: 1rem;
  padding: 0.5rem 1rem;
}

#result img, #outputImage {
  max-width: 400px;
  margin-top: 1rem;
  border: 1px solid #ddd;
}
This ensures buttons are spaced nicely and images are constrained in width.
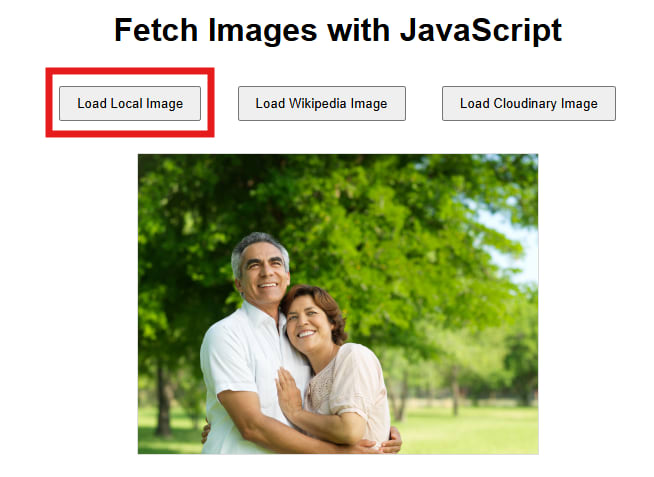
Step 3: Use Fetch API to Get Local Images
In this step, we will use JavaScript to fetch images that exist in our project folder. This is straightforward and doesn’t involve network requests.
Add the following to app.js:
// Get reference to local image button and placeholder
const localBtn = document.getElementById("loadLocalBtn");
const outputImage = document.getElementById("outputImage");

// Load local image
localBtn.addEventListener("click", () => {
  // Simply set the src to our local file
  outputImage.src = "myimage.jpg";
});
We can try opening index.html directly by double-clicking it in our file system. However, due to browser CORS restrictions, this may not work for fetching images. In that case, we can run a local server using Node.js by executing the following command:
npx serve
By default, this serves files at http://localhost:3000. Now we will open that URL in our browser, click Load Local Image to display our image.
Step 4: How to Get Image URLs with JavaScript
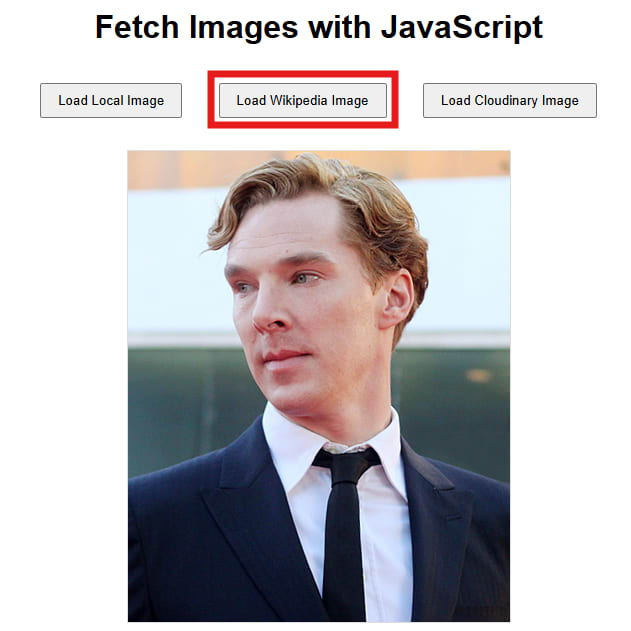
Sometimes we need to fetch images from an API or a remote URL. Let’s go over how to fetch a Wikipedia image using the Fetch API.
Add the following to app.js:
// Get reference to image button
const wikiBtn = document.getElementById("loadWikiBtn");

wikiBtn.addEventListener("click", async () => {
  try {
    // Remote image URL
    const wikiUrl =
      "https://upload.wikimedia.org/wikipedia/commons/1/13/Benedict_Cumberbatch_2011.png";

    // Fetch the image as a blob
    const response = await fetch(wikiUrl);
    if (!response.ok) throw new Error("Failed to fetch Wikipedia image");

    const blob = await response.blob();
    // Convert blob to object URL for <img> src
    outputImage.src = URL.createObjectURL(blob);
  } catch (err) {
    console.error("Error fetching Wikipedia image:", err);
  }
});
In the code above, we fetch the image as a blob, which is a binary representation of the image. Using URL.createObjectURL(blob), we create a temporary URL that allows the <img> element to display it. This approach works for any publicly accessible image URL. Now, clicking the Load Wikipedia Image button will display the fetched image.
We can also use JavaScript to fetch images from external APIs, such as Unsplash, which provides an endpoint for random images. For this, we would need to sign up and use our API credentials, as the API requires authentication.
How to Level Up with Cloudinary
Now let’s explore how Cloudinary allows us to use JavaScript to fetch images by public ID or remote URL while automatically applying optimizations, transformations, and delivery through its global CDN. This makes it ideal for production use, as we don’t have to manually handle resizing, formatting, or caching.
If we haven’t already, we first need to create a free Cloudinary account. Once registered, we’ll get our cloud name and credentials, which are necessary to construct image URLs or use their API. For this guide, we can use Cloudinary’s demo cloud, which provides sample images and doesn’t require sign-up, but in real projects, we should replace "demo" with our own cloud name (along with giving API secret and key) and use our images stored in our Cloudinary account.
Fetch from Your Cloudinary Cloud (Public ID)
We will start by fetching an image from our own Cloudinary account using its public ID. In app.js, we can add the following:
const cloudBtn = document.getElementById("loadCloudBtn");

cloudBtn.addEventListener("click", () => {
  // Replace "demo" with your Cloudinary cloud name
  const cloudName = "demo";
  const publicId = "sample"; // Replace with your image Public ID
  const url = `https://res.cloudinary.com/${cloudName}/image/upload/${publicId}.jpg`;

  outputImage.src = url;
});
The code constructs a URL pointing to an image stored in our Cloudinary cloud using the cloud name and public ID. When we click the Load Cloudinary Image button, the image loads directly into our placeholder <img>.
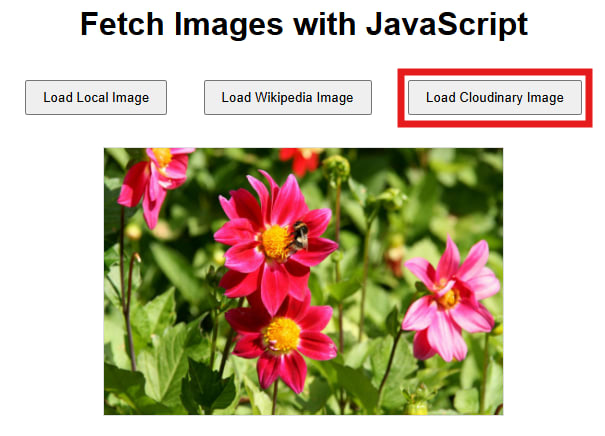
Using the demo cloud works for learning purposes, but for real projects, we should always use our own cloud name to access images we control. Cloudinary automatically handles caching, optimization, and global delivery, so the image loads quickly from anywhere.
Fetch Cloudinary Image with Sepia Effect
Next, let’s enhance the same Cloudinary button to display the image with a sepia filter. For this, we will simply add a transformation to the url in cloudBtn.addEventListener defined above:
const url = `https://res.cloudinary.com/${cloudName}/image/upload/e_sepia/${publicId}.jpg`;
By adding e_sepia to the URL path, Cloudinary applies a sepia effect, automatically loading the transformed image if we reload the page and click the third button.
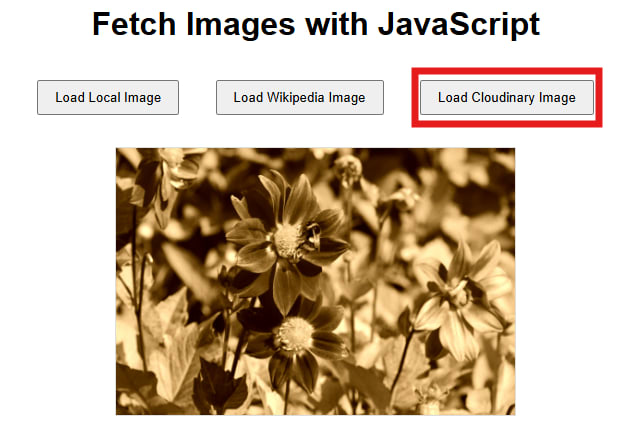
This way, we can transform images on the fly without modifying the original file. We can benefit from Cloudinary’s CDN and optimization features, and we can chain additional transformations like resizing, cropping, or format conversion simply by adding more parameters to the URL.
Fetch an External Image from the Internet with Sepia
Finally, Cloudinary allows us to fetch and transform images hosted anywhere on the web. For example, we can fetch a Wikipedia image, resize it, and apply a transformation, all through Cloudinary. Let’s update the cloudBtn.addEventListener in app.js as follows:
cloudBtn.addEventListener("click", () => {
  const cloudName = "demo";

  // External image URL
  const remoteUrl =
    "https://upload.wikimedia.org/wikipedia/commons/1/13/Benedict_Cumberbatch_2011.png";

  // Cloudinary fetch URL with sepia effect and optional width resizing
  const url = `https://res.cloudinary.com/${cloudName}/image/fetch/w_300,e_sepia/${remoteUrl}`;
Let’s reload the webpage and click on the Load Cloudinary Image button again:
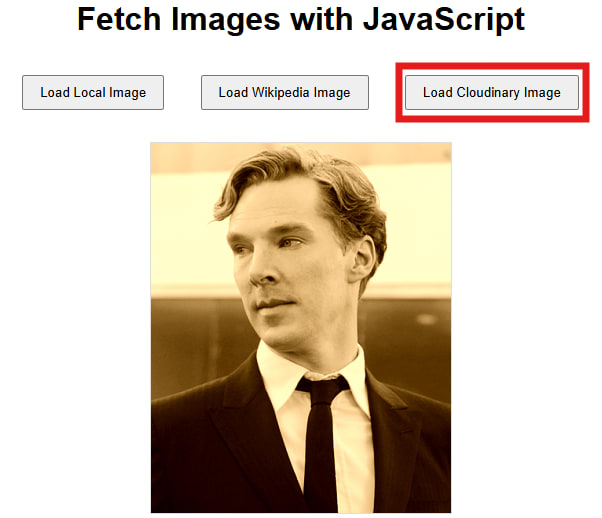
Here, we use image/fetch/ with the external image URL and add transformations such as w_300 for width resizing and e_sepia for the sepia effect. Cloudinary retrieves the external image, applies the transformations on-the-fly, and serves it via its CDN. This way, we can use any publicly accessible image, ensure it is optimized, and deliver it efficiently to our users without manually downloading or hosting it ourselves.
By updating the Cloudinary button in this way, we can fetch images from our cloud, apply transformations, and even fetch external images, all while keeping the interface simple. The first click shows the basic image, the next click adds sepia, and finally, we can fetch and transform an external image using a single button. This approach demonstrates how Cloudinary can simplify image management and optimization in real-world applications.
Wrapping It Up
Fetching images with plain JavaScript is a great starting point, whether you’re working with direct URLs or third-party APIs. But when you move into production, the limitations quickly show as you’re left handling optimization, resizing, and delivery on your own.
By using Cloudinary’s Fetch API, you can not only pull images stored in your own cloud via public IDs but also fetch remote images from anywhere on the web, and instantly apply transformations. The best part is that every image is optimized and served through Cloudinary’s CDN without extra effort on your part.
If you’re ready to streamline your workflow, sign up for a free Cloudinary account and start fetching and transforming images today.
FAQs
What’s the difference between fetching with JavaScript and Cloudinary?
JavaScript fetch gets the raw file. Cloudinary fetch not only grabs the file but also optimizes, transforms, and delivers it globally.
Can I fetch both local Cloudinary images and external ones?
Yes. With public IDs, you fetch assets stored in your Cloudinary cloud. With the Fetch API, you fetch from external URLs like Wikipedia or Unsplash.
Does Cloudinary support automatic optimization?
Absolutely. By adding f_auto and q_auto, Cloudinary automatically delivers the best format and compression level for every device and browser.

