
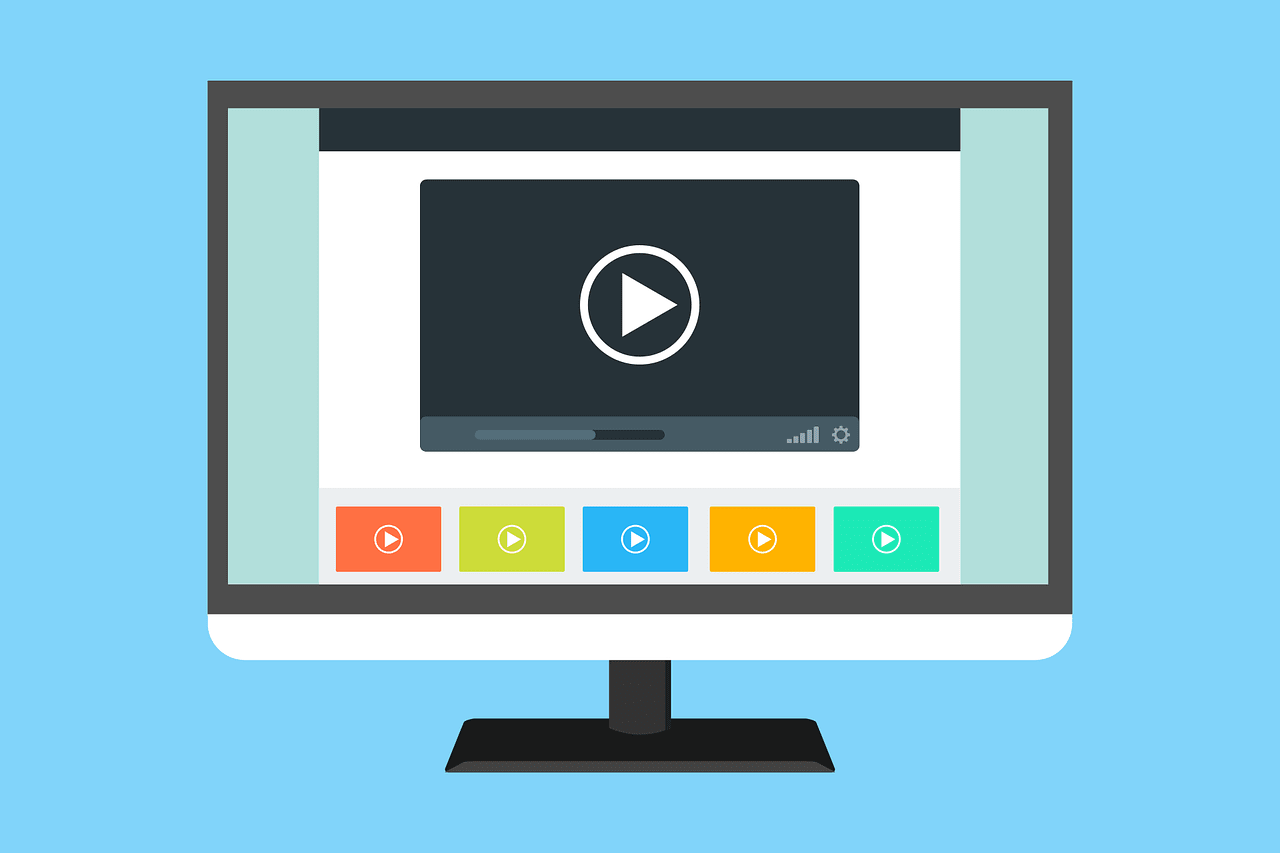
Flutter’s video_player package makes it easy to build fully customized video playback experiences. It uses the target streaming device’s native media players (AVPlayer on iOS and ExoPlayer on Android) to deliver smooth, reliable video playback with programmatic control.
You don’t need to build from scratch. With just a few steps, you can integrate the video player into your app and design your own UI on top of it for a unique look and feel. This article walks you through building a mobile video player using Flutter’s official playback library, step by step
In this article:
- Serving Videos on Mobile with Flutter
- Create a Video Player in Flutter
- Optimize your Video Player with Cloudinary’s SDK for Flutter
- How to Build a Player with Cloudinary for Mobile Devices
Serving Videos on Mobile with Flutter
Platform-specific differences can introduce significant complexity for developers working with tools like React Native or native SDKs. Each operating system has its own preferred video formats, native media players, and codec support; factors that often require separate implementations and extra maintenance.
Flutter removes much of this burden by offering a unified development model. Instead of building in silos to accommodate each platform, you can ship fully functional mobile video players from a single codebase.
video_player is an official Flutter plugin maintained by the Flutter team at Google. It enables video playback from local files, bundled assets, or remote URLs.
To build a mobile video player, make sure you’ve installed the appropriate mobile SDK or simulator, then choose Android or iOS as your target device in your editor. This configuration determines where your app runs during development, even though the final application can be built for all Flutter-supported platforms.
Note, however, that video_player currently supports only iOS and Android. It does not work on Flutter Web or Windows.
Create a Video Player in Flutter
Step 1: Create a Flutter Project
Run this command to generate a Flutter project in a folder named “video_player_app”
flutter create video_player_app
Step 2: Set up Dependencies
Add the video player package to your list of dependencies in your pubspec.yaml file.
dependencies:
  video_player: ^2.8.2
File.
pub get runs in the background and adds the package to your list of dependencies.
Step 3: Add App Permissions
Next, grant your app permission to stream videos from the internet by updating your Android/iOS configuration settings.
For Android:
<manifest xmlns:android="http://schemas.android.com/apk/res/android">
    <application ...>

    </application>

    <uses-permission android:name="android.permission.INTERNET"/>
</manifest>
For iOS
Edit the Info.plist file at <project root>/ios/Runner/Info.plist as below:
<key>NSAppTransportSecurity</key>
<dict>
  <key>NSAllowsArbitraryLoads</key>
  <true/>
</dict>
Step 3: Initialize the VideoPlayerController
Think of the controller as a TV remote. It connects you to videos and gives you playback access, allowing you to pause, play, and loop them programmatically. Follow these instructions to initialize your controller:
- Make a StatefulWidget and its State class
class VideoPlayerScreen extends StatefulWidget {

 	const VideoPlayerScreen({super.key});

 	@override

 	State<VideoPlayerScreen> createState() => _VideoPlayerScreenState();

}

class _VideoPlayerScreenState extends State<VideoPlayerScreen> {
}
- In the State class, create variables for holding the
VideoPlayerController, theFuturevalue fromcontroller.initialize(), the current video position, and the total video duration.
class VideoPlayerScreen extends StatefulWidget {

 	const VideoPlayerScreen({super.key});

 	@override

 	State<VideoPlayerScreen> createState() => _VideoPlayerScreenState();

}

class _VideoPlayerScreenState extends State<VideoPlayerScreen> {
 late VideoPlayerController _controller;
 late Future<void> _initializeVideoPlayerFuture;
  double _currentPosition = 0.0;
  double _videoDuration = 0.0;
}
Add an initState() function inside the state class to initialize the video player controller
class VideoPlayerScreen extends StatefulWidget {

 	const VideoPlayerScreen({super.key});

 	@override

 	State<VideoPlayerScreen> createState() => _VideoPlayerScreenState();

}

class _VideoPlayerScreenState extends State<VideoPlayerScreen> {
 late VideoPlayerController _controller;
 late Future<void> _initializeVideoPlayerFuture;

 @override

 void initState() {
   super.initState();
   _controller = VideoPlayerController.networkUrl(
     Uri.parse(
 'https://flutter.github.io/assets-for-api-docs/assets/videos/butterfly.mp4',
     ),
   )
   ..addListener((){
    if (!_controller.value.isInitialized) return;

    setState(() {
      _currentPosition = _controller.value.position.inMilliseconds.toDouble();
      _videoDuration = _controller.value.duration.inMilliseconds.toDouble();
    });
   });

   _initializeVideoPlayerFuture = _controller.initialize();
 }

}
The listener tracks the progress of the video and updates the currentPosition state accordingly
- It’s recommended to dispose of the
VideoPlayerControllerto free up resources. Add this method after yourinitState()function.
class _VideoPlayerScreenState extends State<VideoPlayerScreen> {
 late VideoPlayerController _controller;
 late Future<void> _initializeVideoPlayerFuture;

 @override

 void initState() {
   super.initState();
   _controller = VideoPlayerController.networkUrl(
     Uri.parse(
 'https://flutter.github.io/assets-for-api-docs/assets/videos/butterfly.mp4',
     ),
   )
   ..addListener((){
    if (!_controller.value.isInitialized) return;

    setState(() {
      _currentPosition = _controller.value.position.inMilliseconds.toDouble();
      _videoDuration = _controller.value.duration.inMilliseconds.toDouble();
    });
   });

   _initializeVideoPlayerFuture = _controller.initialize();
 }

 @override
 void dispose() {
   // Ensure disposing of the VideoPlayerController to free up resources.
   _controller.dispose();
   super.dispose();
 }
}
Step 4: Display the Video Player
We’re almost there. Now that you have your controller, all that’s left is to press play. The video_player package includes a widget that renders the video managed by your VideoPlayerController.
By default, this widget expands to fill the available space. If you want to enforce a specific aspect ratio, wrap it in an AspectRatio widget to control how the video is displayed.
Before we jump into the code, there’s one important precaution: make sure the VideoPlayerController has finished initializing. The recommended approach is to use a FutureBuilder to show a loading spinner until the controller is ready.
FutureBuilder(
  future: _initializeVideoPlayerFuture,
  builder: (context, snapshot) {
    if (snapshot.connectionState == ConnectionState.done) {
//If the controller is done initializing, use the provided values to //control the video's aspect ratio
      return AspectRatio(
        aspectRatio: _controller.value.aspectRatio,
        // Display the video using the VideoPlayer widget
        child: VideoPlayer(_controller),
      );
    } else {
      // loading spinner.
      return const Center(child: CircularProgressIndicator());
    }
  },
)
Step 5: Press Play
The VideoPlayerController starts in a paused state, so you’ll need to call play() to begin playback and pause() to stop it. To make the player more interactive, we’ve added a FloatingActionButton that updates its icon based on the current playback state, giving users responsive and intuitive control over the video.
FloatingActionButton(
  onPressed: () {
    // Wrap play or pause calls to `setState` to ensure the
    // icon matches the context.
    setState(() {
      if (_controller.value.isPlaying) {
        _controller.pause();
      } else {
        _controller.play();
      }
    });
  },
  // Display the correct icon based on the player's state.
  child: Icon(
    _controller.value.isPlaying ? Icons.pause : Icons.play_arrow,
  ),
)
Here’s the full code for our simple VideoPlayer class:
class VideoPlayerScreen extends StatefulWidget {
  const VideoPlayerScreen({super.key});

  @override
  State<VideoPlayerScreen> createState() => _VideoPlayerScreenState();
}

class _VideoPlayerScreenState extends State<VideoPlayerScreen> {
 late VideoPlayerController _controller;
 late Future<void> _initializeVideoPlayerFuture;
  double _currentPosition = 0.0;
  double _videoDuration = 0.0;

 @override
 void initState() {
   super.initState();
   _controller = VideoPlayerController.networkUrl(
     Uri.parse(
 'https://flutter.github.io/assets-for-api-docs/assets/videos/butterfly.mp4',
     ),
   )
   ..addListener((){
    if (!_controller.value.isInitialized) return;

    setState(() {
      _currentPosition = _controller.value.position.inMilliseconds.toDouble();
      _videoDuration = _controller.value.duration.inMilliseconds.toDouble();
    });
   });

   _initializeVideoPlayerFuture = _controller.initialize();
 }

 @override
 void dispose() {
   // Ensure disposing of the VideoPlayerController to free up resources.
   _controller.dispose();
   super.dispose();
 }


  @override
  Widget build(BuildContext context) {
    return Scaffold(
      body: Center(
        child: FutureBuilder(
          future: _initializeVideoPlayerFuture,
          builder: (context, snapshot) {
            if (snapshot.connectionState == ConnectionState.done) {
              //If the controller is done initializing, use the provided values to //control the video's aspect ratio
              return Column(
                // alignment: Alignment.bottomCenter,
                crossAxisAlignment: CrossAxisAlignment.center,
                mainAxisSize: MainAxisSize.min,
                children: [
                Expanded(
                  child: AspectRatio(
                  aspectRatio: _controller.value.aspectRatio,
                  // Display the video using the VideoPlayer widget
                  child: VideoPlayer(_controller),
                ),
                ),
                // _buildControls()
                FloatingActionButton(
                  onPressed: () {
                    // Wrap play or pause calls to `setState` to ensure the
                    // icon matches the context.
                    setState(() {
                      if (_controller.value.isPlaying) {
                        _controller.pause();
                      } else {
                        _controller.play();
                      }
                    });
                  },
                  // Display the correct icon based on the player's state.
                  child: Icon(
                    _controller.value.isPlaying
                        ? Icons.pause
                        : Icons.play_arrow,
                  ),
                )
                ]
              );

            } else {
              // loading spinner.
              return const Center(child: CircularProgressIndicator());
            }
          },
        ),
      ),
    );
  }
We put the video player and action button elements inside a Column widget and wrapped the video player inside an Expanded widget to prevent it from overflowing. Here’s the result:
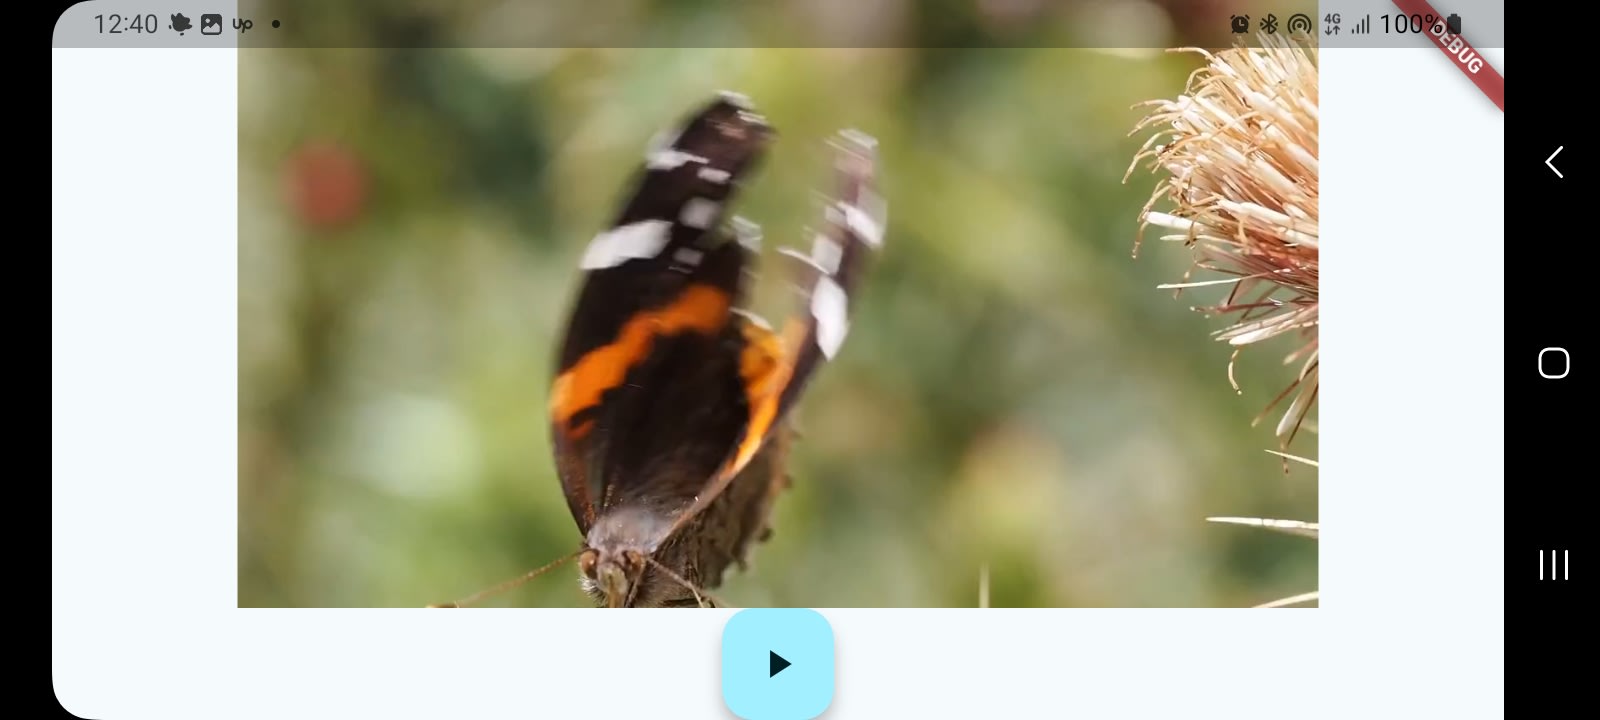
Screenshot of Flutter video player with floating action button
Step 6: Add UI Controls
Finally, let’s enhance the UI by adding additional playback controls. We’ll start by replacing the Column widget with a Stack, which will allow us to layer the control icons directly on top of the video.
  @override
  Widget build(BuildContext context) {
    return Scaffold(
      body: Center(
        child: FutureBuilder(
          future: _initializeVideoPlayerFuture,
          builder: (context, snapshot) {
            if (snapshot.connectionState == ConnectionState.done) {
              //If the controller is done initializing, use the provided values to //control the video's aspect ratio
              return Stack(
                		alignment: Alignment.bottomCenter,
                children: [
                AspectRatio(
                  aspectRatio: _controller.value.aspectRatio,
                  // Display the video using the VideoPlayer widget
                  child: VideoPlayer(_controller),
                ),
			FloatingActionButton(
                    onPressed: () {
                      // Wrap play or pause calls to `setState` to ensure the
                      // icon matches the context.
                      setState(() {
                        if (_controller.value.isPlaying) {
                          _controller.pause();
                        } else {
                          _controller.play();
                        }
                      });
                    },
                    // Display the correct icon based on the player's state.
                    child: Icon(
                      _controller.value.isPlaying
                          ? Icons.pause
                          : Icons.play_arrow,
                    ),
                  )


                ]
              );

            } else {
              // loading spinner.
              return const Center(child: CircularProgressIndicator());
            }
          },
        ),
      ),
    );
  }
}
You should now see the play button layered on top of the video. Next, we’ll replace the FloatingActionButton with a more complete playback control interface. To keep the code organized, we’ll create a custom widget to handle these controls.
  Widget _buildControls() {
    final position = _controller.value.position;
    final duration = _controller.value.duration;

    return Container(
      color: Colors.black54,
      padding: const EdgeInsets.all(8.0),
      // height: ,

      child: Column(
        mainAxisSize: MainAxisSize.min,
        children: [
          // Progress bar
          SliderTheme(
            data: SliderTheme.of(context).copyWith(
              trackHeight: 2,
              thumbShape: RoundSliderThumbShape(
                enabledThumbRadius: 14
              ),
              overlayShape: RoundSliderOverlayShape(
                overlayRadius: 24
              ),
            ),
            child: Slider(
              value: _currentPosition.clamp(0, _videoDuration),
              min: 0,
              max: _videoDuration,
              onChanged: (value) => {
                // setState(() => _currentPosition = value)
                _controller.seekTo(Duration(milliseconds: value.toInt()))
              },
            ),
          ),
          Row(
            mainAxisAlignment: MainAxisAlignment.spaceBetween,
            children: [
              // Play / Pause
              IconButton(
                icon: Icon(
                  _controller.value.isPlaying ?
                  Icons.pause : Icons.play_arrow,
                  color: Colors.white,
                ),
                onPressed: (){
                  setState(() {
                    _controller.value.isPlaying ?
                    _controller.pause()
                    :_controller.play();
                  });
                }),
              //Current Time / Duration
              Text(
                "${_format(position)} / ${_format(duration)}",
                style: const TextStyle(color: Colors.white),
              ),
              // Fullscreen toggle
              // IconButton(
              //   onPressed: () {
              //     Navigator.push(
              //       context,
              //       MaterialPageRoute(builder: (_) => _FullScreenVideo(controller:_controller)),
              //     )
              //   },
              //   icon: const Icon(Icons.fullscreen, color: Colors.white)
              // )
            ],)
        ]
      )
    );
  }
  String _format(Duration d) =>
    d.toString().split('.').first.padLeft(8,"0");
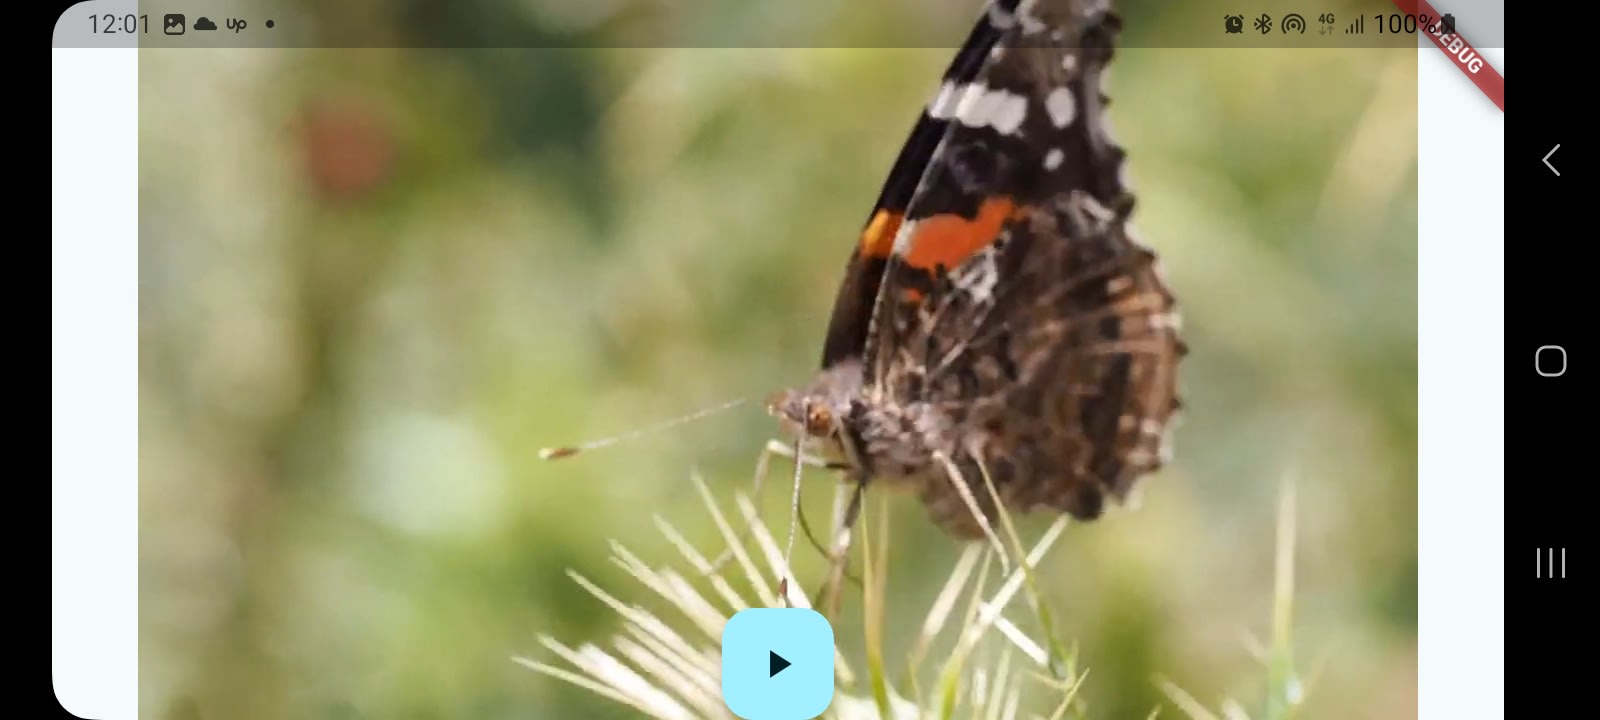
Our custom widget is a container that includes both a slider and the video’s time display. To further style the slider, wrap it in a SliderTheme widget. This allows you to customize elements like its color, track, and thumb shape.
Here’s what our video player looks like after adding custom controls:

Screenshot of Flutter video player with UI controls
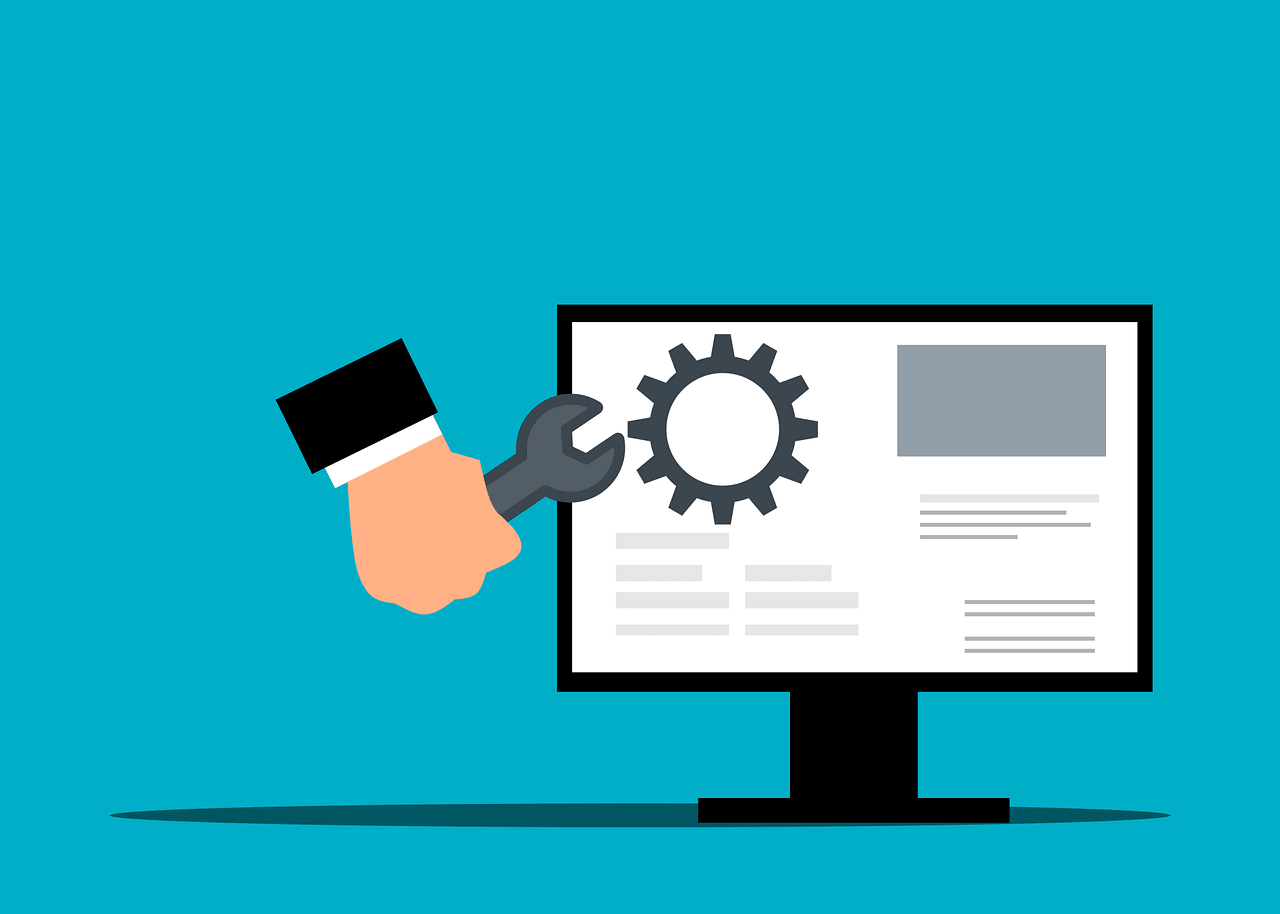
Optimize your Video Player with Cloudinary’s SDK for Flutter
Using the official Flutter video player is a plain and simple solution for video playback. If all you need is to play videos, it gets the job done. However, if you’re aiming for a more advanced and polished viewing experience, the Cloudinary SDK provides powerful enhancements such as automatic adaptive bitrate streaming, on-the-fly video optimization, format transformations, and delivery through a built-in CDN.
With Cloudinary, you don’t just build something that can play a video; you get a robust, fully optimized video player. This platform’s extensive CDN ensures your viewers are connected to the closest servers and enjoy the fastest streaming experience.
While Flutter doesn’t yet offer a fully featured Cloudinary video player, Cloudinary’s API integrates seamlessly with video_player by optimizing your video URLs, resulting in smoother, more efficient playback.
How to Build a Player with Cloudinary for Mobile Devices
Create a CldVideoController
To set up a player, create a new CldVideoController and pass in either the video’s public ID or its full Cloudinary URL:
//Public ID
final CldVideoController _controller = CldVideoController(publicId: 'dog');

//URL
final CldVideoController _controller = CldVideoController.networkUrl(Uri.parse('https://res.cloudinary.com/demo/video/upload/sp_auto/dog.m3u8'));

//or If you haven't set up your Cloudinary credentials as an environment variable.
Cloudinary cloudinary = CloudinaryObject.fromCloudName(cloudName: '<your_cloud_name>');
final CldVideoController _controller = CldVideoController(cloudinary: cloudinary, publicId: 'dog');
Initialize the controller
Create a stateful widget to hold variables and methods for your video player.
 @override
  void initState() {
    super.initState();

    _controller = CldVideoController(cloudinary: cloudinary, publicId: 'dog')
      ..initialize().then((_) {
        // Ensure the first frame is shown after the video is initialized, even before the play button has been pressed.
        setState(() {});
      });
  }
Pause/Play the Video
Connect your controller to the Flutter video_player plugin to pause and play your video after your controller finishes initializing.
 @override
  Widget build(BuildContext context) {
    return MaterialApp(
      title: 'Video Demo',
      home: Scaffold(
        body: Center(
          child: _controller.value.isInitialized
              ? AspectRatio(
                  aspectRatio: _controller.value.aspectRatio,
                  child: VideoPlayer(_controller),
                )
              : Container(),
        ),
        floatingActionButton: FloatingActionButton(
          onPressed: () {
            setState(() {
              _controller.value.isPlaying
                  ? _controller.pause()
                  : _controller.play();
            });
          },
          child: Icon(
            _controller.value.isPlaying ? Icons.pause : Icons.play_arrow,
          ),
        ),
      ),
    );
  }
Add a dispose() method to free up space
 @override
  void dispose() {
    super.dispose();
    _controller.dispose();
  }
Here’s what the full functional code looks like together:
import 'package:cloudinary_flutter/cloudinary_object.dart';
import 'package:cloudinary_flutter/video/cld_video_controller.dart';
import 'package:cloudinary_url_gen/cloudinary.dart';
import 'package:flutter/material.dart';
import 'package:video_player/video_player.dart';

void main() => runApp(const VideoApp());

/// Stateful widget to fetch and then display video content.
class VideoApp extends StatefulWidget {
  const VideoApp({super.key});

  @override
  _VideoAppState createState() => _VideoAppState();
}

class _VideoAppState extends State<VideoApp> {
  late CldVideoController _controller;
  Cloudinary cloudinary = CloudinaryObject.fromCloudName(cloudName: 'demo');

  @override
  void initState() {
    super.initState();

    _controller = CldVideoController(cloudinary: cloudinary, publicId: 'dog')
      ..initialize().then((_) {
        // Ensure the first frame is shown after the video is initialized, even before the play button has been pressed.
        setState(() {});
      });
  }

  @override
  Widget build(BuildContext context) {
    return MaterialApp(
      title: 'Video Demo',
      home: Scaffold(
        body: Center(
          child: _controller.value.isInitialized
              ? AspectRatio(
                  aspectRatio: _controller.value.aspectRatio,
                  child: VideoPlayer(_controller),
                )
              : Container(),
        ),
        floatingActionButton: FloatingActionButton(
          onPressed: () {
            setState(() {
              _controller.value.isPlaying
                  ? _controller.pause()
                  : _controller.play();
            });
          },
          child: Icon(
            _controller.value.isPlaying ? Icons.pause : Icons.play_arrow,
          ),
        ),
      ),
    );
  }

  @override
  void dispose() {
    super.dispose();
    _controller.dispose();
  }
}
Final Thoughts
video_player is a convenient Flutter package that makes it easy to play videos from URLs or local files. As shown in this tutorial, setting it up is straightforward, and Flutter’s flexible widget system lets you fully customize the UI to match your app’s design.
By integrating the Cloudinary SDK, you can elevate the experience even further with adaptive bitrate streaming and other advanced playback features that enhance video quality and performance.
Ensure fast, high-quality video playback with Cloudinary’s adaptive bitrate streaming. Create a Cloudinary account today to start delivering smooth video experiences to your users.
Frequently Asked Questions
What is the best video player plugin for Flutter?
The most commonly used video player plugin for Flutter is the official video_player package, which supports video playback from local files, assets, and network streams. It provides core functionality but minimal UI controls.
How do I implement video playback in a Flutter app?
To implement video playback in Flutter, you can use the video_player plugin by adding it to your pubspec.yaml and initializing a VideoPlayerController. You can then embed the VideoPlayer widget into your UI to display and control playback. Additional UI controls can be customized or added using other packages like Chewie.
Can Flutter play streaming video from a URL?
Yes, Flutter can play streaming video from a URL using the video_player plugin. By initializing a VideoPlayerController.network with the video URL, the plugin handles buffering, playback, and rendering within a Flutter widget. This allows seamless integration of online video content into mobile and web apps.

