SAML SSO
Last updated: Apr-23-2025
SAML is an industry standard that many SSO IdPs (Identity Providers) use to provide authentication and authorization services. This feature can enable your users to log in to Cloudinary with your organization's SAML-based SSO IdP, such as Okta, Azure AD, OneLogin, etc.
SAML SSO can be used for login only, or it can be further extended to also be used for provisioning, where your SAML-compliant IdP controls both the authentication (login), and the user's creation and authorization (provisioning). This effectively lets you create Cloudinary users on the fly the first time they try to log in to Cloudinary via your IdP, eliminating the need to create them in advance.
Configure SAML SSO in Cloudinary
In order to configure your Cloudinary account to allow SSO for logging in, you will need to supply your application's Identity Provider Metadata, either as a URL to the file (of the form: https://<orgname>.okta.com/app/<random_string>/sso/saml/metadata), or by copy/pasting the data itself (for example in Okta, you can find the URL and metadata by clicking the Identity Provider Metadata link on the Sign On tab of your application's settings).
-
In the Cloudinary Console Settings, access the Account Security page and configure the SAML Login fields as follows:
- To set a URL: Select URL as the Metadata retrieval method and add the URL into the field below.
- To use metadata: Select Inline as the Metadata retrieval method and then copy/paste the metadata XML into the field below.
Decide whether to Enforce SAML login by selecting Enabled. Make sure to first test the SSO works before changing this setting. When enabled, all users must log in to Cloudinary using SAML authentication. Only the Master admin can log in directly using the Cloudinary login screen.
Click the Save button at the bottom of the page.
Considerations for SAML SSO with Cloudinary
- Only existing users can login to Cloudinary this way. If you also want to extend this functionality and also create users on the fly the first time they try to log in to Cloudinary, see the SAML Provisioning feature described below.
- The
cloudinary.comdomain is being deprecated in favor ofconsole.cloudinary.com. To ensure compatibility with all login flows, add bothconsole.cloudinary.comandcloudinary.comto your Assertion Consumer Service (ACS) configuration during the Configure SAML settings step.If your IdP doesn't support adding an additional domain, use
console.cloudinary.comand ensure you can log in successfully. If you encounter any issues, contact support.TipLearn more about adding additional requestable SSO URLs in a custom SAML app by referring to Okta's documentation. - The two-factor authentication (2FA) user setting is ignored when using SAML Login to log in to Cloudinary, as the SSO IdP is trusted.
- A Cloudinary account can simultaneously allow both access through SSO using SAML or by using Cloudinary login details (email and password as provisioned via the Cloudinary Console or the Provisioning API). To require all users to log in through SAML, set the Enforce SAML login setting in the User Settings.
- Even if you set Enforce SAML login to Enabled, any user created with the Master admin role will automatically get an invitation to set a Console password and will be able to log in directly to the Console, if needed.
- If you'd like to prevent users with email addresses on your domain from signing up for separate free accounts, which would prevent you from adding them to your main account as a user, please contact support.
-
When a user no longer needs access to Cloudinary, you should remove them from the application access list in the IdP to ensure that they won't be able to log in anymore. However, this user will continue to have an account in Cloudinary, which may take up one user license. If this user isn't expected to use Cloudinary in the future, you should also delete the user from Cloudinary in order to free up the user license, either via the Cloudinary Console, or with custom code using the Provisioning API.
Similarly, groups and product environments aren't deleted, but the user can be de-associated with groups and product environments on an IdP update. Manage groups and product environment permissions and settings in the Cloudinary Console Settings.
SAML provisioning
With SAML provisioning, you can create users on the fly the first time they try to log in to Cloudinary, eliminating the need to create Cloudinary users in advance. SAML provisioning works with your SAML-compliant IdP to pass the correct user information to Cloudinary. You can both create and modify users this way. The SAML provisioning feature also requires that your organization must have SAML-based single sign-on enabled.
Enabling SAML login entails the following two procedures:
- Add Cloudinary as an application to your IdP.
- Configure your Cloudinary account to use SSO. Follow the instructions for Configuring SAML SSO in Cloudinary.
Add Cloudinary as an application to your IdP
To add a Cloudinary-SAML application to your identity provider (IdP):
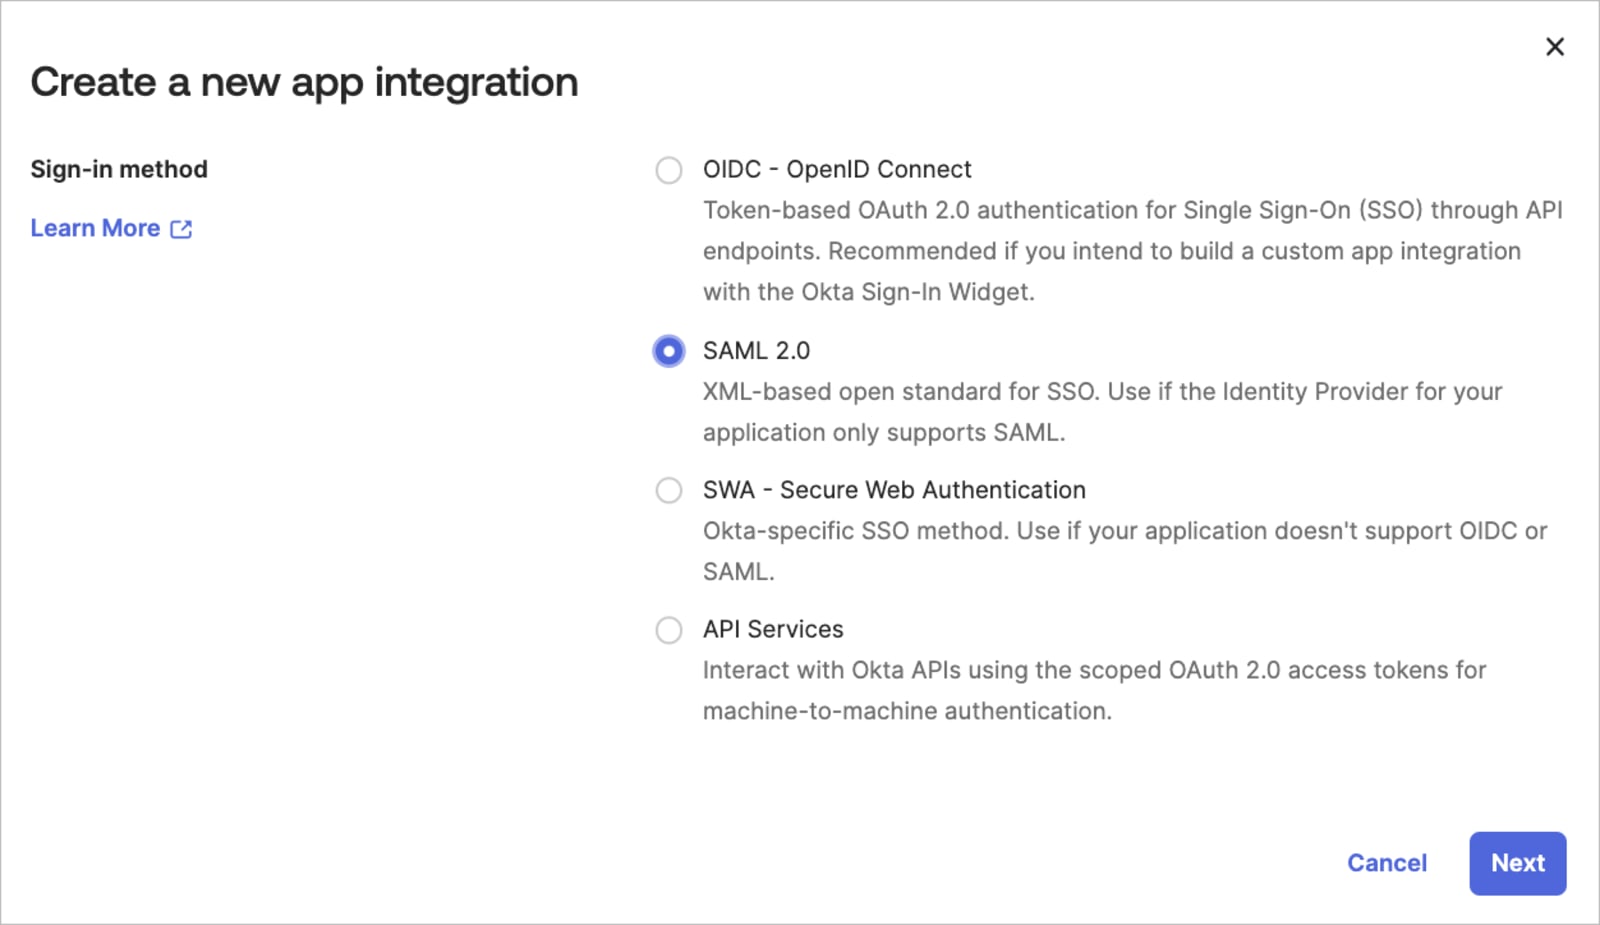
- Create a new SAML 2.0 Web application (e.g., in the Okta Admin console, select Applications from the Applications menu, click Create App Integration. Select SAML 2.0 as the Sign on method).

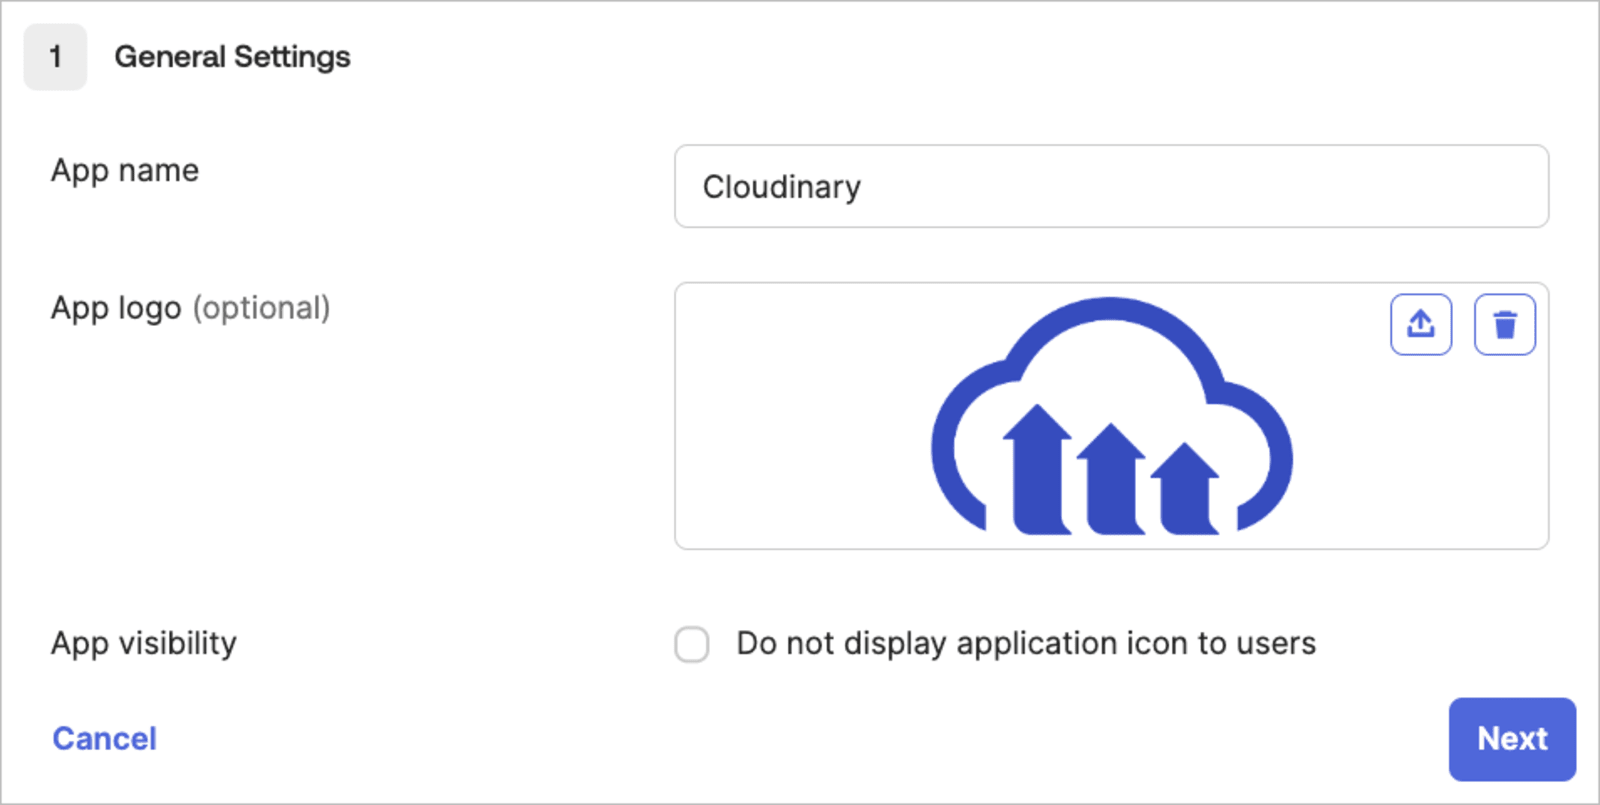
- Give your app a name (e.g., Cloudinary), and then optionally select a logo and visibility options (you can download a Cloudinary logo from our Cloudinary logo kit).

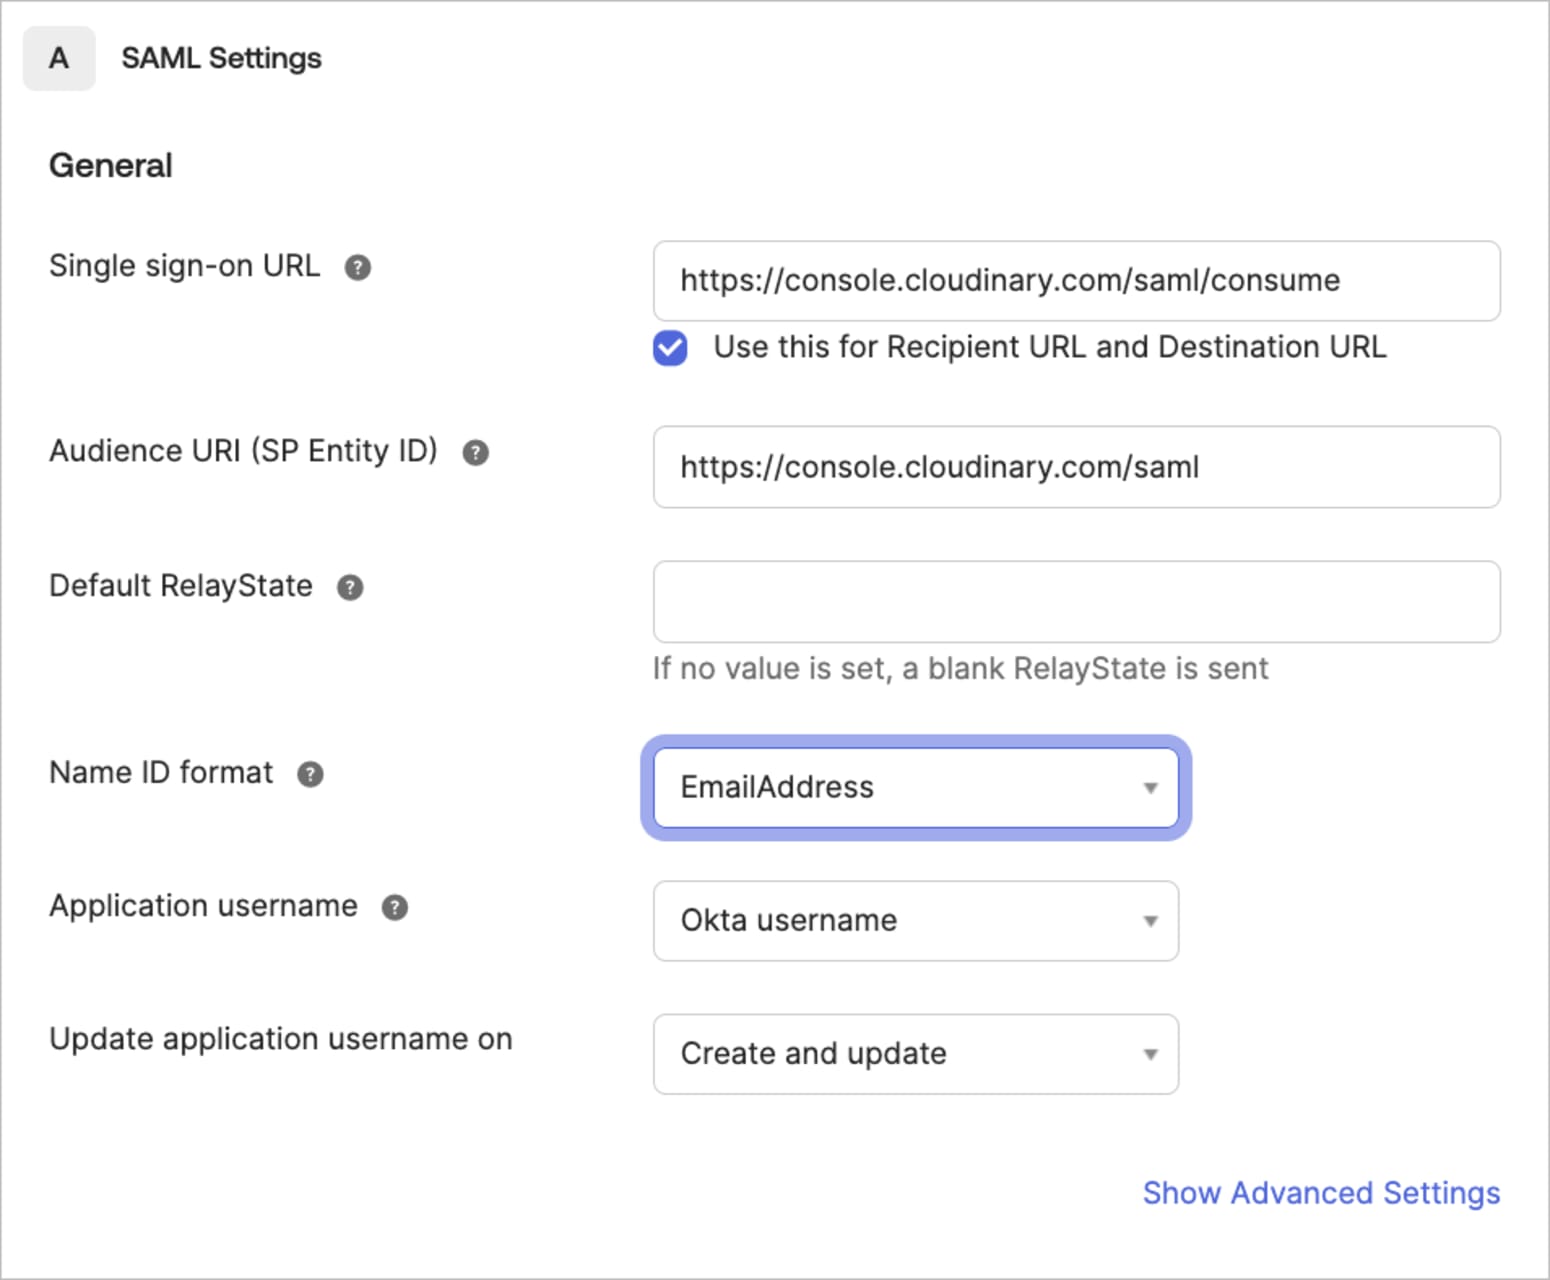
- Configure SAML settings as follows:
- Enter
https://console.cloudinary.com/saml/consumeas the Single sign on URL for both the Recipient URL and the Destination URL. - Enter
https://console.cloudinary.com/samlas the Audience URI. - Select
EmailAddressas the Name ID format.

- Click Show Advanced Settings, then add
cloudinary.com/saml/consumeunder Other Requestable SSO URLs.
 NoteIf your IdP doesn't support adding an additional domain, ensure you can log in successfully. If you encounter any issues, contact support.
- Enter
-
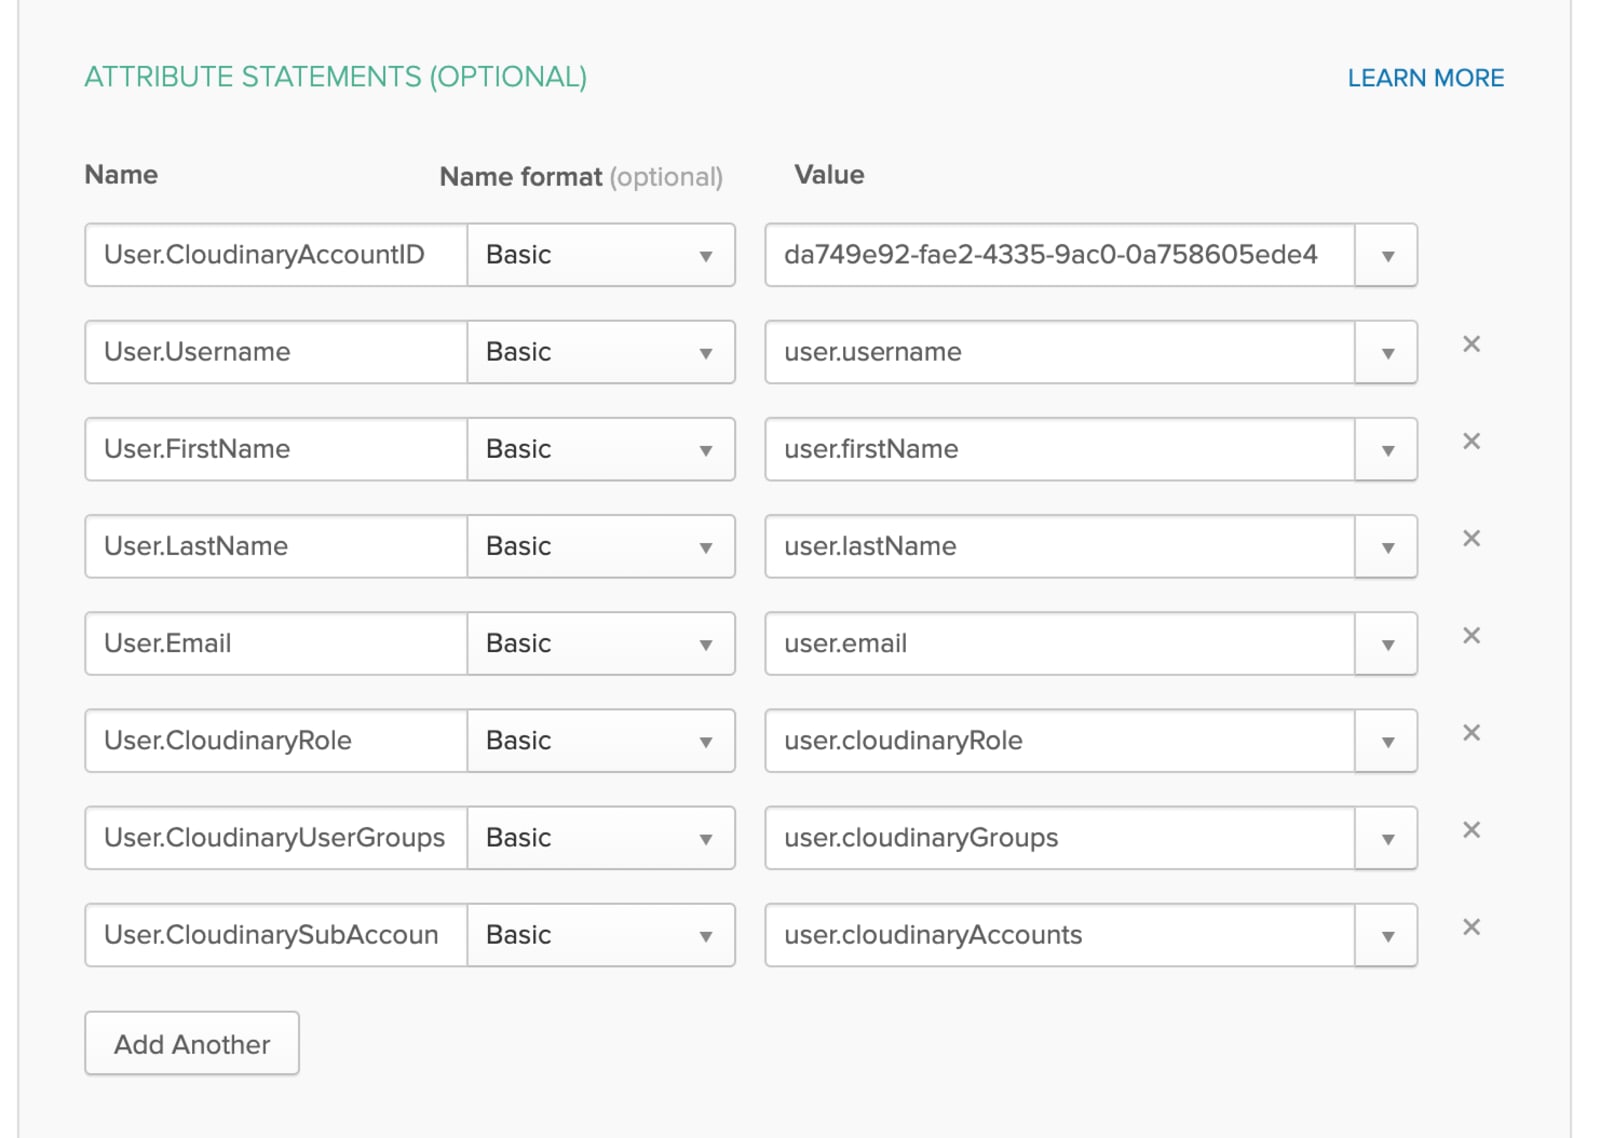
Federate Okta user profile field values to Cloudinary SAML attributes. These are fields and values that Cloudinary expects to receive for each user. Add an attribute statement for the following SAML Assertion Fields, including their corresponding values:
SAML Assertion Field Cloudinary User Field Type Required Notes User.CloudinaryAccountID Provisioning Account ID String Yes Account ID's are located in the Cloudinary Console under Settings > Account API Keys. User.Username (External) User ID String Yes Must be unique: used as the immutable id for creating a new user in your Cloudinary account. User.FirstName First name String Yes User.LastName Last name String No User.Email E-mail String Yes User.CloudinaryRole Role String (list) No
Default: media_library_userPossible values:
master_admin; admin; technical_admin; billing; reports; media_library_admin; media_library_userUser.CloudinaryUserGroups User Groups String array No
If provided, the user is automatically assigned to these groups. If the list includes groups that don't currently exist in Cloudinary, they are automatically created and the user is assigned to them. Note: User groups are relevant only for users with a
media_library_userrole. This setting is ignored for all other roles.User.CloudinarySubAccounts 1 Product environments String array No
Default: all product environments
The string array should contain the cloud names of the product environments that the user will be able to access. Note: Users with a
master_adminrole have access to all product environments, so this field is ignored for users with that role. Optionally add Feedback and click Finish when done.
Considerations for SAML provisioning with Cloudinary
- A new SAML provisioned user to Cloudinary isn't sent an email inviting them to set a password.
- All users' names and sources are available via the User Management page of the Console Settings. Therefore, the Cloudinary Console can also be used for reviewing and updating auto-provisioned user accounts, except for password related fields and options.
- If a user had an account in Cloudinary before the SAML integration and uses the same email in your IdP, the user will now log in through the IdP but will continue to use the same account in Cloudinary.
- Folder-level permissions, collection-level permissions, etc. can't be set directly for users. They're indirectly controlled by the user group associations.
- Cloudinary uses the username field as a unique immutable ID for creating a new user in your Cloudinary account. If any supplied attributes change (including possibly the user email, groups and product environment associations), the user account details will be updated accordingly. This means you should use a unique value for the 'username' field (e.g., if you use the user's email as a username you won't be able to update their email address using a SAML assertion in the future).
- With SAML Provisioning, any login request must include all mandatory fields in the assertion message, where attributes and values are case-sensitive.
- The SAML protocol supports only provisioning. Deprovisioning should be handled with custom code using the Provisioning API. If SSO is enforced on the account, users will not be able to log in if access is removed on the identity provider.
Error handling
On a failed log-in to Cloudinary, SAML errors are returned to the user's browser in the response body of a 400 error. The response includes an Error Code and Description where possible.
| Error | Description |
|---|---|
| 1 | USER_CREATION_ERROR |
| 2 | MISSING_ACCOUNT_ID |
| 3 | INVALID_ACCOUNT_ID |
| 4 | MISSING_FIRST_NAME |
| 5 | MISSING_EMAIL |
| 6 | INVALID_EMAIL_ADDRESS |
| 7 | ROLE_LOOKUP_ERROR |
| 8 | INVALID_SUBACCOUNT_IDENTIFIER |
| 9 | LICENSE_LIMIT_EXCEEDED |
| 10 | USER_UPDATE_ERROR |
| 11 | PROVISIONING_NOT_ALLOWED |
| 12 | USER_ACCOUNT_MISMATCH |
| 13 | USER_GROUP_CREATION_ERROR |
| 14 | INVALID_NAME_ID |
| 15 | SAML_VALIDATION_FAILED |
| 16 | INVALID_SAML_RESPONSE |
 Ask AI


